Table of Contents
Advertisement
Advertisement
Table of Contents

Related Manuals for Dahua ASA1222G-D


Summary of Contents for Dahua ASA1222G-D
- Page 1 Time & Attendance Terminal Quick Start Guide V1.0.0...
-
Page 2: Important Safeguards And Warnings
Important Safeguards and Warnings This Chapter describes the contents covering proper handling of the access standalone, hazard prevention, and prevention of property damage. Read these contents carefully before using the access standalone, comply with them when using, and keep it well for future reference. -
Page 3: Foreword
Foreword General This Quick Start Guide (hereinafter referred to as “Guide”) introduces the installation and basic operation of the Time & Attendance (Standalone) (hereinafter referred to as “standalone”). Safety Instructions The following categorized signal words with defined meaning might appear in the Guide. Signal Words Meaning Provides additional information as the emphasis and supplement... - Page 4 If there is any uncertainty or controversy, please refer to our final explanation. Foreword IV...
-
Page 5: Table Of Contents
Table of Contents Important Safeguards and Warnings ..................... II Foreword ..............................III 1 Overview ..............................1 Introduction ........................... 1 Features ............................1 Appearance ........................... 1 Dimensions ........................... 3 2 Installation .............................. 4 Installation Methods ........................4 Cable Connection ......................... 5 3 Operation .............................. -
Page 6: Overview
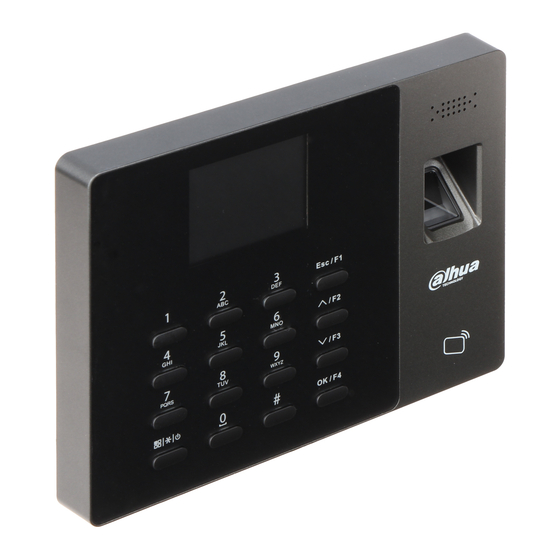
Overview Introduction The Time & Attendance (Standalone) can be used to check attendance. The attendance check can be completed through three methods: fingerprint, password, and card. Features High capacity standby battery works for upto10 hours in the standby mode. Can be connected to the third party access control device. - Page 7 Icon Description Press the key to exit or go to the previous menu. On the standby interface, press the button to ESC/F1 check in. In the standby mode, press the key, BREAK ∧/F2 OUT will be displayed on the screen. ...
-
Page 8: Dimensions
Port Description COM port. Makes the relay normally on. Dimensions Figure 1-3 Dimensions (mm) Overview 3... -
Page 9: Installation
Installation Installation Methods Installed through 86 electrical box Figure 2-1 Installed through 86 electrical box Directly installed on the wall Figure 2-2 Directly installed on the wall Installed through bracket Installation 4... -
Page 10: Cable Connection
Figure 2-3 Installed through bracket Cable Connection The terminal can be connected to exit button to control the door. See Figure 2-4. Figure 2-4 Cable connection Installation 5... -
Page 11: Operation
Operation Notice When the terminal is connected to the power source, you need to press to turn it on. Before an administrator is created, anyone can enter the main menu and do settings for the terminal. For the sake of information security, you need to create administrators first (Select 1 User >... -
Page 12: Configure Network Parameters
Before administrators are created, anyone can enter the main menu and do settings. Once administrators are created, only administrators can enter the main menu. indicates that the network is disconnected. indicates that the network is connected. indicates the battery level and network connection condition. -
Page 13: Add Users
Figure 3-4 Communication Table 3-1 Standby interface description Parameter Description Default value 192.168.1.108, you can configure it according to your needs. Mask Default value 255.255.255.0, you can configure it according to your needs. Gateway Default value 192.168.1.1, you can configure it according to your needs. MAC address of the terminal and it cannot be modified. -
Page 14: Add In Batches
Figure 3-6 Adding new user (2) Step 2 Do the following operations: Enter user ID and name; Record user’s fingerprints; Let users set a password; Register a card for the new user; Select a department; Select a schedule mode; Select a user level. A new user is added. -
Page 15: Shift
Figure 3-7 Swipe cards to add users Add users through USB You can export user information (including user ID, user name, password, card number, department, user level and schedule mode) from one terminal to another terminal. The exported information will be stored in an excel chart. You can edit information in the chart. When imported to other terminals, user information with the same User ID will be overwritten. -
Page 16: Schedule Setting
Duty Description You can set duration for duty time in each shift. For example Duty T1 08:30–12:00. You can set duration for duty time in each shift. For example Duty T2 13:30–17:00. Overtime You can set overtime duration. For example 20:00–21:00. Session There are two periods in which you may need to sign in and sign out, because there is an ... -
Page 17: Late-In/Early-Out Allowed
Numbers at the center of each box are shift numbers. There are 24 shifts in total. Numbers at the top left corner of each box are days. Null and 0 means off duty. 25 means business trip. ... -
Page 18: Attendance
During Duty 1 and Duty 2 period, you have only one chance to get your attendance checked late and one chance to leave early. If you arrive late or leave early within the time period permitted, overtime will still be counted. -
Page 19: Attendance Statistics
Step 2 Press OK/F4. The white text box appears. Press ∧/F2 or ∨/F3 to select Forced. Step 3 Step 4 Press OK/F4. Press ∧/F2 or ∨/F3 continuously, BREAK OUT, CHECK IN, OT-OUT, OT-IN, CHECK OUT, BREAK IN will be displayed in turn. There are shortcut keys for check-in, check-out, break-in, and break-out. -
Page 20: Appendix 1 Cybersecurity Recommendations
IP video surveillance is not immune to cyber risks, but taking basic steps toward protecting and strengthening networks and networked appliances will make them less susceptible to attacks. Below are some tips and recommendations from Dahua on how to create a more secured security system. - Page 21 Change Default HTTP and Other Service Ports We suggest you to change default HTTP and other service ports into any set of numbers between 1024~65535, reducing the risk of outsiders being able to guess which ports you are using. Enable HTTPS We suggest you to enable HTTPS, so that you visit Web service through a secure communication channel.
- Page 22 The network should be partitioned and isolated according to the actual network needs. If there are no communication requirements between two sub networks, it is suggested to use VLAN, network GAP and other technologies to partition the network, so as to achieve the network isolation effect. ...
Need help?
Do you have a question about the ASA1222G-D and is the answer not in the manual?
Questions and answers