Advertisement
Available languages
Available languages
Quick Links
Advertisement

Subscribe to Our Youtube Channel
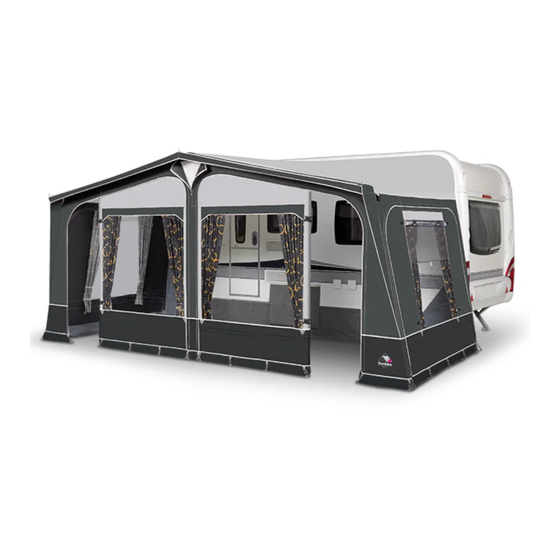
Summary of Contents for Dorema Air Awning
- Page 1 GEBRUIKSAANWIJZING MANUAL-INSTRUCTIONS AUFBAUANLEITUNG INSTRUCTIONS D’INSTALLATION...
- Page 2 OPBOUW VAN EEN OPBLAASBARE VOORTENT Van harte gefeliciteerd met de aanschaf van uw nieuwe Doréma opblaasbare voortent. Wij danken u hartelijk dat u voor Doréma heeft gekozen en wensen u veel kampeerplezier toe. Samen met uw leverancier hebt u de maatkeuze voor uw nieuwe voortent gemaakt.
- Page 3 OPBOUW VAN EEN OPBLAASBARE VOORTENT sluiten en de luchtslangen afzonderlijk afsluiten. Dit is vooral handig bij het zoeken naar een mogelijke lek in het luchtframe. 6. Pomp nu de extra dakliggers op welke zich in de ingenaaide tunnels van het dak bevinden. Als laatste pompt u de extra staanders voor de voorzijde op en plaatst deze in de juiste positie.
- Page 4 OPBOUW VAN EEN OPBLAASBARE VOORTENT 9. Span de voortent nu af. Span altijd eerst de hoeken af. Begin bij aan de caravanzijde met de punten 1 en 2 en daarna de hoeken 3 en 4 van de voorzijde. Werk vanuit het midden, de punten 5 en 6 naar beide hoeken. Span vervolgens de beide zijwanden af.
- Page 5 OPBOUW VAN EEN OPBLAASBARE VOORTENT Optionele uitbouw Bij deze opblaasbare voortent bestaat de mogelijkheid om een optionele uitbouw aan de linker- of rechterzijde te plaatsen. 1. Rits de betreffende zijwand uit de voortent en rits de uitbouw aan de voortent. Pomp de hoofdslang op. 2.
- Page 6 ERECTING YOUR AIR AWNING Congratulations for purchasing a new Dorema Air Awning. We would like to thank you for choosing Dorema and wish you lots of enjoyable camping holidays. With the assistance of your dealer you will have chosen your correct awning size.
- Page 7 ERECTING YOUR AIR AWNING 5. The additional roof rails that are in the sewn-on tunnels in the roof and extra uprights can be inflated now and the uprights can be placed in the right position. 7. Two Fibre Tech canopy bars are included for extra stability in the front canopy.
- Page 8 ERECTING YOUR AIR AWNING 9. You are now ready for pegging the awning with the use of ladder straps and pegs. Always start at the corners. Start at the caravan side with points 1 and 2, then the corners 3 and 4 of the front. Work from the middle, points 5 and 6 to both corners.
- Page 9 ERECTING YOUR AIR AWNING Optional annex with zip This inflatable awning offers the opportunity of fitting an annex on either the left or right-hand side. Unzip the desired side wall to extend the awning with the annex. 1. First start to inflate the main air tube, the valve is situated on the outside of the annex.
- Page 10 AUFBAU DES LUFTSCHLAUCHVORZELTES Herzlichen Glückwunsch zu Ihrem neuen Doréma Air Vorzelt. Wir danken Ihnen von Herzen, dass Sie sich für Doréma entschieden haben und wünschen Ihnen viel Urlaubsspaß. Kontrollieren Sie bitte bei jeglichem Zweifel nochmals das Umlaufmaß Ihres Wohnwagens, bevor Sie das neue Vorzelt der Originalverpackung entnehmen.
- Page 11 AUFBAU DES LUFTSCHLAUCHVORZELTES 6. Bei unserem voll eingezogenem Luftschlauch Vorzelt ist das Grundgestänge mit einem Ventil auf zu blasen. Dazu achten Sie bitte darauf, dass die schwarzen Spezialventile an der Innenseite alle geöffnet sind. (auf den Ventilen sind dazu Markierungen angebracht). Bei diesem Vorzelt sind Spezialventile bei denen Sie sowohl mit einem Ventil die Grundkonstruktion aufblasen können, bei Bedarf jedoch auch die Ventile schließen können und die Elemente wie bei einem Mehrventilsystem...
- Page 12 AUFBAU DES LUFTSCHLAUCHVORZELTES 9. Distanz Pads sind enthalten, um Unebenheiten auf dem Campingplatz auszugleichen. Diese können unter den Eckpfosten oder dem Mittelpfosten verwendet werden, um den Rahmen zu stabilisieren, bzw. aus zu gleichen. 10. Beginnen Sie nun mit dem Abspannen des Air Vorzeltes mit Hilfe der Abspannleitern und den Heringen.
- Page 13 AUFBAU DES LUFTSCHLAUCHVORZELTES Verwendung des optional erhältlichen Anbaus mit Reißverschlusssystem Mit diesem aufblasbaren Vorzelt gibt es die Möglichkeit einen Anbau auf der Linken oder Rechten Seite anzubringen. Befestigen Sie den Anbau mittels Reißverschluss an der Seite des Vorzeltes. Dazu die entsprechende Seitenwand entnehmen.
- Page 14 MONTAGE D’UN AUVENT GONFLABLE Félicitations avec votre nouvel auvent gonflable Doréma. Nous vous remercions de tout cœur d’avoir choisi Doréma et vous souhaitons beaucoup de plaisir de camping. En collaboration avec votre revendeur, vous avez choisi la taille de votre nouvel auvent.
- Page 15 MONTAGE D’UN AUVENT GONFLABLE de travail supplémentaire, ce qui facilite la suite du montage. Pendant le gonflage, veillez à ce que les valves noires – situées sur le côté intérieur du toit – soient ouvertes. Les marquages sont apposés sur ces valves noires. Les valves noires connectent entre eux les boudins à...
- Page 16 MONTAGE D’UN AUVENT GONFLABLE 9. Tendez maintenant l’auvent. Tendez toujours d’abord les coins Commencez du côté de la caravane avec les points 1 et 2, puis les coins 3 et 4 sur l’avant. Travaillez depuis le milieu, les points 5 et 6 vers les deux coins Tendez enfin les deux côtés latéraux.
- Page 17 MONTAGE D’UN AUVENT GONFLABLE Annexe optionnelle Cet auvent gonflable offre la possibilité d’installer une annexe optionnelle sur le côté gauche ou droit. 1. Ouvrez les fermetures éclair pour déposer la paroi latérale en question de l’auvent et fixez l’annexe à l’auvent à l’aide des fermetures éclair. 2.
- Page 18 NOTITIES NOTES NOTIZEN ........................................................................................................................................................................................................................................................................................................................................................................................................................................................................................................................................................................................................................................................................
- Page 19 NOTITIES NOTES NOTIZEN ........................................................................................................................................................................................................................................................................................................................................................................................................................................................................................................................................................................................................................................................................
- Page 20 Doréma Rekreatie B.V. Havenstraat 43 - 45 7005 AG Doetinchem info@dorema.nl www.dorema.nl Dorema UK Ltd. Pioneer Way, Castleford West Yorkshire, WF10 5QU info@dorema.co.uk www.dorema.co.uk Doréma Vorzelt GmbH Kaiserswerther Straße 115 40880 Ratingen - Düsseldorf info@dorema.de www.dorema.de...


Need help?
Do you have a question about the Air Awning and is the answer not in the manual?
Questions and answers
What pressure do you inflate the air awning to?