Advertisement
PatioE-Screen
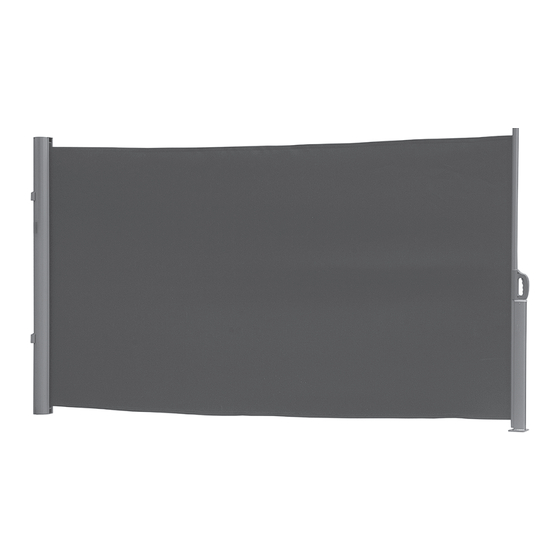
R E T R A C T A B L E S I D E A W N I N G
2.0mtr Height - Expands up to 2.0mtr Width
1 x Cassette
1 x Anchor Post
CAUTION - SMALL PARTS MAY CAUSE CHOKING HAZARDS. KEEP AWAY FROM SMALL CHILDREN.
2 x Wall Bracket
4 x Plastic Plugs
4 x M6 x 60mm Screws
4 x Plastic Plugs
4 x M8 x 75mm Screws
4 x 6mm Washer
4 x 8mm Washer
Advertisement
Table of Contents

Subscribe to Our Youtube Channel
Related Manuals for Pillar Patio E-Screen

Summary of Contents for Pillar Patio E-Screen
- Page 1 PatioE-Screen R E T R A C T A B L E S I D E A W N I N G 2.0mtr Height - Expands up to 2.0mtr Width 2 x Wall Bracket 4 x Plastic Plugs 4 x M6 x 60mm Screws 4 x 6mm Washer 4 x Plastic Plugs 4 x M8 x 75mm Screws...
- Page 2 Assembley Instructions Tools Required • Metal Tape Measure • 10mm Masonary Drill Bit • Electric Drill (hammer action may be required) • Phillips Head Screwdriver • 5mm Allen Key Step One Measure area to ensure Patio Screen has enough height clearance (2.0mtrs) and span distance (Up to 2.0mtrs).
- Page 3 Step Four Insert Plastic Plugs into drilled Fig.3. Fig.4. Fig.5. holes Fig.3. and tap in securely using a hammer if required. Secure brackets to wall using M6 x 60mm Screws shown in Fig.4. using 5mm Allen Key Slot Cassette into brackets shown in Fig.5.
- Page 4 Operation Instructions Keeping the Front Bar upright, hold the handle and pull the screen horizontally towards the Anchor Post. Press the handle Trigger and insert Front Bar over the base spindle and handle spindle the into the Anchor Post cavity. Once locked into place, release trigger. Pull handle firmly to extend screen to desired position...
Need help?
Do you have a question about the Patio E-Screen and is the answer not in the manual?
Questions and answers