
Subscribe to Our Youtube Channel
Related Manuals for Slugger 72905361120

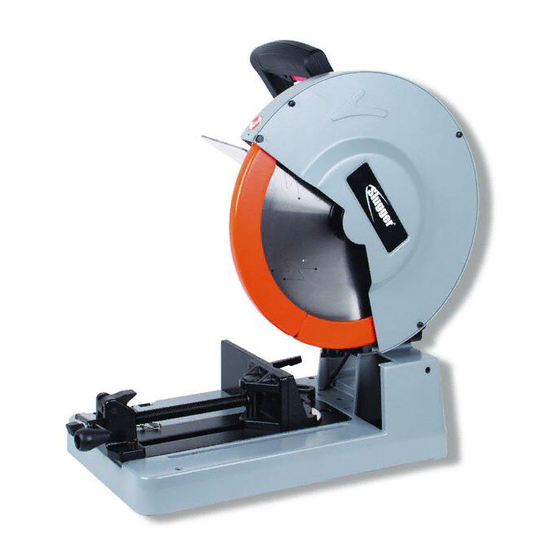
Summary of Contents for Slugger 72905361120
- Page 1 Metal 14" (335mm) SLUGGER METAL CUTTING SAW Instruction Manual Slugger order number: 7 29 05 361 12 0...
-
Page 2: Table Of Contents
TABLE OF CONTENTS Safety Rules ........................2 Additional Safety Rules for Metal Cutting Saw ..............6 Assembly & Adjustment Instruction ................. 7 Installing a New Saw Blade ..................... 9 Cutting Depth Adjustment ....................11 Operation ........................11 Guide Ruler ........................12 Chip Removal ......................... - Page 3 c) Do not expose power tools to rain or wet conditions. Water entering a power tool will increase the risk of electric shock. d) Do not abuse the cord. Never use the cord for carrying, pulling or unplugging the power tool. Keep cord away from heat, oil, sharp edges or moving parts. Damaged or entangled cords increase the risk of electric shock.
- Page 4 g) Use the power tool, accessories and tool bits, etc. in accordance with these instructions, taking into account the working conditions and the work to be performed. Use of the power tool for operations different from those intended could result in a hazardous situation.
- Page 5 operator if proper precautions are taken. b) When blade is binding or when interrupting a cut for any reason, release the trigger and hold the saw motionless in the material until the blade comes to a complete stop. Never attempt to remove the saw from the work or remove the saw blade from the work piece while in motion or kickback may occur.
-
Page 6: Additional Safety Rules For Metal Cutting Saw
• Always keep handles dry, clean and free of oil and grease. • Always be alert at all times, especially during repetitive monotonous operations. Always be sure of position of your hands relative to the blade. • Stay clear of end pieces that may fall after cutting off. They may be sharp and/or heavy. Serious personal injury may result. -
Page 7: Assembly & Adjustment Instruction
Motor Specifications and Electrical Requirements Power Supply and Motor Specifications The AC motor used in this saw is a universal, nonreversible type, having the following specifications: Model No. 72905361120 Maximum Developed HP Voltage 120, 60Hz Amps Hertz (Cycles) Phase Single 1300 Shaft Rotation Counter-Clockwise Power Connections A separate electrical circuit should be used for your tools. This circuit should not be less #12 wire and should be protected with a 20 Amp fuse. - Page 8 1. Remove the saw from the carton by lifting the saw with the carrying handle. 2. Place the saw on a secure and stationary work surface. Inspect for damage. Box Contents Before beginning assembly, check that all parts are included. A.
-
Page 9: Installing A New Saw Blade
6. Carrying Handle: This handle is built into the unit to move it from one location to another. Before attempting to pick up the unit by the carrying handle, attach the chain (#2). 7. Eye Protection Plate: To protect eyes from injury, sparks and iron filings that occur while cutting material. - Page 10 2. Press in arbor lock (C) and rotate blade (G) by hand until lock engages. 3. Using the 8mm HEX wrench, loosen arbor screw (D) by turning counter clock wise, remove arbor screw (D), washer (E), outside blade flange (F), and blade (G). DO NOT REMOVE INSIDE BLADE FLANGE.
-
Page 11: Cutting Depth Adjustment
BASIC SAW OPERATION General Cutting Instructions Familiarize yourself with the following functions of the Metal-Cutting saw before connecting it to a power source and using it. 1. When starting this Metal-Cutting saw for the first time or after it has been idle for awhile, always let the machine run for one full minute with the blade completely recessed into the guard before making any cuts. -
Page 12: Guide Ruler
Two-Piece, Retractable Safety Blade Guard When cutting head is lowered, the guard separates so material can be cut. Locking Switch: The “OFF” Position Important: We suggest that when the machine is not in use, the Fig. 16 switch be locked in the “OFF” position using a padlock (B) through the holes in the switch trigger (A). -
Page 13: Chip Removal
REPLACING CARBON BRUSHES CAUTION: Turn off the switch and disconnect plug from power supply before checking. Check brushes regularly, if worn down to 1/4” (6mm), replace brushes. Carbon brushes should be clean and slide freely in holder. Carbon brushes should be replaced in pairs. Use a flat blade screwdriver to remove the brush cap (A) (Note: This cap is spring-loaded by the brush assembly.), take out the worn carbon brush (B), insert new carbon brush... -
Page 14: Troubleshooting
TROUBLESHOOTING PROBLEM POSSIBLE CAUSE CORRECTIVE ACTION Loss of power supply Check power source Brushes worn or sticking Check brushes Saw won’t start Switch is faulty Contact repair center Possible short circuit Contact repair center Cord damage Contact repair center Dull, damaged or incorrect blade Sharpen or replace blade Unsatisfactory cuts Motor overload Reduce pushing force... -
Page 15: Parts Diagram
PARTS DIAGRAM... -
Page 16: Replacement Parts
REPLACEMENT PARTS LIST REF. # FEIN ORDER # DESCRIPTION 69908120276 SAFETY COVER 69908120277 TOOTH LOCK WASHER COUNTERSINK 69908120278 HEX SOC FLAT HD SCR 69908120279 SPRING 69908120280 M4 x 8MM PAN HD SCREW 69908120281 LEVER 69908120282 SHOULDER SCREW 8, 18 69908120453 BLADE GUARD ASSEMBLY 69908120284 LEVER... - Page 17 REF. # FEIN ORDER # DESCRIPTION 69908120321 END COVER 69908120322 PAN HD SCREW M5 x 12 69908120323 MOTOR HOUSING 69908120324 RUBBER PIN 69908120325 HOLDER BRUSH 69908120326 BRUSH 69908120327 CAP BRUSH 69908120328 SHOULDER SCREW 69908120329 JUMPER WIRE14 x 190mm (yellow) 69908120330 SLEEVING 69908120331 CHAIN HOOK...
- Page 18 REPLACEMENT PARTS LIST ...continued REF. # FEIN ORDER # DESCRIPTION 69908120366 SELF-LOCKING NUT (CLIP) 69908120367 KNOB 69908120368 HANDLE 69908120369 PLASTIC KNOB (WING SCREW) 69908120370 RING 69908120371 SCREW 69908120372 69908120373 SUPPORT 69908120374 CHAIN 69908120375 8MM PIN 69908120376 HEX SOC HD SCREW + WASHER 69908120377 SETTING UP PIECE 69908120378...
-
Page 19: Key/Manufacturer
REPLACEMENT PARTS LIST ...continued REF. # FEIN ORDER # DESCRIPTION 69908120409 WRENCH HOLDER 69908120410 69908120411 PAN HD SCREW + WASHER 69908120412 BASE 69908120413 PAN HD SCREW + WASHER 69908120414 SUPPORT PLATE 69908120415 CHIP BOX 69908120416 HEX NUT 69908120417 WASHER FLAT 69908120418 LOCK WASHER 69908120419... - Page 20 ICON MESSAGE Please read the instructions carefully before starting the machine. Wear ear protection. Always wear safety glasses when using the machine. Always keep hands away from the path of the saw blade. Always disconnect the plug from the socket before carrying out any work on the machine.
- Page 22 Make the most of your FEIN warranty. All you need to do is register your new FEIN power tool at www.feinus.com/warranty within 6 weeks of purchase. FEIN Power Tools, Inc. 1030 Alcon Street Pittsburgh, PA 15220 Tel. 412-922-8886 Toll Free: 1-800-441-9878 www.feinus.com...
Need help?
Do you have a question about the 72905361120 and is the answer not in the manual?
Questions and answers