Table of Contents
Advertisement
Advertisement
Table of Contents

Related Manuals for Hwasung HP-283


Summary of Contents for Hwasung HP-283
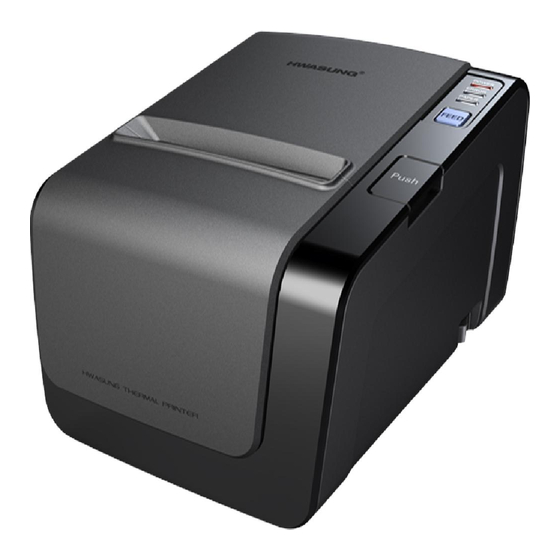
- Page 1 Technical Manual HP-283...
- Page 2 Pleaes keep the requires as necessary as general electrics. Pleaes use the power supply set provided. Pleaes power off the product, when the paper is changed. Otherwise, the auto cutter / the thermal print head could be operated incorrectly. Title Rev. Page Ver1.0 HP-283 Technical Manual...
- Page 3 3-2) Interface 4. Cash drawer / Melody box 4-1) Cash drawer 4-2) Melody box 5. Command 6. Windows Driver 6-1) Printer 6-2) Paper 6-3) New paper 7. USB (User Interface) 8. Ethernet *Spec revision Title Rev. Page Ver1.0 HP-283 Technical Manual...
- Page 4 Please look at the article of paper jam this manual. It is very important to prevent the product from the damage. 4) Cutter open (Front cover) It is to remove the paper jam. Please look at the article of paper jam. Title Rev. Page Ver1.0 HP-283 Technical Manual...
- Page 5 3) Interface card : It is to connect the interface cable with each hosts. You are able to connect RS232C,PARALLEL,USB type B, Serial extension RJ-45, and Ethernet. ◈ RS232C : Connector DSUB25 pin Female. Title Rev. Page Ver1.0 HP-283 Technical Manual...
- Page 6 Lan cable 6 pins one to one DSUB- 9 pins RJ-45 6 pins receptacle : Please do not connect with the cable of Modem / Lan . Notice It is very important to prevent the product from the damage. Title Rev. Page Ver1.0 HP-283 Technical Manual...
- Page 7 You can see the paper is printing and cut, when you close the cover, after you power on. 3) You can see the paper is printing and cut, when you close the cover, after you power on. Title Rev. Page Ver1.0 HP-283 Technical Manual...
- Page 8 Please change the direction which you turn the gear. Please turn the gear, till you make sure you are able to press the cover open lever. Title Rev. Page Ver1.0 HP-283 Technical Manual...
- Page 9 “^”. [Sample] 16 antilogarithm ASCII [HEX DUMP MODE] 41 42 43 44 45 46 47 47 49 4A ABCDEFGHIJ 30 31 32 33 34 35 36 37 38 39 0123456789 1B 4A FF Title Rev. Page Ver1.0 HP-283 Technical Manual...
- Page 10 Please close the program you open. Please check the cable if it is correct. Please go back to the instruction of step 1), and do it again. Title Rev. Page Ver1.0 HP-283 Technical Manual...
- Page 11 Ethernet IP mode Dynamic IP mode Static IP mode Ethernet Boot mode Factory mode Default user mode : You can read the details of Ethernet at this manual / 8. Ethernet. Notice Title Rev. Page Ver1.0 P.10 HP-283 Technical Manual...
- Page 12 No play Firmware Update Update Print Mode Cutting mode Partial cut Full cut Buzzor of printing Play No play : The auto melody will be invalid, if the buzzer is on. Notice Title Rev. Page Ver1.0 P.11 HP-283 Technical Manual...
- Page 13 1 Byte code : you can choose one of the following things as default. ASCII(12x24),ASCII(8x16,9x16). Reserved Reserved Reserved Reserved SW10 Reserved Reserved Code Page Font After you set up, please press the button. (Memory switch Title Rev. Page Ver1.0 P.12 HP-283 Technical Manual...
- Page 14 2) To check the memory switch change change. : You are able to check the memory switch changed as the image below, after you conduct the self-test. Title Rev. Page Ver1.0 P.13 HP-283 Technical Manual...
- Page 15 5) Please dis-connect the jumper cap, after the booting program runs. : The booting will not be available, if you don’t disconnect the jumber cap, Notice because the data is removed. Dis-connection Pin header Jumper cap Title Rev. Page Ver1.0 P.14 HP-283 Technical Manual...
- Page 16 ‘Send File’ as the image below. : Please do not change other parameters. Notice ② ① 7) Please choose the button ‘yes’, after the transmission is complete as the image below. Title Rev. Page Ver1.0 P.15 HP-283 Technical Manual...
- Page 17 8) Please click ‘Execute’, after you make sure ‘Boot from Flash(GPNVM1)’ at the mode ‘Scripts’. 9 ) Please power off and on, to restart. Title Rev. Page Ver1.0 P.16 HP-283 Technical Manual...
- Page 18 TPH life 130km ( Printing duty 12.50%) MCBF 60,000,000 lines Barcode EAN-8,EAN-13,CODE39,CODE93,ITF, UPC-A,UPC-E,CODE128 2D barcode QR, PDF417, Data Matrix Emulation ESC/POS command compatible / HWASUNG Driver Windows(2000,2003,XP,Vista,7,8) 32Bit,64Bit Interface Serial/Parallel/USB/serialextension RJ-45 /Ethernet. Power 24VDC 2.5A Buffer 4K Bytes Cutter Life 1,700,000 cuts / Guillotine / Full or Partial Tempeature Operation 0 ~ 40℃...
- Page 19 JP2 short : +3.3Volt provides : Please do not make the short JP1 and JP2 at the same time. Notice 9) Example Host (PC) Printer Pin Signal Pin Signal : It’s connected inside the printer. Title Rev. Page Ver1.0 P.18 HP-283 Technical Manual...
- Page 20 DATA nSTB BUSY nACK Standard Sign Name Data setup time 0.75 STROBE range 0.75 Data hold time 0.75 BUSY output delay time 0.75 ACK range 0.5(Typ.) 0.5(Typ.) BUSY release time 0.5(Typ.) 0.5(Typ.) Title Rev. Page Ver1.0 P.19 HP-283 Technical Manual...
- Page 21 : End point 3, Bulk OUT : End point 1 Full Speed : Max Packet Size 64 Byte(Bulk OUT),64 Byte(Bulk IN) 5) pin Signal IN/OUT Remark VBus IN/OUT IN/OUT Signal GND Title Rev. Page Ver1.0 P.20 HP-283 Technical Manual...
- Page 22 Printer Busy( the same with DTR) Power *1) +5Volt or +3.3Volt *1) Option : JP1 short : +5Volt / JP2 short : +3.3Volt : Please do not short JP1 and JP2 at the same time (simultaneously). Notice Title Rev. Page Ver1.0 P.21 HP-283 Technical Manual...
- Page 23 : IEEE 802.3 10BASE-T 및 IEEE 802.3u 100BASE-TX 3) Connector : RB1-125BAG1A(UDE) 4) Pin Singal IN/OUT Remark Transmit Data+ Transmit Data- None Connection None Connection Receive Data+ Receive Data- : Please read the details at this manual ‘8.Ethernet’. Notice Title Rev. Page Ver1.0 P.22 HP-283 Technical Manual...
- Page 24 3) Connection : Please connect the cash drawer into the connector as below. : Please do not connect the model / the cable into the connector RJ45. Notice It could damage the printer. Title Rev. Page Ver1.0 P.23 HP-283 Technical Manual...
- Page 25 4-2) Melody : You can connect with the melody box. 1) Connection : You can connect the melody into the the connector as image below. Because the connector as image below is to use the melody and the cash drawer together. Title Rev. Page Ver1.0 P.24 HP-283 Technical Manual...
- Page 26 : Please do off the switch 4 th of SW2. Notice 4) Volume You can control the melody time / the melody volume. You can control the melody time up to 25 seconds max. Title Rev. Page Ver1.0 P.25 HP-283 Technical Manual...
- Page 27 FS ! Korean font decoration FS & Korean extended graphic mode (set up) FS . Korean extended graphic mode (cancel) FS - Underline Korean FS S Space Korean FS W Size Korean Title Rev. Page Ver1.0 P.26 HP-283 Technical Manual...
- Page 28 SUB 2 Line 2 (Vertical, Horiztontal) SUB W Write (line data) SUB C Clear (line data) SUB O Line ON SUB F Line OFF SUB P Print line 1 dot line (Vertical, Horizontal) Title Rev. Page Ver1.0 P.27 HP-283 Technical Manual...
- Page 29 The data is deleted within the area of printing. [Name] Horizontal tab [Format] ASCII Decimal [Range] [Description] Moves the print position to the next tab poisition [Caution] The position of tab is fixed as ESC+’D’+n. Title Rev. Page Ver1.0 P.28 HP-283 Technical Manual...
- Page 30 : Feeding the reverse direction till black mark is detected. [Caution] The range of feeding is restricted within 30 centimeter. When the range 30cm over is not detected, it detects the paper jam. Title Rev. Page Ver1.0 P.29 HP-283 Technical Manual...
- Page 31 : Printing Speed 130mm/s n=8 : Printing Speed 140mm/s n=9 : Printing Speed 150mm/s n=10 : Printing Speed 160mm/s [Caution] Please control the density, since that the low speed prints the density unclear. Title Rev. Page Ver1.0 P.30 HP-283 Technical Manual...
- Page 32 0: Cancel the extension in Vertical 1: Set the extension in Vertical 0: Cancel the extension in Horizontal 1: Set the extension in Horizontal 0: Cancel the underline 1: Set the underline Title Rev. Page Ver1.0 P.31 HP-283 Technical Manual...
- Page 33 Number of data(k) dots dots 8dots single density nL+nH×256 8dots double density nL+nH×256 24dots single density (nL+nH×256)×3 24dots double density (nL+nH×256)×3 •8dots mode Twice Single Three Three times times Double density Single density Title Rev. Page Ver1.0 P.32 HP-283 Technical Manual...
- Page 34 Underline 1 dot 2, 50 Underline 2 dots 3, 51 Underline 3 dots 4, 52 Underline 4 dots 5, 53 Underline 5 dots 6, 54 Underline 6 dots 7, 55 Underline 7 dots Title Rev. Page Ver1.0 P.33 HP-283 Technical Manual...
- Page 35 Decimal [Range] 0≤n≤255 [Initial] [Description] It sets n/2 the row pitch. ESC+’@’ [Name] Printer reset [Format] ASCII Decimal [Description] Clear the buffer, and Initialize all parameter. ESC+’E’+n [Name] Emphasize [Format] ASCII Decimal Title Rev. Page Ver1.0 P.34 HP-283 Technical Manual...
- Page 36 : If you use the program ‘memory switch setting utility’ to set up the memory switch, you don’t Notice need these commands above. You are able to choose one of these fonts above. Please read the ‘memory switch’ at this manual. Title Rev. Page Ver1.0 P.35 HP-283 Technical Manual...
- Page 37 Spain 2 Latin America Korea ESC+’a’+n [Name] Align the printing [Format] ASCII Decimal [Range] 0≤n≤2, 48≤n≤50 [Initial] [Description] Align the position of printing Position 0, 48 Left 1, 49 Center 2, 50 Right Title Rev. Page Ver1.0 P.36 HP-283 Technical Manual...
- Page 38 The reference point should move from left to right. n low rank Format Cancel ESC+’i’ [Name] Full cut [Format] ASCII Decimal [Description] Full cut ESC+’m’ [Name] Partial cut [Format] ASCII Decimal [Description] Partial cut Title Rev. Page Ver1.0 P.37 HP-283 Technical Manual...
- Page 39 The Bit zero (0) of n LSB (low rank), cancel the download character set by ESC+& [Description] The Bit one (1) of n LSB (low rank), set the download character set by ESC+& Title Rev. Page Ver1.0 P.38 HP-283 Technical Manual...
- Page 40 If it is t1 > t2 (ON > OFF), t2 extends as long as t1. To avoid heating the electric parts, it is recommended t1 operates shortly as you can. When the melody box operates, please choose the cash drawer 2. (connector 5, n=1 or 49). Title Rev. Page Ver1.0 P.39 HP-283 Technical Manual...
- Page 41 It changes to the standard mode, and clear the area of page. ESC+’L’ [Name] Page mode [Format] ASCII Decimal [Description] It changes from standard mode to page mode, and clear the area of page. Title Rev. Page Ver1.0 P.40 HP-283 Technical Manual...
- Page 42 ESC+’T’+n [Name] Page mode (Direction of printing) [Format] ASCII Decimal [Range] 0≤n≤3 [Initial] [Description] Set up the direction of page mode. •n=0 (Left→Right), •n=1 (Lower→Upper), ABCD Feeding Feeding •n=2(Right→Left), •n=3(Upper→Lower), Feeding Feeding Title Rev. Page Ver1.0 P.41 HP-283 Technical Manual...
- Page 43 (height of printing -24) by the command LF. Paper Height of printing (x,y) Reference point ABCD Printing area Before (x+dx,y+dy) ABCD Move to the reference point (height of printing -24) After Title Rev. Page Ver1.0 P.42 HP-283 Technical Manual...
- Page 44 Edit the printing of page area the receipt of data. Print the page area in the same time. [Caution] Please use the command ESC+S to clear,because the data remains at the page area. Title Rev. Page Ver1.0 P.43 HP-283 Technical Manual...
- Page 45 It is necessary for Korean, when it is the extended graphic mode to cancel. [Caution] Korean mode is automatically recognized, it is not necessary to set up. Please refer to the command SUB+’x’+n. Title Rev. Page Ver1.0 P.44 HP-283 Technical Manual...
- Page 46 The Bit zero (0) of n LSB (low rank), size twice horizontal, size twice vertical to cancel. The Bit one (1) of n LSB (low rank), size twice horizontal, size twice vertical to set up. Title Rev. Page Ver1.0 P.45 HP-283 Technical Manual...
- Page 47 ‘m’. Printing mode 0, 48 STANDARD 1, 49 Horizontal extension 2, 50 Vertical extension 3, 51 Horizontal/ Vertical extension in the same time Title Rev. Page Ver1.0 P.46 HP-283 Technical Manual...
- Page 48 0≤m≤5, 251≤m≤255 [Initial] [Description] It sets the density of printing. Density Density Standard Level –5 Level +1 Level –4 Level +2 Level –3 Level +3 Level –2 Level +4 Level –1 Level +5 Title Rev. Page Ver1.0 P.47 HP-283 Technical Manual...
- Page 49 It prints at the barcode both above and below. GS+’f’+n [Name] Font of Barcode HRI [Format] ASCII Decimal [Range] 0≤n≤1, 48≤n≤49 [Initial] [Description] It provides the font of barcode HRI. Font 0,48 FONT A (12x24) 1,49 FONT B (9x16) Title Rev. Page Ver1.0 P.48 HP-283 Technical Manual...
- Page 50 It cuts full the paper n x pitch by the command GS+P+n1+n2. It cuts partial the paper n x pitch by the command GS+P+n1+n2. [Caution] Please set up the pitch by the command GS+P+n1+n2. The factory pitch is 360 DPI(0.07mm). Title Rev. Page Ver1.0 P.49 HP-283 Technical Manual...
- Page 51 The area of printing sets up (nL+nH×256)×0.141mm from the left space. Printing area Left Margin Printing area width GS+’h’+n [Name] Barcode (Height) [Format] ASCII Decimal [Range] 1≤n≤255 [Initial] n=162 (22.8mm) [Description] It sets up the height of barcode n×0.141mm. Title Rev. Page Ver1.0 P.50 HP-283 Technical Manual...
- Page 52 CODE A “gABCD" CODE B “hABCD" CODE C “iABCD" If it is CODE C, the data should be an even number. If it is an odd number, 0 (zero) will be added. Title Rev. Page Ver1.0 P.51 HP-283 Technical Manual...
- Page 53 “hABCD" or “{BABCD" CODE C i or {C “iABCD" or “{CABCD" If it is CODE C, the data should be an even number. If it is an odd number, 0 (zero) will be added. Title Rev. Page Ver1.0 P.52 HP-283 Technical Manual...
- Page 54 2 dots 5 dots 4 dots 3 dots 8 dots 5 dots 4 dots 10 dots * Multi Level barcode : UPC-E, EAN13, EAN8 * 2 level barcode : CODE39, ITF, CODABAR Title Rev. Page Ver1.0 P.53 HP-283 Technical Manual...
- Page 55 1 : Paper empty Reserved Reserved Reserved Reserved n=2 or 50 Status Decimal 0 : cash drawer switch LOW 1 : cash drawer switch HIGH Reserved Reserved Reserved Reserved Reserved Reserved Reserved Title Rev. Page Ver1.0 P.54 HP-283 Technical Manual...
- Page 56 1 : Cover open 0 (not use) 0 : Paper enough 1 : Paper necessary 0 (not use) 0 : No cutter error 1 : Cutter error 0 (not use) 0 (not use) Title Rev. Page Ver1.0 P.55 HP-283 Technical Manual...
- Page 57 0 : No error 1 : Error 0 : No error (Auto cutter) 1 : Error (Auto cutter) Fixed 0 : No error 1 : Error 0 : No error 1 : Error Fixed Title Rev. Page Ver1.0 P.56 HP-283 Technical Manual...
- Page 58 1 : Cover open 0 (Not use) 0 : Paper enough 1 : Paper necessary 0 (Not use) 0 : No Cutter error 1 : Cutter error 0 (Not use) 0 (Not use) Title Rev. Page Ver1.0 P.57 HP-283 Technical Manual...
- Page 59 Please print the mode m, after you download the big image which you have registered the command GS+*+x+y+d1..dk Printing mode 0, 48 STANDARD 1, 49 Horizontal extension 2, 50 Vertical extension 3, 51 Horizontal and Vertical extension at the same time. Title Rev. Page Ver1.0 P.58 HP-283 Technical Manual...
- Page 60 When the melody box operates, please choose the cash drawer 2. (connector 5, n=1 or 49). This command is different with ESC+’p’+n+t1+t2, because it prints by the real time, as soon as this command is conducted. Title Rev. Page Ver1.0 P.59 HP-283 Technical Manual...
- Page 61 0 : Online 1 : Offline ②n=2, Status Decimal 0 : Cover close 1 : Cover open 0 : Paper remain 1 : Paper empty 0 : No erro 1 : Error Title Rev. Page Ver1.0 P.60 HP-283 Technical Manual...
- Page 62 1 : Cover open 0 (Not use) 0 : Paper enough 1 : Paper necessary 0 (Not use) 0 : No cutter error 1 : Cutter error 0 (Not use) 0 (Not use) Title Rev. Page Ver1.0 P.61 HP-283 Technical Manual...
- Page 63 = 32 bytes, 32 × 8 = 256 dot …… …… yL+yH×256 dot line …… …… …… …… …… …… …… k-31 k-30 k-29 …… 7 6 5 4 3 2 1 0 Title Rev. Page Ver1.0 P.62 HP-283 Technical Manual...
- Page 64 Horizontal row 4 Size Horizontal row 5 Version 1 Horizontal row 6 Version 3 Horizontal row 7 Version 5 Horizontal row 8 Version 9 Horizontal row 9 The vertical size PDF417 sets up automatically. Title Rev. Page Ver1.0 P.63 HP-283 Technical Manual...
- Page 65 ※ When you print the things such as ASCII, number, extension graphic letter, the number of data you can print, n2, is calculated as the formulation above SUB+’z’+n [Name] Buzzer sound [Format] ASCII Decimal [Range] 0≤n≤255 [Description] n=0, Invalid . n=1, Valid. Title Rev. Page Ver1.0 P.64 HP-283 Technical Manual...
- Page 66 Please use the command line ON/ line OFF to write line 1 to speed up the progress. SUB+’O’ [Name] Line ON [Format] ASCII Decimal [Description] The line data is valid ON. The line prints together, when you print the character. Title Rev. Page Ver1.0 P.65 HP-283 Technical Manual...
- Page 67 Please do not use this command, when you print any character,or any graphic. [Caution] Please use the command Line ON. Please use this command, when you print the line at the space. Title Rev. Page Ver1.0 P.66 HP-283 Technical Manual...
- Page 68 2.1. Form feed 0 : It doesn’t feed the form. 2.2. Form feed +1~+5 : It feeds the form each +1. 3. Cash box, and Melody box set up. 4. Printing Speed 5. Buzzer option set up (Valid / Invalid) Title Rev. Page Ver1.0 P.67 HP-283 Technical Manual...
- Page 69 We recommend this option,if the paper length is not regular. 2-2) Page Length Feeder : After it prints, it conducts the form feeding as much as you fix the paper length. We recommend this option,if the paper length is regular. Title Rev. Page Ver1.0 P.68 HP-283 Technical Manual...
- Page 70 5) Please click the ‘form install’ to install, after you name the register (ex.Ticket (Size 60 x 150mm)) 6)Please click the tap ‘advanced’ and set the paper Ticket(Size 60 x 150mm) as image below. Title Rev. Page Ver1.0 P.69 HP-283 Technical Manual...
- Page 71 ※ These images are about the examples for the operation system Windows XP. ※ Please select the highlight Red, and set up the same ways at Windows 7, or Windows 8. ※ Windows7 example Title Rev. Page Ver1.0 P.70 HP-283 Technical Manual...
- Page 72 Please add the file HwaUSB.DLL at the folder System 32, or the folder SysWow64. 7-1-1)DLL function (Funtions) 1) long UsbOpen(LPCTSTR SelPrinter); Please open the port USB by the printer Model “HP-283” or “HP-083”. Parameters: SelPrinter : Printer Model Name ...
- Page 73 If you use Windows driver together, when you use OCX driver, the data of Windows driver, and the data of OCX driver can not be delivered properly. Please do not use the spool to print. Please refer the following image. Title Rev. Page Ver1.0 P.72 HP-283 Technical Manual...
- Page 74 From now on, the upgrade will be made for DLL only. Please see the following instructions of the ocx driver, how to use at the program Visual Basic. The image as below is Korean, please contact us more details, if you can’t. Title Rev. Page Ver1.0 P.73 HP-283 Technical Manual...
- Page 75 : Please contact us for the sample program. Notice Title Rev. Page Ver1.0 P.74 HP-283 Technical Manual...
- Page 76 7-3-1) OCX function (Functions) 1) long HwaUSB1.Open(LPCTSTR SelPrinter); Please open the port USB by the printer model HP-283, or the printer model HP-083. Parameters: SelPrinter : Printer Model Name Return : Open normal : 0 Open error : -3( minus) 2) void HwaUSB1.Close(void);...
- Page 77 : If you use Windows driver together, when you use OCX driver, Notice the data of Windows driver, and the data of OCX driver can not be delivered properly. Please do not use the spool to print. Title Rev. Page Ver1.0 P.76 HP-283 Technical Manual...
- Page 78 Please try to set up the network to avoid with IP address. Please try to catch up IP address to avoid automatically, as you boot up DHCP mode. Please refer to the next page about DHCP mode. Title Rev. Page Ver1.0 P.77 HP-283 Technical Manual...
- Page 79 We recommend you use the Dynamic IP DHCP Mode, if you boot up Static IP Mode and need to change the parameter, if the IP is collied with network IP. We recommend Static IP Mode, when you communicate with application. Small switch Dip switch 1 Dip switch 2 Small switch Title Rev. Page Ver1.0 P.78 HP-283 Technical Manual...
- Page 80 * Spec revision It is a page for the technician to know what is the revision updated. This page is written in Korea. Page Ver. 날 짜 이 력 Title Rev. Page Ver1.0 P.79 HP-283 Technical Manual...
Need help?
Do you have a question about the HP-283 and is the answer not in the manual?
Questions and answers