
Related Manuals for SUPAIR WALIBI 3


Summary of Contents for SUPAIR WALIBI 3
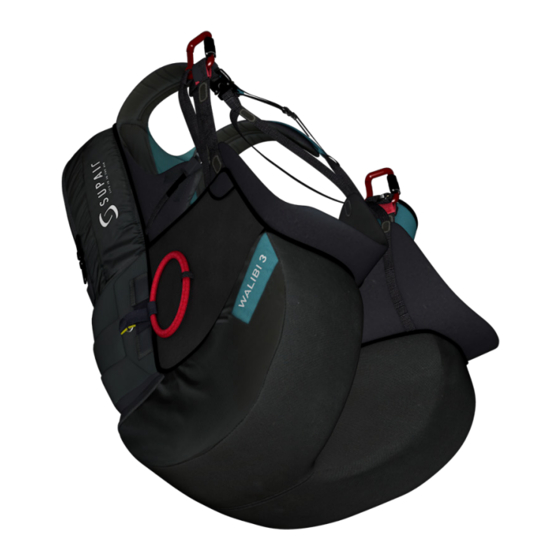
- Page 1 WALIBI 3 SUPAIR SAS PARC ALTAÏS 34 RUE ADRASTÉE 74650 ANNECY CHAVANOD User’s manual FRANCE RCS 387956790 Revision index : V1 23/06/2020...
- Page 2 Harness User’s manual | WALIBI 3 hank you for choosing the WALIBI 3. We are glad to be able to share our common paragliding passion with you. SUPAIR has been designing, producing and selling free flying equipment since 1984. By...
-
Page 3: Table Of Contents
Harness User’s manual | WALIBI 3 LIST OF CONTENTS Introduction Pre-Flight check Technical specifications Take-off Size choice In flight Nomenclature Landing Harness Overview Using the reserve parachute Accessories assembly Towing Carabiners Mandatory controls Neoprene sleeve In case of an incident... -
Page 4: Introduction
The Walibi 3 harness is aimed at professional pilots and flying enthusiats. Comfort, lightness and durability dictated its design and the materials chosen by our R&D team. The WALIBI 3 harness was certified EN 1651 : 2018 and LTF Nfl II 91/09. Indicating that it meets European and German safety requirements. -
Page 5: Technical Specifications
Harness User’s manual | WALIBI 3 TECHNICAL SPECIFICATIONS Harness size Pilot size (cm) 160-180 175-200 Pilot weight (mini - maxi) (kg) 60 - 85 80 -120 Harness weight (+ carabiners+speedbar)(kg) 3,15 3,19 Designed for Tandem ( pilot ) A Back lenght (cm) -
Page 6: Size Choice
“lying flat” flying position, we advise you to try out the harness under a hanging device at one of our retailers in order to choose the correct size. For a complete list of our retailers, please click here : www.supair.com Taille... -
Page 7: Nomenclature
Harness User’s manual | WALIBI 3 NOMENCLATURE Harness 2x 45 mm Zicral self-locking cara- biners Camera pocket Bumpair WI3 POWI3 reserve parachute handle Pre-cut parachute risers sleeves Options TANDEM DYNEEMA PARACHUTE RISERS (réf. : ELEBIY) WALIBI 3 | page 7... -
Page 8: Harness Overview
Harness User’s manual | WALIBI 3 HARNESS OVERVIEW Cobra © buckles (chest & legs) Backrest angle adjustment Shoulder strap adjustment Lumbar support adjustment Reserve parachute pocket Reserve parachute handle Paragliding main hooking points Bumpair Small storage pocket Back storage pocket... -
Page 9: Accessories Assembly
Harness User’s manual | WALIBI 3 ACCESSORIES ASSEMBLY Carabiners Tearable neoprene sleeve Neoprene sleeve Compatible carabiners : Réf. : GAINEELEVW3 45 mm Self-locking zicral carabiners Réf. : MAILCOMOUS45 How to set up the shoulder straps inside the sleeve Detach the shoulder strap... - Page 10 Harness User’s manual | WALIBI 3 ACCESSORIES ASSEMBLY Tearable neoprene sleeve Take out the comfort chest strap Insert the sleeve Take out the shoulder strap Attach the shoulder straps and do the same on the other side WALIBI 3 | page 10...
-
Page 11: Backrest Protection
Harness User’s manual | WALIBI 3 ACCESSORIES ASSEMBLY Tearable neoprene sleeve How to install the sleeves on the spreader bars Connect the spreader bars to the Walibi 3 Install the sleeve on the spreader bar Backrest protection Install the backrest protection... -
Page 12: Bumpair
Harness User’s manual | WALIBI 3 ACCESSORIES ASSEMBLY BUMPAIR Compatible BUMPAIR : Bumpair WI3 Réf. : PROBUMPW3 Bumpairs assembly Fold the harness at the neoprene cap level Open the zip Slide the 2 bumpairs in Fasten the zip WALIBI 3 | page 12... -
Page 13: Installing The Reserve Parachute
Harness User’s manual | WALIBI 3 INSTALLING THE RESERVE PARACHUTE Thank you for reading the following carefully ! We recommend for the initial rescue parachute assembly and installation to be made by a qualified professional. Reserve parachute folding and installation inside the harness must conform to the specific guidelines found in this manual. -
Page 14: Parachute Risers - Harness Connection
Harness User’s manual | WALIBI 3 INSTALLING THE RESERVE PARACHUTE Riser/Harness connection >> Access to the reserve parachute connection points. Open the velcro located on the spreader bars to access the parachute’s attach points. WALIBI 3 | page 14... - Page 15 Harness User’s manual | WALIBI 3 INSTALLING THE RESERVE PARACHUTE Riser/Harness connection Fastening the risers to the harness with a set of 7mm square Maillons Rapides®. Connect each riser to a spreader bar using a squared Maillon Rapide® and O-ring.
-
Page 16: Place The Risers Inside The Neoprene Sleeve
Harness User’s manual | WALIBI 3 INSTALLING THE RESERVE PARACHUTE Place the risers inside the neoprene sleeve. Pass the right-hand riser inside tearable neoprene sleeve along the speader bar then the Maillon Rapide’s and finally the shoulder straps. Repeat the same process for the riser located on the left. -
Page 17: Place The Risers Inside The Sleeve
Harness User’s manual | WALIBI 3 INSTALLING THE RESERVE PARACHUTE Place the risers inside the sleeve Pass the risers through their respective shoulder sleeve. Place the risers inside their guiding sleeve connected alongside the harness and bring them out through the reserve parachute container... -
Page 18: Riser Connection - Reserve Parachute
Harness User’s manual | WALIBI 3 INSTALLING THE RESERVE PARACHUTE Reserve parachute/risers connection One (1) square 7mm Maillon Rapide® will be needed + two (2) flexible toric rings. - Open the 7mm square - Push the riser end - Give a second twist to Maillon Rapide®... -
Page 19: Installing The Reserve Parachute In The Container
Harness User’s manual | WALIBI 3 INSTALLING THE RESERVE PARACHUTE Installing the reserve parachute in its container Place the reserve parachute inside the reserve parachute poc- ket with the handle on the right side. Thank you for reading the following carefully ! We re- commend for the initial rescue parachute assembly and installation to be made by a qualified professional. - Page 20 Harness User’s manual | WALIBI 3 INSTALLING THE RESERVE PARACHUTE Installing the reserve parachute in its container - Using the rod, pass the loops 3 and 4 through the gommets Pass the folding rod through the loops number 3 and 4...
- Page 21 Harness User’s manual | WALIBI 3 INSTALLING THE RESERVE PARACHUTE Installing the reserve parachute in its container Pass the loop 4 through the small side flap Pass the large rod through the guides through the loops 3 and 4 ( white loops ).
- Page 22 Harness User’s manual | WALIBI 3 INSTALLING THE RESERVE PARACHUTE Installing the reserve parachute in its container WARNING Do not pass the big rod in black loops 1 and 2 WALIBI 3 | page 22...
- Page 23 Harness User’s manual | WALIBI 3 INSTALLING THE RESERVE PARACHUTE Installing the reserve parachute in its container Using the rod, pass the loops 1 and 2 through the gommets Pass the loop 1 in the side flap which will maintain the handle...
- Page 24 Harness User’s manual | WALIBI 3 INSTALLING THE RESERVE PARACHUTE Installing the reserve parachute in its container Pass the small rod through the loop 1 Pass the small rod in the guide then in the loop 2 and the second guide...
- Page 25 Harness User’s manual | WALIBI 3 INSTALLING THE RESERVE PARACHUTE Installing the reserve parachute in its container Check the mounting. In each of the 4 loops must pass a rod and only one. WALIBI 3 | page 25...
-
Page 26: Locking The Reserve Parachute Handle
Harness User’s manual | WALIBI 3 INSTALLING THE RESERVE PARACHUTE Locking the reserve parachute handle Insert the parachute handle in the dedicated support Insert the velcro holding the handle into the slot WALIBI 3 | page 26... - Page 27 Harness User’s manual | WALIBI 3 INSTALLING THE RESERVE PARACHUTE Locking the reserve parachute container Mandatory extraction test procedure Check the completed installation during a hang-test. Have the installation checked by a professional outfit. Conduct an extraction test every six ( 6 ) months to assure proper sys- tem functionality.
-
Page 28: Gear Packing And Tips
Harness User’s manual | WALIBI 3 PACKING AND TIPS Tip : The main loop is protected by a safety cover Back storage pocket Small storage pocket Camera pocket Zipped storage pocket for memory cards WALIBI 3 | page 28... -
Page 29: Adjustments
Harness User’s manual | WALIBI 3 ADJUSTING THE HARNESS Adjusting the harness prior each takeoff is vital. The various adjustments Adjusting the backrest Lumbar support adjustment Adjusting the shoulder straps WALIBI 3 | page 29... -
Page 30: Adjusting The Harness
Harness User’s manual | WALIBI 3 ADJUSTING THE HARNESS Adjusting the harness Without strap tension, first adjust the backrest incline at the desired angle. - Tightening will bring the backrest at a more vertical angle - Loosening the backrest will tilt the back support rearward. -
Page 31: Wing/Harness Connection
Harness User’s manual | WALIBI 3 CONNECTING THE WING TO THE HARNESS Connecting the wing to the harness Connect the Walibi 3 harness to the tandem spreader-bars using the loops intended for this purpose Flight direction WALIBI 3 | page 31... -
Page 32: Flight Phases
Harness User’s manual | WALIBI 3 FLIGHT PHASES Pre-Flight control • Check that the harness, the carabiners, the spreader bar and in general all your flight equipment are not damaged. As the captain, you are responsible for the safety of the crew •... -
Page 33: In Flight
Harness User’s manual | WALIBI 3 FLIGHT PHASES In flight Once up in the air, the WALIBI 3 behaviour is stable and instinctive. Landing Straighten yourself in your harness and adopt a running posture to dissipate the horizontal speed. Always be certain to have enough altitude to make a landing approach corresponding to the weather conditions of the moment and ter- rain. -
Page 34: Using The Reserve Parachute
Harness User’s manual | WALIBI 3 USING THE RESERVE PARACHUTE Throwing the reserve parachute We strongly advise you to check frequently the location of the reserve parachute handle location. To do this, we recommend that you lower your right hand following the risers. This movement should be done without looking. By doing so, you will maximize your chances of a rapid extraction if something went wrong and throwing the reserve parachute was called for. -
Page 35: In Case Of An Incident
Harness User’s manual | WALIBI 3 IN CASE OF AN INCIDENT Call for help after an accident Emergency call numbers EUROPE / INDIA Help needed? USA / CANADA CHINA / JAPAN NEPAL IRAN AUSTRALIA NEW ZEALAND Flashlight SOS : WALIBI 3 | page 35... -
Page 36: Maintenance
Safety comes first! Supair advice to replace the carabiners and spreader bars every 5 years or after 500 hours of use. The self-locking carabiners are NEVER to be used for any activities other than paragliding. -
Page 37: Repairs / Spare Parts
We have minimized our manufacturing footprint by carefully selecting environmentally friendly materials; most of our components are recyclable. If you estimate that your WALIBI 3 has reached the end of it life span, you can separate plastics from metals and recycle them according to your com- munity rules in effect. -
Page 38: Warranty
WARRANTY SUPAIR takes the greatest care in its products design and manufacturing and hence offers a five (5) year limited warranty from the date of purchase against manufacturing defects or flaws occurring during normal use. Any damage or degradation resulting from incorrect or abusive use, abnormal exposure to aggressive factors, including, but not limited to;... -
Page 39: Shock Absorber
Entretien / Maintenance : 30°C If your BUMPAIR is damaged, have it inspected and repaired at a professional qualified facility or contact us at sav@supair.com The test results and the EU declaration of conformity can be found at: www.supair.com WALIBI 3 | page 39... -
Page 40: Service Book
Harness User’s manual | WALIBI 3 SERVICE BOOK This page will help you keep record of your WALIBI 3 scheduled maintenance. Care Care Purchase date Resale Resale Owner’s name : Date Date Name and stamp of the shop : Workshop’s name/ Buyer’s name Workshop’s name/ Buyer’s name... - Page 41 SUPAIR-SAS Parc Altaïs 34 rue Adrastée 74650 Chavanod, Annecy FRANCE info@supair.com +33 4 50 45 75 29 RCS 387956790...
Need help?
Do you have a question about the WALIBI 3 and is the answer not in the manual?
Questions and answers