Table of Contents
Advertisement
Advertisement
Table of Contents

Related Manuals for ARCC Abington

Summary of Contents for ARCC Abington
- Page 1 U S E R G U I D E...
- Page 2 ARCC Innovations Ltd Pampisford Road Great Abington Cambridge CB21 6AH 01223 893 290 www.arccbikes.com...
-
Page 3: Table Of Contents
Warranty terms and conditions ..... 53 Basic adjustments / maintenance ....11 Contact us ..............56 Gears ................13 About ARCC Innovations ........57 Brakes ................. 14 Saddle Position ............16 Washing and cleaning your bike ....17 Front wheel removal - Electric......18 Front wheel fitting - Electric ...... -
Page 4: A Modern Twist On A Classic Style
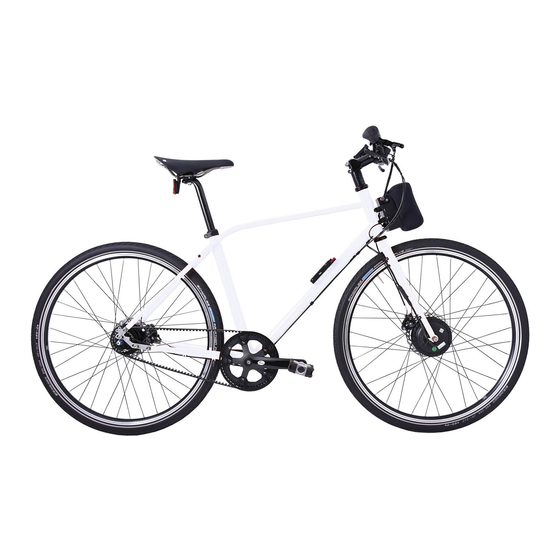
A modern twist on a classic style Meet the Abington; a sleek town bike; and the Rosemont, a lightweight step-through bike designed in collaboration with award winning frame builder Toby Gallagher. They combine the elegance and poise of a bygone era, with state-of-the-art engineering at ARCC Bikes. -
Page 6: Safety
This manual contains some tips and advice for using your ARCC bike but if you are ever unsure of how to maintain your bike, please contact the retailer where you made your purchase or call ARCC for expert advice. -
Page 7: Warning
• Do not use the bike if there is any problem with the e2-pod Intelligent Drive System, take the bike to ARCC Bikes or to the retailer from which you purchased your bike, for inspection. Warning As with all mechanical components, bicycles are subjected to wear and high stresses. Different materials and components may react to wear or stress fatigue in different ways. -
Page 8: Component Names
Component names Shimano single speed/ Shimano Alfine Hub 8 speed/ Saddle Shimano Alfine Hub 11 speed/ Rohloff Hub 14 speed Shimano flat mount disc brake - 140mm Rohloff flat mount disc brake - 160mm Saddle clamp Seat post clamp 650b x 38 tyres Seat post Frame Gates Carbon Drive... - Page 9 Handlebars Grips Bosch battery (e-bike only) Bluetooth controller (e-bike only) USBC ports (e-bike only) Handlebar stem ARCC e2-pod (e-bike only) Headset Shimano quick release hub (Non-electric bike only) Spare battery 250W Motor holder (e-bike only) (e-bike only) Brake / gear...
-
Page 10: Unboxing And Using Your Bike
Unboxing and using your bike 1. Fitting the pedals 1. Identify the correct pedal from the ‘L’ and ‘R’ indicators found on the pedal stem. The ‘L’ refers to the left pedal and the ‘R’ refers to the right pedal when viewed from the riding position. - Page 11 For further information please see the ‘Brakes’ section of this user guide. 6. Lubrication We recommend lubrication of only the headset on your ARCC bicycle. Ensure this is done by a trained professional during your general service. 7. Initial service...
-
Page 12: Basic Adjustments / Maintenance
3. Saddle angle adjustment Whenever you adjust the saddle angle, always tighten the saddle clmap bolt to the correct torque of 22Nm before riding your ARCC bike. Refer to the ‘Saddle Position’ section of this manual for more information. 4. Handlebar position The handlebars can be tilted towards and away from the rider. - Page 13 • Gear cables should be replaced at the same interval as brake cables. Have them fitted at ARCC Bikes or by a certified bicycle technician. Cables that are the incorrect length could affect the safety and performance of your bicycle.
-
Page 14: Gears
Gears Shimano features • A two-way self-returning lever • Gear indicator window helps you to see which gear to select • Available in single speed, 8-speed and 11-speed Using the Shimano gearing The shifter uses a simple-to-use self-returning lever to change between gears. Pushing it down with your thumb will shift into a lower gear and flicking the lever upwards with the back of the thumb will shift into a higher gear. -
Page 15: Brakes
Adjustment is carried out using the threaded cable stop on the brake lever. If you are unsure of how to do this, have it adjusted by a qualified bicycle technician or at ARCC Bikes. Brake lever adjustment In order to achieve a comfortable and safe brake lever position, it is important to spend time ensuring that the lever is correctly adjusted. - Page 16 Brakes Lever angle The range of lever angle adjustment is restricted by the cable exit path, if the lever is angled too high it will cause problems for the operation of the brakes. Lever position The position of the lever on the bar can be adjusted to move the lever closer or further from the end of the handlebar grip.
-
Page 17: Saddle Position
Saddle position Both the angle and the fore-aft position of the saddle can be adjusted. To establish the most comfortable position you should start by adjusting the saddle into a neutral position, you can then work from there to find the best position to suit your needs. First loosen the seat clamp bolt using a 6mm hex key until the saddle can be moved with little force. -
Page 18: Washing And Cleaning Your Bike
Washing and cleaning your bike When cleaning your bike - electric or non-electric - do not use a jet wash or high pressure hose to clean the bike, e2-pod, battery, motor, bottom bracket or rear hub (indicated by fig.2) as this will force water inside of it removing the grease and/or damaging any electronics, causing premature failure. -
Page 19: Front Wheel Removal Electric
Front wheel removal Electric Cable clip Motor electrical connector 1. Remove the electrical cable from the cable clips. Locate the motor electrical connector on the bicycle forks. Hold each side of the connector and pull apart in a straight line, ensure you do not twist or over-strain the connectors. 2. -
Page 20: Front Wheel Fitting Electric
Front wheel fitting Electric Dog washer 1. Ensuring the dog washer and cable are facing down, slot the wheel back into the forks. 2. Tighten the two wheel nuts. Then, ensuring that the two marked arrows are aligned, reconnect the motor electrical cable and fix back into cable clips. -
Page 21: Front Wheel Removal Non-Electric
Front wheel removal Non-electric Please note, to refit the wheel, simply reverse the following instructions. 1. Locate the black lever on the side of the forks. Pull and rotate to face down. 2. On the opposite side of the fork, 3. -
Page 22: Rear Wheel Removal - Shimano Alfine
Rear wheel removal Shimano Alfine hub 1. Rotate the gear arm until the gear cable is slack. 2. Whilst holding the gear arm in position, slide the cable from under the gear retainer. - Page 23 3. Continuing to hold the gear arm in position, pull gently on the cable to remove the cable clamp from the gear arm. 4. Loosen both wheel nuts on either 5. Drop the wheel away from the side of the wheel. frame.
-
Page 24: Rear Wheel Fitting - Shimano Alfine
Rear wheel fitting Shimano Alfine hub 1. To fit the rear wheel, simply reverse the instructions on pages 21-22 ensuring the blue and green washers are in the correct place - indicated in steps 2 and 3 below. 2. Ensure the blue washer is situated 3. -
Page 25: Rear Wheel Removal - Single Speed
Rear wheel removal Single Speed Shimano Please see page 20 for quick release instructions. 1. Loosen both wheel nuts on either 2. Drop the wheel away from the side of the wheel. frame. -
Page 26: Rear Wheel Removal - Rohloff
Rear wheel removal Rohloff hub 2. Ensure that you have selected gear 1. Use an allen key to loosen and fourteen. Then by hand, loosen the remove the snubber arm bolt. knurled head screw on the cable box. 3. Pull the cable box away from the 4. -
Page 27: Rear Wheel Fitting - Rohloff
Rear wheel fitting Rohloff hub 1. To fit the rear wheel, reverse the 2. When the support block is flush instructions on the previous page ensuring within the dropout slot, tighten the that gear 14 is still selected and the support wheel nuts. -
Page 28: Belt Removal Gates Carbon Drive
Belt removal Gates Carbon Drive Please note, to refit the belt simply reverse the following instructions. 1. Once you have removed the rear wheel, use an allen key to loosen and remove the two bolts indicated in the image above. 2. -
Page 29: Bottom Bracket
Please contact ARCC or a local qualified Bike Technician if you have any problems with the bottom bracket of your bike, ensuring you provide them with the... -
Page 30: Torque Settings
Torque settings Component Torque 6 Bolt brake rotor Brake levers Bottom bracket (e-bike) Please see ‘Bottom bracket’ page Bottom bracket (non-electric) 30Nm Calliper mount Chain ring bolt 12Nm Crank set 35Nm Center lock rotor lock ring 41Nm Gear levers Handlebar clamp Steerer tube stem Motor nuts 30Nm... -
Page 31: Specification List
Specification list Description Specification e-bike classification Pedelec Bike manufacturer / ARCC Abington/Rosemont model Motor (e-bike) Brushless 250W 36V DC 170 RPM front wheel drive Front drop-out 100mm Rear drop-out 135mm Battery (e-bike) Bosch Lithium Ion 36V 4.0Ah (144 Wh). Bosch AL 3640 CV professional charger or... - Page 32 Suitable for riders from 5’3” to 6’5” Build standards Conforms to EN15194 & EN14764/BS EN ISO 4210 Frame finish Powder coated Abington: Black BX Ahead Threadless 1-1/8” Headset (e-bike) Rosemont: Silver BLB Ahead Threadless 1-1/8” Gearing Shimano Alfine 8 speed Metres development (2.75 –...
- Page 33 14g stainless steel Tyre/pressures (max.) 650x38b Schwalbe Marathon Plus / 80 PSI Inner tubes Schwalbe 28” Presta valve Bicycle weight (no Abington: 10.5kg - 14.5kg motor, e2-pod, battery, Rosemont: 11kg - 14.8kg accessories) e-bike weight (no Abington: 14.4kg -18.4kg accessories) Rosemont: 14.94kg - 18.7kg...
-
Page 34: Options List
14 speed: Grip shifter (right hand) Mudguards Black/Silver SKS Chromoplastic 42mm Rear rack Tourtec Abington: Fluorescent yellow, vivid green, orange, bronze, silver, dark grey, black, white Colour Rosemont: Pebble grey, pale green, reed green, pastel blue, pearl gentian blue, brown red, black, white... -
Page 35: Using The E2-Pod
Using the e2-pod... - Page 36 The e2-pod Intelligent Drive System comprises of a compact, lightweight 250W geared brushless hub motor that is fitted in the front wheel. This connects, via waterproof cable connectors, with a cable from the bottom bracket torque sensor, to the machined aluminium pod, clamped securely on to the head tube.
-
Page 37: Technology, Meet Simplicity
Technology, meet simplicity The e2-pod Intelligent Drive System comes with the choice of a 4.0 Ah or 6.0 Ah Bosch battery which are readily available from most tool retailers and online. The 4.0 Ah battery gives a typical range of up to 35km and the 6.0 Ah battery, up to 50km. -
Page 38: Unboxing The E2-Pod
Unboxing the e2-pod What’s in the box: Bosch 36volt battery Dependant on your selection, you will have either a 4.0 Ah or 6.0 Ah Bosch battery supplied with your bike. Please ensure you register your battery with BOSCH to obtain your two year warranty. Bosch AL3640CV 36volt Li-on charger Bosch GAL3680CV 36volt Li-on 30 minute charger For use with the 4.0 Ah and 6.0 Ah Bosch batteries. -
Page 39: Checking And Charging The Battery
Checking and charging the battery Battery charge status Charging the battery Press the red ‘On’ button to check Ensuring the battery cover is the battery charge. The battery is fully removed, plug the battery charger charged when the three Green LED’s into a suitable mains power socket light up. -
Page 40: Docking The Battery
Docking the battery 1. Holding the battery securely, locate the 2. With the battery located on the e2-pod, battery on the e2-pod and slide down until push the battery down firmly until it clicks it is in position. and locks. -
Page 41: Removing The Battery
Removing the battery Unlocked Locked Disconnecting the battery Unlocking the lever Rotate the lever to disconnect the (Security lock versions only) If the battery. Please note, do not use lever is locked, use the security key to excessive force on the battery unlock the lever. -
Page 42: Using The Usb-C Ports
Using the USB-C ports Mobile devices can be charged via the USB-C Ports located on the side of the e2-pod. USB-C Ports are fully compliant with all USB-C compatible devices. Charging devices while the bike is being ridden When the bike is in either M or A mode, any device plugged into the USB-C port will automatically begin charging. -
Page 43: Led Indicators
indicators ‘A’ Status Indicators Flashing green: Drive active Please note that the Assist Level LEDs on the Bluetooth controller will also flash green to indicate that drive is active. Amber: Launch control selected Flashing amber (for 3 seconds): Launch control active Red: Fault detected (see trouble shooting guide) Battery Status Indicators... -
Page 44: Using The E2-Pod App
Using the 1. Loading Screen e2-pod app The e2-pod app works with both the Gen I e2-pod and Gen II e2-pod, and gives the user control of the e2-pod via their mobile phone. The app can be downloaded from the App Store on Apple devices. - Page 45 2. Pairing - Scanning 3. Pairing - One device found Pairing required - 2 5. Pairing - Multiple devices found 6. Pairing - Help Opens safari page iOS Confirmation - 9...
- Page 46 8. Not Connected Screen 7. Settings Screen Automatically returns to main screen whenever Bluetooth reconnects. Code Correct 9. iOS Bluetooth Confirmation Dialogue...
-
Page 48: Using The Bluetooth Controller
Using the Bluetooth controller The Bluetooth controller allows the e2-pod mode selection / assist level to be changed. When the Bluetooth controller is powered off or the connection between the remote and the e2-pod is lost, the e2-pod will run at half power. Bluetooth controller operation: Power/Mode selection button: Holding the power / mode selection button for two seconds or more will turn the remote on/off. - Page 49 Initial Bluetooth pairing • Turn on the Bluetooth controller by holding the power button for two seconds. • With the Bosch battery located in the e2-pod, push the battery down firmly until it clicks and locks. • On the Bluetooth controller press and simultaneously hold the two assist level buttons and power mode button until the six assist level LED’s light up, then release.
-
Page 50: Trouble Shooting Guide
Trouble shooting guide Check the battery is fully charged. Check the battery is correctly clicked into position. The e2-pod isn’t working Check brake switch function. Pull each brake lever in turn, the corresponding red LED indicator should illuminate on the brake switches when the brake is applied. - Page 51 Place the battery into the charger for a few seconds, then remove from the charger and place the battery Continuous red light on the onto the e2-pod and wait for 5 seconds, remove the battery battery and place back onto the charger. The battery should now start to charge.
-
Page 53: Warranty
5 years of the purchase of the bike or system. ARCC bikes are made for use on roads and well-made paths, they are not designed for cross-country riding as this can overstress the frame. -
Page 54: Warranty Terms And Conditions
Warranty terms and conditions Thank you for choosing an ARCC bike. Your bike is the product of ARCC’s use of proven engineering, extensive research and testing, superior reliability, safety and performance. You should ensure that your bike is regularly serviced by a qualified bicycle technician, in accordance with the recommendations in this user guide. - Page 55 (or product) posted, transmitted, or otherwise made available via the service, even if advised of their possibility. In the event that you choose to sell your ARCC bike, please note that Bosch battery warranties are non-transferable. Please also note that the bike must undergo a service by ARCC Bikes in order to transfer the remainder of the ARCC warranty onto the new owner.
- Page 56 • by sending an email to the address below. If you have any concerns or need to contact us please email us at info@arcc.co.uk or write to us at ARCC Innovations Ltd, Pampisford Road, Great Abington, Cambridge CB21 6AH. Return of goods You must take reasonable care of the goods whilst they are in your possession.
-
Page 57: Contact Us
Disclaimer: There may be changes to products and services after the publication date of this manual. ARCC reserves the right to make design modifications and allow for discrepancies in colour tones. The illustrations may contain equipment, optional accessories or other services that are not part of the... -
Page 58: About Arcc Innovations
ARCC is a not-for-profit corporation owned by a team who have achieved great success, and now want to help others with the same vision and ambition realise their objectives here in the UK, rather than elsewhere. - Page 60 ARCC Innovations Ltd Pampisford Road Great Abington Cambridge CB21 6AH 01223 893 290 info@arcc.co.uk www.arccbikes.com Follow us: @arccbikes V2. 2020...
Need help?
Do you have a question about the Abington and is the answer not in the manual?
Questions and answers