
Related Manuals for Condair RM Series


Summary of Contents for Condair RM Series
- Page 1 OPERATION MANUAL Steam humidifier Condair RM Humidification and Evaporative Cooling...
- Page 2 Condair Group AG, except to the extent required for installation or maintenance of recipient's equipment. Liability Notice Condair Group AG does not accept any liability due to incorrect installation or operation of the equipment or due to the use of parts/components/equipment that are not authorised by Condair Group AG. Copyright Notice ©...
-
Page 3: Table Of Contents
To the very beginning Notes on the operation manual For your safety Product Overview Models overview Identification of the unit Construction of the Condair RM steam humidifier Functional description System overview Condair RM Operation First-time commissioning Display and operating elements... - Page 4 Maintenance intervals Maintenance list Removing and installing components for maintenance 7.4.1 Preparing the Condair RM for the removal of components 7.4.2 Removal and installation of the steam tank 7.4.3 Removal and installation of the filling cup, the level unit and the water hoses 7.4.4...
-
Page 5: Introduction
We thank you for having purchased the Condair RM steam humidifier. The Condair RM steam humidifier incorporates the latest technical ad van ces and meets all recognized safety standards. Nevertheless, improper use of the Condair RM steam humidifier may result in danger to the user or third parties and/or damage to property. - Page 6 If the documentation gets misplaced, please contact your Condair representative. Language versions This operation manual is available in other languages. Please contact your Condair representative for information. Introduction...
-
Page 7: For Your Safety
Condair RM safely and correctly. All icons, signs and markings applied to the components of the Condair RM must be observed and kept in readable state. - Page 8 Condair RM is no longer operating correctly – if connections and/or piping are not sealed All persons working with the Condair RM must report any alterations to the unit that may affect safety to the owner without delay. Prohibited modifications to the unit No modifications must be undertaken on the Condair RM without the express written consent of Condair Group AG.
-
Page 9: Product Overview
Product Overview Models overview Steam humidifiers Condair RM are available with different heating voltages and steam capacities ranging from 2 kg/h up to a maximum of 8 kg/h. Model Max. steam capacity max. Heating voltage Condair RM in kg/h in kW 230 V/1~/50...60 Hz 400 V/3~/50...60 Hz Key model designation... -
Page 10: Identification Of The Unit
Identification of the unit The identification of the unit is found on the specification label: Type designation Serial number (7 digits) Month/Year Condair Group AG, Gwattstrasse 17, 8808 Pfäffikon SZ, Switzerland Heating voltage Type: Condair RM 8 Serial No: XXXXXXX 01.20 Heating voltage: 230 V/1~/50-60 Hz Heating power: 6.5 kW 28.3 A... -
Page 11: Construction Of The Condair Rm Steam Humidifier
26 Terminals voltage supply ("L1", "L2", "L3" and "PE") 12 Steam outlet connector ø30 mm 27 Heating contactor 13 24 V power supply 28 Terminals voltage supply ("N") 14 Heating elements 29 Over temperature switch 15 Pressure equalizing hose Fig. 2: Construction Condair RM steam humidifier Product Overview... -
Page 12: Functional Description
Functional description The Condair RM steam humidifier is an atmospheric steam humidifier. It operates on the resistance heating principle and is designed for indirect humidification via a steam distributor in venti lating and air-conditioning systems. Water supply The water is supplied via a filter valve (accessory "Z261") to the steam humidifier. It reaches the steam tank via the level controlled inlet valve and the open filling cup. -
Page 13: System Overview Condair Rm
Manometer (recommended, by others) 20 Humidity controller or humidity sensor (extract air control) 10 Filter valve (accessory "Z261") 21 Pure water system Condair RO-A (separate product) 11 Open funnel with water trap (by others) Fig. 3: System overview Condair RM... -
Page 14: Operation
Operation The Condair RM steam humidifier may be commissioned and operated only by persons familiar with the Condair RM steam humidifier and adequately qualified. It is the owner’s responsibility to verify proper qualification of the personnel. First-time commissioning The first-time commissioning must always be done by a service technician of your Condair representative or a well trained and authorised person of the customer. -
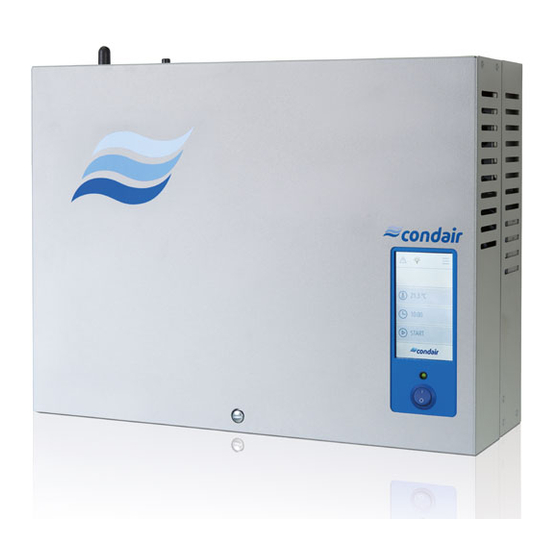
Page 15: Display And Operating Elements
Unit switch Fig. 4: Display and operating elements DANGER! Risk of electric shock! After switching off the unit switch, there is still live voltage inside the control compartment of the Condair RM. Therefore, before opening the unit the steam humidifier must be always separated from the mains supply/supplies via the electrical isolator(s). Operation... -
Page 16: Commissioning After An Interruption Of Operation
"Warning" (LED light yellow) or "Fault" (LED light red). If the function check on the level unit is successful, the Condair RM will be in normal operating mode and the LED blinks green. As soon as a steam demand is present or the humidifying opera- tion is started manually, the heating current is switched on, the status LED lights green and steam is produced after a short time. -
Page 17: Notes On Operation
If, during operation, it is recognized that consistently foaming occurs in the steam tank, the carbonate hardness setting of the inlet water should be increased. As a result, the steam tank of the Condair RM is drained more frequently and thus the foam formation is counteracted. -
Page 18: Taking The Unit Out Of Operation
In order to take the Condair RM steam humidifier out of operation (e.g. for maintenance purpose), per- form the following steps: 1. If maintenance work on the water system of the Condair RM is to be carried out, the steam tank must be emptied. Proceed as follows: a. -
Page 19: Working With The Display
Working with the Display Home screens After switching on the Condair RM and the automatic system test the steam humidifier is in normal operating mode and the Home screen is shown. The appearance of the Home screen depends on the configuration of the control software. -
Page 20: 5.1.1.2 Homescreens With Humidity Sensor And Activated Internal Controller
5.1.1.2 Homescreens with humidity sensor and activated internal controller Internal controller enabled, Timer disabled. Warning triangle (function see chapter 5.2) Navigation elements (see chapter 5.3) Operating status field HVAC 40.9 % Current measured humidity in the air duct/room in % of the relative humidity 60.0 % Current setpoint in% of the relative humidity Internal controller and Timer enabled. -
Page 21: Function Of The Warning Triangle
However, depending on the type of warning, certain restrictions in the operation may occur. Warning triangle lights red: An fault is present. Depending on the type of fault the Condair RM is stopped or continous normal operation. Navigation elements Navigation element Action <Menu>... -
Page 22: Configuration Of The Control Software
Start Time for the set Duration. During the set duration, the Condair RM humidifies as soon as a demand is present. You can set a timer with Start Time and Duration for a single Wochentimer day of the week or for a week day range. - Page 23 General Date Setting the current date in the specified date format. Time Setting the current time of day in the format "hh:mm". User Info Anzeige von Geräteinformationen General Cabin Board Info @Server ID Version FW Version HW (OTP) Hardware Option SPA Control Service System Mode...
-
Page 24: Configuration Of Condair Rm Control Software
Return Duct Maximum humidistat Supply duct Air flow monitor Condair RM with external controller enabled Fig. 5: System layout for operating the Condair RM with a demand signal from an external humidity controller Configuration of Condair RM control software... - Page 25 6. Determine unit size. (Path: Engineering > Steam humidifier > Tank Settings > Capacity) Note: The unit size can be found on the rating plate of the Condair RM under steam output. 7. Determine supply water type and cartridge size: •...
- Page 26 Return Duct Maximum humidistat Supply duct Air flow monitor Condair RM with internal controller enabled Fig. 6: System layout for the operation of the Condair RM with a humidity sensor and the internal humidity controller Configuration of Condair RM control software...
- Page 27 7. Determine unit size. (Path: Engineering > Steam humidifier > Tank Settings > Capacity) Note: The unit size can be found on the rating plate of the Condair RM under steam output. 8. Determine supply water type and cartridge size: •...
-
Page 28: Settings In The "Service" Menu
Shows the list with the current warning and error messages of the Condair RM steam humidifier Error History Shows a list of the last 50 warning and error messages of the Condair RM steam humidifier Water Supply Water supply settings for the Condair RM. -
Page 29: Settings In The "Engineering" Menu
Determining in which system mode the Condair RM Control Board should run. – Steam Generator: Setting for the operation of the Condair RM as a pure steam generator for HVAC applications. The steam production is controlled either by a demand signal from an external controller or a humidity sensor signal when using the internal controller. - Page 30 Input signal: Determining of the type of demand signal for the steam humidifier (0-5V, 1-5V, 0-10V, 2-10V, 0-20V, 0-16V, 3-16V, 0-20mA, 4-20mA, On/Off). – Control Server ID: The Condair RM always uses the Server ID = 0. The setting must be left at "0". –...
- Page 31 – Inlet Valve: Switching the inlet valve of the Condair RM on and off. – Relay Drain: Switching the relay of the drain pump of the Condair RM on and off. – Relay Fan 1: Not used with Condair RM.
- Page 32 Tank Overtemp.: "On" (no overtemperature in the steam tank), "Off" (overtemperature switch for steam tank has triggered). – Hardware Option SPA Control: Shows he hardware option of the Condair RM. Input Analog Indication of the current state of the analog inputs.
-
Page 33: Maintenance
The water in the steam tank can be hot (up to 95 °C). There is danger of burning when the steam tank is dismounted shortly after steam has been produced. Prevention: Before carrying out any work on the steam system set the Condair RM out of operation as described in chapter 4.6, then wait until the components have cooled down sufficiently thus pre-... -
Page 34: Maintenance Intervals
To maintain operational safety the Condair RM steam humidifier must be maintained at regular intervals. The control software of the Condair RM features a maintenance counter for the unit maintenance of the steam humidifier and one for the Replacement of the filter cartridge (only active if system is configured for the operation with the optional filter cartridge). - Page 35 Replacement intervals of the optional filter cartridges in litres The following table gives you an overview of the approximate replacement intervals of the filter cartridge based on the specific output, the carbonate hardness of the supply water (tap water). Carbonate hardness [°dH] Replacement interval in litres supply water Filter cartridge L 14000 7000 4667...
-
Page 36: Maintenance List
Steam tank Remove, disassemble and clean, replace defective components if necessary. Note: When operating the Condair RM with the optional filter cartridge slight lime traces in the steam tank are normal. However, these slight lime traces must not be removed. -
Page 37: Removing And Installing Components For Maintenance
Removing and installing components for maintenance 7.4.1 Preparing the Condair RM for the removal of components Before starting any removal work set the Condair RM out of operation and drain the steam tank. Please refer to the notes in chapter 4.6. - Page 38 3. Carefully lift the steam tank out of steam tank receptacle and remove it towards the front of the steam humidifier. CAUTION! Set down the steam tank carefully to ensure the connector on the bottom side of the steam tank is not damaged! 4.
- Page 39 5. Carefully lift off the steam tank cover with the heating elements, and remove cover sealing. CAUTION! Take care with the cover while it is removed, so as not to damage the heating elements. 6. Loosen the strainer insert and lift it out of the steam tank. t o p t o m b o t...
- Page 40 7. If during maintenance one or more heating elements must be replaced: • First note position of the connecting cables inside the heating cable sockets. • Cut cables on the heating cable connectors. • Undo the nuts on the fixing flange of the appropriate heating element and remove heating ele- ment.
- Page 41 Assembly and installation of the steam tank Assembly of the steam tank takes place in reverse sequence of the removal. Please note the following instructions: • Installation of any heating elements which have been removed should follow the figure of step 7 the removal.
-
Page 42: Removal And Installation Of The Filling Cup, The Level Unit And The Water Hoses
7.4.3 Removal and installation of the filling cup, the level unit and the water hoses For removing the filling cup, the level unit and the water hoses the steam tank must be removed first (see chapter 7.4.2). Fig. 8: Removal of the filling cup, the level unit and the water hoses 1. Release hose clamps, then disconnect all hoses from the corresponding connectors and remove the hoses. - Page 43 2. Carefully pull fixing clip of the filling cup to the front, then push filling cup downwards until it comes to a stop and remove it to the front. 3. Unplug cable from the socket of the level unit PCB. Carefully remove level PCB together with the PCB cover from the level unit.
-
Page 44: Removal And Installation Of The Drain Pump
7.4.4 Removal and installation of the drain pump For removing the drain pump the steam tank must be removed first (see chapter 7.4.2). Fig. 10: Removal of the drain pump 1. Detach electric cables (polarity of the cables must not be observed). 2. -
Page 45: Removal And Installation Of The Inlet Valve
7.4.5 Removal and installation of the inlet valve For removing the inlet valve the steam tank must not be removed. Fig. 11: Removal of the inlet valve 1. Detach electric cables (polarity of the cables must not be observed). 2. Release hose clamp and remove the hose from the connector. 3. -
Page 46: Removal And Installation Of The Steam Tank Receptacle
7.4.6 Removal and installation of the steam tank receptacle For removing the steam tank receptacle the steam tank must be removed first (see chapter 7.4.2). Fig. 12: Removal of the steam tank receptacle 1. Release hose clamps and remove hoses from the connectors. 2. -
Page 47: Notes On Cleaning The Unit Components
Notes on cleaning the unit components Unit component What to clean and how to clean Steam tank / steam tank strainer • Carefully brush off any limescale from the components (do not use a wire brush). If the components are heavily calcified, place them in an 8% formic acid solution (observe safety notes in chapter 7.6), until the limescale comes off. - Page 48 Unit component What to clean and how to clean Inlet valve • Carefully remove any limescale inside the inlet valve and on the strainer using a soft bristled brush (do not use a wire brush). • Wash inlet valve and strainer insert with a lukewarm soap solution, then rinse well with tap water.
-
Page 49: Notes On Cleaning Agents
Unit component What to clean and how to clean Level unit • Disassemble level unit. • Carefully remove any limescale inside the housing of the level unit and its connectors using a soft bristled brush (do not use a wire brush). If the housing of the level unit is heavily calcified, place it in an 8% formic acid solution (observe safety notes chapter... -
Page 50: Replacing The Optional Filter Cartridge
3. Place a rag below the filter cartridge in order to collect any residual water which flows out when the filter cartridge is removed. 4. Close the shut-off valve in the water supply line to the Condair RM. 5. Hold the filter cartridge firmly with both hands on the circumference, so that it does not fall down during removal. - Page 51 Fig. 15: Turn valve to "Bypass" (flushing position) 11. Carefully open the shut-off valve in the water supply line to the Condair RM (slowly) and let water flow into the container (approx. 5 l) until it emerges without bubbles. Then close the shut-off valve in the water supply line again.
- Page 52 Condair RM Fig. 16: Turn valve to "Supply" (operating position) 13. Open the shut-off valve in the water supply line to the Condair RM. Disposal of the exhausted filter cartridge Exhausted filter cartridges can be disposed of in accordance with local waste disposal regulations with domestic waste.
-
Page 53: Resetting The Maintenance Counter
Proceed as follows: 1. Make sure that the unit cover is attached and secured. 2. Switch on the Condair RM. 3. Press the menu button to access the main menu and enter the password "0000" (if the display lock is activated). -
Page 54: Fault Elimination
General notes Only use original spare parts from your Condair representative to replace defective parts. Safety Before starting repair work on the Condair RM set the unit out of operation and disconnect it from the mains (see chapter 4.6). -
Page 55: Fault Indication
LED above the unit switch. Depending on the type of fault the steam production is stopped or the Condair RM continues normal operation. -
Page 56: Malfunction List
––– Max. filling time Maximum filling time exceeded. Note: The operation of the Condair RM is stopped. After the fault has been eliminated, the Condair RM must be switched off and on again. Water supply blocked, shut-off Check water feed (filter, pipes, valve in the water supply line etc.), check/open shut-off valve,... - Page 57 Replace drain pump. ––– Level unit The level in the steam tank of the Condair RM is in an unaccept- able range. Note: The operation of the Condair RM is stopped. After the fault has been eliminated, the Condair RM must be switched off and on again.
- Page 58 Possible causes Remedy ––– Ext. 24 V supply External 24 V supply of the Condair RM faulty. Voltage too high or too low Note: The Condair RM continues to work normally. Fuse "F2" on the control board Replace fuse "F2" on the control defective.
- Page 59 File System Initialization of the Flash file system failed. Note: The Condair RM continues to work normally. After eliminating the fault, the the Condair RM must be switched off and on again to reset the fault. A problem occurred during...
- Page 60 CANopen Initialization of the CANopen adapter failed. Note: The Condair RM continues to work normally. After eliminat- ing the fault, the Condair RM must be switched off and on again to reset the fault. A problem occurred during Contact your Condair represen- initialization of the CANopen tative.
- Page 61 Remedy W250 ––– Export File The configuration file was not saved. Note: The Condair RM continues to work normally. The configuration file ("SpaEx- Make sure the local file system portSettings.json") could not be is working properly. created on the local file system.
-
Page 62: Resetting The Fault Indication
Resetting the fault indication To reset the fault indication (red LED light on the Condair RM, warning triangle on the RM Display lights up red): 1. Switch off the Condair RM via the unit switch on the front side of the unit. -
Page 63: Replacing The Fuses And Backup Battery In The Control Unit
To replace the fuse or the backup battery proceed as follows: 1. Disconnect the Condair RM from the mains by switching off the electrical isolator(s) in the mains supply line(s) and secure electrical isolator(s) in "Off" position against inadvertent switching on. - Page 64 6. Relocate unit cover and lock it with the retaining screw. 7. Reconnect Condair RM to the mains by switching on the electrical isolator(s) in the mains supply line(s).
-
Page 65: Taking Out Of Service/Disposal
Taking out of service/Disposal Taking out of service If the Condair RM must be replaced or if the Condair RM is not needed any more, proceed as follows: 1. Take the Condair RM out of operation as described in chapter 4.6. -
Page 66: Product Specification
Product specification 10.1 Performance data / Fuses "F6" voltage supply 230V/1~/50...60 Hz 400V/3~/50...60 Hz Condair RM –– –– –– –– –– 15.3 –– –– –– –– –– 21.8 12.0 28.3 15.3 10.2 Operating data Condair RM Supply voltage 230 V/1~/50...60 Hz 400 V/3~/50...60 Hz Number of heating elements Max. steam capacity... -
Page 67: Connections/Dimensions/Weights
10.3 Connections/Dimensions/Weights Condair RM Water supply connector G 3/4" external thread Water drain connector ø30 mm Steam outlet connector ø29 mm Unit dimensions (HxBxT) 470 x 350 x 150 Net weight 10.6 kg Operating weight 12.9 kg 10.4 Certificates Certificates... - Page 68 Notes...
- Page 69 Notes...
- Page 70 Notes...
- Page 72 CH94/0002.01 Condair Group AG Gwattstrasse 17, 8808 Pfäffikon SZ, Switzerland Phone +41 55 416 61 11, Fax +41 55 588 00 07 info@condair.com, www.condair-group.com...
Need help?
Do you have a question about the RM Series and is the answer not in the manual?
Questions and answers