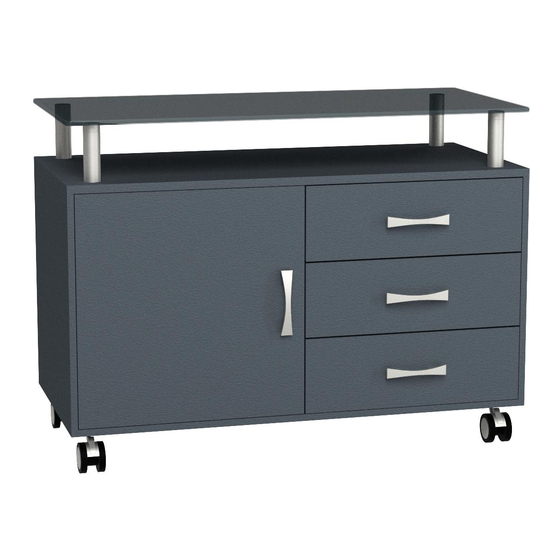
Techni Mobili RTA-S10 Assembly Instructions Manual
Hide thumbs
Also See for RTA-S10:
- Assembly instructions manual (16 pages) ,
- Assembly instructions manual (14 pages)
Advertisement
Quick Links
Advertisement

Subscribe to Our Youtube Channel
Summary of Contents for Techni Mobili RTA-S10
- Page 1 English MODEL RTA-S10 This product comes in 2 boxes. MODEL RTA-S10...
- Page 2 RTA-S10 Product Size: 31.5"W x 15.75"D x 23"H Shelves: 14.75"W x 14.25"D x 7.5" H Drawers: 12.75"W x 13.25"D x 3.5"H Product Net Weight:70.55 lbs...
-
Page 3: Parts List
RTA-S10 PARTS LIST Right Panel Left Panel Middle Vertical Panel Casters Top Wood Panel Bottom Panel Back Panel Middle Horizontal Panel Drawer Right Panels Support Tubes Top Glass Drawer Left Panels x3Sets Right Left Right Left Drawer Front Panel Drawer Bottom Panel... -
Page 4: Screws List
RTA-S10 Handles Door Panel Hinges SCREWS LIST PART QTY. ITEM PART QTY. ITEM 4X14 MM 6X25 MM 6X40 MM 4X30 MM 3X15 MM 6X20 MM 6X25 MM 4X20 MM 4X10 MM HOW TO ASSEMBLE USING BOLTS AND CAM LOCKS: Cam lock... - Page 5 RTA-S10...
-
Page 6: Assembly Steps
RTA-S10 ASSEMBLY STEPS: Use screws A to affix the Casters (3) to the bottom surface of Bottom Panel (6). Make sure to place the locking casters at the front. 4PCS SCREWS Top side: Back 4X14 MM 16PCS Front Get all the Flat Sliders (16) and use screws H to assemble them to the Middle Vertical Panel (2) and the Right Panel (2 &... - Page 7 RTA-S10 SCREWS 6X40 MM 6PCS First screw bolts B to the Left Panel (1) and Right Panel (4), then assemble the Middle Horizontal Panel (5) and Bottom Panel (6) as shown and as explained in page 4. rear side Use screws A to assemble the Back Panel (7) to the Middle Vertical Panel (2).
- Page 8 RTA-S10 4PCS Use screws C to assemble the Support Tubes (9) Use screws D to assemble the Support Tubes (9) to to the Glass Top (10). the Top Wood Panel (8). SCREWS SCREWS 6X25 MM 6X20 MM 4PCS 4PCS 2PCS...
- Page 9 RTA-S10 Use screws E to assemble the Hinges (19) to the Left Panel (1). 2PCS SCREWS 4X10 MM 4PCS If the door does not close properly, you can adjust its position by unscrewing loose the corresponding screws on the hinges:...
- Page 10 RTA-S10 P.10 First screw bolts F to the Drawer Front Panel (13), then assemble the Drawer Left & Right Panels (11 & 12) as explained in page 5. SCREWS 6X25 MM 4PCS Use screws G to assemble the Drawer Back Panel (15) to the Drawer Left &...
- Page 11 RTA-S10 P.11 Tighten any and all screws. Insert the drawers into the cabinet, starting with the bottom drawer. You might have to insert it at a downward tilted angle. Enjoy your unit!
- Page 12 CARE AND MAINTENANCE English - DO NOT EXPOSE THE SURFACES TO DIRECT SUNLIGHT OR EXTREME ENVIRONMENTAL CONDITIONS. ANY DAMAGE RESULTING FROM SUCH EXPOSURE IS NOT COVERED BY THE PRODUCT’S WARRANTY. - THE PREFERABLE METHOD TO CLEAN THE SURFACES IS TO WIPE THEM USING A SOFT CLOTH DAMPENED WITH A SOLUTION SOAP AND WATER, THEN DRY WITH A CLEAN TOWEL.


Need help?
Do you have a question about the RTA-S10 and is the answer not in the manual?
Questions and answers