Table of Contents
Advertisement
Advertisement
Table of Contents

Subscribe to Our Youtube Channel
Related Manuals for Pelican PCL3


Summary of Contents for Pelican PCL3
- Page 1 Owner’s Manual Calcite pH Neutralizer...
- Page 2 Pelican Water Systems shall not be liable for technical or editorial errors or omissions contained herein or for incidental or consequential damages in connection with the furnishing, performance, or use of this material.
-
Page 3: Table Of Contents
Adding the Pelican Logo Sticker: ........ -
Page 4: Table Of Contents
Rev L — Calcite pH Neutralizer Page 4 Product Operation and Specifications PCL3 PCL6 Specification Description Max Flow Rate 10 GPM 15 GPM Minimum Working Pressure 25 PSI Maximum Working Pressure 100 PSI Maximum Vacuum 5 inch/127 mm Hg Operating Temperatures 36°F –... -
Page 5: Complete Parts List
Rev L — Calcite pH Neutralizer Page 5 Complete Parts List Note: Pelican supplies the parts below to accommodate a variety of water supply lines. Table 1: Parts List Part Description Qty. Part Description Qty. Bypass Valve for Electronic 1" PVC Tail Adaptor for... - Page 6 CANNO T BE REPRO DUCED O R USED TO Water Systems 1-877-842-1635 MANUFACTURE ANYTHING SHO WN O R REFERRED INSTALLATION DIAGRAM TO WITHO UT DIRECT WRITIEN PERMISSIO N FROM wm1. pe l i canwater. com PELICAN WATER SYSTEMS. CALCITE PCL3/PCL6...
-
Page 7: Installation Overview
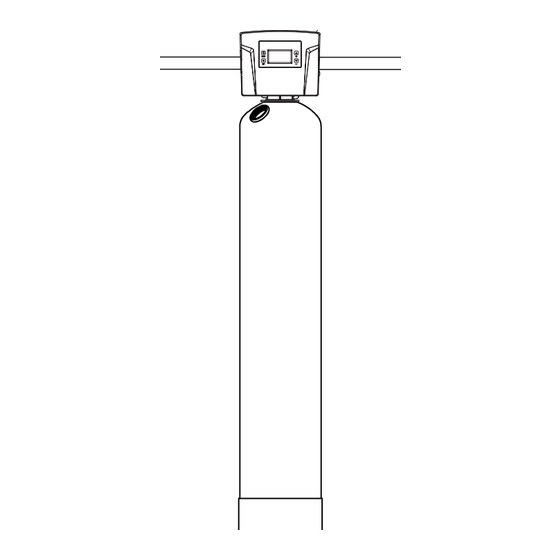
Rev L — Calcite pH Neutralizer Page 6 Installation Overview Wall Outgoing Incoming Bypass Water to Water Drain Line Barb Valve House Supply Electronic Head Top View Calcite Tank Figure 1 Pre-Installation Bypass Valve Installation Front View Bypass Valve Clip Electronic Head Figure 2... -
Page 8: Bypass Valve Operations
Rev L — Calcite pH Neutralizer Page 7 Bypass Valve Operations SERVICE BYPASS Bypass Allen Wrench Notice: The Bypass Valve on the Electronic Head can be set to Bypass or Service by turning the knobs on the top of the valve. The valves can be difficult to turn by hand until the seals become saturated. Use the supplied Bypass Allen Wrench to turn the knobs if necessary. -
Page 9: Installation
Rev L — Page 8 Calcite pH Neutralizer Installation Calcite Tank Installation MENU Electronic Head Red Clips Distributor Tube Bypass Valve Tail Adaptors Figure 3 1. Level the Calcite Tank Notice: If the tank is not level, lift the tank straight up 6 inches and tap it on the ground until the tank stands vertical. -
Page 10: Complete The Installation
1. Turn on the main water supply. 2. Check for leaks. 3. Add the Pelican logo sticker in the desired location on the tank. !IMPORTANT! Do not use where water is microbiologically unsafe or with water of unknown quality without proper disinfection before or after the filter/softener system. -
Page 11: Programming The Electronic Head
Rev L — Page 10 Calcite pH Neutralizer Programming the Electronic Head Note: Power Source - For safety reasons the outlet must be protected by a Ground Fault Circuit Interrupter (GFCI). Your system is pre-set to regenerate every 3 days at 2:00 am, the complete process takes 20 minutes MENU Step 1: Setting the Date &... -
Page 12: Testing Ph Levels In Water
Rev L — Calcite pH Neutralizer Page 11 Testing pH Levels in Water 1. Ensure your system is not in bypass mode. 2. Turn on the nearest faucet to the system (cold water only). 3. Let water run for 10 minutes. 4. -
Page 13: Troubleshooting
Rev L — Calcite pH Neutralizer Page 12 Troubleshooting Problem Solution Water leaking at the top of the tank around the head. You may need to turn the head to tighten it. The tank head is pre-installed hand-tight, do not overtighten the head (just turn it snug). -
Page 14: Warranty
These warranties apply only to the original registered owner so long as the owner owns/lives in the home in which the unit was originally installed. Customer must register their system with Pelican within 90 days of purchase* in order to obtain a warranty. Warranty will discontinue after the unit is removed from the location where it was originally installed. -
Page 15: Warranty Registration Form
Page 14 Warranty Registration Form Send in this Warranty Registration Form to validate your warranty or visit www.PelicanWater.com to complete warranty registration form online. Pelican Warranty Registration Form Date Item(s) were Received: Order ID#: Model: Dealer Purchased From: Model/Serial Number:...
Need help?
Do you have a question about the PCL3 and is the answer not in the manual?
Questions and answers