Table of Contents
Advertisement
Quick Links
Advertisement
Table of Contents

Subscribe to Our Youtube Channel
Summary of Contents for BE Agri Ease GS7.2R
- Page 1 gs7. 2R 7.2V Lithium-ion cordLess sprayer operation manual...
-
Page 2: Parts List
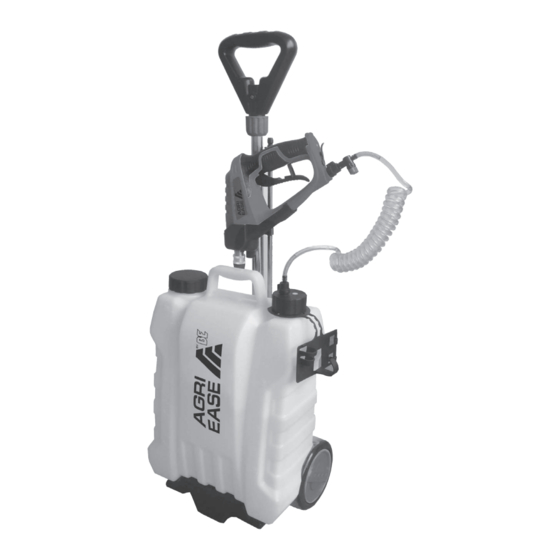
PARTS LIST 1. SPRAY GUN 2. EXTENSION NOZZLE 3. SPRING HOSE 4a. FIRST NOZZLE 4b. SECOND NOZZLE 5. SHOULDER STRAP 6. HANGING HOOK 7. TANK 8. SPRING CLIP 9. TANK LID 10. COUNTER FLOW DEVICE 11. CHARGER 12. ON/OFF AND SAFETY TRIGGER 13. - Page 3 WARNING: READ MANUAL BEFORE USE WARNING: To reduce the risk of injury, the user must read and understand the operator’s manual before using this product. Battery must be fully charged before first use. RETAIN THIS MANUAL FOR FUTURE REFERENCE. Thank you for your purchase.
-
Page 4: Charging The Battery
Cluttered or dark areas invite accidents. WARNING: If the trigger is used continually b) Do not operate power tools in explosive at this point, the lithium battery can be atmosphere, such as in the presence damaged. Do not try to continue to use of flammable liquids, gases or dust. -
Page 5: Personal Safety
Under abusive conditions, liquid may safety shoes, hard hat, or hearing be ejected from the battery; avoid contact protection used for appropriate conditions with this fluid. If contact accidentally will reduce personal injuries. -
Page 6: Introduction And Installation
ATTENTION: Pesticide or liquid fertilizer must be dissolved completely before pouring into the tank in case that any solid material will block off the spraying. Remove any solids on the filter after injection. HOOKS FOR SPRAYER GUN AND NOZZLES... - Page 7 ATTENTION: There are two same spring clips on both ends of the hose, each of them will be connected to the sprayer gun and outlet hole of the tank. Press the clip push in for connecting and pull out for detaching. Before use, you must open the ON/OFF fluid valve first.
- Page 8 HOW TO CHANGE THE NOZZLES The nozzles on this machine can be quickly changed. One can change the nozzle to extension nozzle at any time. To detach the short nozzle: press the copper nut (quich change adapter) as shown in below photo and then pull out the short nozzle.
- Page 9 INSTALLATION INSTRUCTIONS 3. Release handle of trolley, put metal tube FOR TROLLEY in the hole of handle, alignment screw hole and tightening the knob clockwise. 1. Open the package of handle, sprayer machine storage, metal tube, lockbolt and lockout.. 4. Put lockbolt in the hole as shown in the diagram direction and lock the nut.
- Page 10 7. Put lockbolt in the hole as shown in 9. Take off extension nozzle, put it in the the diagram direction and lock the nut. opposite hole of trolley hanging hook. 10. Take out sprayer machine and spring 8. Adjustment the sprayer machine storage hose to connect to the water outlet lid of as show in the diagram position.
-
Page 11: Maintenance
Do not place any other objects on top of the garden sprayer. The sprayer must not be stored in temperatures higher than 35°C (95 °F) or in direct sunlight. Do not store the garden sprayer in places with static electricity. - Page 12 Freight costs from customer to vendor. Repair and transportation costs of products or parts determined not to be defective. Repairs necessary because of operator abuse or negligence, or the failure to install, operate, maintain or store the product according to the instructions in the operator’s manual.
Need help?
Do you have a question about the Agri Ease GS7.2R and is the answer not in the manual?
Questions and answers