
Related Manuals for Keba Kemro CP 263/S


Summary of Contents for Keba Kemro CP 263/S
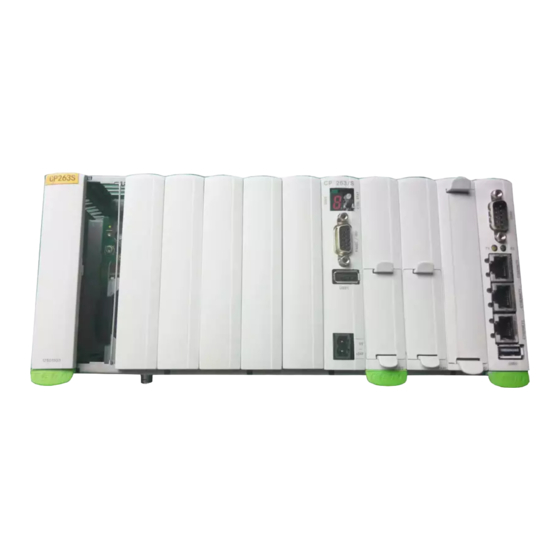
- Page 1 Kemro CP 263/S, CP 263/X CPU module Project engineering manual V1.01 Translation of the original instructions...
- Page 2 Specifications are subject to change due to further technical developments. Details presented may be subject to correction. All rights reserved. KEBA AG Headquarters: Gewerbepark Urfahr, 4041 Linz, Austria, Phone: +43 732 7090-0, Fax: +43 732 7309-10, keba@keba.com For information about our subsidiaries please look at www.keba.com.
- Page 3 CP 263/S, CP 263/X Record of Revision Record of Revision Version Date Change in chapter Description changed by 1.00 09-2014 Newly created 1.01 10-2014 Extended by CP 263/X Project engineering manual V1.01 © KEBA 2014...
-
Page 5: Table Of Contents
Adding modules....................22 Air conditioning and ventilation................23 5.4.1 Use of air filters..................23 Connections and wiring....................24 Power supply......................24 6.1.1 Connection example................25 Grounding......................25 Graphic interface (PANEL / SI0)................26 Project engineering manual V1.01 © KEBA 2014... - Page 6 General procedures and safety principles..........41 13.2.2 EMC guideline..................41 13.2.3 Electrical safety and fire protection............41 13.2.4 Environmental and surrounding conditions..........41 13.3 Standards for the American market..............41 13.3.1 UL test for industrial control equipment..........41 Project engineering manual V1.01 © KEBA 2014...
- Page 7 CP 263/S, CP 263/X Table of Contents 14 Declaration of conformity....................42 Project engineering manual V1.01 © KEBA 2014...
-
Page 9: Introduction
Specialized training in the electro-technical field (in accordance with industrial training guidelines). Knowledge in: ● current valid safety regulations, Electrician ● wiring guidelines, ● circuit diagrams, ● correct installation of electrical connections according to national and international regulations. Project engineering manual V1.01 © KEBA 2014... -
Page 10: Intended Use
1.4.1 Contents of the document ● Description of the module ● Mounting and installation instructions ● Description of interfaces including EMC guidelines Project engineering manual V1.01 © KEBA 2014... -
Page 11: Not Contained In This Document
DE: 1000868 ● Programmer KeMotion automation system manual EN: 1000869 ● Commissioning foreman ● Service technician EtherCAT declaration EtherCAT® is registered trademark and patented technology, li- censed by Beckhoff Automation GmbH, Germany . Project engineering manual V1.01 © KEBA 2014... -
Page 12: Safety Notes
Information Useful practical tips and information on the use of equipment are identified by the “Information” symbol. They do not contain any information that warns about potentially dangerous or harmful functions. Project engineering manual V1.01 © KEBA 2014... -
Page 13: General Safety Instructions
When using a SELV power source it can become PELV by reason of the module construction and the connectors (grounding!). ● Protective low voltage circuits must always be installed safely insulated separated from circuits with dangerous voltage. Project engineering manual V1.01 © KEBA 2014... -
Page 14: Safety Instructions For Device Maintenance
CAUTION! ● The device may only be opened by qualified personnel and only mainte- nance activities expressly approved by KEBA may be performed (see chap- ter “maintenance”). Any other manipulations to the device will result in loss of warranty. ●... -
Page 15: Description Of The Module
For more information please see the system manual for your automation sys- tem. Information Use only Compact Flash cards which are recommended by KEBA. Information The Compact Flash Card cannot be used as removable medium since it also has system programs stored on it. -
Page 16: Precautions When Using The Cf Card
Removing the Compact Flash card 1) Turn off the power supply. 2) Press the eject button ( 1, see drawing). 3) Pull out the Compact Flash card ( 2). Fig.3-3: Removing the CF card Project engineering manual V1.01 © KEBA 2014... -
Page 17: Accessories
Weidmüller order number 2-pole BLZF 5.08/2 SN SW - 1707690000 The appropriate female connectors are not included in the delivery of KEBA, but can be purchased via KEBA. The technical data for the terminals are contained in the technical data sheet of the manufacturer of the female connectors. -
Page 18: Displays And Operating Elements
For further information see: System manual CAN Status LEDs The module has two CAN Status LEDs (RX- and TX-LEDs) per CAN interface, which are activated from the Microcontroller. Project engineering manual V1.01 © KEBA 2014... -
Page 19: Ethernet Status Leds
Ethernet status LEDs The Ethernet-socket (RJ-45) offers a Link-Status-LED and an Activity-LED. Display Significance Link-Status-LED Lights up as soon as an Ethernet connection is available. (green) Activity-LED Lights up when sending and receiving data. Project engineering manual V1.01 © KEBA 2014... -
Page 20: Mounting And Installation Instructions
BX 252/A for K-Net, Ethernet FX 271/C for Sercos, Ethernet Fig.5-1: Assignment of the slots ● Slots not used must be closed with reserve modules to secure contact pro- tection of the ESD-sensitive parts. Project engineering manual V1.01 © KEBA 2014... - Page 21 (see image). Fig.5-2: Inserting the option module into slot Removing an option module 1) Turn off power supply 2) Pull module out of the slot 3) Insert dummy module. Project engineering manual V1.01 © KEBA 2014...
-
Page 22: Adding Modules
"Power consumption 5 V on the K-Bus" and "Pow- er consumption 24 V on the K-Bus" must be used. Further information: ● See system manual Further information: See system manual. Project engineering manual V1.01 © KEBA 2014... -
Page 23: Air Conditioning And Ventilation
The filter elements must be cleaned or replaced regularly. Information Contamination level 2, description according to standard: "The occurring contamination is generally not conductive. However, tempo- rary conductivity must be expected due to condensation." Project engineering manual V1.01 © KEBA 2014... -
Page 24: Connections And Wiring
● Max. load current and required heat dissipation through the connected wire at maximum ambient temperature. ● Permissible voltage drop for error-free operation of the connected equip- ment. Project engineering manual V1.01 © KEBA 2014... -
Page 25: Connection Example
(M4) that is located on the bottom side of the enclosure (grounding point with ground icon). Material: Electrolytic galvanized sheet steel, blue galvanized self-clinching standoff. Project engineering manual V1.01 © KEBA 2014... -
Page 26: Graphic Interface (Panel / Si0)
CP 263/S, CP 263/X Fig.6-2: Example: grounding point on the enclosure Graphic interface (PANEL / SI0) The graphic interface is used to connect an operating panel (DVI interface). Fig.6-3: Position of the graphic interface Project engineering manual V1.01 © KEBA 2014... -
Page 27: Pin Assignment
Cable and plug specification Further information: See system manual. CAN interface (CAN0) Fig.6-4: Position of the CAN interface (CAN0) 6.4.1 Pin assignment, connection example Fig.6-5: CAN connection at the module: 9-pole D-SUB male connector Project engineering manual V1.01 © KEBA 2014... -
Page 28: Cable And Plug Specification
To activate the bus termination at the first and last participant, both the pins 4 and 5 (TERM1) must be connected as well as the pins 8 and 9 (TERM2). Fig.6-7: CAN interface with activated bus termination Project engineering manual V1.01 © KEBA 2014... -
Page 29: Ethernet Interfaces (Ethernet0-2)
Tr. Data + Transmit Data + Output Tr. Data - Transmit Data - Output Re. Data + Receive Data + Input n.c. n.c. n.c. n.c. Re. Data- Receive Data - Input n.c. n.c. n.c. n.c. Project engineering manual V1.01 © KEBA 2014... -
Page 30: Cable And Plug Specification
(danger of unplugging). 6.6.1 Cable and plug specification Further information: See system manual. EMC and wiring guidelines Pay attention from the outset to careful wiring and shielding. Further information: See system manual. Project engineering manual V1.01 © KEBA 2014... -
Page 31: Configuration
On leaving the factory, all modules are set to address 0. Therefore the K-Net address is setted correctly and does not have to be changed. Fig.7-1: Position of address switches Project engineering manual V1.01 © KEBA 2014... -
Page 32: Operating Behavior
● The K-Bus watchdog causes a K-Bus reset and the outputs of the K-Bus module will be disabled. Project engineering manual V1.01 © KEBA 2014... -
Page 33: Diagnosis
CP 263/S, CP 263/X Diagnosis Diagnosis The module has a 7-segment display for signalling status information and error codes. Further information: See system manual. Project engineering manual V1.01 © KEBA 2014... -
Page 34: 10 Maintenance
3) Remove old battery and replace it with new battery. Pay attention to po- larity! 4) Re-insert battery case into CP 263/x. CAUTION ● If the battery is inserted incorrectly, the retain data is lost if the front panel power supply is interrupted. Project engineering manual V1.01 © KEBA 2014... -
Page 35: Fan
Fig.10-2: Fan case. Position on the bottom of the housing ... Back side of the fan case ... Fastening screw with pressure spring The fan case with fan must be obtained from KEBA. Project engineering manual V1.01 © KEBA 2014... - Page 36 4) Pull out fan case in a straight way. 5) Insert new fan with fan case. Pay attention to the mounting direction, like displayed in the picture. Project engineering manual V1.01 © KEBA 2014...
- Page 37 The fan case has to be inserted straight into the slot, otherwise the inter- nal connector would not plug in. 6) Fix the fan case with the screw. The fan is now replaced. Project engineering manual V1.01 © KEBA 2014...
-
Page 38: 11 Disposal
Although batteries have a low voltage, they can provide enough current when short-circuited to ignite flammable material. They should not be dis- posed of together with conductive material (e.g. iron filings, wire wool contaminated with oil, etc.) Project engineering manual V1.01 © KEBA 2014... -
Page 39: 12 Technical Data
● Connection: DSUB 9-pin pin plug Ethernet: 3 (choosable 2 EtherCAT) ● Data transmission rate: 10/100 Mbit/s ● Galvanic isolation: Yes, signaling lines EtherCAT: 2 (choosable 2 Ethernet) USB: USB 2.0; high speed Project engineering manual V1.01 © KEBA 2014... -
Page 40: Dimensions, Weight
Possibilities for plugs for PCI modules: For BX 250, NX 250, BX 252, FX 271 K-Bus: At the side; used for adding Kemro modules. DVI + RS-485-A (only for KEBA operating pan- Graphic interface: els) 12.5 Dimensions, weight Module height:... -
Page 41: 13 Ec Directives And Standards
Programmable controllers - Part 2 13.2.4 Environmental and surrounding conditions EN 61131-2:2007 Programmable controllers - Part 2 13.3 Standards for the American market 13.3.1 UL test for industrial control equipment UL 508, 2005 Industrial Control Equipment Project engineering manual V1.01 © KEBA 2014... - Page 42 Important notes: This document is only an overview and not the original declaration of conform- ity. The original declarations of conformity can be requested from KEBA. Any modification on the product(s), that is performed without KEBA’s consent will render this declaration invalid. The safety instructions contained in the documentation supplied with the product(s) must implicitly be followed! Project engineering manual V1.01...
Need help?
Do you have a question about the Kemro CP 263/S and is the answer not in the manual?
Questions and answers