Table of Contents
Advertisement
Quick Links
Advertisement
Table of Contents

Subscribe to Our Youtube Channel
Related Manuals for SICK InspectorP64 Series


Summary of Contents for SICK InspectorP64 Series
- Page 1 O P E R A T I N G I N S T R U C T I O N S InspectorP64x/65x 2D vision...
- Page 2 This work is protected by copyright. Any rights derived from the copyright shall be reserved for SICK AG. Reproduction of this document or parts of this document is only permissible within the limits of the legal determination of Copyright Law. Any modifica‐...
-
Page 3: Table Of Contents
CDM420-0006 wiring connection module..........Commissioning.................. 55 Installing SensorApps and programming the device......8019943/16UR/31-01-2020 | SICK O P E R A T I N G I N S T R U C T I O N S | InspectorP64x/65x Subject to change without notice... - Page 4 13.1 EU declaration of conformity / Certificates..........13.2 Licenses....................O P E R A T I N G I N S T R U C T I O N S | InspectorP64x/65x 8019943/16UR/31-01-2020 | SICK Subject to change without notice...
-
Page 5: About This Document
… indicates a situation of imminent danger, which will lead to a fatality or serious injuries if not prevented. 8019943/16UR/31-01-2020 | SICK O P E R A T I N G I N S T R U C T I O N S | InspectorP64x/65x... -
Page 6: Further Information
Documents on request Overview of command strings for the device. SICK service If you require any technical information, our SICK Service will be happy to help. To find your agency, see the final page of this document. NOTE Before calling, make a note of all type label data such as type code, serial number, etc., to ensure faster processing. -
Page 7: Safety Information
The device must not be used in explosion-hazardous areas, in corrosive environ‐ ments or under extreme environmental conditions. • Any use of accessories not specifically approved by SICK AG is at your own risk. WARNING Danger due to improper use! Any improper use can result in dangerous situations. -
Page 8: Limitation Of Liability
The liability and warranty of SICK AG is limited to the device specification (hardware functionality and any programming interfaces) according to the agreed conditions. Therefore, SICK AG is not liable, among other things, for damages that are caused by programming of the customer or third parties. -
Page 9: Operational Safety And Particular Hazards
LED radiation of the internal illumination unit (variants of the VI55I illumination unit) NOTE Only the VI55I integrable illumination units from SICK intended for the application can be used as internal illumination units. Risk group 1 •... - Page 10 , depending on parameteriza‐ tion), or impairment of color vision, for example. O P E R A T I N G I N S T R U C T I O N S | InspectorP64x/65x 8019943/16UR/31-01-2020 | SICK Subject to change without notice...
-
Page 11: Repairs
Repairs Repair work on the device may only be performed by qualified and authorized person‐ nel from SICK AG. Interruptions or modifications to the device by the customer will inval‐ idate any warranty claims against SICK AG. 8019943/16UR/31-01-2020 | SICK... -
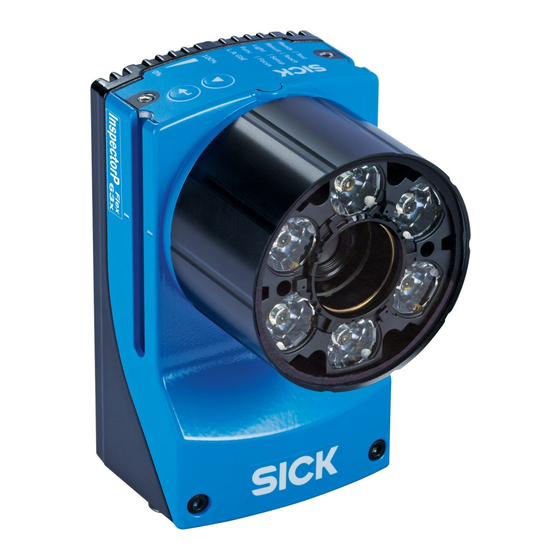
Page 12: Product Description
W: White B: Blue X: No illumination unit installed O P E R A T I N G I N S T R U C T I O N S | InspectorP64x/65x 8019943/16UR/31-01-2020 | SICK Subject to change without notice... -
Page 13: Scope Of Delivery
SW 2 hexagon key for opening and closing the cover of the micro SD card slot and mounting the integrable illumination unit from the optic kit (InspectorP6xx Flex) • SICK lens cloth (only with Flex variant) Accessories Accessories, such as the optic kit, brackets, and connecting cables, are only supplied if ordered separately. -
Page 14: Product Characteristics
Function button (2 x) ä Status display (10 x LEDs) å O P E R A T I N G I N S T R U C T I O N S | InspectorP64x/65x 8019943/16UR/31-01-2020 | SICK Subject to change without notice... - Page 15 3.3.2 Status indicators and functions Enter pushbutton Skip pushbutton table 2 for LED descriptions. The functions for the programmable LEDs are defined by the user in the SICK AppStudio software. Table 2: LED status descriptions Display Color Status Ready green...
- Page 16 InspectorP6xx. The SICK AppStudio SDK is used for developing SensorApps on programmable SICK devices. Its user interface for machine operators can be cre‐ ated individually as a web GUI. The SICK AppManager software tool supports the ser‐ vice in the field in the simple distribution and management of SensorApps.
-
Page 17: Transport And Storage
For storage periods of longer than 3 months, check the general condition of all ■ components and packaging on a regular basis. 8019943/16UR/31-01-2020 | SICK O P E R A T I N G I N S T R U C T I O N S | InspectorP64x/65x Subject to change without notice... -
Page 18: Mounting
Clear view of the object to be measured. ■ O P E R A T I N G I N S T R U C T I O N S | InspectorP64x/65x 8019943/16UR/31-01-2020 | SICK Subject to change without notice... -
Page 19: Mount The Optics
Two or four M5 screws for mounting on a mounting device supplied by the cus‐ ■ tomer. The screw length depends on the mounting base (wall thickness of the bracket). When using an optional SICK bracket, the screws for mounting are included with delivery. Tool and tape measure. - Page 20 Manually preset the sharpness and mask of the lens unit. O P E R A T I N G I N S T R U C T I O N S | InspectorP64x/65x 8019943/16UR/31-01-2020 | SICK Subject to change without notice...
-
Page 21: Mounting Location
Affix the illumination unit to the device housing. Manually adjust the sharpness and mask settings of the lens unit and check using the live image in SICK AppStudio. Attach the protective optics cover and screw it tight. Attach the warning label to the protective optics cover near the light outlet so that it is clearly visible. - Page 22 Working distance in mm Field of view in mm O P E R A T I N G I N S T R U C T I O N S | InspectorP64x/65x 8019943/16UR/31-01-2020 | SICK Subject to change without notice...
- Page 23 Working distance in mm Field of view in mm 8019943/16UR/31-01-2020 | SICK O P E R A T I N G I N S T R U C T I O N S | InspectorP64x/65x Subject to change without notice...
- Page 24 Working distance in mm Field of view in mm O P E R A T I N G I N S T R U C T I O N S | InspectorP64x/65x 8019943/16UR/31-01-2020 | SICK Subject to change without notice...
- Page 25 Working distance in mm Field of view in mm 8019943/16UR/31-01-2020 | SICK O P E R A T I N G I N S T R U C T I O N S | InspectorP64x/65x Subject to change without notice...
-
Page 26: Mounting The Device
Mounting the device Perform one of the following steps: O P E R A T I N G I N S T R U C T I O N S | InspectorP64x/65x 8019943/16UR/31-01-2020 | SICK Subject to change without notice... - Page 27 M5 sliding nuts in the lateral slots. • Attach the optional SICK bracket that has been ordered separately (e.g. mounting angle, part number 2042902) to the device using the two sliding nuts. 8019943/16UR/31-01-2020 | SICK...
-
Page 28: Electrical Installation
The IP 67 enclosure rating for the device is only achieved under the following condi‐ tions: O P E R A T I N G I N S T R U C T I O N S | InspectorP64x/65x 8019943/16UR/31-01-2020 | SICK Subject to change without notice... - Page 29 This is achieved by complying with the following conditions: 8019943/16UR/31-01-2020 | SICK O P E R A T I N G I N S T R U C T I O N S | InspectorP64x/65x Subject to change without notice...
-
Page 30: Connections And Pin Assignment
A-coded connector, A-coded connector connector connector, X-coded D-coded O P E R A T I N G I N S T R U C T I O N S | InspectorP64x/65x 8019943/16UR/31-01-2020 | SICK Subject to change without notice... -
Page 31: Connection Diagrams
Cable, e.g. part no. 6051194 (3 m) Cable, e.g. part no. 6049728 (2 m) Wiring without SICK connection module When using customer-specific connection units, the wiring principle for the signals can be found in the connection diagrams for the connection module CDM420-0006, "Connecting the InspectorP6xx to the CDM420-0006", page... - Page 32 External switching outputs (not supported) à Supply voltage V á O P E R A T I N G I N S T R U C T I O N S | InspectorP64x/65x 8019943/16UR/31-01-2020 | SICK Subject to change without notice...
-
Page 33: Connecting The Device
Additional 0.5 W output power required when using the optional CMC600 parame‐ ter memory module in the CDB650-204 or CDM420-0006 connection module 8019943/16UR/31-01-2020 | SICK O P E R A T I N G I N S T R U C T I O N S | InspectorP64x/65x... - Page 34 Wiring the data interface Wiring the Ethernet interface Connect the sensor to the Ethernet connection of the PC via the adapter cable. Set up communication via SICK AppStudio. NOTE The Ethernet interface of the device has an Auto-MDIX function. This automatically adjusts the transmission speed as well as any necessary crossover connections.
- Page 35 8019943/16UR/31-01-2020 | SICK O P E R A T I N G I N S T R U C T I O N S | InspectorP64x/65x...
-
Page 36: Cdb650-204 Wiring Connection Module
Wiring overview for InspectorP63x ... 65x (1 switching input used) O P E R A T I N G I N S T R U C T I O N S | InspectorP64x/65x 8019943/16UR/31-01-2020 | SICK Subject to change without notice... - Page 37 Device to be connected ß Name of the switching output à 8019943/16UR/31-01-2020 | SICK O P E R A T I N G I N S T R U C T I O N S | InspectorP64x/65x Subject to change without notice...
- Page 38 CDB650-204 and device isolated from supply voltage. Recommended position for all connection work. O P E R A T I N G I N S T R U C T I O N S | InspectorP64x/65x 8019943/16UR/31-01-2020 | SICK Subject to change without notice...
- Page 39 Male connector, M12, 17-pin, A-coded Female connector, M12, 17-pin, A-coded 8019943/16UR/31-01-2020 | SICK O P E R A T I N G I N S T R U C T I O N S | InspectorP64x/65x Subject to change without notice...
- Page 40 The connection shown above is configured for operation of the host with perma‐ nently activated drivers (often described as “RS-422 operation”). O P E R A T I N G I N S T R U C T I O N S | InspectorP64x/65x 8019943/16UR/31-01-2020 | SICK Subject to change without notice...
- Page 41 Ethernet (host port) Serial host interface 8019943/16UR/31-01-2020 | SICK O P E R A T I N G I N S T R U C T I O N S | InspectorP64x/65x Subject to change without notice...
- Page 42 Signal B Pin C Sensor D SENS/IN 1 SENS/IN 2 O P E R A T I N G I N S T R U C T I O N S | InspectorP64x/65x 8019943/16UR/31-01-2020 | SICK Subject to change without notice...
- Page 43 Wiring IN/OUT 3 ... 6 of the device in the CDB650-204 These outputs can be configured independently as IN and OUT. Default: IN 8019943/16UR/31-01-2020 | SICK O P E R A T I N G I N S T R U C T I O N S | InspectorP64x/65x...
- Page 44 −1.5 V) ≤ U ≤ U at I ≤ 100 mA O P E R A T I N G I N S T R U C T I O N S | InspectorP64x/65x 8019943/16UR/31-01-2020 | SICK Subject to change without notice...
-
Page 45: Cdm420-0006 Wiring Connection Module
6.6.1 Wiring overview for InspectorP63x ... 65x (1 switching input used) 8019943/16UR/31-01-2020 | SICK O P E R A T I N G I N S T R U C T I O N S | InspectorP64x/65x Subject to change without notice... - Page 46 Supply voltage V Switching inputs and outputs (not supported) O P E R A T I N G I N S T R U C T I O N S | InspectorP64x/65x 8019943/16UR/31-01-2020 | SICK Subject to change without notice...
- Page 47 CDM420-0006 and device isolated from supply voltage. Recommended position for all connection work. 8019943/16UR/31-01-2020 | SICK O P E R A T I N G I N S T R U C T I O N S | InspectorP64x/65x Subject to change without notice...
- Page 48 Male connector, M12, 17-pin, A-coded Female connector, D-Sub-HD, 15-pin O P E R A T I N G I N S T R U C T I O N S | InspectorP64x/65x 8019943/16UR/31-01-2020 | SICK Subject to change without notice...
- Page 49 The connection shown above is configured for operation of the host with perma‐ nently activated drivers (often described as “RS-422 operation”). 8019943/16UR/31-01-2020 | SICK O P E R A T I N G I N S T R U C T I O N S | InspectorP64x/65x...
- Page 50 Ethernet (host port) Serial host interface O P E R A T I N G I N S T R U C T I O N S | InspectorP64x/65x 8019943/16UR/31-01-2020 | SICK Subject to change without notice...
- Page 51 Pin C Pin D Sensor E Sensor 1 Sensor 2 8019943/16UR/31-01-2020 | SICK O P E R A T I N G I N S T R U C T I O N S | InspectorP64x/65x Subject to change without notice...
- Page 52 Functional assignment for the switching inputs is done withAppStudio configuration software. O P E R A T I N G I N S T R U C T I O N S | InspectorP64x/65x 8019943/16UR/31-01-2020 | SICK Subject to change without notice...
- Page 53 NOTE Functional assignment for the switching outputs is done with AppStudio. 8019943/16UR/31-01-2020 | SICK O P E R A T I N G I N S T R U C T I O N S | InspectorP64x/65x Subject to change without notice...
- Page 54 For the purpose of electromagnetic compatibility, inputs must be set to a defined low- impedance level! O P E R A T I N G I N S T R U C T I O N S | InspectorP64x/65x 8019943/16UR/31-01-2020 | SICK Subject to change without notice...
-
Page 55: Commissioning
Installing SensorApps on the device Use the SICK AppManager software to manage and install SensorApp packages (*.sapk files) on the device. The latest version of SICK AppManager is available from www.sick.com/SICK_AppManager. Many SensorApps have a web user interface which is accessed by following the steps below: Open a Google Chrome web browser window. - Page 56 Save the program in the non-volatile memory of the device. Save the parameter set on the PC. O P E R A T I N G I N S T R U C T I O N S | InspectorP64x/65x 8019943/16UR/31-01-2020 | SICK Subject to change without notice...
-
Page 57: Maintenance
NOTE Static charging may cause dust particles to stick to the inspection window. This effect can be reduced by using an anti-static cleaning agent in combination with the SICK lens cloth (part no. 4003353) (can be obtained from www.sick.com). NOTICE Damage to the inspection window/. - Page 58 ■ safety of lamps and lamp systems as well as on laser protection. Only the illumination units from SICK intended for the application can be used as inter‐ nal illumination units. O P E R A T I N G I N S T R U C T I O N S | InspectorP64x/65x...
-
Page 59: Repairs
Repairs Repair work on the device may only be performed by qualified and authorized person‐ nel from SICK AG. Interruptions or modifications to the device by the customer will inval‐ idate any warranty claims against SICK AG. 8019943/16UR/31-01-2020 | SICK... -
Page 60: Troubleshooting
SICK AG. Rapid replacement of a device by the user is, however, possible. Where a fault cannot be rectified, make contact with the SICK Service department. To find your representative, see the final page of this document. -
Page 61: Decommissioning
Separate the recyclable materials by type and place them in recycling containers. ■ 8019943/16UR/31-01-2020 | SICK O P E R A T I N G I N S T R U C T I O N S | InspectorP64x/65x Subject to change without notice... -
Page 62: Technical Data
1 x LED, visible light. Green (λ = 525 ± 15 nm) O P E R A T I N G I N S T R U C T I O N S | InspectorP64x/65x 8019943/16UR/31-01-2020 | SICK Subject to change without notice... -
Page 63: Performance
Image sensor see "Type code", page 12 type 8019943/16UR/31-01-2020 | SICK O P E R A T I N G I N S T R U C T I O N S | InspectorP64x/65x Subject to change without notice... -
Page 64: Interfaces
Ethernet Image transmission (FTP). 10/100/1,000 Mbit/s, TCP/IP, PROFINET OI, Eth‐ erNet/IP. MAC address(es), see type label. 20 kbit/s ... 1 Mbit/s Protocol: SICK CAN sensor network PROFIBUS Optional via external fieldbus module CDF600-21xx PROFINET IO Built-in, additionally available (optional) via external fieldbus module... -
Page 65: Ambient Data
Notes regarding adequate dissipation of lost heat: see "Mounting requirements", page 18 8019943/16UR/31-01-2020 | SICK O P E R A T I N G I N S T R U C T I O N S | InspectorP64x/65x Subject to change without notice... -
Page 66: Accessories
Accessories and where applicable mounting information can be found online at: • www.sick.com/InspectorP64x • www.sick.com/InspectorP65x O P E R A T I N G I N S T R U C T I O N S | InspectorP64x/65x 8019943/16UR/31-01-2020 | SICK Subject to change without notice... -
Page 67: Annex
13.2 Licenses SICK uses open-source software. This software is licensed by the rights holders using the following licenses among others: the free licenses GNU General Public License (GPL Version2, GPL Version3) and GNU Lesser General Public License (LGPL), the MIT license, zLib license, and the licenses derived from the BSD license. - Page 68 Phone +36 1 371 2680 Phone +386 591 788 49 E-Mail office@sick.hu E-Mail office@sick.si India South Africa Phone +91 22 4033 8333 Phone +27 11 472 3733 Further locations at www.sick.com E-Mail info@sick-india.com E-Mail info@sickautomation.co.za SICK AG | Waldkirch | Germany | www.sick.com...
Need help?
Do you have a question about the InspectorP64 Series and is the answer not in the manual?
Questions and answers