Table of Contents
Advertisement
Available languages
Available languages
Quick Links
Advertisement
Table of Contents

Subscribe to Our Youtube Channel
Related Manuals for KUMATSUGEN GB3000


Summary of Contents for KUMATSUGEN GB3000
- Page 1 ΓΕΝΝΗΤΡΙΕΣ ΒΕΝΖΙΝΗΣ ΑΕΡΟΨΥΚΤΕΣ...
- Page 2 ΟΔΗΓΙΕΣ ΧΡΗΣΗΣ ΚΑΙ ΣΥΝΤΗΡΗΣΗΣ ΟΔΗΓΙΕΣ ΧΡΗΣΕΩΣ ΓΕΝΝΗΤΡΙΑΣ ΒΕΝΖΙΝΗΣ ΜΟΝΤΕΛΟ ΓΕΝΝΗΤΡΙΑΣ KVA (max.) GB3000 GB4000 GB6500 GB6500M 7.5 (380Volt) GB8500MP GB9000M GB9000MP GB10000MP 10.0 ΚΕΦΑΛΑΙΟ 1 ΠΛΗΡΟΦΟΡΙΕΣ ΑΣΦΑΛΕΙΑΣ Σας ευχαριστούμε που διαλέξατε την δική μας γεννήτρια βενζίνης. Παρακαλώ διαβάστε προσεχτικά τις οδηγίες πριν την χρήση και βεβαιωθείτε ότι κατέχετε τις σωστές μεθόδους...
- Page 3 Μην καπνίζετε όταν βάζετε βενζίνη. Απενεργοποιήστε την μηχανή για να γεμίσετε βενζίνη. Αποφύγετε την υπερχείλιση όταν βάζετε βενζίνη. 1. ΠΡΟΦΥΛΑΞΕΙΣ: 1. Αποφυγή φωτιάς Το καύσιμο που χρησιμοποιεί η συγκεκριμένη γεννήτρια είναι η βενζίνη, οπότε πετρέλαιο, κηροζίνη κ.α. δεν θα πρέπει να χρησιμοποιηθούν. Στεγνώστε...
- Page 4 4. Ηλεκτροπληξίες, βραχυκυκλώσεις Για να αποφύγετε ηλεκτροπληξίες ή βραχυκύκλωμα, μην ακουμπάτε την γεννήτρια σε περιπτώσεις που είτε η γεννήτρια ή τα χέρια σας είναι βρεγμένα. Αυτή η γεννήτρια δεν είναι αδιάβροχη, οπότε δεν πρέπει να χρησιμοποιηθεί σε κάποιο μέρος που να είναι εκτεθειμένη σε βροχή, χιόνι ή σε πιτσιλιές από νερό. Η γεννήτρια...
- Page 5 Μην αντιστρέψετε τα καλώδια του φορτιστή γιατί σοβαρές βλάβες μπορεί να προκύψουν στην γεννήτρια και /ή την μπαταρία. Όταν θέλετε να συνδέσετε την γεννήτρια σε ηλεκτρικό κύκλωμα σπιτιού να αφήσετε μόνο έναν εξειδικευμένο ηλεκτρολόγο να το κάνει. Η μη σωστή σύνδεση ανάμεσα...
- Page 6 ΚΕΦΑΛΑΙΟ 3 ΕΛΕΓΧΟΣ ΠΡΙΝ ΤΗΝ ΛΕΙΤΟΥΡΓΙΑ ΕΠΙΠΕΔΟ ΛΑΔΙΟΥ Ελέγξτε το επίπεδο λαδιού με απενεργοποιημένη την γεννήτρια σε επίπεδο δάπεδο. Πάντα ελέγχετε τη στάθμη λαδιού πριν από κάθε χρήση. Αλλαγή λαδιών στις πρώτες είκοσι ώρες λειτουργίας (στρώσιμο) και κάθε 50 ώρες λειτουργίας ή ένα χρόνο...
- Page 7 ΕΦΟΔΙΑΣΜΟΣ ΜΕ ΚΑΥΣΙΜΑ 1.Ξεβιδώστε το καπάκι της δεξαμενής καυσίμου. 2.Ελέγξτε το επίπεδο καυσίμου και εάν βρίσκετε πολύ χαμηλά γεμίστε την δεξαμενή με βενζίνη. 3.Γεμίστε μέχρι το κάτω μέρος από το φίλτρο καυσίμου. 4.Βιδώστε ξανά το καπάκι της δεξαμενής καυσίμου. ΦΙΛΤΡΟ ΑΕΡΟΣ 1.Αφαιρέστε...
- Page 8 ΚΕΦΑΛΑΙΟ 4 ΕΚΚΙΝΗΣΗ ΤΗΣ ΓΕΝΝΗΤΡΙΑΣ ΒΗΜΑΤΑ ΕΚΚΙΝΗΣΗ ΛΕΙΤΟΥΡΓΙΑΣ ΗΛΕΚΤΡΟΓΕΝΝΗΤΡΙΑΣ ΓΕΙΩΣΤΕ ΤΗΝ ΓΕΝΝΗΤΡΙΑ ΑΠΟΣΥΝΔΕΣΤΕ ΟΛΑ ΤΑ ΗΛΕΚΤΡΙΚΑ ΦΟΡΤΙΑ ΕΛΕΓΞΤΕ ΤΗΝ ΣΤΑΘΜΗ ΛΑΔΙΟΥ ΚΑΙ ΣΥΜΠΛΗΡΩΣΤΕ ΑΝ ΧΡΕΙΑΖΕΤΑΙ ΕΛΕΓΞΤΕ ΤΗΝ ΣΤΑΘΜΗ ΚΑΥΣΙΜΟΥ ΚΑΙ ΣΥΜΠΛΗΡΩΣΤΕ ΒΑΛΤΕ ΤΟΝ ΔΙΑΚΟΠΤΗ “ON-OFF” ΣΤΗ ΘΕΣΗ “ON” ΒΑΛΤΕ ΤΟΝ ΔΙΑΚΟΠΤΗ ΚΑΥΣΙΜΟΥ ΣΤΗΝ ΘΕΣΗ “ON” “ΚΛΕΙΣΤΕ”...
- Page 9 Α/Α ΠΑΥΣΗ ΛΕΙΤΟΥΡΓΙΑΣ ΗΛΕΚΤΡΟΓΕΝΝΗΤΡΙΑΣ ΑΦΑΙΡΕΣΤΕ ΟΛΑ ΤΑ ΗΛΕΚΤΡΙΚΑ ΦΟΡΤΙΑ ΑΦΗΣΤΕ 5 ΛΕΠΤΑ ΧΩΡΙΣ ΦΟΡΤΙΟ ΛΕΙΤΟΥΡΓΕΙΣΤΕ ΤΟΝ ΚΙΝΗΤΗΡΑ ΣΤΟ ΡΕΛΑΝΤΙ ΘΕΣΕΤΕ ΤΟΝ ΔΙΑΚΟΠΤΗ “ON-OFF” ΣΤΗ ΘΕΣΗ “OFF” (“STOP” ΓΙΑ ΤΑ DIESEL) ΚΛΕΙΣΤΕ ΤΟΝ ΔΙΑΚΟΠΤΗ ΚΑΥΣΙΜΟΥ ΣΤΡΕΨΑΤΕ ΤΟ ΔΙΑΚΟΠΤΗ ΤΗΣ ΜΙΖΑΣ ΣΤΗ ΘΕΣΗ “OFF” (ΜΟΝΟ ΓΙΑ ΤΑ ΜΟΝΤΕΛΑ ΜΕ ΗΛΕΚΤΡΙΚΗ ΕΚΚΙΝΗΣΗ) Σημείωση: Για...
- Page 10 • • • • • • 4.Γεμίστε με λάδι μέχρι το 5.Τοποθετήστε το δείκτη στη ανώτατο σημείο στο δείκτη. θέση του. Χρησιμοποιείτε Λάδι τετράχρονου κινητήρα 20W/50 • ΕΛΕΓΧΟΣ ΜΠΟΥΖΙ: 1.Βγάλτε το καλώδιο από το μπουζί. 2.Βγάλτε το μπουζί. 3.Καθαρίστε την οξείδωση. 4.Μετρήστε...
- Page 11 Τοποθετήστε ένα καινούριο λαστιχάκι στο φίλτρο • και βιδώστε το φίλτρο στη θέση του. ΔΙΑΤΗΡΗΣΗ ΓΙΑ ΜΑΚΡΟΠΡΟΘΕΣΜΗ ΑΠΟΘΗΚΕΥΣΗ Εάν η γεννήτρια πρόκειται να αποθηκευτεί για μεγάλο χρονικό διάστημα, οι παρακάτω προετοιμασίες θα πρέπει να ολοκληρωθούν. 1. Ξεβιδώστε την βάνα καυσίμου και αδειάστε όλο το καύσιμο από το καρμπυρατέρ. 2.
- Page 12 ATTENTION 1. Kids should be kept in safe distance to generator. 2. Don't touch the engine and muffler while generator is working or just be turned down to avoid empyrosis. Please pay attention to warning sticker on generator. 3. Electrical equipment (including cable and plug connecting component) should be in good condition before starting.
- Page 13 THE IMPORTANCE OF THE SECURITY LABEL caution risk of electric shock stay away from the do not remove the pads the heat source moving parts do not use in the rain. read before using the user manual. do not wash with water jet do not use in a non ventilated earthing terminal...
-
Page 14: Residual Risks
INTENDED USE / NOT INTENDED USE The machines are portable generators with a four-stroke gasoline engine, with AC, 50Hz / 60Hz and 12V DC output for domestic use. The gasoline generator set is suitable for temporary power supply. It may only be operated in a well ventilated area. -
Page 15: Safety Tips
1. SAFETY TIPS ◄ Never operate the generator in door or in a poor-ventilated area. ► Do not operate the generator Under wet climate(rain,snow). ◄ Never connect to house power circuit if commerical power supply is not cut. ► Keep at least 1 m (3ft) away from inflammables. - Page 16 ◄ Do not smoking when fueling. ► Do not spilling out when fueling. ◄ Remember to stop generator before fueling. Others: ● Do not touch the muffler or muffler cover while the engine is running or still hot. ● Do not touch the generator when either it or your hand are wet, avoid short circuit or electric shock.
-
Page 17: Parts And Components Introduction
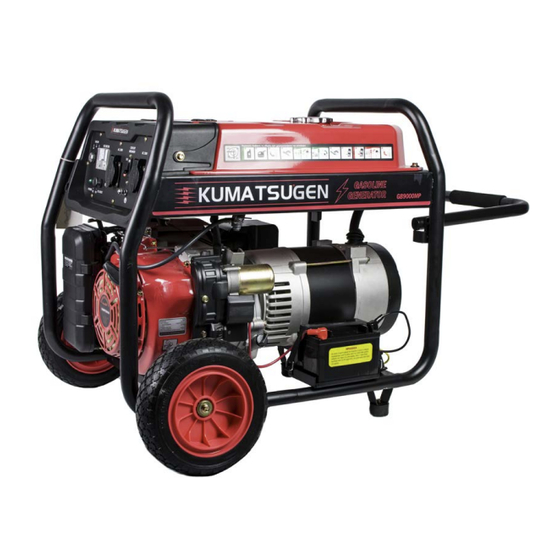
2. PARTS AND COMPONENTS INTRODUCTION Model:unit (1) Fuel tank (14) (2) Muffler (3) Earth terminal (12) (4) AC socket/plug (5) Carburetor throttle lever (13) (6) Starter handle (7) Fuel cock (8) Air cleaner (11) (9) Pipe frame (10) Spark plug (11) Fuel tank cap (10) (12) Breaker... -
Page 18: Inspection Before Operation
3. INSPECTION BEFORE OPERATION 34-1. Lube Oil Always check the oil level before start The stooping generator on a level place. ① Turn out the oil fillter gauge (dipstick) and clean it with a clean cloth. ② Insert the dipstick back without screw in, and check the oil level. - Page 19 3-2. Fuel ① Open the fuel tank cap. ② Check the fuel level, and refuel if necessary. ③ Refuel up to the shoulder of the fuel fillter. ④ Reinstall the fuel tank cap. -21-...
- Page 20 3-3. Air Cleaner ① Loosen the clip and remove the air cleaner housing. (For model: CL) Loosen the wing-nut and remove the air cleaner cover. (For model: C) (Model: unit) ( Model: Simple unit) ② Loosen the wing-nut and washer, and remove the element.
-
Page 21: Starting The Generator
4. STARTING THE GENERATOR 5-1. Remove all the loads from Set the fuel cock to 5-2. ACsocket and switch off “ON” position. the BREAKER. (Model: unit) ( Model: Simple unit) (Model: unit, Simple unit) 5-3. Push the choke lever to 5-4. -
Page 22: Electric Connecting
5. ELECTRIC CONNECTING CAUTION ★ To keep the generator in the best running and electric condtion, please obey the follows: 5-1. Ground the generator to prevent electric shock: (Model: unit,Simple unit) 5-2. Refer some appliance for electric consumption: Wattage Sample Type Appliance Starting... - Page 23 5-3. If the generator is supply more than 2 appliances, be sure to start them one by one with the highest current first. CAUTION: Do not connect the generator to home power circuit. When this connection is necessary, be sure that a skilled electrician does the job. Improper connecting between the generator and home power circuit may cause damage of the generator, and even fire accident.
- Page 24 5-4. AC electric connecting 1. Starting the generator. 2. Connecting the appliances. (Model: unit,Simple unit) 3. Turn on the BREAKER or push down the Ac protector. 5-5. DC Application The DC terminal may be used for charging 12V automotive-type batteries only. ①...
-
Page 25: Stopping The Generator
6. STOPPING THE GENERATOR 6-1. Turn off the Breaker. (Model: unit,Simple unit) 6-2. Turn off the engine switch. ( Model: Simple unit) (Model: unit) 6-3. Turn off the fuel cock. (Model: unit) ( Model: Simple unit) NOTE: In emergency, turn the engine switch to “OFF” to stop the generator. WARNING Never stopping the generator at high speed under heavy load, otherwise, the damage will result. -
Page 26: Regular Inspection And Maintenance
7. REGULAR INSPECTION AND MAINTENANCE CAUTION Daily and regular inspection is important to assure safe, proper and long-term operation of the generator. Refer to the regular inspection table when conducting inspection and maintenance. Inspection Replace Cleaning Adjustment 300hrs Refer page 50hrs 100hrs 20hrs or... - Page 27 7-1. Engine oil replacement ① Loosen the oil drain plug ② Drain off the engine oil in the crankshaft. and dipstick. ③ Screw in and tighten the ④ Filling the engine oil to the drain with seal washer. upper plug level. ⑤...
- Page 28 7-2. Spark plug cleaning ① Dismantle the spark plug cap. ② Dismantle the spark plug. ④ Measure the electrodes (Model: unit) ( Model: Simple unit) clearance. ③ Clean away carbon sediment. 0.7-0.8mm ⑤ Reinstall the spark plug and cap. 7-3. Spark plug cleaning ①...
-
Page 29: Storage Of Generator
② Clean the fuel filter with air ③ Clean the fuel filter cup blow from inside. thoroughly. ④ Mount a new rubber ring and the filter cup securely. 8. STORAGE OF GENERATOR If the generator should be stored for a long time (more than 30 days), the following preparation should be made. -
Page 30: Troubles Shooting
8-5.Loosen the oil drain plug and 8-6.Reinstall the drain plug and dipstick, dipstick, drain off the dipstick. engine oil. 8-7.Pull the starter handle gently until resistance is felt. 9. TROUBLES SHOOTING 9-1. Starting failure ① Is the engine switch at “ON” position? (Model: unit) ( Model: Simple unit) ②... - Page 31 ④ Check the spark plug. (Model: unit) ( Model: Simple unit) MAINTENACE 9-2. Appliance do not work ① Check the appliance device. ② Is the BREAKER at “ON” position? (Model: unit) ③ Is the AC protector reset at “ON” position? ( Model: Simple unit) MAINTENACE -33-...
-
Page 32: Electric Diagram
10. ELECTRIC DIAGRAM Breaker Brack Yellow/Green AC 220V OUT AC 220V OUT Commute Charger FU 10A Brack 2.2K DC 12V OUT 1/2W Brack Brack Brown White Brack White Ignition coil Battery assem SWITCH START...
Need help?
Do you have a question about the GB3000 and is the answer not in the manual?
Questions and answers