Table of Contents
Advertisement
ATTENTION!
NON USARE L'APPARECCHIO SENZA AVER LETTO LE ISTRUZIONI PER L'USO
ATTENTION!
DO NOT USE THE MACHINE BEFORE READING USE INSTRUCTIONS
ATTENTION!
NE PAS UTILISER LA MACHINE SANS LIRE LES INSTRUCTIONS POUR L'EMPLOI
ACHTUNG!
DIE MASCHINENICHT GEBRAUCHEN, OHNE VORHER DIE ANLEITUNGEN GELESEN ZU HABEN
ATENCIÓN!
LA MÁQUINA NO DEBE SER UTILIZADA SIN HABER LEÍDO LAS INSTRUCCIONES PARA EL EMPLEO
Minny 17-20b
CODE 10001452 VER AA REV 00
Codice Fiscale 09224090150 - Partita IVA 02520310232 - Capitale Sociale Euro 516.500,00 int.vers. – Registro Imprese di Verona n. 09224090150 - R.E.A. n. 244619
Pursuant to art. 2497 of the Italian Civil Code, it is herewith pointed out that the company is subject to the management and coordinatation of the the company COMAC S.p.a.
FIMAP spa - Viale del Lavoro, 56 - 37036 S.Martino Buon Albergo (Verona) Italy
Tel. +39 045 8788311 - Fax +39 045 8788317 - E-mail:fimap@fimap.com - www.fimap.com
Advertisement
Table of Contents

Subscribe to Our Youtube Channel
Related Manuals for Fimap Minny 17-20b


Summary of Contents for Fimap Minny 17-20b
- Page 1 Minny 17-20b CODE 10001452 VER AA REV 00 FIMAP spa - Viale del Lavoro, 56 - 37036 S.Martino Buon Albergo (Verona) Italy Tel. +39 045 8788311 - Fax +39 045 8788317 - E-mail:fimap@fimap.com - www.fimap.com Codice Fiscale 09224090150 - Partita IVA 02520310232 - Capitale Sociale Euro 516.500,00 int.vers. – Registro Imprese di Verona n. 09224090150 - R.E.A. n. 244619...
-
Page 2: Table Of Contents
TABLE OF CONTENTS TABLE OF CONTENTS ......................................2 MACHINE DELIVERY ......................................3 GENERAL CONSIDERATIONS..................................3 TECHNICAL DESCRIPTION....................................4 SYMBOLS USED ON THE MACHINE................................5 PREPATION OF THE MACHINE..................................6 MOVING THE MACHINE WHEN PACKED ..................................... 6 UNPACKING THE MACHINE ........................................6 INSTALLING THE BATTERIES IN THE MACHINE................................. 7 CONNECTING THE BATTERY CHARGER .................................... -
Page 3: Machine Delivery
Machine delivery When the machine is delivered, please check immediately that all materials match the delivery documents and that the machine has not been damaged during transport. If so, ask your shipping agent to assess the extent of the damage and inform our customer care service at once. -
Page 4: Technical Description
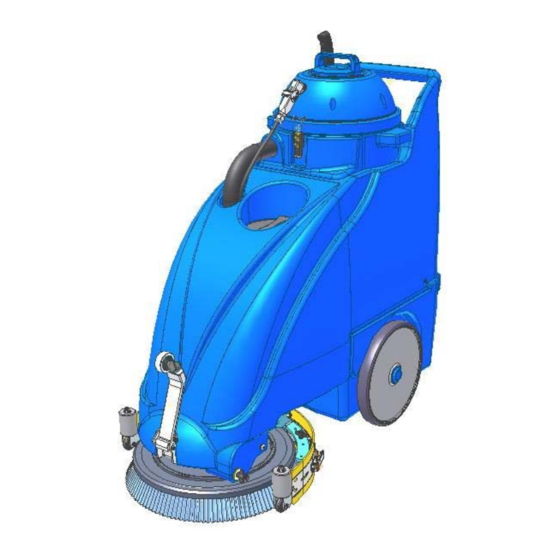
TECHNICAL DESCRIPTION TECHNICAL DESCRIPTION Minny 17 Minny 20 Working width Squeegee length Working capacity, up to 1500 Brush diameter Brush rpm rev/min. Brush pressure Brush motor, supply voltage Brush motor, rated power Type of drive Semi-aut. Max gradient Suction motor, supply voltage Suction motor, rated power Suction vacuum mbar... -
Page 5: Symbols Used On The Machine
SYMBOLS USED ON THE MACHINE Symbol for tap It indicates the solenoid valve switch to turn on the tap Symbol for brush It indicates the main switch/brush motor switch Symbol for suction motor It indicates the suction motor switch Symbol for squeegee up/down It indicates the squeegee lever Symbol for batteries Symbol for discharge hose of the recovery tank... -
Page 6: Prepation Of The Machine
PREPARATION OF THE MACHINE MOVING THE MACHINE WHEN PACKED Figure 1 The machine comes in a specific packing which includes a platform for fork-lift transport. Do not ever place more than two packings one on top of the other. The overall mass is 85 Kg (without accessories) The packing size is: A : 1240 mm 660 mm... -
Page 7: Installing The Batteries In The Machine
PREPARATION OF THE MACHINE Figure 4 6. Make sure the squeegee body is lifted, otherwise operate the control lever as described in the figure. Figure 5 7. Push the machine backwards and down the platform on a tilted plane. Avoid bumping the brush head 8. -
Page 8: Connecting The Battery Charger
PREPARATION OF THE MACHINE Figure 7 For battery installation proceed as follows: 1. Release the hook on the back and extract the battery tray (1) 2. A support (2) comes down automatically as the battery tray is pulled out Figure 8 3. -
Page 9: Richarging The Batteries
PREPARATION OF THE MACHINE RICHARGING THE BATTERIES Fig.10 Disconnect the battery/system connectors. Pull out the battery tray. Connect the battery charger plug to the mains socket. Make sure the battery charger is suitable for the capacity and the type of battery that is installed (lead/acid or GEL and equivalent). -
Page 10: Fitting The Squeegee
PREPARATION OF THE MACHINE FITTING THE SQUEEGEE Figure 13 The squeegee is supplied already assembled (1) on the machine and with adjustments made during machine testing. ADJUSTING THE SQUEEGEE HEIGHT Figure 14 The squeegee height can be adjusted according to rubber wear. Use the screw (1) to loosen the little wheel (placed at the centre of the squeegee back). -
Page 11: Fitting The Brush
PREPARATION OF THE MACHINE FITTING THE BRUSH Figure 17 Keeping the machine lifted (fig.3), place the brush at the centre of the brush head. Lower the machine on the brush (fig.3). The brush is automatically coupled when starting the motor (fig.21-23). SUCTION HEAD Figure 18 Make sure the suction unit is properly fitted. -
Page 12: General Safety Rules
• When, after years of valuable usage, you have to dispose of your FIMAP machine, make sure you dispose correctly of all the materials it consists of, especially oils, batteries and electrical components, considering that the machine itself has been manufactured with completely recyclable materials. -
Page 13: Operating
OPERATING PREPARING TO OPERATE Figure 21 Make sure the connectors (suction head and power connector) are properly connected (fig.11- Figure 22 1. Press the brush switch/main switch (1) 2. Press the tap/solenoid valve switch (2) Figure 23 3. Use the lever to lower the squeegee unit and the suction motor starts. Figure 24 4. -
Page 14: Automatic Shut-Off Float System
OPERATING AUTOMATIC SHUT-OFF FLOAT SYSTEM Figure 25 The machine is provided with a float valve to shut off suction as soon as the recovery tank is full. In such event, empty the recovery tank by removing the plug of the discharge hose. ATTENTION: To carry out this procedure please wear protection gloves to avoid contact with harmful solutions. -
Page 15: Upon Completion Of Work
UPON COMPLETION OF WORK Figure 27 Upon completion of work, and prior to any maintenance procedure, please proceed as follows: 1. Lift the squeegee with the lever (fig.4) 2. After a few seconds, press the tap button (2) to switch off the suction motor and to dry the squeegee hose. -
Page 16: Daily Maintenance
DAILY MAINTENANCE CLEANING THE RECOVERY TANK Figure 29 ATTENTION: To carry out this procedure please wear protection gloves to avoid contact with harmful solutions. Unplug the power connector between the suction head and the recovery tank (1) Remove the suction head from the tank after releasing the two safety hooks (2) Figure 30 Rinse the tank inside using a jet of running water and drain it immediately through the hose (fig.25) -
Page 17: Replacing The Rear Squeegee Rubber Bar
DAILY MAINTENANCE REPLACING THE REAR SQUEEGEE RUBBER BAR Figure 33 If the rear squeegee rubber bar is worn out and does not dry properly, the drying side can be changed as follows: 1. Pull out the squeegee body as illustrated under “CLEANING THE SQUEEGEE” 2. -
Page 18: Weekly Maintenance
WEEKLY MAINTENANCE CLEANING THE SQUEEGEE HOSE Figure 36 1. In case of poor suction effect, make sure the suction hose is not clogged. If necessary, clean it wit a jet of water flowing from the top of the tank. CLEANING THE SOLUTION TANK Figure 37 Unscrew the filler plug on the solution tank (fig.20) Rinse it with a jet of water... -
Page 19: Operation Control
OPERATION CONTROL NOT ENOUGH WATER ON THE BRUSHES Make sure the main switch and the solenoid valve are on (fig.22) Make sure the tap is open (fig.15) Make sure there is water in the solution tank MACHINE DOES NOT CLEAN EFFECTIVELY Check for brush wear and, if necessary, replace it (the brush should be replaced as the bristles are about 15 mm long). -
Page 20: Brush Choice And Use
BRUSH CHOICE AND USE POLYPROYLENE BRUSH (PPL) It is used on every type of floor and it has good wear and hot water resistance (not exceeding 60 degrees C). PPL is not hygroscopic so that it preserves its features even when working on wet surfaces. BRISTLE THICKNESS The thicker bristles are more rigid and so they are suitable for smooth floors with narrow joints.
Need help?
Do you have a question about the Minny 17-20b and is the answer not in the manual?
Questions and answers