CommScope NG4access Installation Instructions Manual
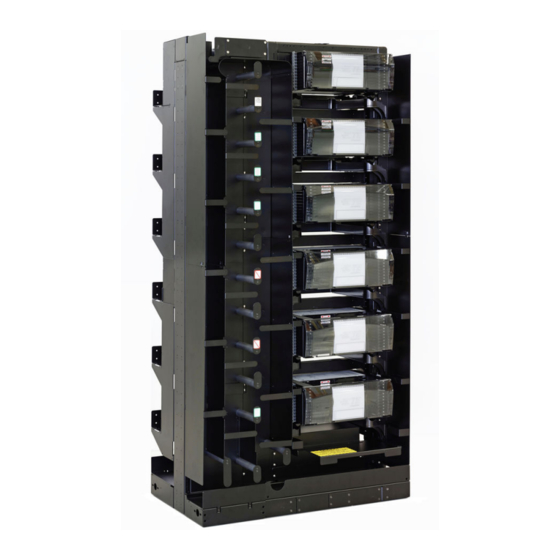
Fiber optic storage panel
Hide thumbs
Also See for NG4access:
- Installation manual (58 pages) ,
- User manual (30 pages) ,
- Manual (14 pages)

Related Manuals for CommScope NG4access


Summary of Contents for CommScope NG4access
-
Page 1: Installation Instructions
Installation Instructions TECP-90-702, Issue 4, April 2017 ® NG4access Frame (Concrete Floor) 25285-A 300001749219 Rev B © 2017 CommScope. All Rights Reserved. -
Page 2: Revision History
Contents herein are current as of the date of publication. CommScope reserves the right to change the contents without prior notice. In no event shall CommScope Inc. be liable for any damages resulting from loss of data, loss of use, or loss of profits and CommScope Inc. -
Page 3: Table Of Contents
CUSTOMER INFORMATION AND ASSISTANCE ........... 24 Page 1 © 2017, CommScope, Inc. - Page 4 TECP-90-702 • Issue 4 • April 2017 • Preface TABLE OF CONTENTS Content Page Blank Page 2 © 2017, ADC Telecommunications, Inc.
-
Page 5: About This Manual
TECP-90-702 • Issue 4 • April 2017 • Preface ABOUT THIS MANUAL This manual provides complete instructions for installing a NG4access frame on a concrete floor, grounding the frame, and securing two frames. RELATED PUBLICATIONS Listed below are related manuals and their publication numbers. Copies of these publications can be ordered using the following URL: http://www.commscope.com/SupportCenter... -
Page 6: Admonishments
This practice also prevents dirt particles from entering the adapter or connector. LIST OF ACRONYMS AND ABBREVIATIONS The following acronyms are used in this manual: Fiber Optic Terminal Intra Facility Cable Outside Plant Page 4 © 2017, CommScope, Inc. -
Page 7: Tools And Materials Required
TECP-90-702 • Issue 4 • April 2017 1 TOOLS AND MATERIALS REQUIRED The tools and materials required for mounting the NG4access frame on a concrete surface are specified in Table Table 2, and Table Table 1. Tools Required TOOL PICTURE Adjustable wrenches (2) 0.25 to 1 inch (8 to 25.4 mm) - Page 8 TECP-90-702 • Issue 4 • April 2017 Table 1. Tools Required, continued TOOL PICTURE Set of sockets 0.25 to 1 inch (8 to 25.4 mm) 12504-B Crimping tool 0.25 to 0.3 inches (6.35 to 7.62 mm) Note: Used for grounding frame 12824-A Vacuum 12505-B...
- Page 9 TECP-90-702 • Issue 4 • April 2017 Table 3. Other Components Used PART PICTURE Concrete floor installation kit STUD NOTE: ONE PIECE TOP FLANGE (four threaded assemblies) (SHEARS OFF) TORQUE NUT TORQUE LIMITING HEX NUT FLAT WASHER PLASTIC COVER METAL SLEEVE 18008-B NYLON SPACER EXPANDABLE CONE...
-
Page 10: Footprint Of Frame And Fiber Optic Storage Panel (Fotsp)
TECP-90-702 • Issue 4 • April 2017 2 FOOTPRINT OF FRAME AND FIBER OPTIC STORAGE PANEL (FOTSP) Figure 1 shows the frame footprint. Figure 2 shows the FOTSP footprint. The optional FOTSP is installed adjacent to the frame on the left front side. 29.84 IN. -
Page 11: Mounting The Frame On A Concrete Surface
TECP-90-702 • Issue 4 • April 2017 3 MOUNTING THE FRAME ON A CONCRETE SURFACE To mount the frame on a concrete surface, use the following procedure. Note: Storage spools may loosen during shipment. Check storage spools for looseness. Tighten spool cover screws if spools are loose. 1. - Page 12 TECP-90-702 • Issue 4 • April 2017 3. Set aside the isolation pad and drill four mounting holes in the concrete at the marks just made, as shown in Figure DRILL VACUUM AS REQUIRED HOLE DIMENSIONS: DIAMETER: 0.71-IN. (18mm) TEMPLATE/ISOLATION PAD DEPTH: 3-15/16-IN.
- Page 13 TECP-90-702 • Issue 4 • April 2017 4. Thread the washer and torque nuts onto the threaded rod, as shown in Figure 6. Insert the anchor bolt assembly into the hole. The washer should touch the top of the anchor sleeve. Tap the anchor bolt assembly with a hammer until the washer touches the concrete.
- Page 14 TECP-90-702 • Issue 4 • April 2017 5. Pre-torque the anchor bolt to approximately 30 foot-pounds (41 Newton meters). Refer to Figure FT-LB 24993-A TORQUE WRENCH Figure 7. Pre-torquing Anchor Bolt Page 8 © 2017, ADC Telecommunications, Inc.
- Page 15 TECP-90-702 • Issue 4 • April 2017 6. Loosen the torque nuts several turns, and then remove the torque nut and washer, as shown Figure LOOSEN TORQUE NUT 24994-A TORQUE NUT WASHER REMOVE TORQUE NUT AND WASHER THREADED ROD Figure 8. Removing Torque Nut and Washer Page 9 ©...
- Page 16 TECP-90-702 • Issue 4 • April 2017 Caution: A NG4access frame weighs approximately 350 lbs. (159 Kg.) Do not attempt to lift or move the rack without using appropriate lifting equipment (Figure 24988-A Figure 9. Caution Page 10 © 2017, ADC Telecommunications, Inc.
- Page 17 TECP-90-702 • Issue 4 • April 2017 7. Remove the front and rear troughs to access the mounting slots (Figure 10). FRONT VIEW LOWER TROUGH BACK 24995-A MOUNTING SLOTS (PARTIALLY SHOWN) LOWER TROUGH GUARD BOX BASE COVER REAR VIEW MOUNTING SLOTS (PARTIALLY SHOWN) 25065-A REAR COVER...
- Page 18 TECP-90-702 • Issue 4 • April 2017 8. Position the isolation pad and frame on the concrete, as shown in Figure ALIGN SLOTS IN RACK AND TEMPLATE/ISOLATION PAD WITH THREADED RODS TEMPLATE/ISOLATION PAD (SHADED FOR CLARITY) 24996-A Figure 11. Positioning Isolation Pad and Frame Page 12 ©...
- Page 19 TECP-90-702 • Issue 4 • April 2017 9. Assemble the hardware provided onto the threaded rods (in four places), but do not tighten the torque nut fully. Refer to Figure 24997-A TORQUE FLAT WASHER HOLD DOWN WASHER THREADED Figure 12. Assembling Hardware Onto Threaded Rods Page 13 ©...
- Page 20 TECP-90-702 • Issue 4 • April 2017 10. Using a 5/16-inch allen wrench, adjust the set screws to level the rack. Refer to Figure 24998-A ADJUST SET SCREW TO LEVEL RACK (4 PLACES) ALLEN WRENCH (5/16-INCH) Figure 13. Adjusting Set Screws to Level Rack Page 14 ©...
- Page 21 TECP-90-702 • Issue 4 • April 2017 11. Tighten the torque nut until the top flange shears off (in four places) (Figure 14). Note: The torque nut will be correctly set at 60 foot-pounds (81 Newton meters) when set as described. FT-LB TIGHTEN TORQUE NUT UNTIL TOP FLANGE...
-
Page 22: Installing A Fiber Optic Storage Panel (Fotsp)
Figure 15. Re-installing Front and Rear Troughs 4 INSTALLING A FIBER OPTIC STORAGE PANEL (FOTSP) A Fiber Optic Storage Panel (FOTSP), installed onto the left side of the NG4access frame as looking from the front, provides storage space on the rear for Fiber Optic Terminal Equipment patch cords. - Page 23 TECP-90-702 • Issue 4 • April 2017 FOTSP FRONT COVER 25258-A Figure 16. Removing FOTSP Front Cover 5. Remove the FOTSP back cover and cover plate (Figure 17). FOTSP COVER PLATE FOTSP BACK COVER 25260-A Figure 17. Removing FOTSP Back Cover and Cover Plate Page 17 ©...
- Page 24 TECP-90-702 • Issue 4 • April 2017 6. Secure the FOTSP to the NG4access frame by installing tie brackets in two places and trough ties in six places as shown in Figure Note: Refer also to the detailed views in...
-
Page 25: Rear View
TECP-90-702 • Issue 4 • April 2017 TOP TIE TOP CROSS-FRAME TROUGH BRACKET PLACE ONE TROUGH TIE ON BOTTOM SIDE OF EACH JUNCTION OF TROUGHS 3RD-DOWN CROSS-FRAME TROUGH MID-FRAME TIE BRACKET REAR VIEW 25262-A Figure 19. Rear View of Bracket Locations MID-FRAME TIE BRACKET 3RD DOWN CROSS-FRAME TROUGH 25263-A... - Page 26 TECP-90-702 • Issue 4 • April 2017 7. To secure the bases of the frame and FOTSP together, install two hex bolts on the rear of the frame as shown in Figure 21, then, as noted, install two hex bolts in the analogous location on the front of the frame.
-
Page 27: Grounding The Frame
Figure 22. Grounding the Frame 6 SECURING TWO FRAMES TOGETHER When a NG4access frame is installed adjacent to an existing NG4access frame, the frames must be secured together. This is done using the following items shipped with the frame: • Junction plates (6);... - Page 28 TECP-90-702 • Issue 4 • April 2017 • Rear splice brackets (4); • Associated hardware. Use the following procedure: 1. Position yourself on the rear side of the two frames and locate the place where the two top horizontal troughs interface with one another. Install a junction plate spanning the two troughs on the bottom side as shown in Figure 23.
- Page 29 TECP-90-702 • Issue 4 • April 2017 3. Install rear splice brackets. There are two sets of two brackets installed in the two locations shown in Figure REAR SPLICE BRACKETS INSERT REAR SPLICE BRACKET INTO CABLE TROUGH SLOT (2 PLACES) 12-24 SCREWS (6) NOTE: SPLICE BRACKETS PROVIDED WITH RACK...
-
Page 30: Customer Information And Assistance
TECP-90-702 • Issue 4 • April 2017 7 CUSTOMER INFORMATION AND ASSISTANCE ® • To find out more about CommScope products, visit the web at www.commscope.com/ • For technical assistance, customer service, or to report any missing/damaged parts, visit http://www.commscope.com/SupportCenter...
Need help?
Do you have a question about the NG4access and is the answer not in the manual?
Questions and answers