
Related Manuals for Philips MCD289/55


Summary of Contents for Philips MCD289/55
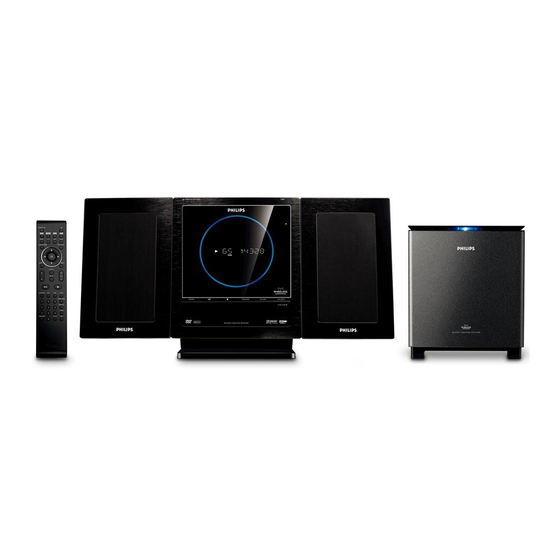
- Page 1 DVD Micro Theatre Register your product and get support at www.philips.com/welcome User Manual Manual de usuario Manual do Utilizador MCD289...
- Page 2 País de Origen: Nº de Serie: LEA CUIDADOSAMENTE ESTE INSTRUCTIVO AVISO IMPORTANTE Philips Mexicana, S.A. de C.V. no se hace responsable por daños o desperfectos causados por: – Maltrato, descuido o mal uso, presencia de insectos o roedores (cucarachas, ratones etc.).
- Page 4 ™ ∞ & STANDBY-ON SLOW ANGLE DISPLAY MUTE ª º £ § ¡ • ≤ ⁄ ≥...
- Page 5 Manufactured under license from Dolby Laboratories. "Dolby", "Pro Logic" and the double-D symbol are trademarks of Dolby Laboratories. This product incorporates copyright protection technology that is protected by method claims of certain U.S. patents and other intellectual property rights owned by Macrovision Corporation and other rights owners.
-
Page 6: Table Of Contents
Contents General Information Discs for playback ... 8 Region Codes ... 8 Supplied accessories ... 8 Environmental information ... 8 Care and safety information ... 8~9 Hearing Safety ... 9 Installation Step 1: Connecting speakers ... 10 Connecting the wireless subwoofer ... 10 Step 2: FM antenna connection ... - Page 7 System Menu Options Basic operations ... 21 GENERAL SETUP PAGE ... 21 TV DISPLAY ... 21 OSD LANGUAGE ... 21 SCREEN SAVER ... 21 DIVX(R) VOD registration code ... 21 AUDIO SETUP PAGE ... 21~22 ANALOG AUDIO SETUP ... 22 DIGITAL AUDO SETUP ...
-
Page 8: General Information
General Information Congratulations on your purchase and welcome to Philips! To fully benefit from the support that Philips offers, register your product at www.philips.com/ welcome. Discs for playback Your DVD System will play: – Digital Video Discs (DVDs) – Video CDs (VCDs) –... -
Page 9: Hearing Safety
Avoid condensation problem ● The lens may cloud over when the player is suddenly moved from cold to warm surroundings, making it impossible to play a disc. Leave the player in the warm environment until the moisture evaporates. Do not block the vents ●... -
Page 10: Step 1: Connecting Speakers
IMPORTANT! – The type plate is located at the rear of the system. – Before connecting the AC power cord to the wall outlet, ensure that all other connections have been made. – Never make or change any connections with the power switched on. –... -
Page 11: Step 3: Connecting
Step 3: Connecting TV IMPORTANT! – You only need to make one video connection from the following options, depending on the capabilities of your TV. – Connect the DVD system directly to the TV. Using A/V OUT jack S-VIDEO AUDIO VIDEO IN S-VIDEO AUDIO... -
Page 12: Step 4: Placing The Set And Speakers
Installation Step 4: Placing the set and speakers After finishing all rear connections, mount the detachable cover on the back of the set until hearing a click to avoid cable clutter. Align the side marked PRESS4 of the stand to the slots at the bottom of the set. -
Page 13: Controls
Controls on the system STANDBY-ON y – switches the system on or to standby mode. iR sensor – infrared sensor for remote control. PROGRAM – DVD/VCD/CD/MP3-CD/USB: enters the program menu. – Picture CD: during playback, to select a slide show mode. –... - Page 14 Controls – In DISC mode, to select a movement direction in the disc menu or system menu bar. 9 OK – to exit or confirm the selection. í/ë – Disc: skips to the previous/next chapter/title/ track. – Tuner: selects a preset radio station. –...
-
Page 15: Preparations
IMPORTANT! – Make sure to complete the preparation procedures before operating the system. Step 1: Using the remote control Open the battery compartment. Insert two AAA batteries following the indications (+/-) inside the compar tment. Close the cover. Using the Remote Control to operate the Player Aim the Remote Control directly at the remote sensor (IR) on the front panel. -
Page 16: To Deactivate Progressive Manually
Preparations Select "TV MODE" to "P-SCAN", then OK to confirm. ➜ The instruction menu appears on the TV. Press 2/3 to highlight OK in the menu and press OK to confirm. There will be a distorted picture on your TV at this state until you turn on the progressive scan mode on your TV. -
Page 17: Basic Functions
Switching the system on/off ● Press STANDBY-ON B. ➜ “HELLO” is displayed briefly. The system will switch to the last selected source. ● Press DISC, TUNER, USB or AUX on the remote control. ➜ The system will switch to the selected source. To switch the system to standby mode ●... -
Page 18: Disc Operations
Disc Operations Playing discs Insert a disc into the slot loader. ➜ Make sure the label side is facing you. ➜ Make sure you have removed any other disc from the slot loader. Playback will start automatically (depending on the disc type). ➜... -
Page 19: Slow Motion
Slow Motion (DVD/VCD) Press SLOW on the remote control during playback to select the required forward speed: 1/ 2, 1/4, 1/8 or 1/16. ➜ Sound will be muted. To return to normal speed, press 2;. Forward/Reverse Searching (DVD/VCD/ Press TUNING 22/33 (2/3 on the remote control) during playback to select the required speed: X2, X4, X8, X16 or X32 (backward or forward). -
Page 20: Special Jpeg Features
Disc Operations Special JPEG features Zoom picture (JPEG) ● During playback, press ZOOM repeatedly to display the picture with different scales (2x, 3x, 4x, 1/2x, 1/3x or 1/4x). ● Use 2/3/5/4 to view the zoomed picture. Playback with multi-angles (JPEG) ●... -
Page 21: System Menu Options
Basic operations Press SYSTEM MENU to enter the Setup Menu. Press 2/3 to select a page to be set. Press 5/4 to highlight an option. Enter its submenu by pressing 3 or OK. Move the cursor by pressing 5/4 to highlight the selected item. -
Page 22: Digital Audo Setup
System Menu Options NIGHT MODE ➜ ON: Select this to level out the volume. This feature is only available for movies with Dolby Digital mode. ➜ OFF: Select this when you want to enjoy the surround sound with its full dynamic range. VIDEO SETUP PAGE COMPONENT This setting is not required if you are using the... -
Page 23: Radio Reception
Tuning to radio stations Press SOURCE on the set repeatedly or TUNER on the remote to select FM tuner source. Press and hold TUNING 22/33 (2/3 on the remote control) and release the button. ➜ The radio automatically tunes to a station with sufficient reception. -
Page 24: External Sources
External Sources Using a USB mass storage device By connecting a USB mass storage device to the Hi-Fi system, you can enjoy the device's stored music through the powerful speakers of Hi-Fi system. Playing a USB mass storage device Compatible USB mass storage devices With the Hi-Fi system, you can use: –... -
Page 25: Clock/Timer
Clock setting See "Preparations-Step 2: Setting the clock". Timer setting ● The system can be used as an alarm clock, whereby the last selected source is switched on at a set time (one time operation). The clock time needs to be set first before the timer can be used. -
Page 26: Specifications
Specifications Amplifier Frequency response (L/R) ... 180 - 20000Hz (Subwoofer) ... 50 - 180Hz Signal to noise ratio ... > 65dB Aux input ... 1V RMS 20kohm Disc Laser type ... Semiconductor Disc diameter ... 12cm/8cm Video decoding ... MPEG-1 / MPEG-2 / Divx Video DAC ... -
Page 27: Troubleshooting
Do not open the system as there is a risk of electric shock. If a fault occurs, first check the points listed below before taking the system for repair. If you are unable to remedy a problem by following these hints, consult your dealer or Philips for help. Problem No power. - Page 28 Troubleshooting Problem The DVD player does not start playback. The DVD player does not respond when buttons are pressed. The language for the sound or subtitle cannot be changed when playing a DVD. No image is output when a function is selected.
-
Page 29: Troubleshooting
Problem Left and right sound outputs are reversed. The remote control does not function. Wireless connection with the subwoofer fails The timer is not working The Clock/Timer setting is erased Unable to select Progressive Scan. Some files on the USB device are not displayed.