
Subscribe to Our Youtube Channel
Related Manuals for DeDietrich DTG 701 Series


Summary of Contents for DeDietrich DTG 701 Series
-
Page 1: Cooking Hob
GUIDE D’INSTALLATION ET D’UTILISATION GUIDE FOR INSTALLATION AND USE Table de cuisson Cooking Hob... - Page 2 Chère Cliente, Cher Client, Vous venez d'acquérir une table de cuisson DE DIETRICH et nous vous en remercions. Nos équipes de recherche ont conçu pour vous cette nouvelle génération d’appareils, qui par leur qualité, leur esthétique, leurs fonctions et leurs évolutions technologiques en font des produits d’exception, révélateurs de notre savoir-faire.
-
Page 3: Table Of Contents
SOMMAIRE • • Consignes de sécurité ______________________________________ 04 • • Respect de l’environnement _________________________________ 05 • • Description de votre appareil _________________________________ 06 1 / INSTALLATION DE VOTRE APPAREIL • • Choix de l’emplacement _____________________________________ 07 • • Avant l’installation __________________________________________ 07 •... -
Page 4: Consignes De Sécurité
CONSIGNES DE SÉCURITÉ • • CONSIGNES DE SÉCURITÉ pression du gaz) et le réglage de l’appareil sont compatibles. — — Nous avons conçu cette table de cuisson — — Cette table est conforme à la norme pour une utilisation par des particuliers dans EN 60335-2-6 en ce qui concerne les un lieu d’habitation. -
Page 5: Respect De L'environnement
RESPECT DE L’ENVIRONNEMENT • • RESPECT DE L’ENVIRONNEMENT — Les matériaux d’emballage de cet appareil sont recyclables. Participez à leur recyclage et contribuez ainsi à la protection de l’environnement en les déposant dans les conteneurs municipaux prévus à cet effet. Votre appareil contient également nombreux matériaux... -
Page 6: Description De Votre Appareil
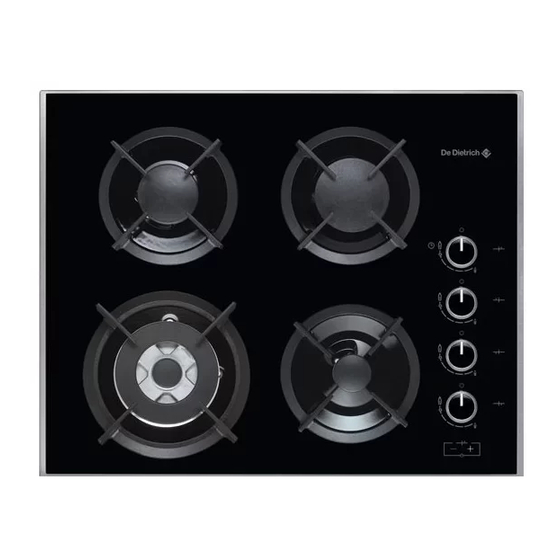
DESCRIPTION DE VOTRE APPAREIL • • DESCRIPTION DE VOTRE TABLE Grille support casserole Table modèle 4 feux gaz Bougie d’allumage Bague d’étanchéité Chapeau de brûleur Thermocouple Tête de brûleur Robinet (modèle avec sécurité) Manette Injecteur Conseil Ce guide d’installation et d’utilisation est valable pour plusieurs modèles. De légères différences de détails et d’équipements peuvent apparaître entre votre appareil et les descriptions présentées. -
Page 7: Installation De Votre Appareil
1 / INSTALLATION DE VOTRE APPAREIL APPAREIL Largeur Profondeur Epaisseur Modèle Découpe 56 cm 49 cm suivant 60 cm meuble meuble standard Découpe 26,5 cm 49 cm suivant 30 cm meuble meuble standard Dimensions 71 cm 52,2 cm 5 cm 60 cm hors tout au-dessus... -
Page 8: Conseils D'encastrement
1 / INSTALLATION DE VOTRE APPAREIL RACCORDEMENT ELECTRIQUE • • CONSEILS D’ENCASTREMENT • • Votre table doit être raccordée sur le réseau 220- Vue de dessous 240 V ~ monophasé par l’intermédiaire d’une du carter fiche de prise de courant 2 pôles + terre normalisée CEI 60083 ou d’un dispositif à... -
Page 9: Raccordement Gaz
1 / INSTALLATION DE VOTRE APPAREIL • • RACCORDEMENT GAZ • Remarques préliminaires Si votre table de cuisson est installée au-dessus d'un four ou si la proximité d'autres éléments chauffants risque de provoquer un échauffement du raccordement, il est impératif de réaliser celui-ci en tube rigide. - Page 10 1 / INSTALLATION DE VOTRE APPAREIL Gaz distribué par bouteille ou • Dans une installation existante, un tube réservoir (gaz butane/propane) souple équipé de ses colliers de serrage (conforme à la norme XP D 36-110) dont la Pour votre sécurité, vous devez choisir durée de vie est de 5 ans peut être utilisé.
-
Page 11: Changement De Gaz
1 / INSTALLATION DE VOTRE APPAREIL • • CHANGEMENT DE GAZ Conseil A chaque changement de gaz, cochez Attention la case correspondante au niveau gaz sur Votre appareil est livré pré-réglé pour l’étiquette située dans la pochette. le gaz naturel. Reportez-vous au paragraphe Les injecteurs nécessaires à... - Page 12 1 / INSTALLATION DE VOTRE APPAREIL • R R é é g g l l e e z z l l e e s s r r a a l l e e n n t t i i s s d d e e s s r r o o b b i i n n e e t t s s : ceux-ci sont situés sous les manettes (Fig.
- Page 13 CHANGEMENT DE GAZ SUR LE BRULEUR TRIPLE COURONNE P P e e t t i i t t c c h h a a p p e e a a u u d d e e b b r r û û l l e e u u r r Petit Chapeau de brûleur P P e e t t i i t t b b r r û...
- Page 14 1 / INSTALLATION DE VOTRE APPAREIL • Repérage des injecteurs R R E E P P É É R R A A G G E E D D E E S S I I N N J J E E C C T T E E U U R R S S Le tableau ci-contre indique les implantations Exemple : repère injecteur 95...
- Page 15 1 / INSTALLATION DE VOTRE APPAREIL •Caractéristiques gaz A A p p p p a a r r e e i i l l d d e e s s t t i i n n é é à à ê ê t t r r e e i i n n s s t t a a l l l l é é e e n n : : B B u u t t a a n n e e P P r r o o p p a a n n e e G G a a z z...
- Page 16 1 / INSTALLATION DE VOTRE APPAREIL •Caractéristiques gaz A A p p p p a a r r e e i i l l d d e e s s t t i i n n é é à à ê ê t t r r e e i i n n s s t t a a l l l l é é e e n n : : B B u u t t a a n n e e P P r r o o p p a a n n e e G G a a z z...
-
Page 17: Utilisation De Votre Appareil
2 / UTILISATION DE VOTRE APPAREIL • • DESCRIPTION DE VOTRE DESSUS Modèle 4 feux gaz DTG702* Modèle 2 feux GAZ + 1 foyer radiant + 1 foyer halogène DTG715* Modèle 4 feux gaz DTG703* Modèle 2 feux gaz DTG710* Modèle 3+1 électrique DTG712* Brûleur semi-rapide 1,50 kW ( ( * * ) ) Brûleur auxiliaire 0,85 kW ( ( * * ) ) -
Page 18: Mise En Marche Des Brûleurs Gaz
2 / UTILISATION DE VOTRE APPAREIL • • MISE MARCHE BRULEURS GAZ Chaque brûleur est alimenté par un robinet, dont l’ouverture se fait en appuyant et en tournant dans le sens inverse des aiguilles d’une montre. ● Le point “ ”... -
Page 19: Réglage De La Minuterie Gaz (4 Feux Gaz Selon Modèle)
2 / UTILISATION DE VOTRE APPAREIL • • REGLAGE DE LA MINUTERIE (4 feux gaz selon modèle) Le brûleur arrière droit est équipé d’une minuterie (durée maximale de 99 minutes). Toutefois, il peut fonctionner sans celle-ci. — A A l l l l u u m m e e z z le brûleur arrière droit (voir page précédente). -
Page 20: Récipients Adaptés Pour Les Brûleurs Gaz
2 / UTILISATION DE VOTRE APPAREIL • • RECIPIENTS ADAPTES POUR LES BRULEURS GAZ • Quel brûleur utiliser en fonction de votre récipient ? Diamètre du récipient Diamètre du récipient Usage 20 à 30 cm Triple couronne 18 à 28 cm Grand rapide Fritures - Ebullition 16 à... -
Page 21: Récipients Adaptés Sur La Plaque Électrique (Selon Modèle)
2 / UTILISATION DE VOTRE APPAREIL • • RECIPIENTS ADAPTES SUR LA PLAQUE ELECTRIQUE (selon modèle) Utilisez des récipients à fond plat qui plaquent parfaitement à la surface du foyer : — en acier inoxydable avec fond trimétal épais ou “sandwich”, —... -
Page 22: Mise En Marche Des Foyers Radiant / Halogène (Selon Modèle)
2 / UTILISATION DE VOTRE APPAREIL • • MISE EN MARCHE DES FOYERS RADIANT / HALOGENE (selon modèle) Pour démarrer la cuisson, positionnez la manette sur le repère qui convient à votre plat (voir tableau des cuissons en fin de notice). Le voyant de mise sous tension du foyer s’allume immédiatement. -
Page 23: Récipients Adaptés Sur Les Foyers Radiant / Halogène (Selon Modèle)
2 / UTILISATION DE VOTRE APPAREIL • • RECIPIENTS ADAPTES SUR LES FOYERS RADIANT / HALOGENE (selon modèle) Utilisez des récipients à fond plat qui plaquent parfaitement à la surface du foyer : — en acier inoxydable avec fond trimétal épais ou “sandwich”, —... -
Page 24: Entretien Courant De Votre Appareil
3 / ENTRETIEN COURANT DE VOTRE APPAREIL ENTRETENIR VOTRE APPAREIL • • P P R R O O D D U U I I T T S S / / A A C C C C E E S S S S O O I I R R E E S S E E N N T T R R E E T T I I E E N N . -
Page 25: Messages Particuliers, Incidents
4 / MESSAGES PARTICULIERS, INCIDENTS • • EN COURS D’UTILISATION VOUS CONSTATEZ QUE : QUE FAUT-IL FAIRE : • Allumage des brûleurs : . Vérifiez le branchement électrique de votre appareil Il n’y a pas d’étincelles lors de l’appui . Vérifiez la propreté des bougies d’allumage. des manettes. -
Page 26: Tableau De Cuisson
5 / TABLEAU DE CUISSON • • GUIDE DE CUISSON GAZ P P R R E E P P A A R R A A T T I I O O N N S S T T E E M M P P S S T T R R I I P P L L E E G G R R A A N N D D R R A A P P I I D D E E... -
Page 27: Guide De Cuisson Radiant / Halogène
5 / TABLEAU DE CUISSON • • GUIDE DE CUISSON RADIANT / HALOGENE P P R R E E P P A A R R A A T T I I O O N N S S T T R R E E S S V V I I F F V V I I F F M M O O Y Y E E N N L L E E N N T T... -
Page 28: Service Apres-Vente Et Relations Consommateurs
6 / SERVICE APRES-VENTE ET RELATIONS CONSOMMATEURS •RELATIONS CONSOMMATEURS •INTERVENTIONS •Pour en savoir plus sur tous les produits Les éventuelles interventions sur votre de la marque : appareil doivent être effectuées par un profes- informations, conseils, les points de vente, sionnel qualifié... - Page 29 Dear Customer, You have just acquired a DE DIETRICH cooking hob and we would like to thank you. Our research teams have created this new generation of appliances for you. Their quality, appearance, functions and technological advances make them exceptional products, showcases of our unique know-how.
- Page 30 TABLE OF CONTENTS • • Safety Instructions _________________________________________ 31 • • Caring for the environment __________________________________ 32 • • Description of your appliance ________________________________ 33 1 / INSTALLING YOUR APPLIANCE • • Choice of location __________________________________________ 34 • • Before installation __________________________________________ 34 •...
-
Page 31: Safety Instructions
SAFETY INSTRUCTIONS • • SAFETY INSTRUCTIONS EN 60335-2-6 relating to the heating of cabinets and the Class 3 standard with regard — — We have designed this cooking hob for use to installation (as per standard EN 30-1-1). by private individuals in their homes. —... -
Page 32: Caring For The Environment
CARING FOR THE ENVIRONMENT • • CARING FOR THE ENVIRONMENT — This appliance’s packing materials are recyclable. Recycle them and play a role in protecting the environment by depositing them in local authority containers provided for this purpose. Your appliance also contains various recyclable materials. -
Page 33: Description Of Your Appliance
DESCRIPTION OF YOUR APPLIANCE • • DESCRIPTION OF THE HOB Pan support Hob model: 4 gas burners Spark igniter Gasket Burner cover Thermocouple Burner head (model with safety device) Injector Knob This Guide to Installation and Use is valid for several models. There may be minor differences in details or fittings between your appliance and the descriptions provided. -
Page 34: Installing Your Appliance
1 / INSTALLING YOUR APPLIANCE APPLIANCE Width Depth Thickness Model Standard 56 cm 49 cm depending 60 cm cabinet cut-out cabinet Standard 26.5 cm 49 cm depending 30 cm cabinet on cabinet cut-out Total 71 cm 52.2 cm 5 cm 60 cm dimensions above... -
Page 35: Fitting Tips
1 / INSTALLING YOUR APPLIANCE • • FITTING TIPS • • ELECTRIC CONNECTION Your hob must be connected to the 220-240 V ~ Underside view single phase grid via a standardised CEI 60083 of the housing 2-pole + ground electrical outlet plug or an all- pole cut-off device, in compliance with the current regulations. -
Page 36: Gas Connection
1 / INSTALLING YOUR APPLIANCE • • GAS CONNECTION • Preliminary comments If your hob is installed above an oven or if proximity to other heating elements poses a threat of overheating the connection, you must insulate the cable in a rigid pipe. If a hose or soft pipe (in the case of butane gas) is used, it should not come into contact with a moving part of the cabinet, nor should it pass through a location that may become blocked. - Page 37 1 / INSTALLING YOUR APPLIANCE Gas supplied by tank or In an existing system, a soft pipe fitted with • cylinder (butane/propane) clamps (compliant with the XP D 36-110 standard) whose service life is five years may For your safety, you must choose from the be used.
-
Page 38: Changing The Gas Supply
1 / INSTALLING YOUR APPLIANCE • • CHANGING THE GAS SUPPLY Each time you change the gas supply, Warning tick the box corresponding to the new gas Your appliance is sold pre-set for level on the label found in the plastic bag. natural gas. - Page 39 1 / INSTALLING YOUR APPLIANCE • A A d d j j u u s s t t t t h h e e h h o o b b c c o o n n n n e e c c t t i i o o n n s s : these are located underneath the knobs (Fig.
- Page 40 GAS CHANGE ON TRIPLE-CROWN BURNER CHANGEMENT DE GAZ SUR LE BRULEUR TRIPLE COURONNE B B u u r r n n e e r r c c o o v v e e r r Petit Chapeau de brûleur C C e e n n t t r r a a l l s s m m a a l l l l b b u u r r n n e e r r Petit brûleur central Petit brûleur central Chapeau de brûleur...
- Page 41 1 / INSTALLING YOUR APPLIANCE • Markings on the injectors M M A A R R K K I I N N G G S S O O N N T T H H E E I I N N J J E E C C T T O O R R S S The adjacent table shows where the injectors Example: injector marking 95...
- Page 42 1 / INSTALLING YOUR APPLIANCE •Gas Properties A A p p p p l l i i a a n n c c e e i i n n t t e e n n d d e e d d t t o o b b e e i i n n s s t t a a l l l l e e d d f f o o r r u u s s e e w w i i t t h h : : B B u u t t a a n n e e P P r r o o p p a a n n e e N N a a t t u u r r a a l l...
- Page 43 1 / INSTALLING YOUR APPLIANCE •Gas Properties A A p p p p l l i i a a n n c c e e i i n n t t e e n n d d e e d d t t o o b b e e i i n n s s t t a a l l l l e e d d f f o o r r u u s s e e w w i i t t h h : : B B u u t t a a n n e e P P r r o o p p a a n n e e N N a a t t u u r r a a l l...
-
Page 44: Using Your Appliance
2 / USING YOUR APPLIANCE • • DESCRIPTION OF YOUR HOB TOP Model: 4 gas burners DTG702* Model: 2 burner GAS + 1 radiant burner + 1 halogen burner DTG715* Model: 4 gas burners DTG703* Model: 2 gas burners DTG710* Model: 3+1 electric DTG712* Semi-fast burner 1.50 kW ( ( * * ) ) Auxiliary burner 0.85 kW ( ( * * ) ) -
Page 45: Switching On The Gas Burners
2 / USING YOUR APPLIANCE • • SWITCHING BURNERS Each burner is supplied by a tap which can be opened by pressing it and turning it in in a counterclockwise motion. ● The point “ ” corresponds to a closed tap. —... -
Page 46: Setting The Timer (4 Gas Burner Depending On Model)
2 / USING YOUR APPLIANCE • • SETTING THE TIMER (4 gas burner depending on model) The rear right burner is equipped with a timer (maximum duration 99 minutes). However, it can work without this. — L L i i g g h h t t the rear right burner (see previous section). -
Page 47: Cookware Suitable For Gas Burners
2 / USING YOUR APPLIANCE • • COOKWARE SUITABLE FOR GAS BURNERS • Which burner should you use depending on your cookware? Diameter of the cookware Diameter of the cookware Usage 20 to 30 cm Triple ring 18 to 28 cm Super fast Frying - Boiling 16 to 22 cm... -
Page 48: Most Suitable Cookware To Be Used With The Electric Plate (Depending On Model)
2 / USING YOUR APPLIANCE • • MOST SUITABLE COOKWARE TO BE USED WITH THE ELECTRIC PLATE (depending on model) Use cookware with flat bottoms that are perfectly flush with the surface of the burner: — in stainless steel with a thick, three-metal or “sandwich”... -
Page 49: Turning On The Radiant/Halogen Burners (Depending On Model)
2 / USING YOUR APPLIANCE • • TURNING ON THE RADIANT/ HALOGEN BURNERS (depending on model) To start the cooking, turn the knob to the setting suitable for your dish (see cooking table at the end of the instructions). The cooking zone’s power indicator lights up immediately. -
Page 50: Most Suitable Cookware For Radiant/Halogen Burners (Depending On Model)
2 / USING YOUR APPLIANCE • • MOST SUITABLE COOKWARE RADIANT/ HALOGEN BURNERS (depending on model) Use cookware with flat bottoms that are perfectly flush with the surface of the burner: — in stainless steel with a thick, three-metal or “sandwich”... -
Page 51: Daily Care Of Your Appliance
3 / DAILY CARE OF YOUR APPLIANCE MAINTAINING YOUR APPLIANCE • • M M A A I I N N T T E E N N A A N N C C E E ... . W W H H A A T T T T O O D D O O P P R R O O D D U U C C T T S S / / A A C C C C E E S S S S O O R R I I E E S S T T O O B B E E U U S S E E D D... -
Page 52: Special Messages, Incidents
4 / SPECIAL MESSAGES, INCIDENTS • • DURING USE YOU OBSERVE THAT: WHAT SHOULD YOU DO? • Lighting of burners: . Check the electrical connection of your appliance There are no sparks when you press . Check that the spark plugs are clean. the knobs. -
Page 53: Cooking Chart
5 / COOKING CHART • • GAS COOKING GUIDE P P R R E E P P A A R R A A T T I I O O N N S S T T I I M M E E S S T T R R I I P P L L E E S S U U P P E E R R F F A A S S T T... -
Page 54: Radiant/Halogen Cooking Guide
5 / COOKING CHART • • RADIANT/HALOGEN COOKING GUIDE P P R R E E P P A A R R A A T T I I O O N N S S V V E E R R Y Y H H I I G G H H M M E E D D I I U U M M S S L L O O W W... -
Page 55: After-Sales Service Department And Customer Relations
6 / AFTER-SALES SERVICE DEPARTMENT AND CUSTOMER RELATIONS • SERVICE CALLS Any repairs to your appliance must be carried out by a qualified professional authorised to work on the brand. When you call, mention your appliance’s complete reference (model, type, serial number). This information appears on the manufacturer’s nameplate (Fig. - Page 56 F F a a g g o o r r B B r r a a n n d d t t S S A A S S , , M M a a n n a a g g e e m m e e n n t t c c o o m m p p a a n n y y – – S S A A S S : : s s o o c c i i a a l l c c a a p p i i t t a a l l o o f f 2 2 0 0 , , 0 0 0 0 0 0 , , 0 0 0 0 0 0 e e u u r r o o s s R R C C S S N N a a n n t t e e r r r r e e 4 4 4 4 0 0 3 3 0 0 3 3 1 1 9 9 6 6 . . D D T T G G 7 7 0 0 1 1 * * / / * * - - D D T T G G 7 7 0 0 3 3 * * / / * * - - D D T T G G 7 7 0 0 2 2 * * / / * * D D T T G G 7 7 1 1 2 2 * * / / * * - - D D T T G G 7 7 1 1 5 5 * * / / * * - - 9 9 9 9 6 6 4 4 - - 2 2 8 8 5 5 4 4 - - 0 0 3 3 / / 0 0 8 8...
Need help?
Do you have a question about the DTG 701 Series and is the answer not in the manual?
Questions and answers