Table of Contents
Advertisement
Quick Links
Instruction Booklet IB150020EN
PXG950-4G installation manual
Effective June 2019
Contents
Description
Overview . . . . . . . . . . . . . . . . . . . . . . . . . . . . . . . . 2
System views . . . . . . . . . . . . . . . . . . . . . . . . . . . . 2
Top view . . . . . . . . . . . . . . . . . . . . . . . . . . . . . . . 2
Bottom view . . . . . . . . . . . . . . . . . . . . . . . . . . . . 2
Left view . . . . . . . . . . . . . . . . . . . . . . . . . . . . . . 3
Right view . . . . . . . . . . . . . . . . . . . . . . . . . . . . . 3
Installing your PXG950-4G . . . . . . . . . . . . . . . . . . . 4
Professional installation instructions . . . . . . . . . 4
interference statement . . . . . . . . . . . . . . . . . . . 4
Industry Canada statement . . . . . . . . . . . . . . . . 4
Setting up your PXG950-4G . . . . . . . . . . . . . . . . . . 5
Mounting your PXG950-4G . . . . . . . . . . . . . . . . . . 7
using the DIN-rail bracket . . . . . . . . . . . . . . . . . 7
mounting bracket (purchased separately) . . . . 10
Basic PXG950 configuration via USB . . . . . . . . . 12
Factory reset using USB . . . . . . . . . . . . . . . . . 12
Static IP address setting using USB . . . . . . . . 12
Antenna specifications . . . . . . . . . . . . . . . . . . . . 13
Page
Advertisement
Table of Contents

Related Manuals for Eaton PXG950-4G


Summary of Contents for Eaton PXG950-4G
-
Page 1: Table Of Contents
Setting up your PXG950-4G . . . . . . . . . . . . . . . . . . 5... -
Page 2: Overview
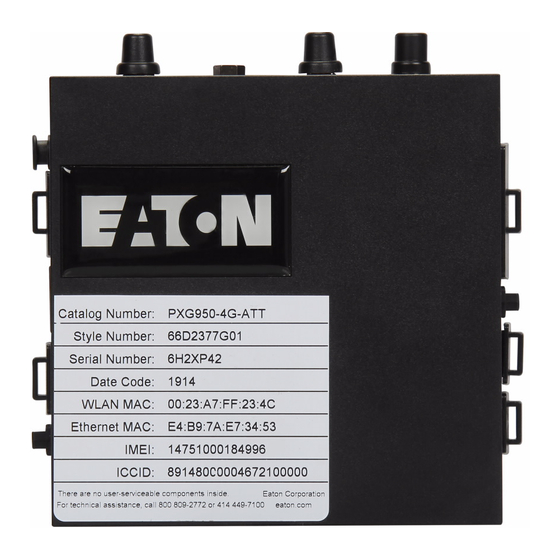
Effective June 2019 Overview System views The PXG950-4G is an Internet-of-Things (IoT) device . It is mounted Top view at the edge of a network, enabling you to collect, secure, analyze, and act on data from multiple devices and sensors . It enables you to connect with devices used in transportation, building automation, manufacturing, and other applications . -
Page 3: Left View
Provides data transfer speeds up to 10/100 Ethernet support) Mbps and supports Alternative A of the IEEE 802.3af standard. The PXG950-4G is an IEEE 802.3af Alternative A compliant powered device (PD). To comply with EU Declaration of Conformity (DoC), ensure cable length from the system to the device does not exceed 30 m (98.4 ft). -
Page 4: Installing Your Pxg950-4G
Instruction Booklet IB150020EN PXG950-4G installation manual Effective June 2019 Installing your PXG950-4G Table 7. RS-485 half-duplex pin definition details. Signal Characteristics Professional installation instructions Data- (–) TX/RX data Installation location Data+ (+) TX/RX data The product shall be installed at a location where the radiating... -
Page 5: Setting Up Your Pxg950-4G
Under Industry Canada regulations, the radio transmitter(s) may only operate using an antenna(s) of a type and maximum (or lesser) gain Mounting can be done before or after configuring your PXG950-4G . approved for the transmitter(s) . To reduce potential radio interfer- ence to other users, the antenna type(s) and gain(s) should be 1 . - Page 6 9 . Connect a grounding cable between the PXG950-4G and the secondary enclosure . 10 . Connect the PXG950-4G to one of the following power sources: 4 . Secure the antenna by tightening the rotating head of the connector until it firmly holds the antenna in the preferred posi- tion (upright or straight) .
-
Page 7: Mounting Your Pxg950-4G
Mounting can be completed before or after configuring your PXG950-4G . Install the PXG950-4G using one of the following mounting options . An open space of 63 .50 mm (2 .50 in .) is recommended around the PXG950-4G for optimal air circulation . -
Page 8: Mounting The Pxg950-4G Using The Perpendicular Mount
Mounting the PXG950-4G using the perpendicular mount The perpendicular mount is designed for mounting in a DIN-rail only . An open space of 63 .50 mm (2 .50 in) around the PXG950-4G is recommended for optimal air circulation . Ensure that the environ- mental temperature in which the PXG950-4G is installed does not exceed the operating temperature of the PXG950-4G . - Page 9 (17 .64±1 .1 pounds-inch) . 6 . Secure the PXG950-4G on the DIN rail . 4 . Place the PXG950-4G on the DIN rail at an angle and push the PXG950-4G down to compress the springs on the DIN-rail mount brackets .
-
Page 10: Mounting The Pxg950-4G Using The Mounting Bracket (Purchased Separately)
PXG950-4G . 1 . Secure the standard-mount bracket to the back of the PXG950-4G using the four M-4 x 4 .5 screws . Torque the screws at 8±0 .5 kilograms-centimeter (17 .64±1 .1 pounds-inch) . - Page 11 PXG950-4G installation manual Effective June 2019 2 . Place the PXG950-4G against the wall and align the holes in the bracket with the holes on the wall . Screw holes on the bracket 4 . Drill four holes in the wall as marked .
-
Page 12: Basic Pxg950 Configuration Via Usb
Basic PXG950 configuration via USB 6 . Align the screw holes on the standard-mount bracket with the screws and place the PXG950-4G onto the wall . Factory reset using USB To factory reset the PXG950, one can use a USB drive . In the top level directory of the USB, place a file named “LoadFactoryDefault”... -
Page 13: Antenna Specifications
Instruction Booklet IB150020EN PXG950-4G installation manual Effective June 2019 Antenna specifications The PXG950-4G is professionally-installed equipment . The radio frequency (RF) output power does not exceed the maximum limit allowed in the country of operation . CAUTION UNAUTHORIZED ANTENNAS, MODIFICATIONS, OR ATTACHMENTS MAY DAMAGE THE DEVICE AND POTENTIALLY VIOLATE INTERNATIONAL REGU- LATIONS. -
Page 14: Instruction Booklet Ib150020En Pxg950-4G Installation Manual Effective June
Instruction Booklet IB150020EN PXG950-4G installation manual Effective June 2019 Notese: EATON www.eaton.com... - Page 15 Instruction Booklet IB150020EN PXG950-4G installation manual Effective June 2019 Notese: EATON www.eaton.com...
- Page 16 OF THIS DOCUMENT SHALL NOT BECOME PART OF OR MODIFY ANY CONTRACT BETWEEN THE PARTIES . In no event will Eaton be responsible to the purchaser or user in contract, in tort (including negligence), strict liability or other-wise for any special, indirect, incidental or consequential damage or loss...
Need help?
Do you have a question about the PXG950-4G and is the answer not in the manual?
Questions and answers