
Subscribe to Our Youtube Channel
Related Manuals for S-WORKS Creo SL


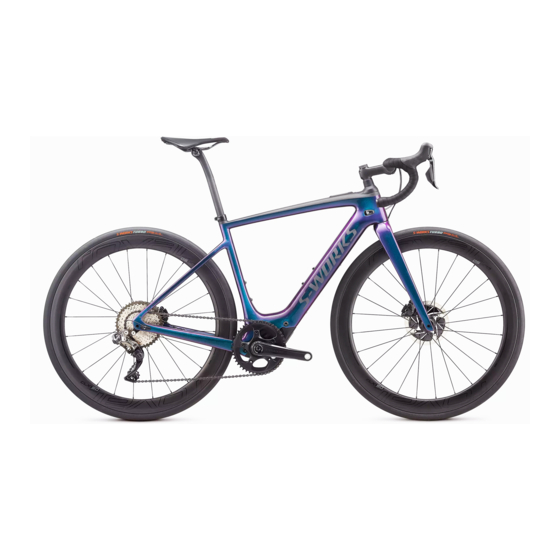
Summary of Contents for S-WORKS Creo SL
- Page 1 EN IT SP PT KR CNT ENGLISH - USER MANUAL ITALIANO - MANUALE DELL’UTILIZZATORE ESPAÑOL - MANUAL DE USUARIO PORTUGUÊS - MANUAL DO USUÁRIO 한국어 - 설명서 繁體中文 - 使用說明書...
-
Page 2: Table Of Contents
TABLE OF CONTENTS 1. INTRODUCTION ........................1 1.1. WARRANTY ..................................1 2. CREO SL COMPONENTS ...................... 2 3. GENERAL INFORMATION ABOUT YOUR CREO SL ..............3 3.1. INTENDED USE ...................................3 3.2. PEDELEC / EPAC ................................3 4. GENERAL NOTES ABOUT RIDING ..................4 4.1. -
Page 3: Introduction
(translation of Original instructions). This user manual is specific to your Specialized Turbo CREO SL bicycle and should be read in addition to the Specialized Bicycle Owner’s Manual (“Owner’s Manual”). It contains important safety, performance and technical information, which you should read before your first ride and keep for reference. -
Page 4: Creo Sl Components
13. REAR DERAILLEUR 26. TCU DISPLAY TURBO CONNECT UNIT (TCU) All Turbo CREO SL models are all equipped with the TCU display (Fig. 2.2). The display turns on the motor, and provides access to the support modes options, as well as the battery state of charge and... -
Page 5: General Information About Your Creo Sl
3.2. PEDELEC / EPAC The CREO SL is classified as a EPAC. Your motor support will automatically switch off when you reach a maximum speed of 25 km/h (15.5 mph) or 28 mph in the US and 20 mph in Canada. A driver’s license or insurance is typically not required. -
Page 6: General Notes About Riding
4. GENERAL NOTES ABOUT RIDING The CREO SL motor provides pedal assistance only while you are pedaling and the bicycle is in motion. The amount of pedal assistance will be higher or lower depending on the amount of force applied to the pedals. If you stop pedaling, the motor will stop providing any assistance. -
Page 7: Know Your Range
WARNING! Due to the complexity of the CREO SL bicycle, proper assembly requires a high degree of mechanical expertise, skill, training and specialty tools. Therefore, it is essential for your safety that the assembly, maintenance and troubleshooting be performed by an Authorized Specialized Retailer. -
Page 8: Seatpost
Use of other components or hardware will compromise the integrity and strength of the assembly. CREO SL specific components should only be used on the CREO SL and not on other bicycles, even if they fit. Failure to follow this warning could result in serious injury or death. -
Page 9: Speed Sensor
5.2. SPEED SENSOR The CREO SL is equipped with a Speed Sensor magnet, located on the rear hub/disc rotor interface (either Centerlock or 6-bolt). Dirt and/or metal debris may accumulate on the Speed Sensor magnet. Too much accumulation may result in interruptions in motor support and/or inaccurate speed readings. -
Page 10: General Notes About Maintenance
6. GENERAL NOTES ABOUT MAINTENANCE The CREO SL bicycle is a high performance bicycle. All regular maintenance, troubleshooting, repair and parts replacement must be performed by an Authorized Specialized Retailer. For general information regarding maintenance of your bicycle, please refer to the Owner’s Manual. In addition, routinely perform a Mechanical Safety Check before each ride, as described in the Owner’s Manual. -
Page 11: Display Interface (Tcu)
POWER BLE PAIRING CODE All Turbo CREO SL models are all equipped with the TCU display. The display turns on the motor, and provides access to the support modes options, as well as the battery state of charge and error codes. -
Page 12: Support Modes On The Tcu
App itself. ANT+: The ANT+ Protocol allows a range of devices to sync with the CREO SL, including the TCD display (available separately). Using an ANT+ compatible device provides access to more information like speed, cadence and power. -
Page 13: Factory Reset
ERROR SOLUTION BATTERY ERROR For Error Codes 1-4 try the following solutions. 2. BATTERY NOT FOUND Reboot your bicycle. „ Check Mission Control App for more information. „ 3. MOTOR ERROR If the problem persists contact your Authorized Specialized Retailer. „... -
Page 14: Changing The Internal Tcu Battery
To perform a factory reset (Fig. 7.6). A: Long-press (hold) the Mode button. (1) „ B: Press and release the Power button (2) (continue pressing the Mode button 1). LEDs will light up (3). „ C: Continue to long-press the Mode button for 10 seconds (4), until the LEDs turn off (5) and turn back on (6). „... -
Page 15: Mission Control
When connecting to the Mission Control App for the first time, you need to enter the BLE pairing code that comes with your CREO SL on the TCU and on the “Peel Me” sticker. It serves as a security measure, since it ensures that only you as bicycle owner, or entrusted people you share the code with, are able to connect to the bicycle. - Page 16 1: LET’S RIDE: Record your rides, see a map, live ride data and set Smart Control. With Smart Control activated, the motor and battery output are adjusted based on how far or how long you want to ride. 2: TUNE: Customize motor performance and range based on your needs by individually adjusting Support and Peak Power.
-
Page 17: Battery And Charger
9. BATTERY AND CHARGER The CREO SL battery is fitted inside the down tube and can only be removed by first removing the motor. Any work required on the motor and battery should be carried out by an Authorized Specialized Turbo Retailer. -
Page 18: Charging The Battery
Only use the supplied charger cord. Ensure the cord plug is fully inserted in the charger before plugging the „ charger into a power outlet. Only use the Specialized charger supplied with the bicycle or other chargers approved by Specialized. Inspect „... -
Page 19: Charge Level Display
110V | 220V During the charging process (Fig. 9.4), the diode on the charger will glow red (1). When the battery is fully charged, the diode on the charger will turn green (2). CAUTION: If the red diode flashes during the charging process (3) a charging error has occurred. In that case, remove the charger from the socket, discontinue use of the motor support and contact your Authorized Specialized Retailer. -
Page 20: Cleaning
Retailer may also have helpful information available. When carrying the battery outside the frame, Specialized recommends using an approved battery transport box. CAUTION: Be aware that your CREO SL bicycle is significantly heavier than a bicycle without motor support. Use caution when handling, carrying or lifting your CREO SL bicycle. -
Page 21: Disposal
9.7. DISPOSAL Batteries and chargers must not be disposed of in your household trash! All batteries and chargers must be disposed of in an environmentally friendly manner, in accordance with the battery disposal regulations in your country or state. Ask your Authorized Specialized Retailer for information about how to dispose of a battery or charger and any applicable take-back program. -
Page 22: Specifications
WARNING! Fig. 9.6 is a copy of the battery label which is supplied with your bicycle, familiarize yourself with the information before first use. DO NOT TEMPERATURE RANGE DO NOT handle DO NOT DO NOT DO NOT DO NOT DO NOT DO NOT store in Storage Charge... -
Page 23: Recommended Tire Pressures
11.1. RANGE EXTENDER (RE) Your CREO SL is compatible with the RE to further increase range and ride time. The RE is securely held in the specific bottle holder and connects to the motor through a dedicated power cable that plugs into the charge port. - Page 24 USING YOUR RANGE EXTENDER Install the bottle cage for the RE on the bicycle. „ Power off your CREO SL bicycle. „ Insert the end of the power cable with the rounded cover into the port on the RE (Fig. 11.1 a).
- Page 25 CHARGE LEVEL DISPLAY WITH RANGE EXTENDER BATTERY When the RE is attached to the bicycle, the charge level is displayed on the TCU, the TCD and the Mission Control App. The displays adapt to show the state of charge for both internal and RE batteries. With both the internal battery and the RE fully charged, the TCD will show the two charge levels separately (Fig.
-
Page 26: Fenders
11.3. RACK Your Creo SL can also be outfitted with a rear rack. All frames feature mounting tabs at the dropouts to support the vertical rack stays. To attach the rack at the top, especially on carbon frames, you need to upgrade your bicycle with our dedicated “”SEAT CLAMP WITH RACK MOUNT””... -
Page 27: Replacement Parts And Accessories
11.5. REPLACEMENT PARTS AND ACCESSORIES Specialized replacement parts and accessories are available through your Authorized Specialized Retailer. 12. REGULATORY STATEMENTS RoHS: Specialized Bicycle Components, Inc. Certifies that this product and its packaging are in compliance with European Union Directive 2011/65/EU on the Restriction of the Use of Certain Hazardous Substances in Electrical and Electronics Equipment, commonly known as RoHS. -
Page 28: Ec - Declaration Of Conformity
Product description: EPAC (Electrically Power Assisted Cycle) CREO SL SW CARBON Model designation: CREO SL EXPERT CARBON CREO SL EXPERT CARBON EVO CREO SL COMP CARBON CREO SL COMP CARBON EVO CREO SL E5 COMP The conformity with all applicable Machines (2006/42/EC). - Page 30 INDICE 1. INTRODUZIONE ........................1 1.1. GARANZIA .....................................1 2. DESCRIZIONE DELLA BICICLETTA CREO SL ................. 2 3. INFORMAZIONI GENERALI SULLA VOSTRA CREO SL ............3 3.1. DESTINAZIONE D’USO ...............................3 3.2. PEDELEC / EPAC ................................3 4. INFORMAZIONI GENERALI SULL’UTILIZZO ................4 4.1.
-
Page 31: Introduzione
Si consiglia di custodire il manuale assieme alla bicicletta, in modo che sia sempre a portata di mano. Questa guida contiene solo le informazioni specifiche per la bicicletta Specialized CREO SL, e deve essere utilizzata in combinazione con il “Manuale di istruzioni”. Si prega di leggere il Manuale di istruzioni completamente prima di procedere. -
Page 32: Descrizione Della Bicicletta Creo Sl
13. Deragliatore posteriore 26. Schermo TCU UNITÀ TURBO CONNECT (TCU) I modelli CREO SL sono tutti dotati di schermo TCU. Lo schermo accende il motore e consente di accedere alle opzioni di modalità di supporto, nonché allo stato di carica della batteria ed ai codici... -
Page 33: Informazioni Generali Sulla Vostra Creo Sl
3.2. PEDELEC / EPAC CREO SL è classificata come EPAC. Il motore offre una assistenza alla pedalata fino a una velocità massima di 25 km/h (15,5 mph) o 28 mph in USA e 20 mph in Canada, quindi interrompe il proprio intervento. In genere non sono necessarie la patente di guida e l’assicurazione. -
Page 34: Informazioni Generali Sull'utilizzo
4. INFORMAZIONI GENERALI SULL’UTILIZZO Il motore della CREO SL fornisce assistenza quando si pedala e la bicicletta è in movimento. Il supporto fornito dal motore sarà direttamente proporzionale alla forza applicata. Se nessuna forza è applicata ai pedali, il motore non fornirà... -
Page 35: Conoscere La Propria Autonomia
Per controllare l’autonomia si consiglia inoltre di utilizzare la funzione Smart Control nell’applicazione Mission Control. 4.4. ADESIVO “PEEL ME” La nuova bicicletta Turbo CREO SL ha un adesivo applicato al telaio, che riporta il numero di serie della bicicletta e il proprio codice personale di... -
Page 36: Note Generali Per Il Montaggio
PERICOLO! Molti componenti di CREO SL come, ad esempio, l'ammortizzatore posteriore e le guide per i cavi, sono specifici per le biciclette CREO SL. Utilizzare esclusivamente i componenti forniti con la bicicletta. L'utilizzo di altri componenti può compromettere l'integrità e la solidità... -
Page 37: Sensore Di Velocita
Rivendiotore Autorizzato Specialized. 5.2. SENSORE DI VELOCITA’ La CREO SL è dotata di un magnete per il sensore di velocità, situato sull’interfaccia mozzo posteriore/rotore (con bloccaggio centrale o a 6 bulloni). Sul magnete del sensore di velocità possono accumularsi sporcizia e/o detriti metallici. -
Page 38: Serie Sterzo
L’usura dei componenti ed il tipo di manutenzione necessaria sono influenzate da molteplici fattori, quali la frequenza e „ le condizioni delle uscite, la loro durata ed il peso dell’utilizzatore. Poiché la CREO SL è una bicicletta a pedalata assistita elettricamente, la distanza percorsa risulterà superiore a parità di tempo. I componenti possono essere soggetti ad un’usura maggiore a velocità... -
Page 39: Interfaccia Del Display (Tcu)
CODICE DI ACCOPPIAMENTO BLE I modelli CREO SL sono tutti dotati di schermo TCU. Lo schermo accende il motore e consente di accedere alle opzioni di modalità di supporto, nonché allo stato di carica della batteria e ai codici di errore. -
Page 40: Avviare Il Sistema Dalla Tcu
LED. 7.3. MODALITÀ DI ASSISTENZA DALLA TCU Il motore CREO SL offre cinque diverse impostazioni di guida. TURBO, SPORT, ECO, OFF e SMART CONTROL. TURBO: Modalità di potenza massima per „... -
Page 41: Codici Di Errore Visualizzati
Control, fino alla navigazione GPS e alla diagnostica del sistema. I dispositivi Android e iOS possono sincronizzarsi con tutte le biciclette CREO SL via Bluetooth LE. Visitare Google Play o App Store per la versione più aggiornata dell’applicazione gratuita Mission Control. Istruzioni dettagliate di tutte le funzionalità Mission Control sono disponibili all’interno della stessa. -
Page 42: Riportare Alle Impostazioni Di Fabbrica
7.6. RIPORTARE ALLE IMPOSTAZIONI DI FABBRICA Prima di vendere una bici nuova o usata, il nuovo utente deve eseguire un ripristino delle impostazioni di fabbrica dello schermo TCU, per ripristinare la potenza di picco e le impostazioni delle modalità di supporto. Per eseguire un ripristino di fabbrica (fig.7.6): A: Premere a lungo (tenere premuto) il pulsante Modalità... -
Page 43: Mission Control
Quando ci si connette per la prima volta all’App Mission Control, è necessario inserire il codice di accoppiamento BLE fornito con la CREO SL sulla TCU e sull’adesivo “Peel Me”. Si tratta di una misura di sicurezza, poiché assicura che solo il proprietario della bicicletta, o le persone con cui si condivide il codice, possano collegarsi alla bicicletta. - Page 44 1: PARTI Per registrare le uscite, vedere una mappa o dati live e impostare Smart Control. Con lo Smart Control attivato, la potenza del motore e della batteria viene regolata in base all’autonomia o alla durata della guida. 2: PERSONALIZZA Per personalizzare le prestazioni e la portata del motore in base alle proprie esigenze regolando individualmente l’assistenza alla pedalata e la potenza di picco.
-
Page 45: Batteria/Caricabatteria
INFO: Per maggiori informazioni su Mission Control visitare specialized.com/us/us/en/ missioncontrol 9. BATTERIA/CARICABATTERIA La batteria della CREO SL è montata all’interno del tubo inferiore e può essere rimossa solo rimuovendo prima il motore. Qualsiasi intervento sul motore e sulla batteria deve essere eseguito da un Rivenditore Autorizzato Specialized Turbo La vostra bicicletta è... -
Page 46: Suggerimenti Per La Ricarica
Evitare che chiodi, viti o altri piccoli oggetti metallici possano venire a contatto con la presa di ricarica della „ batteria. Prevenire il surriscaldamento della batteria. Proteggere la batteria da un’eccessiva esposizione ai raggi solari. „ Non esporre la batteria a fiamme libere o fonti di calore. „... - Page 47 INFO: Caricare la batteria solo a una temperatura ambiente compresa tra 0 °C e +45 °C (+32 °F e +113 °F). Se le temperature esterne sono troppo calde o troppo fredde, caricare la batteria all'interno. Per motivi di sicurezza, il processo di carica non avrà luogo se la batteria è surriscaldata o troppo fredda.
-
Page 48: Visualizzazione Del Livello Di Carica
Il sistema di gestione della batteria (BMS) è impostato per proteggere una batteria completamente scarica. Tuttavia, per mantenere ottimali le prestazioni, Specialized raccomanda di effettuare regolarmente la ricarica della batteria stessa ad almeno 60% (7 LED). Una batteria non funzionante a causa di una mancata ricarica non verrà sostituita in garanzia. Ogni batteria con tecnologia agli ioni di litio è... -
Page 49: Periodo Di Non Utilizzo Della Bicicletta
ATTENZIONE: Non utilizzare mai un’idropulitrice o un tubo ad alta pressione durante la pulizia della CREO SL. La pratica migliore è utilizzare un secchio di acqua con un panno umido o una spugna per rimuovere i residui di sporco, quindi asciugare tutte le superfici con un panno pulito. -
Page 50: Dati Tecnici Caricabatteria
1.85 PESO CAPACITA’ NOMINALE 6.7 AH 3.35 AH ENERGIA 320 WH 160 WH TEMPO DI RICARICA 2:35 3:20 9.9. DATI TECNICI CARICABATTERIA DESCRIZIONE UNITA SPECIFICHE CARICABATTERIE SBC-C06 °C -00 — +40 TEMPERATURA DI RICARICA °F 32 — +104 °C -20 — +65 TEMPERATURA DI STOCCAGGIO °F -4 —... -
Page 51: Specifiche
10. SPECIFICHE 10.1. SPECIFICHE GENERALI PRODOTTO CODICE PEZZO SPECIFICHE SERIE STERZO S182500005 1 1/8” UPPER / 1.5” LOWER DROP-IN BEARINGS COLLARINO REGGISELLA S174700008 30.6 REGGISELLA 27.2 FORCELLINO S182600001 HGR MY18 ROAD DISC THRU AXLE DER HANGER DISTANZIALE MOZZO S194400004 148 MM X 12 MM POSTERIORE DISTANZIALE MOZZO ANTERIORE S194400002... -
Page 52: Pressione Pneumatici Raccomandata
11.1. RANGE EXTENDER (RE) (ACCESSORIO OPZIONALE) La nuova CREO SL è compatibile con il RE per aumentare ulteriormente l’autonomia e il tempo di guida. La batteria aggiuntiva è tenuta saldamente nel portaborraccia specificato e si collega al motore attraverso un cavo di alimentazione dedicato che si innesta nella porta di carica. - Page 53 CONFIGURAZIONE / USO DEL RANGE EXTENDER Installare sulla bicicletta il portaborraccia specifico per il RE. „ Spegnere la bicicletta CREO SL. „ Inserire l’estremità del cavo di alimentazione con il coperchio arrotondato nella porta del RE. „ Fissare il cavo nel canale situato nell’alloggiamento del RE (Fig. 11.1).
-
Page 54: Parafanghi
0-9% 0-9% 80-100% 40-59% 0-19% 80-100% 80-100% 80-100% 0-9% RE BAT 11.2. PARAFANGHI La bicicletta Creo SL è compatibile con i parafanghi “Plug & Play”. Per una migliore funzionalità raccomandiamo i nostri parafanghi Specialized Dry Tech 35c. INSTALLAZIONE DEI PARAFANGHI... -
Page 55: Portapacchi
Per montare i parafanghi su un telaio in carbonio CREO SL, è necessario l’uso di un tubo piantone montato su misura per imitare il ponte del fodero obliquo e di un distanziale extra lungo per montare il parafango nell’area del movimento centrale. -
Page 56: Manutenzione Generale E Cura Del Mezzo
Denominazione del prodotto: EPAC (Electrically Power Assisted Cycle) CREO SL SW CARBON Modello: CREO SL EXPERT CARBON CREO SL EXPERT CARBON EVO CREO SL COMP CARBON CREO SL COMP CARBON EVO CREO SL E5 COMP Risulta in conformità con la direttiva: Macchine (2006/42/EC). - Page 58 TABLE OF CONTENTS 1. INTRODUCCIÓN ........................1 1.1. GARANTÍA .....................................1 2. COMPONENTES DE LA CREO SL ............................2 3. INFORMACIÓN GENERAL SOBRE LA CREO SL ..............3 3.1. USO .......................................3 3.2. PEDELEC / EPAC ................................3 4. CONSEJOS GENERALES DE USO ..................4 4.1.
-
Page 59: Introducción
Este manual ha sido creado en Inglés (Instrucciones originales). Esta versión es una “Traducción de las instrucciones originales”. Este manual de usuario es específico a tu bicicleta Specialized Turbo CREO SL y debería leerse como añadido al Manual de Usuario Specialized (“Manual de Usuario”). Contiene información importante sobre seguridad, rendimiento e información técnica, que deberías leer antes de tu primera salida con la bicicleta y guardar para... -
Page 60: Componentes De La Creo Sl
13. Cambio trasero 26. Pantalla TCU UNIDAD TURBO CONNECT (TCU) Todos los modelos de la CREO SL están equipados con la pantalla TCU (Fig. 2.2). La pantalla permite encender el motor y acceder a las opciones de los modos de asistencia, así como al estado de carga de... -
Page 61: Información General Sobre La Creo Sl
Antes de utilizar tu bicicleta CREO SL, infórmate de todos los requisitos legales y normativas de tu país o estado. Puede haber restricciones de uso de las bicicletas CREO SL en carreteras públicas, carriles bici y/o caminos. Puede que haya también restricciones de edad o requisitos sobre la iluminación, el uso del casco, la licencia o el seguro. -
Page 62: Consejos Generales De Uso
4. CONSEJOS GENERALES DE USO El motor CREO SL solo proporciona asistencia al pedaleo mientras das pedales y la bicicleta se encuentra en movimiento. La cantidad de asistencia será más alta o baja dependiendo de la cantidad de fuerza aplicada a los pedales. -
Page 63: Determina La Autonomía
Además de la calculadora de autonomía, recomendamos utilizar la función Smart Control de la aplicación Mission Control para controlar el alcance. 4.4. PEGATINA “PEEL ME” (DESPÉGAME) Tu nueva bicicleta Turbo CREO SL tiene una pegatina adherida al cuadro que indica el número de serie de la bicicleta y el código de... -
Page 64: Instrucciones Generales De Montaje
El uso de otros componentes o hardware puede comprometer la integridad y la resistencia del conjunto. Los componentes específicos CREO SL sólo deben utilizarse en CREO SL y no en otras bicicletas, incluso si encajan. El incumplimiento de esta advertencia podría causar lesiones graves o la muerte. -
Page 65: Sensor De Velocidad
5.2. SENSOR DE VELOCIDAD La CREO SL está equipada con un sensor magnético de velocidad, situado en la parte del disco/buje trasero (bloqueo central o de 6 tornillos). La suciedad o los residuos metálicos pueden acumularse en este sensor. Una acumulación excesiva puede provocar interrupciones en la asistencia del motor o lecturas de velocidad inexactas. -
Page 66: Future Shock Suspensión Delantera (Bloqueo Y Desbloqueo)
La vida útil y el mantenimiento dependen de muchos factores, como la frecuencia y el tipo de uso, el peso del ciclista, „ las condiciones de conducción o los golpes. Además, la CREO SL utiliza un sistema de motor asistido, lo que significa que se cubre más distancia en el mismo tiempo. Los componentes pueden estar sujetos a un mayor desgaste, dependiendo del tipo de componente. -
Page 67: Interfaz De Pantalla (Tcu)
EMPAREJAMIENTO Todos los modelos de la CREO SL están equipados con la pantalla TCU. La pantalla permite encender el motor y acceder a las opciones de los modos de asistencia, así como al estado de carga de la batería y a los códigos de error. -
Page 68: Inicio Del Sistema En La Tcu
POWER hasta que los LED se apaguen. 7.3. MODOS DE ASISTENCIA EN LA TCU El motor de la CREO SL ofrece cinco ajustes de accionamiento diferentes. TURBO, SPORT, ECO, OFF y SMART CONTROL. MODO TURBO: Modo de máxima potencia para „... -
Page 69: Códigos De Error Mostrados
Control y hacer diagnósticos del sistema. Los dispositivos Android y iOS pueden sincronizarse con todas las bicicletas CREO SL a través de Bluetooth LE. Visita Google Play o Apple App Store para obtener la última versión de la aplicación gratuita Mission Control. Todas las instrucciones de la funcionalidad de Mission Control se pueden encontrar dentro de la aplicación. -
Page 70: Restablecimiento De Fábrica
7.6. RESTABLECIMIENTO DE FÁBRICA Antes de vender una bicicleta nueva o usada, el nuevo usuario debe realizar un restablecimiento de fábrica de la pantalla TCU para restablecer los ajustes de potencia máxima y modo de asistencia. Para realizar un restablecimiento de fábrica (fig. 7.6): Realiza una pulsación larga (mantén pulsado) el botón de modo (1). -
Page 71: Mission Control
Al conectarla por primera vez a la aplicación Mission Control, debes introducir el código de emparejamiento BLE que viene con la CREO SL en la TCU y en la etiqueta “Peel Me”. Sirve como medida de seguridad, ya que garantiza que solo tú, como propietario de la bicicleta, o personas a las que hayas confiado el código, puedan conectarse a... - Page 72 1: VAMOS A MONTAR EN BICI Registra tus recorridos, consulta un mapa y datos de viaje en vivo y configura Smart Control. Con Smart Control activado, la potencia de la batería y el motor se ajustan en función de la distancia o la duración del recorrido. 2: AJUSTES Personaliza el rendimiento del motor y la autonomía en función de tus necesidades ajustando individualmente la asistencia y la Peak Power (Potencia máxima).
-
Page 73: Batería / Cargador
9. BATERÍA / CARGADOR La batería de la CREO SL se encuentra ubicada en el interior del tubo vertical y solo se puede extraer retirando primero el motor. Cualquier trabajo necesario en el motor y la batería debe realizarlo un distribuidor autorizado de Specialized Turbo Tu bicicleta está... -
Page 74: Carga Y Uso De La Batería
La batería no debe sumergirse. „ Mantener la batería alejada de objetos metálicos que puedan provocar un cortocircuito „ No debe usarse una batería o un cargador que muestren signos de estar dañados o con pérdida de líquido. Este „ líquido es corrosivo y puede dañar ojos y piel, y producir un incendio. - Page 75 Debe enchufarse a un enchufe que ofrezca entre 100 - 240V de salida, seleccionando el enchufe apropiado „ según el país. Localiza el puerto de carga en el lado no motriz del cuadro, cerca del pedalier. „ Abre la tapa del puerto de carga (Fig. 9.2) e inserta el enchufe de carga en el puerto (Fig. 9.3); usa la flecha del „...
-
Page 76: Nivel De Carga
RE no esté en uso. PRECAUCIÓN: La CREO SL no debe limpiarse con un sistema de agua a presión ni con una manguera. La mejor forma de limpiarla es con un cubo de agua y un paño húmedo o esponja para eliminar la suciedad, aplicando luego una toalla limpia para secar todas las superficies. -
Page 77: Almacenamiento
9.6. TRANSPORTE Transportar o enviar la batería de la CREO SL es delicado y requiere ciertas medias especiales de manejo, empaquetamiento y etiquetado. Deben conocerse todas las normativas y requisitos del país sobre este tema. En las tienda distribuidoras oficiales de Specialized disponen de esa información. -
Page 78: Datos Técnicos Del Cargador
9.9. DATOS TÉCNICOS DEL CARGADOR DESCRIPCIÓN ESPECIFICACIONES UNIDAD NÚMERO DE MODELO DEL SBC-C06 CARGADOR °C -00 — +40 TEMPERATURA DE CARGA °F 32 — +104 °C -20 — +65 TEMPERATURA DE ALMACENAMIENTO °F -4 — +149 VOLTAJE VOLTAJE ENTRADA CA 100 —... -
Page 79: Diámetro De Tornillo / Par De Apriete
10.2. DIÁMETRO DE TORNILLO / PAR DE APRIETE ¡ADVERTENCIA! El apriete correcto de tornillos y tuercas es básico para la seguridad. Si están poco apretados, las piezas pueden soltarse. Si se aprietan mucho, las roscas pueden pasarse o las piezas romperse. Por tanto el apriete incorrecto puede provocar roturas, lo que podría significar pérdida de control y caída. -
Page 80: Presión De Aire Recomendada
Utiliza un medidor de presión de calidad y respeta las recomendaciones de presión indicadas en el flanco de los neumáticos. Al ser la bicicleta CREO SL más pesada, la presión de los neumáticos debería ser más alta que en una bicicleta normal, como la DIVERGE 11. - Page 81 11.4 95 % - 100 % 30 % - 94% 10% - 29% 5% - 9% 0% - 4% ADVERTENCIA: Al conducir con un RE, mantén siempre el cable del RE enchufado y bloqueado en el puerto de carga de la bicicleta. Un cable suelto puede dañar la bicicleta y el RE, y convertirse en una obstrucción que puede hacer que pierdas el control y te caigas.
-
Page 82: Guardabarros
INSTALACIÓN DE GUARDABARROS El cuadro de la CREO SL está diseñado para dejar el máximo espacio libre para los neumáticos. En consecuencia, los cuadros no tienen la vaina ni el puente de tirante que generalmente se usa para fijar los guardabarros. Para montar guardabarros en el cuadro de una CREO SL, se requiere un soporte de tubo de sillín personalizado para... -
Page 83: Portabultos
11.4. ILUMINACIÓN A través de un distribuidor autorizado de Specialized, la Creo SL se puede actualizar con un cable divisor de luz que añade conexiones para las luces delanteras y traseras (número de pieza de servicio: S196800022). Se conecta a la TCU dentro del tubo superior y proporciona la salida siguiente: solo 12 V, 8 W/650 mA máx. -
Page 84: Ec - Declaración De Conformidad
EPAC (Electrically Power Assisted Cycle) Denominación del modelo: CREO SL SW CARBON CREO SL EXPERT CARBON CREO SL EXPERT CARBON EVO CREO SL COMP CARBON CREO SL COMP CARBON EVO CREO SL E5 COMP De conformidad con todas las directivas Maquinaria (2006/42/EC). - Page 86 SUMÁRIO 1. INTRODUÇÃO ........................1 1.1. GARANTIA .....................................1 2. COMPONENTES DA CREO SL ....................2 3. INFORMAÇÕES GERAIS SOBRE SUA CREO SL ..............3 3.1. USO PREVISTO ..................................3 3.2. PEDELEC / EPAC ................................3 4. INFORMAÇÕES GERAIS SOBRE USO ..................4 4.1.
-
Page 87: Introdução
Este manual foi escrito originalmente em Inglês (Instruções Originais). Esta versão é uma “Tradução das instruções originais”. Este manual de instruções contém apenas informações específicas à sua bicicleta Specialized Turbo CREO SL, e deve ser utilizado juntamente com o Manual do Proprietário da Bicicleta Specialized. (”Manual do Proprietário”). Ele contém informações importantes sobre desempenho e segurança, bem como informações técnicas, e é... -
Page 88: Componentes Da Creo Sl
2. COMPONENTES DA CREO SL Tubo superior 14. Corrente 27. Pastilha do Freio Dianteiro Tubo inferior 15. Coroa 28. Rotor do Freio Dianteiro Tubo de selim 16. Braço do pedivela 29. Pastilha do Freio Traseiro Tubo da Caixa de Direção 17. -
Page 89: Informações Gerais Sobre Sua Creo Sl
3. INFORMAÇÕES GERAIS SOBRE SUA CREO SL 3.1. USO PREVISTO A CREO SL é destinada, testada e projetada para pedalar em superfícies pavimentadas, estradas com poucas pedras e trilhas leves, com inclinações moderadas onde os pneus não perdem contato com o solo. (Condição 2). -
Page 90: Informações Gerais Sobre Uso
Se você parar de pedalar, o motor não proporcionará nenhuma assistência. A bicicleta CREO SL também pode ser pedalada como uma bicicleta normal sem pedal assistido, basta selecionar o modo OFF na tela. O mesmo se aplica se a bateria tiver carga menor que 3 - 5%. -
Page 91: Conheça Sua Autonomia
Além da calculadora de autonomia, recomendamos que você use o recurso SMART CONTROL no Aplicativo Mission Control para controlar a autonomia. 4.4. ADESIVO “PEEL ME” Sua nova bicicleta Turbo CREO SL tem um adesivo colado no quadro, indicando o número de série da bicicleta e seu código de pareamento BLE... -
Page 92: Informações Gerais Sobre Montagem
O uso de outros componentes ou peças irá comprometer a integridade e força do conjunto. Componentes específicos para a CREO SL devem ser usados somente na CREO SL e não em outras bicicletas, mesmo se servirem. Não seguir este aviso pode resultar em sérios ferimentos ou morte. -
Page 93: Sensor De Velocidade
5.2. SENSOR DE VELOCIDADE A CREO SL está equipado com um ímã de sensor de velocidade, localizado na interface do rotor com o cubo/disco traseiro (uma Centerlock ou 6 parafusos). Sujeira e/ou detritos metálicos podem se acumular sobre o ímã do sensor de velocidade. -
Page 94: Suspensão Dianteira Future Shock (Amortecida E Não Amortecida)
5.4. SUSPENSÃO DIANTEIRA FUTURE SHOCK (amortecida e não amortecida) Sua bicicleta Creo SL está equipada com um sistema de suspensão Future Shock no tubo da caixa de direção. Este sistema requer uma instalação e ajuste bem específicos. Toda a instalação, remoção e ajuste do amortecedor Future Shock deve ser realizada por sua Loja Specialized Autorizada. -
Page 95: Tela De Interface (Tcu)
PAREAMENTO BLE Todos os modelos CREO SL são equipados com a Unidade TCU. A unidade liga o motor e fornece acesso às opções dos modos de Assistência, e também indica o estado de carga da bateria e códigos de erro. -
Page 96: Modos De Assistência Na Tcu
“ansiedade de autonomia” com a função Smart Control, navegação baseada em GPS e diagnósticos do sistema. Dispostivos Android e iOS podem sincronizar com as bicicletas CREO SL através de Bluetooth LE. Visite a Google Play ou a Apple App Store para obter a última versão do aplicativo gratuito Mission Control. Todas as instruções das funcionalidades do Mission Control podem ser encontradas dentro do próprio aplicativo. -
Page 97: Redefinição De Fábrica
SIGNIFICADO SOLUÇÃO ERRO DA BATERIA Para os códigos de erro de 1 a 4 tente as seguintes soluções. Faça a reinicialização da sua bicicleta „ 2. BATERIA NÃO ENCONTRADA Verifique o App Mission Control para obter mais informações „ 3. ERRO NO MOTOR Se o problema persistir entre em contato com sua Loja Specialized „... -
Page 98: Troca Da Bateria Interna Da Tcu
Para fazer uma redefinição de fábrica (fig. 7.6): Pressione e mantenha pressionado o botão Mode (1), durante vários segundos. „ Pressione e solte (2) o botão de Energia (continuando a pressionar o botão Mode). Os LEDs (3) vão acender. „ Continue a pressionar o botão Mode durante 10 segundos (4), até... -
Page 99: Mission Control
Ao conectar o App Mission Control pela primeira vez, você precisa digitar o Código de pareamento BLE indicado em sua CREO SL na TCU e no adesivo amarelo “Peel Me”. Isto serve como uma medida de segurança, pois assegura que somente você como proprietário da bicicleta, ou pessoas de confiança a quem você revela o código, possam se conectar à... - Page 100 1: VAMOS PEDALAR Registre suas pedaladas, veja um mapa, dados do pedal ao vivo e ajuste o Smart Control. Com o Smart Control ativado, a potência utilizada do motor e da bateria são ajustados com base na distância ou quanto tempo você...
-
Page 101: Bateria / Carregador
Opere a bateria somente na seguinte faixa de temperatura: -20º C até 60ºC. „ Utilize somente a bateria da CREO SL com a bicicleta CREO SL. Não utilize a bateria da CREO SL com qualquer „ outra bicicleta, ou qualquer outra bateria com a bicicleta CREO SL, mesmo se couber. -
Page 102: Para Carregar A Bateria
Certifique-se de que o soquete e o plugue de carga estejam limpos e secos antes de conectá-los para carregar „ a bateria. Use somente o cabo de carregador fornecido. Certifique-se de que o plugue do cabo esteja totalmente inserido „ no carregador antes de conectar o carregador em uma tomada de energia elétrica. -
Page 103: Display Do Nível De Carga
Quando a carga estiver completa, desconecte o plugue do carregador da tomada de carga. „ Feche a tampa da tomada de carga para vedá-lo contra entrada de água e detritos. „ Desconecte o carregador da tomada da parede. „ CUIDADO: Mantenha sempre a tampa da tomada de carga totalmente fechada depois da carga e ao pedalar. -
Page 104: Limpeza
9.6. TRANSPORTE Transportar e/ou enviar sua bateria CREO SL pode estar sujeito a certas restrições e pode requerer um manuseio e empacotamento especial. Por favor se informe de todos os requisitos legais e regulamentos aplicáveis em seu país ou estado. Seu Revendedor Autorizado Specialized também pode ter informações que podem lhe ajudar. -
Page 105: Descarte
CUIDADO: Saiba que sua bicicleta CREO SL é significantemente mais pesada do que uma bike sem pedal assistido. Tenha cuidado ao manusear, transportar ou levantar sua bicicleta CREO SL. 9.7. DESCARTE Baterias e carregadores não podem ser descartados em seu lixo doméstico! Todas as baterias e carregadores devem ser descartados de maneira correta, de acordo com os regulamentos de descarte de bateria em seu país ou estado. -
Page 106: Especificações
SOBRE USO” na página 4 para mais informações sobre autonomia da bateria e dicas para maximizar o alcance. INFORMAÇÕES: A Figura 9.6 é uma cópia da etiqueta da bateria que é fornecida com a sua bicicleta. Familiarize-se com as informações antes de utilizá-la. DO NOT TEMPERATURE RANGE DO NOT handle... -
Page 107: Rpressões De Pneu Recomendadas
11.1. EXTENSOR DE ALCANCE (RE) (acessório opcional) Sua nova CREO SL é compatível com o RE para aumentar mais a autonomia e o tempo de pedalar. A bateria adicional está presa firmemente no suporte de garrafa apropriado e se conecta ao motor através de um cabo elétrico dedicado que se conecta a tomada de carga. - Page 108 CONFIGURAÇÃO / COMO USAR SEU EXTENSOR DE ALCANCE (RE) Instale a garrafa suporte específica correspondente para o RE na bicicleta. „ Desligue sua bicicleta Creo SL. „ Insira a extremidade do cabo elétrico com a tampa redonda na tomada do RE.
- Page 109 INFORMAÇÕES: O cabo divisor Y está disponível em sua Loja Specialized Autorizada. TELA DE NÍVEL DE CARGA COM A BATERIA DO EXTENSOR DE ALCANCE (RE) Quando o RE é instalado na bicicleta, o nível de carga é exibido na TCU, no TCD e no App Mission Control. A tela se adapta para mostrar o estado de carga das duas baterias, a interna e a do RE.
-
Page 110: Para-Lamas
Specialized Dry Tech 35c. INSTALANDO PARA-LAMAS O quadro da CREO SL é projetado para oferecer máximo de espaço ao pneu. Assim, os quadros em carbono não possuem junção de rabeiras superior ou inferior, geralmente utilizadas para prender para-lamas. Para montar o para-lamas no quadro da CREO SL, é... -
Page 111: Peças E Acessórios De Reposição
Descrição dos Produtos: EPAC (Electrically Power Assisted Cycle) CREO SL SW CARBON Designação do Modelo: CREO SL EXPERT CARBON CREO SL EXPERT CARBON EVO CREO SL COMP CARBON CREO SL COMP CARBON EVO CREO SL E5 COMP Em conformidade com todas as Machines (2006/42/EC). - Page 112 목차 1. 도입 ......................1 1.1. 품질보증 ..........................1 2. CREO SL 구성품 ................... 2 3. CREO SL에 관한 일반 정보 ................3 3.1. 용도 ............................3 3.2. PEDELEC / EPAC........................3 4. 라이딩에 관한 일반 고지 ................. 4 4.1. 주행 팁 ..........................4 4.2.
-
Page 113: 도입
본 설명서는 본래 영어로 초안을 작성했습니다(원본 설명서). 본 버전은 “원본 설명서의 번역본” 입니다. 본 사용자 설명서는 Specialized CREO SL 에 특정하여 설명하며 스페셜라이즈드 자전거 사용자 설명서(“사용자 설명서”)를 추가로 읽어야 합니다. 본 설명서는 중요한 안전, 성능 및 기술 정보가 포함되어 있으며 첫 라이딩 전에 숙지하고 참고를 위해 보관해야 합니다. 또한 사용자 설명서... -
Page 114: Creo Sl 구성품
25. 충전 소켓 13. 리어 드레일러 26. TCU 디스플레이 TURBO CONNECT 유닛(TCU) CREO SL 자전거 모델에는 모두 TCU 디스플레이가 장착되어 있습니다. 이 디스플레이를 통해 모터를 켜고, 지원 모드 옵션에 액세스할 수 있으며 배터리 충전 상태 및 오류 코드를 확인할 수 있습니다. -
Page 115: Creo Sl에 관한 일반 정보
3. CREO SL에 관한 일반 정보 3.1. 용도 CREO SL은 타이어가 지면과의 접촉을 유지할 수 있는 포장 도로나 매끄러운 자갈길, 어느 정도 정리된 도로에서의 라이딩을 위한 용도로 테스트 및 설계되어 있습니다. (노면 조건 2). 용도 및 프레임과 구성품의 구조적 중량 제한에 관한 자세한 내용은 사용자 설명서를 참조하십시오. -
Page 116: 라이딩에 관한 일반 고지
어시스턴스의 양은 페달에 작용하는 힘의 양에 따라 높아지거나 낮아집니다. 페달링을 멈추면 모터가 어시스턴스를 제공하지 않습니다. 또한 CREO SL 자전거는 디스플레이를 OFF 모드로 전환하여 모터의 도움 없이 일반 자전거로 탈 수 있습니다. 배터리 충전량이 5% - 3% 미만으로 떨어지는 경우에도 마찬가지입니다. -
Page 117: 주행 가능 거리 확인
유지보수는 스페셜라이즈드 공식 대리점에 문의하십시오. 또한 스페셜라이즈드 공식 대리점에서 자전거 사용, 서비스, 정비, 유지보수에 관한 수업, 클리닉, 서적 등을 추천 받을 수 있습니다. 경고! CREO SL 자전거의 복잡성으로 인해 적절한 조립을 위해서는 높은 수준의 기계적 전 문지식, 기술, 교육, 전용 공구가 필요합니다. 따라서 안전을 위해 조립, 유지보수, 문제해결... -
Page 118: 싯포스트
경고! 리어 서스펜션과 케이블 가이드를 포함하여 이에 국한되지 않고 CREO SL의 많은 구 성품이 CREO SL 전용입니다. 반드시 순정으로 제공되는 구성품과 하드웨어만 사용하십 시오. 다른 구성품이나 하드웨어를 사용하는 경우 조립 무결성과 강도가 훼손될 수 있습니 다. CREO SL 전용 구성품은 CREO SL에만 사용해야 하며 다른 자전거에 장착되더라도 사... -
Page 119: 속도 센서
없습니다. 설치 전 베어링 표면에 그리스를 도포합니다. 5.4. FUTURE SHOCK 전방 서스펜션(댐퍼 사용과 미사용) “Creo SL 바이크에는 Future Shock 핸들 튜브 서스펜션 시스템이 장착되어 있습니다. 이 시스템은 매우 특별한 설치 및 조정 작업을 필요로 합니다. Future Shock의 설치, 제거 및... -
Page 120: 유지보수에 관한 일반 고지
수명과 유지보수의 유형 및 빈도는 사용, 라이더 체중, 라이딩 컨디션 및/또는 충격 등 여러 „ 가지 요인에 따라 달라집니다. 또한 CREO SL은 동력 보조 드라이브 시스템을 사용하기 때문에 같은 시간 동안 더 긴 거리를 주행할 수 있습니다. 구성품의 종류에 따라 마모 속도가 달라 어떤... -
Page 121: 디스플레이 인터페이스(Tcu)
...에 떨어져서 조합 코드 CREO SL 자전거 모델에는 모두 TCU 디스플레이가 장착되어 있습니다. 이 디스플레이를 통해 모터를 켜고, 지원 모드 옵션에 액세스할 수 있으며 배터리 충전 상태 및 오류 코드를 확인할 수 있습니다. 블루투스 페어링을 위한 여섯 자리의 BLE 코드는 “Peel Me” 스티커와 탑 튜브의 TCU 밑면에... -
Page 122: Tcu의 지원 모드
진단을 통해 “주행 거리에 대한 걱정”을 해소해 줍니다. Android 또는 iOS 장치는 블루투스 LE 를 통해 모든 CREO SL 자전거와 동기화할 수 있습니다. Google Play 또는 Apple App Store에서 최신 버전의 무료 미션 컨트롤 앱을 다운로드할 수 있습니다. 미션 컨트롤 기능에 대한 모든 설명은... -
Page 123: 공장 초기화
의미 해결책 배터리 오류 Fo에러 코드1-4에 대해서는 다음 방법을 적용해 보십시오. 바이크 다시 시작 2. 배터리 없음 „ Mission Control 앱에서 추가 정보 확인 „ 3. 모터 오류 문제가 계속 발생할 경우 Specialized 공식 대리점에 „ 문의 4. 모터 없음 5. -
Page 124: 내부 Tcu 배터리의 교환
공장 초기화 실시 방법(그림 7.6): A: 모드 버튼 (1)을 길게 누릅니다(유지). „ B: 출력 버튼을 눌렀다 (2) 뗍니다(모드 버튼은 계속 누르고 있음). LED가 켜집니다 (3). „ C: LED가 꺼졌다 (4) 켜질 (5) 때까지 모드 버튼을 계속해서 10초간 길게 누릅니다 (6). „... -
Page 125: Mission Control
을 검색하여 앱을 다운로드하고 설치할 수 있습니다. 등록 후 바이크에 연결할 수 있습니다. 8.2. 바이크를 MISSION CONTROL과 페어링하기 처음 Mission Control 앱에 연결하려면 CREO SL과 같이 제공된 TCU 또는 “Peel Me” 스티커의 BLE 페어링 코드를 입력해야 합니다. 이는 바이크 소유자 또는 바이크 소유자가 코드를 공유한... - Page 126 1: LET’S RIDE 라이딩 기록, 지도 보기, 실시간 라이딩 데이터, Smart Control 설정. Smart Control을 활성화하면 원하는 라이딩 거리 및 주행 지속 시간에 따라 모터와 배터리 출력이 조정됨 2: TUNE: Support와 Peak Power를 개별적으로 조정함으로써 필요에 따라 모터의 성능 및 주행 가능 거리 최적화...
-
Page 127: 배터리 / 충전기
진행해야 합니다. Your bicycle is powered by a Lithium-Ion (Li-Ion) battery. Always adhere to the 자전거는 리튬 이온(Li-Ion) 배터리로 구동합니다. 배터리 취급 또는 충전 시 또는 CREO SL 자전거 사용 시 다음을 항상 준수하십시오. 배터리를 -20° C (-4° F) 와 +60° C (+140° F) 사이의 범위에서만 사용하십시오. -
Page 128: 배터리 충전 및 사용
경고! 본 섹션의 설명을 준수하지 않는 경우 자전거의 전기 구성품에 손상이 발생하고 품질 보증이 배제됩니다. 무엇보다도 중요한 것은 심각한 부상 또는 사망으로 귀결될 수 있습니 다. 배터리 또는 충전기에 손상 조짐이 보이는 경우 사용하지 말고 즉시 스페셜라이즈드 공 식 대리점에 점검을 문의하십시오. 9.1. -
Page 129: 충전 레벨 표시
하부 브라켓 근처에 있는 프레임의 비구동면에 충전 포트를 놓습니다. „ 충전 포트의 뚜껑(그림 9.2)을 열고 충전 플러그를 충전포트에 넣으십시오(그림 9.3). 커넥터의 „ 화살표를 참고하여 올바른 방향으로 넣으십시오. 충전이 완료되면 충전 포트에서 충전 플러그를 분리합니다. „ 물이나 먼지가 들어가지 않도록 충전 포트의 뚜껑을 닫습니다. „... -
Page 130: 청소
„ 충전하거나 RE를 사용하는 때를 제외하면 항상 충전 포트를 닫아 주십시오. "주의: CREO SL 자전거를 청소할 때 절대로 고압 청소기나 호스를 사용하지 마십시오. 최선의 방법은 통에 담긴 물로 젖은 천이나 스폰지를 사용해 이물질을 제거한 다음, 청결한 수건으로 전체 표면의 습기를 제거하는 것입니다. 드라이브트레인 청소 방법은... -
Page 131: 저장
배터리가 충전된 후 배터리를 충전기와 장시간 동안 연결해 두지 마십시오. 9.6. 운반 CREO SL 배터리 운반 그리고/또는 운송에는 제약사항이 따를 수 있으며 특수 취급, 라벨 부착, 포장 등이 필요할 수 있습니다. 사전에 해당 국가에서 적용되는 모든 법률 요건 및 규정을 숙지하십시오. 또한 스페셜라이즈드 공식 대리점에서 유용한 정보를 제공할... -
Page 132: 사양
°C -00 — +40 충전 온도 °F 32 — +104 °C -20 — +65 보관 온도 °F -4 — +149 동작 전압 AC 입력 전압 100 — 240 주파수 50 / 60 최대 충전 전류 치수 177 X 78 X 38.5 배터리의... -
Page 133: 볼트 사이즈 / 토크 사양
10.2. 볼트 사이즈 / 토크 사양 경고! 안전을 위해 자전거의 파스너(너트, 볼트, 스크류)에 올바른 조임 토크를 적용하는 것 이 중요합니다. 너무 적은 힘을 적용하면 파스너가 단단히 고정되지 않을 수 있습니다. 너 무 많은 힘을 적용하면 파스너의 나사산이 뭉그러지거나 늘어나거나 변형되거나 파손될 수 있습니다. -
Page 134: 부품시장 부속품
다양한 타이어 압력을 실험해 보십시오. 양질의 압력 게이지를 사용하고 타이어 측면에 기입되어 있는 타이어 압력 권장값을 참조하십시오. CREO SL 자전거는 중량이 더 무겁기 때문에 스텀프점퍼 FSR 과 같은 일반적인 자전거와 비교하여 타이어 압력이 더 높아야 합니다. 11. 부품시장 부속품 11.1. RANGE EXTENDER(RE) (선택 사양 부속품) CREO SL는... - Page 135 경고! RE를 장착하고 라이딩을 할 때는 항상 RE 케이블이 연결되고 바이크의 충전 포트에 고정되어 있도록 하십시오. 케이블이 느슨한 경우 바이크와 RE가 손상될 수 있으며, 주행을 방해해 라이더가 제어력을 잃거나 넘어질 수 있습니다. 주의: 보틀 케이지를 설치할 때는 반드시 제공된 나사를 사용하십시오. 더 긴 나사를 사용하는...
-
Page 136: 펜더(Fender)
80-100% 80-100% 0-9% 11.2. 펜더(Fender) Creo SL 바이크는 ‘Plug & Play’ 펜더와 호환됩니다. 최적의 기능을 위해 Specialized Dry Tech 35c 펜더를 권장합니다. 펜더 설치 CREO SL 프레임은 타이어의 여유가 최대가 되도록 설계되었습니다. 따라서 프레임에는 일반적으로 펜더를 부착하기 위해 사용되는 체인 지지대나 안장 지지대 브리지가 없습니다. CREO SL 프레임에... -
Page 137: 랙
펜더를 사용할 때의 타이어의 최대 크기는 700x32c입니다. „ 11.3. 랙 “Creo SL에는 리어 랙도 장착할 수 있습니다. 모든 프레임에는 드롭아웃 부분에 수직 랙 지지대를 위한 마운팅 탭이 있습니다. 랙을 위에 장착하려면(특히 카본 프레임의 경우), ‘SEAT CLAMP WITH RACK MOUNT’(서비스 부품 번호: S184700001)를 사용해 바이크를 업그레이드해야 합니다. -
Page 138: Ec - Declaration Of Conformity
제품 설명: EPAC (Electrically Power Assisted Cycle) 표시법 CREO SL SW CARBON CREO SL EXPERT CARBON CREO SL EXPERT CARBON EVO CREO SL COMP CARBON CREO SL COMP CARBON EVO CREO SL E5 COMP 적용되는 지침의 모든 명령 적합성: 기계 (2006/42/EC). - Page 140 內容目錄 1. 說明 ......................1 1.1. 保固 ..........................1 2. CREO SL 零件 ..................... 2 3. CREO SL 一般注意事項 ................4 3.1. 有可能的使用 ......................4 3.2. 電動輔助自行車 ......................5 4. 騎乘注意事項 ....................5 4.1. 騎乘要領 ........................5 4.2. 騎乘前須知 ........................5 4.3.
-
Page 141: 說明
更多特定零件的安全須知 、 性能與維護資訊 , 例如避震器或踏板 , 抑或零配件如安全帽貨車燈 , 也可能存在 。 確認您的Specialized授權經銷商已將所有隨附的自行車或零附件的製造廠商文 件交給您 。 若此使用手冊中的資訊與製造廠商的資訊相抵觸 , 請聯絡就近的Specialzied授權經 銷商 。 CREO SL 被歸類為電動輔助自行車 (EPAC, Electrically Power Assisted Cycle) , 並且若無其 他補充說明 , 於本手冊中統稱為自行車 。 其他語言版本請至 www.specialized.com下載 。 在此說明指南內 , 你會閱讀到許多的注意符號和警語 , 其說明如下 :... -
Page 142: Creo Sl 零件
2. CREO SL 零件 2.1A 上管 14. 鏈條 27. 前煞車卡鉗 下管 15. 大盤 28. 前煞車碟盤 立管 16. 曲柄 29. 後煞車卡鉗 頭管 17. 踏板 30. 後煞車碟盤 後下叉 18. 電動機 31. 輻條 後上叉 19. 把手套組 32. 輪圈 前叉 20. 變速撥把 33. 輪胎... - Page 143 48. 飛輪 61. 可充電電池 74. FUTURE SHOCK 49. 鉤爪 62. 充電插座 50. 後變速器 63. TCU 顯示器 車輛型式 長 (公分) 寬 (公分) 高 (公分) 車重 (含電池 / 公斤) 1700 mm 440 mm 1100 mm 13.3 Kg CREO SL EXPERT CARBON EVO...
-
Page 144: Creo Sl 一般注意事項
3. CREO SL 一般注意事項 3.1. 有可能的使用 CREO SL 是專門設計在平整地面 、 平坦碎石路與不會使外胎離開地面且經整修的較平林道上 騎乘 ; CREO SL 經過這類騎乘的測試 。 (條件 2) 。 若需要更多關於專門用途及車架與零件結構的限重訊息 , 請參閱使用者手冊 。 在開始使用你的 CREO SL 自行車前 , 請先了解你所在國家或州內的相關法律規定 。 對 於在公用道路 、 單車專用道與/或林道上騎乘你的 CREO SL 自行車 , 可能有相關法律規... -
Page 145: 電動輔助自行車
輔助 。 嚴禁任何擅自修改電力輸出與/或系統的行為 , 此舉將使保固失效 。 3.2. 電動輔助自行車 CREO SL 分類為電動輔助自行車 (EPAC) 。 電動機輔助動力會在最高時速達 25 公里 (15.5 英 里) 自動關閉 (在美國為 28 英里 ; 加拿大則為 20 英里) 。 騎乘自行車通常不需要駕照或保險 。 根據 EN 15194 安全標準 : 騎士耳朵接收到的 A 加權放射聲壓值小於 70 分貝 (A) 。... -
Page 146: 了解你的里程
銷商 , 以進行所有售後服務和維修 。 此外 , Specialized授權經銷商也會向你介紹自行車使用 , 以 及服務和維修相關的課程 、 故障診斷方式 , 以及書籍 。 警告 ! 由於CREO SL自行車結構較為複雜 , 因此需有專業的機械知識 、 技巧 、 訓練 , 以及 特殊工具 , 以適當地組裝 。 安全起見 , 請由Specialized授權經銷商進行組裝 、 保養 , 以及 故障檢修服務 。 在首次騎乘時 , 請確認零組件 , 包括煞車與傳動系統已根據使用手冊正... -
Page 147: 座桿
警告 ! CREO SL的許多零件 , 包括但不限於後避震器與導線板等 , 皆為CREO SL所有 。 請全程使用原廠提供的零件與硬體設備 , 使用其他的零件或硬體設備將會危及產品組 裝的完整性與功能 。 CREO SL的專用零件僅適用於CREO SL自行車 , 即便尺寸可能相 符 , 也請勿將零件用於其他自行車上 。 未遵守此警告可能造成嚴重的人員傷亡 。 警告 ! 請勿以任意改裝車架或車體 。 請勿對自行車打磨 、 鑽孔 、 銼光 , 或從車體取下任何 零件 。 請勿安裝不相容的零件或設備 。 未遵守此警告可能造成嚴重的人員傷亡 。... -
Page 148: 速度感應器
響座桿的密合程度 。 Specialized建議使用碳纖組裝聚合物 (纖維膏) 以增加碳纖接觸面 之間的摩擦力 。 請洽詢Specialized授權經銷商以獲得更多資訊 。 5.2. 速度感應器 CREO SL 配備有速度感應器 (Speed Sensor) 磁鐵 ; 磁鐵位於後花鼓 / 碟盤交接處 (中心鎖定或 六孔螺栓) 。 泥土與 / 或金屬碎屑可能會累積在速度感應器磁鐵上 。 過多的累積可能阻擋電動機 輔助與 / 或產生速度誤差讀數 。 定期檢查速度感應器磁鐵上泥土與 / 或金屬碎屑累積的狀況 , 並且清理 。 清理的頻率取決於你... -
Page 149: 保養注意事項
Specialized授權經銷商進行檢查 。 產品壽命與維護保養的種類和頻率取決於許多因素 , 例如使用方式 、 騎士體重 、 騎乘狀況 、 衝擊 „ 等 。 此外 , CREO SL 使用動力輔助傳動系統 , 在相同時間內可騎乘的距離更長 。 每個零件可能有 不同的損耗速度 , 實際情形取決於該部位為何種零件 。 動力傳動系統與煞車零件較容易磨損 。 請定期由你的 Specialized 授權經銷商檢查你的自行車與零件 , 查看是否有破損處 。 當產品所處的外在環境較為嚴峻 , 尤其若空氣含有鹽分 (例如海邊或冬天騎乘) , 則可能會導致... -
Page 150: 顯示器介面 (Tcu
電池盒 充電程度顯示 錯誤代碼顯示 電源 BLE 配對碼 所有 CREO SL 型號皆配備 TCU 顯示器 。 顯示器可以開啟電動機 , 並可存取輔助模式選項 , 也可 以顯示充電狀態與錯誤代碼 。 六位數 BLE 藍芽配對碼標示在安裝於上管的 TCU 背面 , 亦可在 「Peel Me」 貼紙上找到 。 (圖 4.1 ) 7.2. 在 TCU 上啟動系統 欲啟動系統 , 長按位於上管上 TCU 顯示器... -
Page 151: 在 Tcu 上顯示輔助模式
7.3. 在 TCU 上顯示輔助模式 CREO SL 電動機提供五種不同驅動設定 。 TURBO 、 SPORT 、 ECO 、 OFF 與 SMART CONTROL 。 TURBO 模式 : 最高動力模式 , 針對高速林 „ 道 、 平緩路段與爬坡 。 SPORT 模式 : 非鋪裝路面模式 , 提供最高 „ TURBO 操控與按需輸出的充足動力 。... -
Page 152: 原廠設定
涵義 解決方案 電池異常 對應錯誤代碼 1-4 , 請嘗試以下解決方法 。 2. 找不到電池 重啟自行車 „ 查看 Mission Control App 取得更多資訊 。 3. 電動機異常 „ 若問題持續存在 , 請聯繫你的 Specialized 授權經銷商 „ 4. 找不到電動機 5. 電池與電動機錯誤 聯繫你的 Specialized 授權經銷商 6. TCU 鈕扣電池低電量 更換 TCU 鈕扣電池 7.6. -
Page 153: 更換 Tcu 內部電池
進行原廠設定 (圖 7.6) : A : 長按 (壓住) 模式鈕 (1) 。 „ B : 按壓 然後釋放 (2) 動力鈕 (持續壓住模式鈕) 。 LED 燈將會亮起 (3) 。 „ C : 連續長按模式鈕 10 秒鐘 (4) , 直到 LED 燈熄滅 (5) 然後再度亮起 (6) 。 „ D :... -
Page 154: Mission Control
Mission Control」 , 然後安裝此應用軟體 。 在註冊之後 , 即可與你的自行車連線 。 8.2. 自行車與 MISSION CONTROL 配對 在第一次連線至 Mission Control App 時 , 你需要輸入標示在 CREO SL TCU 上或是 「Peel Me」 貼紙上的 BLE 配對碼 。 這是一種安全措施 , 可確保只有身為車主的你 , 或是將此碼分享給可信 賴的人 , 才能連線到這台自行車 。... - Page 155 1 : LET’ S RIDE (開始騎乘) 記錄騎乘 、 查閱地圖 、 即時騎乘資料與設定 Smart Control 。 當啟動 Smart Control 時 , 電動機 與電池輸出將會根據你想要騎乘的距離與時間來調整 。 2 : TUNE (調整) : 根據你的需求個別調整 Support ( 輔助) 與 Peak Power ( 峰值功率) , 以便對電動機性能與里程 進行客製化 。 藉由...
-
Page 156: 電池 / 充電器
9. 電池 / 充電器 CREO SL 的電池安裝在下管內部 , 只有移除電動機後才能卸除 。 任何有關電動機與電池的拆裝 動作 , 都必須由 Specialized 授權的 Turbo 經銷商進行 。 你的自行車是由鋰離子電池提供動力 , 在操作 、 充電或使用CREO SL自行車時 , 請遵照以下說 明 : 請在--20° C (-4° F) and +60° C (+140° F) 的溫度範圍內使用電池 。... -
Page 157: 電池充電
將充電器置於穩定 、 水平的平面上 , 不受到熱能影響 。 若電池在車架以外的地方進行充電 , 請 „ 將其置於和充電器相同的平面上 。 充電應在乾燥 、 通風的環境進行 , 並確保電池與充電器在充電過程中不受到遮蓋 。 請確定電 „ 池與充電器未接觸任何易燃或危險的成分 。 警告 ! 未遵守此章節中的說明可能會使你自行車上的電子零件受損 , 並使保固失效 。 更 甚者 , 此舉可能造成嚴重的人員傷害或生命危險 。 若你的電池或充電器出現任何受損 的跡象 , 請勿繼續使用 , 並請立即將其交給Specialized授權經銷商檢查 。 9.2. -
Page 158: 充電程度顯示
110V | 220V 充電器上的LED燈在充電過程中會亮紅燈 (圖9.4) 。 電池充電完畢後 , LED燈會改亮綠燈 。 注意 : 若紅色的LED燈開始在充電過程中閃爍 (圖9.4 - 3) , 則表示充電有誤 。 此時請立 即將充電器自插座取下 , 停止使用電動輔助 , 並連絡Specialized授權經銷商 。 電池管理系統 (BMS) 的設計是為了保護完全沒電的電池在一段時間內不受損壞 。 但為 維持最佳的電池性能與壽命 , Specialized建議固定將電池充到至少 60% 滿 (7個LED 燈) 。 鋰離子電池的電容量會隨著年限與使用次數遞減 。 若充電後的電力續航時間明顯降 低... -
Page 159: 清潔
壓空氣或軟刷去除乾燥污染物 。 若其為潮溼狀態 , 在連接至充電器或 RE 之前 , 可讓充電埠護蓋開著至完全風乾 。 內部電池若 „ 非正在充電或連接至 RE 時 , 一定要緊密蓋住充電埠 。 注意 : 絕對不要使用高壓水槍或水管清潔你的 CREO SL 。 最佳的清理方法是使用水桶 裝水 , 搭配濕抹布或海綿清理髒污 。 然後用乾淨的毛巾擦乾表面 。 有關如何清理傳動零 件的說明 , 請參閱傳動零件製造商的說明書 。 再次連接與騎乘之前 , 請先確認連接器保持清潔與乾燥 。 若需更多關於自行車清潔的... -
Page 160: 電池技術資料
9.8. 電池技術資料 規格 內容 單位T SBC - B15 SBC - B16 (RE) 工作電壓 °C 0 — +45 0 — +45 充電溫度 °F +32 — +113 +32 — +113 °C -20 — +60 -20 — +60 運行溫度 °F -4 — +140 -4 —... -
Page 161: 規格
DO NOT TEMPERATURE RANGE DO NOT handle DO NOT DO NOT DO NOT DO NOT DO NOT DO NOT store in Storage Charge Ride when damaged submerge modify connect +/- crush puncture direct sunlight/heat ATTENTION DANGER NOT FOLLOWING THESE INSTRUCTIONS SPECIALIZED BICYCLE COMPONENTS INC. -
Page 162: 建議胎壓
空氣釋放) 。 請在不同情況下嘗試不同胎壓 , 以找出騎乘偏愛地形時所適合你的設定 。 請使用品質優良的壓力計 , 並參考輪胎邊註明的建議胎壓 。 由於 CREO SL 自行車的額外重量 , 胎壓通常會較一般普通自行車高 , 比如 DIVERGE 。 11. 修補零件市場配件 11.1. RANGE EXTENDER (增程電池 , RE) ( 選配配件) 你的新 CREO SL 可與 RE 相容 , 可增加騎乘里程與時間 。 額外的電池穩固地安置於在特定水壺... - Page 163 將帶有圓形護蓋的電源線尾端插入增程電池的連接埠 。 „ 將電源線塞入 RE 外殼一側的凹槽之中 (圖 11.1) 。 „ 將 RE 放入適當的水壺架之中 (圖 11.2) 。 „ 可在車架非傳動端接近五通的位置找到充電埠 。 „ 打開充電埠護蓋 , 將增程電池插入充電埠 , 依照連接器上的箭頭指示方向進行 (圖 11.3 A) 。 „ 在插頭正確連接後 , 以順時針方向轉動連接器上的撥片以便將電線鎖固 (圖 11.3 B) 。 „ 為確認增程電池已成功正確地連接至系統 , 請檢查 TCU 上已顯示綠色電量 LED 燈 。 „...
-
Page 164: 擋泥板
80-100% 80-100% 0-9% 11.2. 擋泥板 CREO SL 自行車相容於 「Plug & Play」 ( 隨插即用) 擋泥板 。 為達到最佳功能性 , 我們建議使用 Specialized Dry Tech 35c 擋泥板 。 安裝擋泥板 CREO SL 碳纖維車架是為最大胎寬所設計 。 因此車架上並沒有後上叉或後下叉之間的叉橋結 構 , 這通常是固定擋泥板的位置 。 為了在 CREO SL 碳纖維車架上安裝擋泥板 , 必須在立管上安... -
Page 165: 貨架
11.4. 車燈 可透過 Specialized 授權經銷商取得車燈分路線連接前 、 後車燈 (序號 : S196800022) , 為你的 CREO SL 升級 。 此車燈可連接至位於上管內的 TCU , 並提供下列輸出功率 : 單一電壓 12V , 最高 8W / 650 mA 。 注意 , CREO 車架僅可供前燈電線的簡單佈線 。 對後燈電線沒有專用的出線孔 , 我們建議使用如我們的 Flux 或 Stix 尾燈這些獨立內裝電池的後車燈 。 欲安裝特殊車燈 , 請由... -
Page 166: 歐洲合格認證 (Ec) -統一聲明書
EPAC (Electrically Power Assisted Cycle) EPAC ( 產品敘述 : 電動輔助自行車) 型號名稱 : CREO SL SW CARBON CREO SL EXPERT CARBON CREO SL EXPERT CARBON EVO CREO SL COMP CARBON CREO SL COMP CARBON EVO CREO SL E5 COMP 統一指南內所有適用條目 : 機器 (2006/42/EC)... - Page 167 12. 交車同意書 本人確認購買之電動輔助自行車已經組裝調整完善 、 產品外觀無異常且功能正常 , 已可騎乘使 用 。 本人確認已被告知電動輔助自行車的正確操作方式 , 且不得擅自變更做大速率 , 也已收到電 動輔助自行車操作手冊等相關文件 。 車主簽收欄 : 姓名 : 出生日期 : 西元 年 月 日 地址 : 電話 : 電子郵件 : 性別 : ⃞男 ⃞女 手機 : 經銷商店章 車主簽名...
- Page 168 ● ENGLISH: PLACE THE YELLOW STICKER LOCATED ON THE FRAME ON TOP OF THE STICKER SAMPLE LOCATED BELOW. ● FRANÇAIS: COLLEZ L’ÉTIQUETTE JAUNE SITUÉE SUR LE CADRE PAR-DESSUS L’ÉTIQUETTE IMPRIMÉE CI-DESSOUS. ● DEUTSCH: PLATZIEREN SIE DEN AUF DEM RHAHMEN BEFINDLICHEN GELBEN AUFKLEBER ÜBER DEM FOLGENDEN AUFKLEBER-BEISPIEL. ● ČESKY: NA KOPII ŠTÍTKU NÍŽE NALEPTE ŽLUTOU NÁLEPKU, KTEROU NAJDETE NA RÁMU KOLA. ● SLOVENŠČINA: NAMESTITE RUMENO NALEPKO, KI JE NAMEŠČENA NA OKVIR, PREKO FAKSIMILA NALEPKE SPODAJ. ● HRVATSKI: STAVITE ŽUTU NALJEPNICU, KOJA JE STAVLJENA NA OK- VIR, PREKO FAKSIMILA ISPOD. ● NEDERLANDS: BRENG DE GELE STICKER, DIE ZICH OP HET FRAME VAN DE FIETS BEVINDT, AAN OP ONDERSTAANDE STICKERPLAATS. ● DANSK: PLACER KLISTERMÆRKET, SOM FINDES PÅ CYKLEN, OVEN PÅ KLISTERMÆRKET NEDENFOR. ● NORSK: PLASSER KLISTREMERKET PÅ TOPPEN AV OVERRØRET PÅ KLISTREMERKEKSEMPLET SOM BEFINNER SEG NEDENFOR. ● SVENSKA: PLACERA KLISTERMÄRKET SOM FINNS CYKELN OVANPÅ KLSIERMÄRKSPROVET SOM HITTAS NEDAN. ● POLSKI: UMIEŚĆ ŻÓŁTĄ NAKLEJKĘ ZNAJDUJĄCĄ SIĘ NA RAMIE NA POWIERZCHNI PRZEDSTAWIAJĄCEJ PRZYKŁADOWĄ NAKLEJKĘ, KTÓRA ZNAJDUJE SIĘ PONIŻEJ. ● SLOVENSKY: NA KÓPIU ŠTÍTKU NIŽŠIE NALEPTE ŽLTÚ NÁLEPKU, KTORÚ NÁJDETE NA RÁME KOLA. ● ITALIANO: POSIZIONARE L’ADESIVO GIALLO SITUATO SUL TELAIO SULLA PARTE SUPERIORE DELL’ETICHETTA CAMPIONE POSIZIONATA IN BASSO.
Need help?
Do you have a question about the Creo SL and is the answer not in the manual?
Questions and answers