Table of Contents
Advertisement
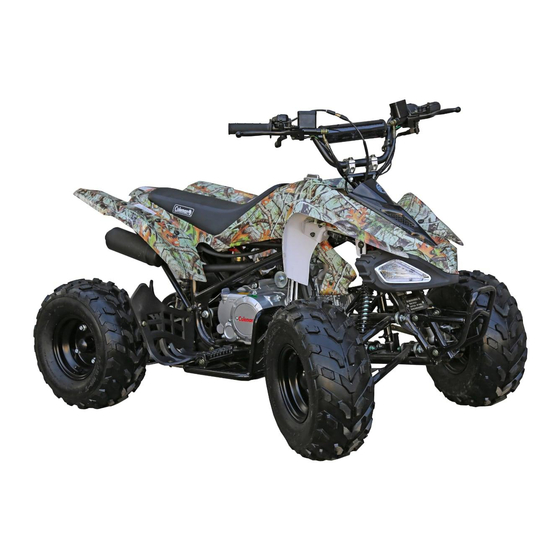
POWERSPORTS
This is a category "T" ATV
No one under the age of 14 should operate this ATV
BEFORE OPERATING THIS VEHICLE, THE OWNER AND EACH
OPERATOR MUST HAVE READ AND HAVE AN UNDERSTANDING
OF ALL THE INSTRUCTIONS FOR PROPER ASSEMBLY AND SAFE
OPERATION, AS WELL AS THE INSTRUCTIONS CONCERNING
THE ENGINE AND ALL OTHER PORTIONS OF VEHICLE.
AT125-B
ATV
REV 012418
Advertisement
Table of Contents

Subscribe to Our Youtube Channel
Related Manuals for Coleman POWERSPORTS AT125-B


Summary of Contents for Coleman POWERSPORTS AT125-B
- Page 1 POWERSPORTS AT125-B This is a category “T” ATV No one under the age of 14 should operate this ATV BEFORE OPERATING THIS VEHICLE, THE OWNER AND EACH OPERATOR MUST HAVE READ AND HAVE AN UNDERSTANDING OF ALL THE INSTRUCTIONS FOR PROPER ASSEMBLY AND SAFE OPERATION, AS WELL AS THE INSTRUCTIONS CONCERNING THE ENGINE AND ALL OTHER PORTIONS OF VEHICLE.
-
Page 2: Table Of Contents
CONTENTS COLEMAN POWERSPORTS LIMITED WARRANTY--------- 1 1. INTRODUCTION--------------------------------------------------- 3 2. SAFETY---------------------------------------------------------------9 3. SAFETY WARNING-----------------------------------------------11 4. DAILY PRE-RIDE INSPECTION------------------------------- 15 5. OPERATION WARNINGS----------------------------------------16 6. V.I.N-------------------------------------------------------------------32 7. CONTROL AND PARTS FUNCTIONS-------------------------33 8. STARTING THE ENGINE---------------------------------------- 43 9. VEHICLE BREAK-IN PERIOD----------------------------------44 10. RIDING GEAR---------------------------------------------------- 45 11. -
Page 3: Coleman Powersports Limited Warranty
Coleman Powersports offers the following warranty to the initial purchaser of this new Coleman Powersports product. The initial purchaser is defined as the first person to purchase a new Coleman Powersports product from an Authorized Retailer of Coleman Powersports products. - Page 4 Length of Implied Warranties Any implied warranties are limited to the duration set forth in this warranty. Coleman Powersports does not make any claim as to the merchantability or fitness for a particular purpose which would extend longer than the duration of this written warranty.
-
Page 5: Introduction
1. INTRODUCTION Congratulations on the purchase of your Coleman ALL Terrain Vehicle (ATV). We take pride in offering you this product engineered and manufactured to the highest performance and quality standards. We are sure that you will enjoy superior levels of performance, reliability, riding comfort, and safety. - Page 6 Practice Responsible ATV Riding Make sure that you understand and follow all local, state/province, and federal/national riding laws and requirements. Remember……Respect your vehicle, respect the environment and respect the property of others. You are responsible for your safety and the safety of others around you when you ride! WARNING YOUR VEHICLE CAN BE HAZARDOUS TO OPERATE.
-
Page 7: Age Recommendation
Due to late changes, some differences between the manufactured product and the descriptions and/or specifications in this guide may occur. Coleman Powersports reserves the right at any time to discontinue or change specifications, designs, features, models... -
Page 8: Notice To Parents
or equipment without incurring an obligation upon itself. This Operator’s Guide should remain with the vehicle when it’s sold. Notice to Parents Review this Operator’s Guide with any user of the vehicle. Please take time with the children to review the instructions on its safe and proper use, and pay particular attention to the on-product safety labels, before allowing them to ride the vehicle. - Page 9 follow these instructions. · Read this manual and all labels carefully and follow the operating procedures described. ·Never operate an ATV without proper instruction. Take a training course. Beginners should receive training from a certified instructor. Contact an authorized ATV dealer to find out about the training courses nearest you. ·Never allow anyone under the age of 14 to operate this category T ATV ·Never permit a guest to operate this ATV unless the guest has read this manual and all product labels and has completed a certified training course.
- Page 10 the top of any hill at high speed. ·Always follow proper procedures for going downhill and for braking on hills as described in this manual. Check the terrain carefully before you start down any hill. Shift your weight backward. Never go down a hill at high speed. Avoid going down a hill at an angle, which would cause the vehicle to lean sharply to one side.
-
Page 11: Safety
·Never modify an ATV through improper installation or use of accessories. ·Never exceed the stated load capacity for an ATV. Cargo should be properly distributed and securely attached. Reduce speed and follow instructions in this manual for carrying cargo. Allow greater distance for braking 2. -
Page 12: Safety Alert
Safety alert WARNINGS identify special instructions or procedures which, if not correctly followed, could result in personal injury, or loss of life. Read all WARNINGS in this manual care fully. Follow their instructions to remain safe. The following precautionary signal words are used throughout this manual to convey the following messages: This is the safety alert symbol. -
Page 13: Safety Warning
3. SAFETY WARNING NOTE: Warning decals have been placed on the vehicle for your protection. Read and follow the instructions on each decal carefully. In the event any decal becomes illegible or comes off, contact your dealer for a replacement. - Page 14 1. General Warning Label...
- Page 15 2. Age Recommendation Warning Label for AT125-B 3. Combined Tire Pressure and Overloading Warning Label for AT125-B...
- Page 16 4. Passenger Warning Label 5. Certification Label...
-
Page 17: Daily Pre-Ride Inspection
4. DAILY PRE-RIDE INSPECTION WARNING You must inspect your ATV each time before riding to ensure it is in proper working order. If proper inspection is not done, severe injury or death could result. Use the following checklist to verify your machine is in proper working order each time you ride. -
Page 18: Operation Warnings
5. OPERATION WARNINGS WARNING POTENTIAL HAZARD Operating this ATV without proper instruction. WHAT CAN HAPPEN The risk of an accident is greatly increased if the operator does not know how to operate the ATV properly in different situations and on different types of terrain. - Page 19 WARNING POTENTIAL HAZARD Carrying a passenger on this ATV. WHAT CAN HAPPEN Greatly reduces your ability to balance and control this ATV. Could cause an accident, resulting in harm to you and /or your passenger. HOW TO AVOID THE HAZARD Never carry a passenger.
- Page 20 WARNING POTENTIAL HAZARD Operating this ATV on paved surfaces, including sidewalks, paths, parking lots, and driveways. WHAT CAN HAPPEN Paved surfaces may seriously affect the handling and control of the ATV, and may cause the vehicle to go out of control. HOW TO AVOID THE HAZARD Avoid operating the ATV on pavement.
- Page 21 WARNING POTENTIAL HAZARD Operating this ATV after consuming alcohol or drugs. WHAT CAN HAPPEN Could seriously affect your judgment. Could cause you to react more slowly. Could affect your balance and perception. Could result in an accident. HOW TO AVOID THE HAZARD Never consume alcohol or drugs before or while driving this ATV.
- Page 22 WARNING POTENTIAL HAZARD Attempting wheelies, jumps and other stunts. WHAT CAN HAPPEN Increases the chance of an accident, including an overturn. HOW TO AVOID THE HAZARD Never attempt stunts, such as wheelies or jumps.
- Page 23 WARNING POTENTIAL HAZARD Failure to inspect the ATV before operating. WHAT CAN HAPPEN Increases the possibility of an accident or equipment damage. HOW TO AVOID THE HAZARD Always inspect your ATV each time you use it to make sure the ATV is in safe operating condition.
- Page 24 WARNING POTENTIAL HAZARD Failure to use extra care when operating this ATV on unfamiliar terrain. WHAT CAN HAPPEN You can come upon hidden rocks, bumps, or holes, without enough time to react. Could result in the ATV overturning or going out of control. HOW TO AVOID THE HAZARD Go slowly and be extra careful when operating on unfamiliar terrain.
- Page 25 WARNING POTENTIAL HAZARD Failure to use extra care when operating on excessively rough, slippery or loose terrain. WHAT CAN HAPPEN Could cause loss of traction or vehicle control, which could result in an accident, including an overturn. HOW TO AVOID THE HAZARD Do not operate on excessively rough, slippery or loose terrain until you have learned and practiced the skills necessary to control the ATV on such terrain.
- Page 26 WARNING POTENTIAL HAZARD Turning improperly. WHAT CAN HAPPEN ATV could go out of control, causing a collision or overturn. HOW TO AVOID THE HAZARD Always follow proper procedures for turning as described in the Owner’s Manual. WARNING POTENTIAL HAZARD Operating on excessively steep hills. WHAT CAN HAPPEN The vehicle can overturn more easily on extremely steep hills than on level surfaces or small hills.
- Page 27 WARNING POTENTIAL HAZARD Going down a hill improperly. WHAT CAN HAPPEN Could cause loss of control or cause ATV to overturn. HOW TO AVOID THE HAZARD Always follow proper procedures for going down hills as described in the Owner’s Manual. NOTE: A special technique is required when braking as you go downhill.
- Page 28 WARNING POTENTIAL HAZARD Stalling, rolling backwards or improperly dismounting while climbing a hill. WHAT CAN HAPPEN Could result in ATV overturning. HOW TO AVOID THE HAZARD Maintain steady speed when climbing a hill. If you lose all forward speed: Keep your weight uphill. Apply the brakes.
- Page 29 WARNING POTENTIAL HAZARD Improperly operating over obstacles. WHAT CAN HAPPEN Could cause loss of control or a collision. Could cause the ATV to overturn. HOW TO AVOID THE HAZARD Before operating in a new area, check for obstacles. Use extreme caution when riding over large obstacles, such as large rocks or fallen trees.
- Page 30 WARNING POTENTIAL HAZARD Operating this ATV through deep or fast-flowing water. WHAT CAN HAPPEN Tires may float, causing loss of traction and loss of control, which could lead to an accident. HOW TO AVOID THE HAZARD Never operating the ATV through water which exceeds the recommended maximum depth in this manual.
- Page 31 WARNING POTENTIAL HAZARD Operating this ATV with improper tires, or with improper or uneven tire pressure. WHAT CAN HAPPEN Use of improper tires on this ATV, or operation of this ATV with improper or uneven tire pressure, may cause loss of control, and increases the risk of an accident.
- Page 32 WARNING POTENTIAL HAZARD Overloading this ATV or carrying or towing cargo improperly. WHAT CAN HAPPEN Could cause changes in vehicle handling, which could lead to an accident. HOW TO AVOID THE HAZARD Never exceed the stated load capacity for this ATV. Cargo should be properly distributed and securely attached.
- Page 33 WARNING After a rollover or an accident, have a qualified service dealer check the complete machine including, but not limited to, brakes, throttle and steering for possible damage. WARNING Safe operation of this ride active vehicle requires good judgment and physical skills. Persons with cognitive or physical disabilities who operate this vehicle have an increased risk of overturns and loss of control which could result in severe injury or death.
-
Page 34: V.i.n
6. V.I.N Record these numbers from your ATV in the spaces provided. 1. Frame VIN (on the left side of the front bottom beam) 2. Engine Serial Number (on the left side of the box) Remove the spare key and store in a safe place. Your key can be duplicated only by obtaining a key blank and having it cut by mating it with your existing The vehicle frame and engine serial numbers are important for model identification when registering your vehicle, obtaining insurance or whenever... -
Page 35: Control And Parts Functions
7. CONTROL AND PARTS FUNCTIONS Electrical Switches 1. Main Switch-This key switch must be turned clockwise to the “on” position to start the engine. 2. Emergency shut down switch - Emergency shut down switch are pulled out, ATV will automatically shut down, and the electric switch can't start the engine. - Page 36 Light Switches and Indicator Lights WARNING This ATV is not equipped with highway approved lighting. This ATV is designed for off – road use only and must not be ridden on streets or highways. Use caution and drive at reduced speeds in conditions of reduced visibility such as fog, rain and darkness.
- Page 37 Throttle WARNING Do not start or operate an ATV with sticking or improperly operating throttle controls. A sticking or improperly operating throttle could cause an accident resulting in severe injury or death. Always contact your dealer for service repairs whenever throttle problems arise.
-
Page 38: Front And Rear Brakes
Front and Rear Brakes Front Brakes Front brake fluid box is mounted on the right handlebar by hand manipulation. Before driving, the brake fluid level must be checked every time, the fluid level should be maintained above the limit mark. Rear Brakes Rear brake fluid box is mounted is mounted behind the right brake pedal, operated by the right foot. - Page 39 If you feel soft and no force, it’s possible that the braking fluid leaks or lower than the limited fluid level height, and you must verify it before using. Please go to the Coleman Powersports authorized dealer for checking and repairing.
-
Page 40: Setting The Parking Brake
Setting the Parking Brake 1. Squeeze the right hand brake lever(3) two or three times and hold it. 2. Press down the parking hinge pin (1), place the parking lock into the groove then release brake lever. The ATV will now be in the parking condition. 3.Pulling back the brake lever, and releasing the parking lock will disengage the parking brake Important Safeguards... - Page 41 Gearshift struction The foot shift lever is on the left side of the vehicle near pedal position. The shift lever can be placed in 5 positions: reverse, neutral,1 forward gear, 2 forward gear, 3 forward gear. CAUTION Always place the transmission in gear with the parking brake locked whenever the vehicle is left unattended.
- Page 42 Fuel and Oil system WARNING Gasoline is highly flammable and explosive under certain conditions. ·Always exercise extreme caution whenever handling gasoline. ·Always refuel with the engine stopped, and outdoors or in a well ventilated area. ·Do not smoke or allow open flames or sparks in or near the area where refueling is performed or where gasoline is stored.
- Page 43 Fuel and Oil System Fuel System The fuel tank filler cap is located directly behind the handlebar. Refer to your owner’s manual for tank capacity. Use regular unleaded gasoline. The fuel valve is installed under the left side of the middle plate. OFF: For vehicle storage and whenever transporting.
-
Page 44: Oil System
Oil System The oil tank is located on the right side of the engine. To check the oil: 1. Set machine on a level surface. 2. Start the engine and let it idle for 20-30 seconds. 3. Stop the engine, remove dipstick (1) and wipe dry with a clean cloth. -
Page 45: Starting The Engine
8. STARTING THE ENGINE Procedure for Starting a Cold Engine WARNING Never run an engine in an enclosed area. Carbon monoxide exhaust gas is poisonous and can cause severe injury or death. Always start engines outdoors. CAUTION You must allow your vehicle adequate warm up time before operating or engine damage could result. -
Page 46: Vehicle Break-In Period
9. VEHICLE BREAK-IN PERIOD The break-in period for your new ATV is defined as the first 50 hours of operation. No single action on your part is as important as a proper break-in period. Careful treatment of a new engine will result in more efficient performance and longer life for the engine. -
Page 47: Riding Gear
10. RIDING GEAR Safe Riding Gear Always wear clothing suited to the type of riding you are doing. ATV riding requires special protective clothing which will make you feel more comfortable and reduce chances of injury. 1. Helmet Your helmet is the most important piece of protective gear for safe riding. A helmet can prevent a severe head injury. -
Page 48: Carrying Loads
11. CARRYING LOADS Some models have been designed to carry a certain amount of load. CARGO WEIGHT should be evenly distributed (1/3 on the front and 2/3 on the rear) and mounted as low as possible. When operating over rough or hilly terrain, reduce speed and cargo weight to maintain stable driving conditions. - Page 49 To reduce risk of injury or machine damage when carrying loads, read and follow the warnings listed below: · REDUCE SPEED AND ALLOW GREATER DISTANCES FOR BRAKING WHEN CARRYING CARGO. ·CARGO WEIGHT DISTRIBUTION should be 1/3 on the front rack and 2/3 on the rear rack.
-
Page 50: Riding
12. RIDING WARNING You must inspect your ATV each time before riding to ensure it is in proper working order. If proper inspection is not done, severe injury or death could result. See “4. DAILY PRE-RIDE INSPECTION” 1. Sit upright with both feet on footrests and both hands on the handlebars. 2. -
Page 51: Making Turns
Making turns Practice making turns at slow speeds This ATV is equipped with a solid rear axle which drives both rear wheels equally at all times. This means that the wheel on the outside of the turn must travel a greater distance than the inside wheels when turning and the inside tire must slip traction slightly. -
Page 52: Riding On Slippery Surfaces
Riding on slippery surfaces Whenever riding on slippery surfaces such as wet trails or loose gravel, or during cold freezing weather, special attention must be paid to prevent vehicle turnover. Always: 1. Slow down when entering slippery areas. 2. Maintain a high level of alertness, reading the trail and avoiding quick, sharp turns, which can cause skids. -
Page 53: Traveling Uphill
Traveling Uphill WARNING Exercise extreme caution when traveling in hilly terrain. Braking and handling are greatly affected. Loss of vehicle control or overturning of the ATV could occur causing severe injury or death. Whenever traveling uphill always travel straight uphill and: 1. -
Page 54: Side Hilling
Side hilling Side hilling is one of the most dangerous types of riding your ATV and should be avoided. If you do enter into a situation where side hilling is necessary, always: 1. Slow down. 2. Lean into the hill, transferring your upper body weight toward the hill while keeping your feet on the footrests. -
Page 55: Traveling Downhill
Traveling Downhill Whenever descending a hill, always: 1. Drive directly downhill. 2. Transfer your weight to the rear of the vehicle. 3. Slow down. 4. Apply the brakes slightly to aid in slowing. warning Do not travel at excessive speeds. It is dangerous and can cause loss of vehicle control and tipping, resulting in severe injury or death. -
Page 56: Turning Around On A Hill
Turning Around on a Hill If the ATV stalls while climbing a hill, never back it down the hill! One maneuver which can be used when it is necessary to turn around while climbing a hill is the K-turn. 1. Stop and lock the parking brake while maintaining body weight uphill. 2. -
Page 57: Crossing Streams
Crossing Streams Your ATV can operate through water up to a maximum recommended depth (8 inch). Before fording streams always: 1. Determine water depths and current. 2. Choose a crossing where both banks have gradual inclines. 3. Proceed slowly, avoiding rocks and obstacles if possible. 4. - Page 58 CAUTION If your ATV becomes immersed, take it to your dealer before starting the engine. Major engine damage can result if the maching is not thoroughly inspected. If it is impossible to take it to a dealer before starting, follow these steps outlined below.
-
Page 59: Trail Obstacles
Trail Obstacles Keep Alert! Look ahead and learn to read the trail as you ride. Stay on the right side of the trail, if possible, and be constantly alert for hazards such as logs, rocks and low hanging branches. WARNING Not all obstacles are visible. - Page 60 WARNING Backing your ATV can be dangerous! You should hit an obstacle or a person behind you; or the vehicle could tip over rearward on a steep incline causing severe injury or death. Backing up 1. Avoid backing up on steep inclines. 2.
-
Page 61: Parking On An Incline
Parking on an incline Whenever the vehicle is parked 1. Turn the engine off. 2. Place the transmission in gear. 3. Set the parking brake. 4. Shut off fuel supply. 5. Avoid parking on an incline. If it is necessary to park on an incline, always block the rear wheels on the downhill side as shown above. -
Page 62: Battery
13. BATTERY Battery WARNING Whenever removing the battery, disconnect the negative (black) cable first. When reinstalling the battery, connect the negative (black) cable last or explosive situation could result causing serious injury or death. WARNING Battery electrolyte is poisonous. It contains sulfuric acid. Serious burns can result from contact with skin, eyes or clothing. -
Page 63: Battery Removal
Battery Removal 1. Remove the battery plate or battery belt. 2. Remove the battery vent tube from the battery. 3. Disconnect the black (negative) battery cable first. 4. Disconnect the red (positive) battery cable next. CAUTION If electrolyte spills, immediately wash it off with a solution of one tablespoon baking soda and one cup water to prevent damage to the ATV. - Page 64 1. Set the battery in its holder. 2. First connect and tighten the red (positive) cable. 3. Second connect and tighten the black (negative) cable. 4. Put on the battery plate or battery belt. 5. Verify that cables are properly routed. NOTE: ·When your ATV is placed in storage for one month or more, the battery should be removed, charged to proper level, and stored in a cool dry place.
-
Page 65: Exhaust System
14. EXHAUST SYSTEM System regulation TAMPERING WITH NOISE CONTROL SYSTEM PROHIBITED! CAUTION: Exhaust system components are very hot during and after use of ATV. ·Do not tough exhaust system components. Serious burns can result. ·Be especially careful when traveling through tall grass. The potential for fire exists. -
Page 66: Maintenance
15. MAINTENANCE CAUTION More often under severe use, such as dirty or wet conditions to purge water or dirt contamination from grease fittings and other critical components. Periodic Maintenance Schedule Careful periodic maintenance will help keep your vehicle in the safest, most reliable condition. - Page 67 Item Interval Initial Every Every month months months Air Cleaner ^Exhaust pipe bolt muffler bolt *Cylinder head, cylinder and — muffler — Spark plug Idle Speed Throttle cable *Fuel line ^Brakes Tires Inspect every month Drive Chain Clean, lubricate and inspect each time the ATV is ridden —...
-
Page 68: Lubrication Recommendations
Lubrication Recommendations Lube Item Method Frequency 1. Engine Oil Add to proper level on Check level daily 15W-40 dipstick 2. Brake Fluid Maintain level between As required; change Only fill lines. every two years or See “7. CONTROL” 200 hours ... - Page 69 NOTE: More often under severe use, such as wet or dusty conditions. Grease: Light weight lithium-soap grease. Grease M:molybdenum disulfide(MoS ) grease(water resistant). *When suspension action becomes stiff or after washing. Hours are based on 10 mph (16 Km/h) average.
- Page 70 Periodic Maintenance Record Use the following chart to record periodic maintenance work: Maintenance Servicing Date Servicing Dealer Remark Interval or Person Performed Initial 1 month 2 month 3 month 4 month 5 month 6 month 7 month 8 month...
- Page 71 WARNING Improper adjustment of the handlebars or incorrect torquing of the adjuster block tightening bolts can cause limited steering or loosening of the handlebars, resulting in loss of control and possible serious personal injury or death. Handlebar Adjustment Your ATV has handlebars which can be adjusted for your personal fit.
- Page 72 The following items should be checked occasionally for tightness; or if they have been loosened for maintenance service. Wheel Nut Torque Specifications Bolt Size Specification M8X1.0 20 ft. lbs. 27 Nm M10X1.25 26 ft. lbs. 35 Nm NOTE: All nuts that have a cotter pin installed must be serviced by an authorized Dealer.
-
Page 73: Rear Spring Adjustment
Rear Spring Adjustment The rear shock absorber spring is adjusted by rotating the adjuster in the direction required to increase or decrease spring tension.(Some models are not adjustable shock absorbers) Rear Spring Adjustment... -
Page 74: Steering Inspection
Steering Inspection The steering assembly of the machine should be checked periodically for loose nuts and bolts. If loose nuts and bolts are found, have your dealer tighten them before riding your vehicle. Camber and Caster Camber and caster can’t be changed by yourself. WARNING Do not attempt to adjust the tie rod for toe alignment. -
Page 75: Front Brake
Front Brake WARNING Once a bottle of brake fluid is opened, use what is necessary and discard the rest. Do not store or use a partial bottle fluid. Brake fluid is hygroscopic, meaning it rapidly absorbs moisture from the air. This causes the boiling temperature of the brake fluid to drop, which can lead to early brake fade and the possibility of serious injury. - Page 76 Rear and Auxiliary Brake Rear Brake Rear brake is controlled by a small brake lever on the left side of the handlebars. The following checks are recommended to keep the brake system in good operating condition. How often they need checking depends upon the type of driving that has been done.
- Page 77 Carburetor/Engine Idle RPM Adjustment If the engine idle speed is not satisfactory, and all other conditions are favorable, the carburetor can be adjusted as follows: 1. Warm up the engine by running the vehicle approximately five minutes. 2. Place the transmission in gear with the parking brake applied. 3.
-
Page 78: Spark Plugs
Spark Plugs Inspect: ·Insulator ① Abnormal color: Replace. Normal color is a medium-to-light tan color. ·Electrode ② Wear/damage: Replace. Clean: ·Spark plug (with spark plug cleaner or wire brush) Standard spark plug A7RTC (NGK) Measure: ·Spark plug gap ③ ③ Gap: 0.6-0.7 mm Out of specification: Adjust gap. -
Page 79: Oil And Filter Change
Oil and Filter Change The recommended oil change interval is 30 hours, or every 3 months, whichever comes first. Suggested break in oil change is at 20 hours, or one month, whichever comes first. Severe use operation requires more frequent service. - Page 80 WARNING Operating your ATV with worn tires, improperly inflated tires, non-standard tires or improperly installed tire will affect vehicle handling which could cause an accident resulting in serious injury or death. Follow the safeguards listed below to prevent this type of situation. Important Safeguards Maintain proper tire pressure.
-
Page 81: Wheel Installation
Wheel Installation 1. With the transmission in gear and the parking brake locked, place the wheel in the correct position on the wheel hub. Be sure the valve stem is toward the outside and rotation arrows on the tire point toward rotation. 2. -
Page 82: Headlight Lamp Replacement
Headlight Lamp Replacement WARNING Keep your headlights and taillights clean. Poor light while riding can result in an accident causing severe injury or death. CAUTION Do not service while headlight is hot. Serious burns may result. Do not touch a halogen lamp with bare fingers. Oil from your skin leaves a residue, causing a hot spot which will shorten the life of the lamp. -
Page 83: Cleaning Your Atv
Cleaning Your ATV Keeping your ATV clean will extend the life of various components. Washing Never use a high pressure type car wash system, it can damage the wheel bearings, transmission seals, body panels, brakes and warning labels, and water might enter the engine or exhaust system. The best and safest way to clean your ATV is with a garden hose and a pail of mild soap and water. -
Page 84: Storage Tips
Storage Tips CAUTION Do not start the engine during the storage period. This will disturb the protective film created by fogging. Cleaning—Clean the ATV thoroughly. Fuel—Turn the fuel valve to “OFF” and drain the carburetor bowl completely. Oil Add and Filter Change—Warm the engine and change oil and filter. Air Filter/Air Box—Inspect and clean or replace the pre-cleaner and air filter. - Page 85 Transporting Whenever the ATV is to be transported, the following measures should be taken. 1. Turn off the engine and remove the key. 2. Turn the fuel valve to off. 3. Be certain the fuel cap, oil cap, and seat are installed correctly. 4.
-
Page 86: Trouble Shooting
16. TROUBLE SHOOTING Discharged battery Possible Causes Solutions See “8. STARTING THE ENGINE” and check Allowing the starter to run too long without the fuel/air/ignition/compression system. starting the engine. Main key switch left on When stopping the engine, turn off the main while parked. - Page 87 NOTE: The following troubleshooting does not cover all the possible causes of trouble. It should be helpful, however, as a guide to troubleshooting. Refer to the relative procedure in this manual for inspection, adjustment and replacement of parts. Adjustment and replacement must be done by your dealer. STARTING FAILURE/HARD STARTING FUEL SYSTEM Fuel tank...
- Page 88 COMPRESSION SYSTEM Cylinder and cylinder head Valve system ·Loose spark plug ·Improperly adjusted valve ·Loose cylinder head clearance ·Broken cylinder head gasket ·Improperly sealed valve ·Broken cylinder gasket ·Improperly contacted ·Worn, damaged or seized cylinder valve and valve seat ·Improper valve timing Piston and cylinder head ·Worn piston ·Broken valve spring...
- Page 89 POOR IDLE SPEED PERFORMANCE Carburetor Air cleaner ·Loose or clogged pilot jet ·Clogged air cleaner element ·Damaged carburetor joint Ignition system ·Improperly tightened carburetor ·Fault spark plug ·Joint clamp hose ·Fault high tension cord ·Fault igniter unit ·Improperly adjusted idle speed ·Fault pick up coil (Pilot screw), (Throttle stop screw) ·Improperly adjusted throttle cable...
- Page 90 Engine oil ·Improperly oil level (low or over oil level) Ignition system ·Faulty spark plug ·Faulty high tension cord ·Faulty ignitor unit ·Faulty pick up coil ·Faulty ignition coil ·Valve system ·Improperly adjusted valve clearance OVER HEATING OVER HEATING Ignition system ·Improperly spark plug gap ·Improper spark plug heat rang ·Faulty ignitor unit...
-
Page 91: Specification
17. SPECIFICATION Drive System Engine Capacities Drive System Chain Transmission 153FMI 4Stroke, Single Fuel capacity 1.59 gal. (6L) Engine Type Front Tire 16X8-7 Cylinder Engine Oil Capacity 0.95qt. (.9L) Rear Tire 16X8-7 Bore x Stroke 52.4X55.5 Tire Pressure Ground Clearance 3.15 in. - Page 92 AT125-B Wire Diagram...
Need help?
Do you have a question about the POWERSPORTS AT125-B and is the answer not in the manual?
Questions and answers