
Related Manuals for NuVinci Harmony 330


Summary of Contents for NuVinci Harmony 330
- Page 1 NuVinci Harmony OWNERS MANUAL HUB GEAR GEBRAUCHSANWEISUNG SCHALTNABE GEBRUIKERSHANDLEIDING VERSNELLINGSNAAF MANUEL D’INSTRUCTIONS DE L’INTERFACE DE MOYEU...
- Page 2 MANU-HRMY-00 TECHNICAL OWNER MANUAL NUVINCI OPTIMIZED CVP WITH HARMONY AUTOMATIC SHIFT SYSTEM 1-30 31-60 61-90 91-120 TECHNICAL OWNER MANUAL...
- Page 3 MANU-HRMY-00 TECHNICAL OWNER MANUAL NUVINCI OPTIMIZED CVP WITH HARMONY AUTOMATIC SHIFT SYSTEM TECHNICAL OWNER MANUAL...
-
Page 4: Table Of Contents
6.3 Installing the Input Speed Ring European Support and Service 6.4 Installing the Output Speed Ring North American Office 2. Harmony 330 operation & care 6.5 Installing the Hub Encoder 2.1 Harmony 330 System (Older Harmony Systems) 2.2 Calibrating the Harmony 330 System 6.6 Harmony Hub Interface... -
Page 5: Nuvinci Cycling Products
The Harmony 330 system offers automatic- Ratio changes occur within the hub smoothly only shifting specifically for the NuVinci via internals that are sealed for life and Optimized N330 CVP. -
Page 6: Harmony
If the Harmony system has been reinstalled, or only with the NuVinci Optimized N330 if system operation is inconsistent or incorrect, CVP, and provides automatic shifting for your Harmony 330 system may need to be the rider at all times. calibrated. "Fast" Cadence Setting •... -
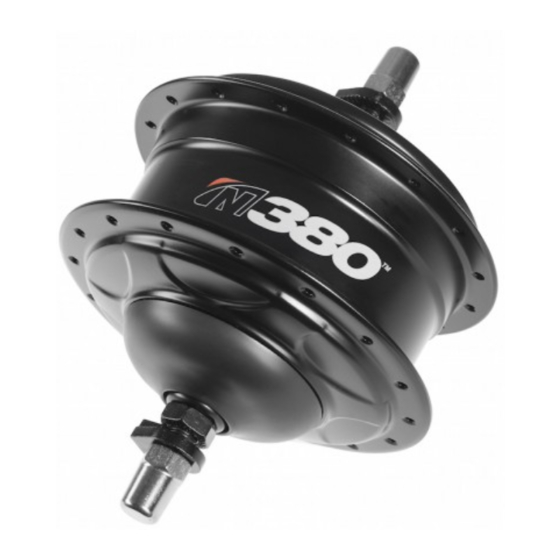
Page 7: Harmony 380 Operation & Care
Mode button System • The Harmony 380/380 system is compatible with NuVinci Optimized N360 If the Harmony system has been reinstalled, or and N380/380 series CVPs (but is if system operation is inconsistent or incorrect, incompatible with the NuVinci Optimized... -
Page 8: Harmony H|Sync Operation & Care
System - General • The Harmony H|Sync system is com- If the Harmony system has been reinstalled, or patible with NuVinci Optimized N360 if system operation is inconsistent or incorrect, and N380/N380 series CVPs (but is your Harmony H|Sync system may need to be incompatible with the NuVinci Optimized calibrated. -
Page 9: Calibrating The Harmony H|Sync System - Bosch Intuvia
HARMONY H|SYNC OPERATION & CARE 4.3 Calibrating the Harmony H|Sync System - Bosch Intuvia If the Harmony system has been reinstalled, or if system operation is inconsistent or incorrect, your Harmony H|Sync system may need to be calibrated. To do this on the Bosch Intuvia system: 1. -
Page 10: Harmony General Care
HARMONY GENERAL CARE 5. Harmony general care 5.1 Disconnecting the Rear Wheel Switch eBike power “off” and disconnect the eBike battery (if possible). 1. Remove the Harmony main connector at the rear wheel Grab the connector at the ribbed location (A) and pull lightly away from the Harmony Hub Interface ... -
Page 11: Fitting The Rear Wheel
HARMONY GENERAL CARE 5.2 Fitting the Rear Wheel 1. Place the rear wheel into the frame, making sure not to obstruct or pinch the Harmony wire harness and main connector. Orient the chain around the Harmony Hub Interface and onto the sprocket. In some cases, it is easiest to remove the chain from the front chain ring to ease rear wheel installation. -
Page 12: Cleaning & Lubrication
Do not use aggressive cleaners Optimized CVP, Nfinity shift system, or Harmony shift system could endanger you, • The NuVinci Optimized CVP is provided and your warranty may become void. with permanent lubrication and the CVP • internals are maintenance-free for the life Please contact your qualified bike dealer of the product. -
Page 13: Harmony Assembly Of Components
HARMONY ASSEMBLY OF COMPONENTS 6. Harmony assembly of components 6.1 Wheelbuilding • The anti-shift retainer (A) provides 135mm spacing, and should remain on the CVP 135 mm during lacing and wheelbuilding. Maximum spoke diameter is #13/ 2.34mm Minimum spoke diameter is #14/ 2.00mm •... -
Page 14: Installing The Sprocket
HARMONY ASSEMBLY OF COMPONENTS 6.2 Installing the Sprocket • 1. Remove the anti-shift retainer (A) by pulling See section 8.1 (for chainline and beltline firmly away from the NuVinci CVP. specifications). • The NuVinci Optimized CVPs are NuVinci Optimized CVPs are compatible with 16 to 28 tooth sprockets. -
Page 15: Installing The Input Speed Ring
HARMONY ASSEMBLY OF COMPONENTS 6.3 Installing the Input Speed Ring 1. Belt compatible Harmony systems come with an Input speed ring (A) that must be secured onto the assembled sprocket snap Ring (B). The twelve magnets in the Input speed ring provide pedal cadence for the Harmony system. -
Page 16: Installing The Output Speed Ring
HARMONY ASSEMBLY OF COMPONENTS 6.4 Installing the Output Speed Ring Belt Compatible Harmony systems require an output speed ring (A) that must be secured over the CVP, flush with the CVP cover (B). Six magnets in the output speed ring provide bicycle speed for the Harmony system. -
Page 17: Installing The Hub Encoder
HARMONY ASSEMBLY OF COMPONENTS 6.5 Installing the Hub Encoder (Older Harmony Systems) Older “chain only” Harmony systems require a color-matched hub encoder (A) that must be secured over the CVP cover. Six magnets in the hub encoder provide bicycle speed for the Harmony system. -
Page 18: Harmony Hub Interface 3
& Orientation Compatibility & Orientation 1. Ensure you have the correct Harmony Hub compatible Interface for your NuVinci Optimized CVP. • N330 CVPs have a yellow dot (A), and are compatible only with HHI3 Hub Interfaces (B, for Harmony systems). -
Page 19: Installing The Harmony Hub Interface
HARMONY ASSEMBLY OF COMPONENTS 6.7 Installing the Harmony Hub Interface 1. Remove the anti-shift retainer, if installed (reference section 6.2) N330 and N360/N380/N380 series CVPs have different shift driver configurations, and are compatible only with the appropriate Harmony Hub Interface. -
Page 20: Installing The Harmony H8 Tm Controller
HARMONY ASSEMBLY OF COMPONENTS 6.8 Installing the Harmony H8 Controller 6.9 Installing the Harmony H3 Controller 1. Install right brake lever according to the 1. The H3 controller mounts to a rubber base manufacturer’s instruction. that wraps around a standard handlebar, adjacent to the grip. -
Page 21: Harmony Electrical Connections
HARMONY ASSEMBLY OF COMPONENTS 6.10 Harmony Electrical Connections An overview of Harmony 330 and Harmony An overview of Harmony H|Sync 380/380 electrical connections is provided electrical connections is provided below: below: H|Sync Harness – Connects directly to eBike system for power and CAN communication Y-Harness –... -
Page 22: Harmony Service Instructions
HARMONY SERVICE INSTRUCTIONS 7. Harmony service instructions 7.1 Servicing or Replacing Freewheel 1. Remove the rear wheel per section 5.1. 2. Remove the Harmony Hub Interface and Harmony input speed ring per reversing section 6.7 and section 6.3. 3. Reference the exploded view in section 8.3. -
Page 23: Removing Brake Configurations
HARMONY SERVICE INSTRUCTIONS 7.2 Removing Brake Configurations Reference exploded view in section 8.3 for numbering and descriptions. Remove the rear wheel per section 5.1. Removing Roller Brake Hardware 1. Remove left hand axle nut (1), left hand no-turn washer (2), and left hand nut (3). 2. -
Page 24: Installing Brake Configurations
HARMONY SERVICE INSTRUCTIONS 7.3 Installing Brake Configurations Reference exploded view in section 8.3 for numbering and descriptions. Installing Roller Brake Hardware Installing Disc Brake Hardware 1. Install the roller brake adapter (7) and 1. Install the disc brake adapter (9) and brake apply a high strength thread locking shield (8) and apply a high strength thread compound (equivalent to Loctite®... -
Page 25: Harmony Technical Data
HARMONY TECHNICAL DATA 8. Harmony technical data 8.1 CVP Specifications Harmony 330 Harmony 380/380 N330 N380/N380 Hub colors Silver or black Hub colors Silver or black Speed ratio Infinitely variable within ratio range Speed ratio Infinitely variable within ratio range Ratio range 330% nominal, 0.5 underdrive to 1.65 overdrive... -
Page 26: Approved Gearing
HARMONY TECHNICAL DATA 8.2 Approved Gearing NuVinci Cycling rear sprocket 58 & above 27 & below 23 & above Approved for any bicycle (including 250W mid-motor-eBikes) Approved for bicycles and front hub motor eBikes (Not approved for mid-motor eBikes) Not approved for any bicycle •... -
Page 27: Exploded View
HARMONY TECHNICAL DATA 8.3 Exploded View (Optional – to be Left (non-drive) side Right (drive) side used with 2.3 mm thick sprockets) Rim brake configuration 15 13 Roller brake configuration Disc brake configuration Axle nut No-turn washer Left hand nut Cupped washer Rim brake cover Brake lock ring... -
Page 28: Cvp & Harmony Shifter Dimension
HARMONY TECHNICAL DATA 8.4 CVP & Harmony Shifter Dimensions H3 controller H8 controller CVP with Harmony Hub Interface CVP with Harmony Hub Interface Harmony Hub Interface 67.5 49.0 CENTERLINE CHAINLINE SCALE 0.500 SPOKE HOLE 16.0 ISO 6 BOLT DISC BRAKE VERSION 32 AND 36 SPOKE CONFIGURATIONS... -
Page 29: Chain Only" And "Belt Compatible
HARMONY TECHNICAL DATA 8.5 “Chain Only” and “Belt Compatible” Harmony Systems 2. How to identify “belt compatible” Harmony 1. How to identify “chain only” Harmony systems systems • • Produced from 2015 - current Produced from 2011 - 2015 • •... -
Page 30: Intellectual Property Notice
(3) European Patents EP2171312; EP2234869; Bosch GmbH. days for a full refund. The NuVinci Optimized Dansk Patent No. 1954959; Spanish Patent components sold herewith are to be used ES2424652; as well as other patents. Other All rights reserved. -
Page 31: Warranty
• apply to you). If you purchased your NuVinci Damage to parts not manufactured by Dealers requesting a warranty claim should • Optimized CVP as part of another product,... -
Page 32: European Support And Service
WARRANTY Limitations of warranty NuVinci CYCLING North American Office THIS LIMITED WARRANTY IS THE SOLE AND EXCLUSIVE European Support and Service WARRANTY MADE BY FALLBROOK WITH RESPECT Fallbrook Technologies Inc. TO THE PRODUCT, AND IS GIVEN IN LIEU OF ANY... - Page 33 MANU-HRMY-00 TECHNISCHES BEDIENUNGSHANDBUCH NUVINCI OPTIMIZED CVP MIT HARMONY AUTOMATIK-SCHALTSYSTEM TECHNISCHES BEDIENUNGSHANDBUCH...
- Page 34 9. Hinweis auf geistiges Eigentum 1.2 Das NuVinci Optimized CVP 6.1 Laufradbau 6.2 Das Ritzel montieren 10. Garantie 2. Harmony 330 Bedienung & Handhabung 6.3 Den Eingabe-Geschwindigkeits-Ring montieren Support und Service in Europa 2.1 Harmony 330 System 6.4 Den Abgabe-Geschwindigkeits-Ring montieren Niederlassung Nordamerika 2.2 Das System Harmony 330 kalibrieren...
-
Page 35: Nuvinci Cycling-Produkte
(Continuously) automatischen Schaltsysteme für Fahrräder. verstellbaren (Variable) Planetengetriebe (Planetary)-Antriebsstrang (CVP), der eine Das Harmony 330 System bietet rein unbegrenzte Anzahl an Gängen innerhalb automatisches Schalten speziell für das seiner breiten Bandbreite bietet. NuVinci Optimized N330 CVP. -
Page 36: Harmony 330 Bedienung & Handhabung
2. Harmony 330 Bedienung & Handhabung 2.1 Harmony 330 System 2.2 Das System Harmony 330 kalibrieren • Das System Harmony 330 ist nur mit dem Wenn das Harmony-System wieder montiert CVP NuVinci Optimized N330 kompatibel wurde oder der Systembetrieb unzuverlässig und ermöglicht dem Fahrer jederzeitiges... -
Page 37: Harmony 380 Bedienung & Handhabung
"Modus"-Taste kalibrieren • Das Harmony 380/380 System ist mit den CVPs der Serien NuVinci Optimized Wenn das System Harmony wieder montiert N360 und N380 kompatibel (es ist wurde oder der Systembetrieb unzuverlässig allerdings nicht kompatibel mit dem CVP oder falsch ist, muss ihr System Harmony NuVinci Optimized N330). -
Page 38: Harmony H|Sync Bedienung & Handhabung
- Allgemein • Das Harmony H|Sync System ist mit den Wenn das System Harmony wieder montiert CVPs der Serien NuVinci Optimized N360 wurde oder der Systembetrieb unzuverlässig und N380 / N380 kompatibel (es ist oder fehlerhaft ist, muss ihr System Harmony allerdings nicht kompatibel mit dem CVP H|Sync eventuell kalibriert werden. -
Page 39: Das Harmony H|Sync System Kalibieren
HARMONY H|SYNC BEDIENUNG & HANDHABUNG 4.3 Das Harmony H|Sync System kalibieren - Bosch Intuvia Wenn das System Harmony wieder montiert 6. Nach dem Abschluss des Vorgangs wurde oder der Systembetrieb unzuverlässig erscheint die Anzeige "Success" auf dem oder fehlerhaft ist, muss ihr System Harmony Display. -
Page 40: Harmony - Allgemeine Handhabung
HARMONY - ALLGEMEINE HANDHABUNG 5. Harmony - Allgemeine Handhabung 5.1 Das Hinterrad ausbauen Schalten Sie Ihr eBike aus und nehmen Sie 3. Das Hinterrad entfernen. den Akku des eBikes ab (wenn möglich). Bei einigen Fahrrädern kann es erforderlich sein, die CVP-Achse und 1. -
Page 41: Das Hinterrad Einbbauen
HARMONY - ALLGEMEINE HANDHABUNG 5.2 Das Hinterrad einbbauen 1. Führen Sie das Hinterrad in den Rahmen ein und achten Sie darauf, dass Sie den Harmony-Kabelstrang und den Hauptanschluss nicht einklemmen oder behindern. Richten Sie die Kette entlang der Harmony- Nabenverbindung und auf dem Ritzel aus. In einigen Fällen ist es am einfachsten, die Kette vom vorderen Kettenring zu entfernen, um das Montieren des... -
Page 42: Reingung & Schmierung
Verwenden Sie keine aggressiven Fragen oder Probleme haben. Reinigungsmittel. • Beachten Sie auch unsere Webseite für • Das CVP NuVinci Optimized ist mit zusätzliche Service-Informationen auf Dauerschmierung ausgestattet und die www.nuvinci.com Innenteile des CVP sind über die gesamte Lebensdauer des Produkts wartungsfrei. -
Page 43: Harmony - Montage Von Einzelteilen
HARMONY MONTAGE VON EINZELTEILEN 6. Harmony - Montage von Einzelteilen 6.1 Laufradbau • Die Anti-Shift-Befestigung (A) bietet 135 mm Abstand und sollte während des 135 mm Einspeichens und Laufradbaus an der CVP bleiben. Der maximale Speichendurchmesser beträgt 2,34 mm Der minimale Speichendurchmesser beträgt 2,00 mm •... -
Page 44: Das Ritzel Montieren
HARMONY MONTAGE VON EINZELTEILEN 6.2 Das Ritzel montieren • 1. Entfernen Sie die Anti-Rutsch Aufnahme Siehe Abschnitt 8.1 (für Spezifikationen zu (A), indem Sie sie kräftig vom CVP NuVinci Kette und Riemen). abziehen. • The NuVinci Optimized CVPs sind mit NuVinci Optimized CVPs sind nicht ... -
Page 45: Den Eingabe-Geschwindigkeits-Ring Montieren
HARMONY MONTAGE VON EINZELTEILEN 6.3 Den Eingabe-Geschwindigkeits-Ring montieren • 1. Riemenkompatible Harmony-Systeme werden So montieren, dass die Magnete zum Ritzel mit einem Eingabe-Geschwindigkeits-Ring gerichtet sind, wie gezeigt. (A) geliefert, der auf dem montierten • Ritzelschnappring (B) gesichert werden Den "Zahn" am Eingabe- muss. -
Page 46: Den Abgabe-Geschwindigkeits-Ring Montieren
HARMONY MONTAGE VON EINZELTEILEN 6.4 Den Abgabe-Geschwindigkeits-Ring montieren Riemenkompatible Harmony-Systeme erfordern 2. Die Befestigungsschraube mit einem einen Abgabe-Geschwindigkeits-Ring (A) der Drehmoment von 1,0 Nm anziehen. auf dem CVP gesichert und bündig mit der CVP-Abdeckung (B) sein muss. Sechs Magnete im Abgabe-Geschwindigkeits-Ring liefern die Fahrradgeschwindigkeit für das Harmony- System. -
Page 47: Den Naben-Kodierer Montieren
HARMONY MONTAGE VON EINZELTEILEN 6.5 Den Naben-Kodierer montieren (Ältere Harmony-Systeme) Ältere Harmony-Systeme nur mit Kette 2. Montieren Sie den Naben-Kodierer, benötigen einen farblich passenden indem Sie ab der Stelle mit der Passfeder Nabenkodierer (A), der über der CVP- beginnen und den Nabenkodierer auf die Abdeckung gesichert werden muss. -
Page 48: Ausrichtung
Harmony HHI3 Naben-Interface N330 Nabe Kompatibilität & Ausrichtung 1. Achten Sie darauf, dass Sie das korrekte kompatible Harmony Naben-Interface für Ihre NuVinci Optimized Nabe haben. • N330 Naben sind mit einem gelben Punkt (A) markiert und sind ausschließlich mit einem Harmony HHI3 Naben-Interface (B, für Harmony 330 Produktgruppen) kompatibel. -
Page 49: Die Harmony-Nabenverbindung Montieren
HARMONY MONTAGE VON EINZELTEILEN 6.7 Harmony Naben-Interface montieren 1. Entfernen Sie die, wenn sie noch montiert ist (vgl. Abschnitt 6.2). Mutter auf, bis sie mit der gezahnten Mutter fluchtet, wie gezeigt. Die CVPs der Serien N330 und N360/N380/N380 haben 4. -
Page 50: Den Harmony H8 Controller Montieren
HARMONY MONTAGE VON EINZELTEILEN 6.8 Den Harmony H8 Controller 6.9 Den Controller Harmony H3 montieren montieren 1. Bauen Sie den rechten Bremshebel den 1. Der Controller H3 wird auf einer Anweisungen des Herstellers entsprechend Gummiunterlage montiert, die neben ein. dem Griff um eine Standard-Lenkerstange gewunden ist. -
Page 51: Harmony Elektrische Verbindungen
6.10 Harmony Elektrische Verbindungen Eine Übersicht über die elektrischen Verbindungen von Eine Übersicht über die elektrischen Verbindungen Harmony 330 und Harmony 380 wird unten gegeben: von Harmony H|Sync ist unten gegeben: H|Sync Strang - direkt ans Elektrofahrrad-System angeschlossen für Strom und CAN-Kommunikaktion Y-Strang - Harmony-Nabenverbindung zum Tretlager (bb)-Bereich H|Sync Anschlüsse (mitgeliefert) -
Page 52: Harmony Wartungsanweisungen
HARMONY WARTUNG 7. Harmony Wartungsanweisungen 7.1 Den Freilauf warten oder reparieren 1. Das Hinterrad gemäß Abschnitt 5.1 8. Montieren Sie das Ritzel und die Harmony- entfernen. Bestandteile gemäß Schritt 2. und 3. oben. 2. Entfernen Sie die Harmony- 9. Montieren Sie das Hinterrad gemäß Nabenverbindung und den Harmony- Abschnitt 5.2. -
Page 53: Bremsen-Konfiguration Entfernen
HARMONY WARTUNG 7.2 Bremsen-Konfiguration entfernen Siehe Explosionszeichnung in Abschnitt 8.3 für Nummerierung und Beschreibung. Das Hinterrad entfernen gemäß Abschnitt 5.1. Entfernen der Metallteile der Entfernen der Metallteile der Klemmrollenbremse Scheibenbremse 1. Entfernen Sie die Achsmutter (1) die linke 1. Entfernen Sie die Achsmutter (1), die linke Nasenscheibe (2) und die linke Mutter (3). -
Page 54: Bremsen Konfigurationen Montieren
HARMONY WARTUNG 7.3 Bremsen Konfigurationen montieren Siehe Explosionszeichnung in Abschnitt 8.3 für Nummerierung und Beschreibung. Montieren der Metallteile der Montieren der Metallteile der Klemmrollenbremse Scheibenbremse 1. Montieren sie den Adapter (7) der 1. Montieren sie den Adapter (9) Klemmrollenbremse und tragen Sie ein der Scheibenbremse und die hochfestes Gewindesicherungs-Präparat Bremsenabschirmung (8) und tragen Sie... -
Page 55: Harmony Technische Daten
HARMONY TECHNISCHE DATEN 8. HARMONY TECHNISCHE DATEN 8.1 CVP-Spezifikationen Harmony 330 Harmony 380/380 Nabe N380/N380 Nabe N330 Naben-Farben Silber oder schwarz Naben-Farben Silber oder schwarz Übersetzung der Geschwindigkeit Stufenlos variabel innerhalb der Bandbreite der Gänge Übersetzung der Geschwindigkeit À variation continue au sein de la plage de rapports Bandbreite der Gänge... -
Page 56: Zugelassene Getriebeübersetzung
HARMONY TECHNISCHE DATEN 8.2 Zugelassene Getriebeübersetzung NuVinci Cycling Hinter-Ritzel 58 & drüber 27 & drunter 23 & drüber Für jedes Fahrrad zugelassen (einschließlich 250 W Elektrofahrräder mit Motor in der Mitte) Zugelassen für Fahrräder und Elektrofahrräder mit Vorder-Naben-Motor (Nicht zugelassen für Elektrofahrräder mit Motor in der Mitte) Für kein Fahrrad zugelassen... -
Page 57: Explosionszeichnung
HARMONY TECHNISCHE DATEN 8.3 Explosionszeichnung (Optional - mit 2,3 Linke (Fahr-)Seite Rechte (Fahr-)Seite mm breiten Ritzeln zu verwenden) Ausstattung mit Felgenbremse 15 13 Ausstattung mit Klemmrollenbremse Ausstattung mit Scheibenbremse Achsmutter Nasenscheibe Linke Mutter Tellerscheibe Abdeckung Felgenbremse Bremsen-Sicherungsring Klemmrollen-Adapter Bremsen-Abschirmung Scheibenbremsen-Adapter Rechte Mutter Nabenverbindung 1Ritzel-Schnappring... -
Page 58: Cvp & Harmony Schaltstück-Abmessungen
HARMONY TECHNISCHE DATEN 8.4 CVP & Harmony Schaltstück-Abmessungen H3 Controller H8 Controller CVP mit Harmony-Nabenverbindung CVP mit Harmony-Nabenverbindung Harmony-Nabenverbindung 67.5 49.0 CENTERLINE CHAINLINE SCALE 0.500 SPOKE HOLE 16.0 ISO 6 BOLT DISC BRAKE VERSION 32 AND 36 SPOKE CONFIGURATIONS AVAILABLE MULTI-GEAR (2.3MM OR 3/32") 26.0... -
Page 59: Nur Kette" Und "Riemen-Kompatibel
HARMONY TECHNISCHE DATEN 8.5 "Nur Kette" und "Riemen- kompatibel" Harmony-Systeme 1. Erkennen von Harmony-Systemen 2. Erkennen von "riemenkompatiblen" "nur mit Kette": Harmony-Systemen: • • Herstellung zwischen 2011 - 2015. Hergestellt ab 2015 bis jetzt • • Harmony-Systeme "nur mit Kette" umfassen "Riemenkompatible"... -
Page 60: Hinweis Auf Geistiges Eigentum
HINWEIS AUF GEISTIGES EIGENTUM 9. Hinweis auf geistiges Eigentum Die NuVinci Optimized N360, Harmony & Harmony H|Sync Steuergeräte Hinweis Geistiges Eigentum Durch Kaufen und/oder Verwenden der Die hiermit verkauften Komponenten NuVinci Fallbrook, NuVinci, N360, Harmony, Komponenten NuVinci Optimized und/oder Optimized, einschließlich, aber nicht Harmony H|Sync und ihre stilisierten Logos des Fahrrades, das sie enthält, stimmen Sie... -
Page 61: Garantie
Einschränkung möglicherweise nicht für Sie). (wie z.B. Ausfallenden, Ketten und müssen über den Händler, bei dem das • Wenn Sie ihr CVP NuVinci Optimized als Freilauf). Ein für kommerzielle Zwecke verwendetes Fahrzeug oder die Fallbrook-Komponente Teil eines anderen Produkts erworben haben, gekauft wurde oder über einen zugelassenen... -
Page 62: Support Und Service In Europa
GARANTIE Wie erhält man Garantieleistungen? NuVinci CYCLING North American Office DIESE BEGRENZTE GARANTIE IST DIE EINZIGE UND European Support and Service AUSSCHLIESSLICHE GARANTIE; DIE VON FALLBROOK Fallbrook Technologies Inc. IM HINBLICK AUF DAS PRODUKT GEGEBEN WIRD UND Cedar Park, Texas 78613 USA... - Page 63 MANU-HRMY-00 TECHNISCHE GEBRUIKERSHANDLEIDING NUVINCI OPTIMIZED CVP MET HARMONY AUTOMATISCH SCHAKELSYSTEEM TECHNISCHE GEBRUIKERSHANDLEIDING...
- Page 64 1.2 The NuVinci Optimized CVP 6.3 Installatie van de input-speed-ring Europese support en onderhoud 6.4 Installatie van de output-speed-ring Kantoor Noord-Amerika 2. Harmony 330 bediening & onderhoud 6.5 Installeren van de naafcodeur 2.1 Harmony 330 System (oudere Harmony-systemen) 2.2 Kalibreren van het Harmony 330-systeem 6.6 Comptabiliteit van de Harmon-naafinterface...
-
Page 65: Nuvinci Cycling - Producten
NuVinci Optimized N360 en de N380/ N380 CVP's mogelijk maakt. De Nfinity-serie van mechanische schakelversnellingsnaven zijn de eerste continu variabele systeem voor fietsen. -
Page 66: Harmony 330 Bediening & Onderhoud
HARMONY 330 GEBRUIK & ONDERHOUD 2. Harmony 330 bediening & onderhoud 2.1 Harmony 330 System 2.2 Kalibreren van het Harmony 330-systeem • Het Harmony 330-systeem is alleen compatibel met de NuVinci Optimized Als het Harmony-systeem opnieuw is N330 CVP, en biedt te allen tijde geïnstalleerd, of als het systeem niet consistent... -
Page 67: Harmony 380 Bediening & Onderhoud
NuVinci Optimized Als het Harmony-systeem opnieuw is N360 en N380/N380 CVP's (maar is geïnstalleerd, of als het systeem niet consistent incompatibel met de NuVinci Optimized of zelfs onjuist werkt, moet uw Harmony N330 CVP). 380-systeem opnieuw worden ingesteld. •... -
Page 68: Harmony H|Sync Gebruik & Onderhoud
NuVinci Optimized N360 geïnstalleerd, of als het systeem niet consistent en N380/N380 CVP's (maar is incom- of zelfs onjuist werkt, moet uw Harmony patibel met de NuVinci Optimized N330 H|Sync- systeem opnieuw worden ingesteld. CVP). Om dit te doen: •... -
Page 69: Kalibreren Van De Harmony H|Sync
HARMONY H|SYNC BEDIENING & ONDERHOUD 4.3 Kalibreren van de Harmony H|Sync Systeem - Bosch Intuvia Als het Harmony-systeem opnieuw is 6. Als het is afgerond, staat er "succes" op de geïnstalleerd, of als het systeem niet consistent display. of zelfs onjuist werkt, moet uw Harmony H|Sync- systeem opnieuw 7. -
Page 70: Harmony Algemeen Onderhoud
HARMONY ALGEMEEN ONDERHOUD 5. Harmony algemeen onderhoud 5.1 Demontage van het achterwiel Schakel de e-Bike “uit” en maak de accu van de e-Bike los (indien mogelijk). 1. Verwijder de hoofdstekker van de Harmony bij het achterwiel Pak de stekker vast waar hij geribbeld is (A) en trek licht weg van de Harmony- naafinterface. -
Page 71: Montage Van Het Achterwiel
HARMONY ALGEMEEN ONDERHOUD 5.2 Montage van het achterwiel 1. Plaats het achterwiel in het frame en let er daarbij op dat het draadloze huls van de Harmony en de hoofdstekker niet klem komen te zitten. Plaats de ketting om de Harmony- naafinterface en op het tandwiel. -
Page 72: Reinigen & Smering
Dit kan tot storingen leiden • doordat er water doordringt. Noodzakelijke werkzaamheden aan de NuVinci Optimized CVP, het • In de winter kunt u uw fiets beter iets Nfinity schakelsysteem of het Harmony- vaker schoonmaken zodat strooizout geen schakelsysteemsysteem mogen schade kan aanbrengen. -
Page 73: Harmony Assemblage Van De Componenten
HARMONY ASSEMBLAGE VAN DE COMPONENTEN 6. Harmony assemblage van de componenten 6.1 Montage van het wiel • The antischakelborgveer (A) zorgt voor 135 mm ruimte en moet op de CVP blijven tijdens 135 mm het vastsnoeren en de montage van het wiel. De maximale spaakdiameter is #13/ 2.34 mm De minimale spaakdiameter is #14/ 2.00 mm •... -
Page 74: Installatie Van Het Tandwiel
HARMONY ASSEMBLAGE VAN DE COMPONENTEN 6.2 Installatie van het tandwiel • 1. Verwijder de transportborging (A) door Zie paragraaf 8.1 (voor specificaties deze stevig van de NuVinci CVP te trekken. betreffende kettinglijn en riemlijn). • De NuVinci Optimized CVP‘s zijn ... -
Page 75: Installatie Van De Input-Speed-Ring
HARMONY ASSEMBLAGE VAN DE COMPONENTEN 6.3 Installatie van de input-speed-ring 1. Riemcompatibele Harmony-systemen zijn uitgerust met een input-speed-ring (A) die moet worden vastgemaakt op de gemonteerde tandwielklemring (B). De twaalf magneten in de input-speed- ring zorgen voor pedaalcadans voor het Harmony-systeem. -
Page 76: Installatie Van De Output-Speed-Ring
HARMONY ASSEMBLAGE VAN DE COMPONENTEN 6.4 Installatie van de output-speed-ring Riemcompatibele Harmony-systemen vereisen een output-speed-ring (A) die moet worden vastgezet op de CVP, parallel aan de CVP- cover (B). Zes magneten in de output-speed. ring bieden fietssnelheid voor het Harmony- systeem. -
Page 77: Installeren Van De Naafcodeur
HARMONY ASSEMBLAGE VAN DE COMPONENTEN 6.5 Installeren van de naafcodeur (oudere Harmony-systemen) Oudere “Alleen ketting” Harmony-systemen vereisen een naafcodeur in dezelfde kleur (A) die moet worden vastgezet op de CVP- cover. Zes magneten in de naafcodeur bieden fietssnelheid voor het Harmony-systeem. ... -
Page 78: Comptabiliteit Van De Harmon-Naafinterface
Hub Interface naafinterface Compatibility & Orientation 1. Zorg ervoor dat u de juiste Harmony compatibel naafinterface hebt voor uw NuVinci Optimized CVP. • N330 CVP's hebben een gele stip (A en zijn alleen compatibel met HHI3- naafinterfaces (B, voor Harmony-systemen). -
Page 79: Installeren Van De Harmony-Naafinterface
HARMONY ASSEMBLAGE VAN DE COMPONENTEN 6.7 Installeren van de Harmony naafinterface 1. Verwijder de transportborging, indien deze 4. Voorzie de rechterasmoer van geïnstalleerd is. (Zie paragraaf 6.2) schroefdraad (C), de gekartelde randen naar buiten gericht, op de as en draai vast ... -
Page 80: Installatie Van De Harmony H8-Controller
HARMONY ASSEMBLAGE VAN DE COMPONENTEN 6.8 Installatie van de Harmony H8- 6.9 Installatie van de Harmony H3- controller controller 1. Monteer de rechterremhendel volgens de 1. De H3-controller wordt op een rubber voorschriften van de fabrikant. basis gemonteerd die om een standaard handgreep heen zit, aan de greep. -
Page 81: Harmony Elektrische Aansluitingen
HARMONY ASSEMBLAGE VAN DE COMPONENTEN 6.10 Harmony elektrische aansluitingen Een overzicht van elektrische aansluitingen Een overzicht van elektrische aansluitingen van de Harmony H|Sync staat hieronder: van de Harmony H|Sync staat hieronder: H|Sync-harnas – Maakt direct aansluiting met e-Bike- systeem voor stroom en CAN-communicatie Y-harnas –... -
Page 82: Harmony Onderhoudsinstructies
HARMONY ONDERHOUDSINSTRUCTIES 7. Harmony onderhoudsinstructies 7.1 Onderhoud of vervanging van het 8. Installeer het tandwiel en de Harmony- componenten volgens stap 2 en stap 3 freewheel hierboven. 1. Verwijder het achterwiel zoals beschreven 9. Installeer het achterwiel zoals beschreven in paragraaf 5.1. in paragraaf 5.2. -
Page 83: Verwijderen Van De Remconfiguraties
HARMONY ONDERHOUDSINSTRUCTIES 7.2 Verwijderen van de remconfiguraties Zie explosietekening in paragraaf 8.3 voor nummers en beschrijvingen. Verwijder het achterwiel zoals beschreven in paragraaf 5.1. Verwijderen van de roller-brake-bevestiging Verwijderen van de schrijfrembevestiging 1. Verwijder de linkerasmoer (1), de linker-no- 1. -
Page 84: Installeren Van Remconfiguraties
HARMONY ONDERHOUDSINSTRUCTIES 7.3 Installeren van remconfiguraties Zie explosietekening in paragraaf 8.3 voor nummers en beschrijvingen. Installeren van roller-brake-bevestiging Installeren van de schrijfrembevestiging 1. Installeer de roller-brake-adapter (7) en 1. Installeer de schrijfremadapter (9) gebruik een sterk schroefborgingsmiddel en remcover (8) en gebruik een sterk (vergelijkbaar met Loctite®... -
Page 85: Harmony Technische Gegevens
HARMONY TECHNISCHE GEGEVENS 8. Harmony technische gegevens 8.1 CVP-specificaties Harmony 330 Harmony 380/380 Naaf N330 Naaf N380/N380 Naafkleuren Zilver of Zwart Naafkleuren Zilver of Zwart Versnellingen Oneindig binnen het versnellingsbereik Versnellingen Oneindig binnen het versnellingsbereik Versnellingsbereik 330% nominaal, 0.5 underdrive tot 1.65 overdrive Versnellingsbereik 380% nominaal, 0.5 underdrive tot 1.9 overdrive... - Page 86 HARMONY TECHNISCHE GEGEVENS 8.2 Goedgekeurde overbrengingsverhoudingen NuVinci Cycling achtertandwiel 58 & boven 27 & beneden 23 & boven Goedgekeurd voor iedere fiets (inclusief 250W middenmotor-e-Bikes) Goedgekeurd voor fietsen en voornaaf-motor- e-Bikes (Niet goedgekeurd voor middenmotor-e-Bikes) Niet goedgekeurd voor iedere fiets •...
-
Page 87: Explosietekening
HARMONY TECHNISCHE GEGEVENS 8.3 Explosietekening (Optioneel- te gebruiken Linker- (niet-aangedreven) kant Rechter- (aangedreven) kant bij tandwielen met een dikte van 2,3 mm) Velgremonfiguratie 15 13 Roller-brake-configuratie Schijfremconfiguratie Asmoer No-turn-onderlegring Linkerasmoer Schuin toelopende vulring Velgremcover Klemring voor rem Roller-brake-adapter Remcover Schijfremcover Rechtermoer Naafinterface Tandwielklemring... -
Page 88: Cvp & Harmony Draaischakelaardimensies
HARMONY TECHNISCHE GEGEVENS 8.4 CVP & Harmony draaischakelaardimensies H3 controller H8 controller CVP met Harmony Hub-naafinterface CVP met Harmony Hub-naafinterface Harmony-naafinterface 67.5 49.0 CENTERLINE CHAINLINE SCALE 0.500 SPOKE HOLE 16.0 ISO 6 BOLT DISC BRAKE VERSION 32 AND 36 SPOKE CONFIGURATIONS AVAILABLE MULTI-GEAR... -
Page 89: Harmony -Systemen
HARMONY TECHNICAL DATA 8.5 “Alleen ketting”- en “riemcompatibele” Harmony-systemen 2. “Riemcompatibele" Harmony-systemen 1. Hoe u “alleen ketting” Harmony-systemen identificeren. kunt identificeren. • • Geproduceerd vanaf 2015-heden. Geproduceerd van 2011 - 2015. • • “Riemcompatibele” Harmony-systemen “Alleen ketting” -Harmony-systemen bevatten een output-speed-ring (B) die op bevatten een naafcodeur (A) die op de de CVP-cover gemonteerd wordt, altijd in vlakke zijde van de CVP-cover wordt... -
Page 90: Kennisgeving Betreffende Intellectueel Eigendom
Deens octrooinr. 1954959; Spaans octrooinr. Robert Bosch GmbH overeenstemming met de bijgeleverde ES2424652; en andere octrooien. Andere instructies. U stemt ermee in om de NuVinci Amerikaanse en buitenlandse octrooi- Alle rechten voorbehouden © 2015 Optimized-componenten niet te gebruiken aanvragen zijn ingediend voor voor een ander doel, Fallbrook Technologies Inc. -
Page 91: Garantie
(zoals uitvaleinden, wordt voor commerciële doeleinden. NuVinci Optimized-componenten. Stuur het op u van toepassing is) Als u uw NuVinci kettingen en freewheels). Fallbrook-component naar de dealer samen • Schade aan het product:... -
Page 92: Europese Support En Onderhoud
WARRANTY Beperkingen van de garantie NuVinci CYCLING North American Office DEZE BEPERKTE GARANTIE IS DE ENIGE EN EXCLUSIEVE European Support and Service GARANTIE DIE FALLBROOK GEEFT MET BETREKKING Fallbrook Technologies Inc. TOT HET PRODUCT EN WORDT VERSTREKT TER Cedar Park, Texas 78613 USA Popovstraat 12 VERVANGING VAN ELKE ANDERE GARANTIE. - Page 93 MANU-HRMY-00 MANUEL TECHNIQUE D’UTILISATION ENGRENAGE PLANÉTAIRE À VARIATION CONTINUE (CVP) NUVINCI OPTIMIZED AVEC SYSTÈME DE CHANGEMENT DE VITESSES AUTOMATIQUE HARMONY MANUEL TECHNIQUE D’UTILISATION...
- Page 94 1.2 Le CVP NuVinci Optimized 6.4 Installation du plateau de vitesse de sortie Bureau nord-américain 6.5 Installation de l'encodeur du moyeu 2. Harmony 330 – Utilisation & entretien (anciens systèmes Harmony) 2.1 Système Harmony 330 6.6 Interface de moyeu Harmony 2.2 Calibrage du système Harmony 330...
-
Page 95: Produits Nuvinci Cycling
Les passages de vitesses s'effectuent en aux vélos. douceur à l'intérieur du moyeu par le biais de dispositifs internes scellés à vie, qui ne Le système Harmony 330 offre un nécessitent aucun entretien. changement de vitesses exclusivement automatique pour le CVP NuVinci Optimized N330. -
Page 96: Harmony 330 - Utilisation & Entretien
Si le système Harmony a été réinstallé ou si uniquement compatible avec le CVP son fonctionnement est irrégulier ou incorrect, NuVinci Optimized N330 et fournit il se peut que votre système Harmony 330 au cycliste un changement de vitesses nécessite un calibrage. Cadence « Rapide »... -
Page 97: Harmony 380 - Utilisation & Entretien
Le système Harmony 380/380 compatible avec les CVP des gammes Si le système Harmony a été réinstallé ou si NuVinci Optimized N360 et N380 (mais son fonctionnement est irrégulier ou incorrect, pas avec le CVP NuVinci Optimized il se peut que votre système Harmony N330). -
Page 98: Harmony H|Sync - Utilisation & Entretien
H|Sync - Généralités • Le système Harmony H|Sync est compatib- Si le système Harmony a été réinstallé ou si le avec les CVP des gammes NuVinci Op- son fonctionnement est irrégulier ou incorrect, timized N360 et N380/N380 (mais pas il se peut que votre système Harmony H|Sync avec le CVP NuVinci Optimized N330). -
Page 99: Calibrage Du Système Harmony H|Sync - Bosch Intuvia
HARMONY H|SYNC - UTILISATION & ENTRETIEN 4.3 Calibrage du système Harmony H|Sync - Bosch Intuvia Si le système Harmony a été réinstallé ou si 5. Tout en continuant à pédaler, appuyez une son fonctionnement est irrégulier ou incorrect, fois sur le bouton [ ] (B) pour entamer le il se peut que votre système Harmony H|Sync calibrage... -
Page 100: Harmony - Entretien Général
HARMONY - ENTRETIEN GÉNÉRAL 5. Harmony - Entretien général 5.1 Démontage de la roue arrière Éteignez le vélo électrique et déconnectez la 3. Enlevez la roue arrière. batterie (si possible). Sur certains modèles, il est parfois nécessaire d'effectuer une rotation de l'axe 1. -
Page 101: Montage De La Roue Arrière
HARMONY - ENTRETIEN GÉNÉRAL 5.2 Montage de la roue arrière 1. Placez la roue arrière dans le cadre et assurez-vous que le faisceau de câbles ainsi que le connecteur principal du système Harmony ne soient ni entravés, ni coincés. Ajustez la chaîne autour de l'interface de moyeu Harmony et sur le pignon. -
Page 102: Nettoyage & Lubrification
• Réaliser des travaux non autorisés sur le • N'employez pas de détergents agressifs. CVP NuVinci Optimized, le système de changement de vitesses Nfinity ou le • Le CVP NuVinci Optimized bénéficie d'une système de changement de vitesses... -
Page 103: Harmony - Assemblage Des Composants
HARMONY - ASSEMBLAGE DES COMPOSANTS 6. Harmony - Assemblage des composants 6.1 Construction de la roue • Le disque de retenue anti-glissement (A) fournit un espace de 135 mm et doit 135 mm rester sur le CVP durant le frettage et la construction de la roue. -
Page 104: Installation Du Pignon
• Les CVP NuVinci Optimized sont compatibles avec les Les CVP NuVinci Optimized ne sont pignons de 16 à 28 dents. pas compatibles avec les chaînes et Voir section 8.1 pour les exigences en pignons de 1/8 pouce (3,18 mm) matière de rapports de pignon et les... -
Page 105: Installation Du Plateau De Vitesse D'entrée
HARMONY - ASSEMBLAGE DES COMPOSANTS 6.3 Installation du plateau de vitesse d'entrée • 1. Les systèmes Harmony compatibles avec Montez-le en ayant soin d'orienter les une courroie sont pourvus d'un plateau de aimants vers le pignon, tel qu'illustré. vitesse d'entrée (A) à fixer sur la bague •... -
Page 106: Installation Du Plateau De Vitesse De Sortie
HARMONY - ASSEMBLAGE DES COMPOSANTS 6.4 Installation du plateau de vitesse de sortie • Les systèmes Harmony compatibles avec une Positionnez la partie du dispositif de courroie requièrent un plateau de vitesse de fixation entre les orifices des rayons et sortie (A) à... -
Page 107: Installation De L'encodeur Du Moyeu
HARMONY - ASSEMBLAGE DES COMPOSANTS 6.5 Installation de l'encodeur du moyeu (anciens systèmes Harmony) Les anciens systèmes Harmony « à chaîne 2. Installez l'encodeur du moyeu en uniquement » nécessitent un encodeur de commençant par l'emplacement de la moyeu de couleur assortie (A) à fixer sur le clavette et placez-le sur la protection côté... -
Page 108: Interface De Moyeu Harmony
& Orientation 1. Assurez-vous d'être en possession de compatible l'interface de moyeu Harmony adapté à votre CVP NuVinci Optimized. • Les CVP N330 présentent un point jaune (A) et sont uniquement compatibles avec les interfaces de moyeu HHI3 (B, pour les systèmes Harmony). -
Page 109: Installation De L'interface De Moyeu Harmony
HARMONY - ASSEMBLAGE DES COMPOSANTS 6.7 Installation de l'interface de moyeu Harmony 1. Enlevez le disque de retenue anti- 3. Lorsque l'angle d'installation est aligné, glissement le cas échéant (voir section 6.2). enfilez entièrement l'interface de moyeu Harmony sur la commande de changement ... -
Page 110: Installation Du Régulateur Harmony H8
HARMONY - ASSEMBLAGE DES COMPOSANTS 6.8 Installation du régulateur Harmony H8 6.9 Installation du régulateur Harmony H3 1. Placez le levier de frein droit conformément 1. Le régulateur H3 est monté sur une base en aux indications du fabricant. caoutchouc qui s'enroule autour d'un guidon standard, juste à... -
Page 111: Harmony - Raccordements Électriques
Vous trouverez ci-dessous un aperçu des raccordements électriques Vous trouverez ci-dessous un aperçu des raccordements électriques des systèmes Harmony 330 et Harmony 380/380 du système Harmony H|Sync : Câblage H|Sync – directement relié au système du vélo électrique pour l'alimentation et la communication CAN Câblage en Y –... -
Page 112: Harmony - Instructions Pour L'entretien
HARMONY - INSTRUCTIONS DE SERVICE 7. Harmony - Instructions pour l’entretien 7.1 Entretien ou remplacement de la roue libre 7. Installez les nouveaux composants / les 1. Enlevez la roue arrière conformément à la composants réparés conformément à la section 5.1. vue éclatée présentée dans la section 5.3. -
Page 113: Démontage Des Freins
HARMONY - INSTRUCTIONS DE SERVICE 7.2 Démontage des freins Consultez la vue éclatée dans la section 8.3 pour la numérotation et les descriptions. Enlevez la roue arrière tel que décrit dans la section 5.1. Démontage du matériel d'un frein à rouleau Démontage du matériel d'un frein à... -
Page 114: Montage Des Freins
HARMONY - INSTRUCTIONS DE SERVICE 7.3 Montage des freins Consultez la vue éclatée dans la section 8.3 pour la numérotation et les descriptions. Montage du matériel d'un frein à rouleau Montage du matériel d'un frein à disque 1. Installez l'adaptateur du frein à rouleau (7) 1. -
Page 115: Harmony - Données Techniques
HARMONY - DONNÉES TECHNIQUES 8. Harmony - Données techniques 8.1 Spécifications du CVP Harmony 330 Harmony 380/380 Moyeu N380/380 Moyeu N330 Couleur du moyeu Argenté ou noir Couleur du moyeu Argenté ou noir Rapport de vitesse À variation continue au sein de la plage de rapports Rapport de vitesse À... -
Page 116: Engrenages Autorisés
HARMONY - DONNÉES TECHNIQUES 8.2 Engrenages autorisés Pignon arrière NuVinci Cycling 58 et plus 27 et moins 23 et plus Autorisé pour n'importe quel vélo (y compris les vélos électriques avec moteur intermédiaire de 250 W) Autorisé pour les vélos et vélos électriques dotés d'un moteur sur le moyeu avant (non autorisé... -
Page 117: Vue Éclatée
HARMONY - DONNÉES TECHNIQUES 8.3 Vue éclatée (facultatif – á utiliser Côté gauche Côté droite avec des pignons deto (Côté opposé á (Côté entraînement) 2.3 mm d'epaisseur) l'entraînement) Frein sur jante 15 13 Frein à rouleau Frein à disque Écrou d'axe Rondelle fixe Écrou gauche Rondelle bombée... -
Page 118: Dimensions Du Cvp Et Du Dérailleur Harmony
HARMONY - DONNÉES TECHNIQUES 8.4 Dimensions du CVP et du dérailleur Harmony Régulateur H3 Régulateur H8 CVP avec interface de moyeu Harmony CVP avec interface de moyeu Harmony Interface de moyeu Harmony 67.5 49.0 CENTERLINE CHAINLINE SCALE 0.500 SPOKE HOLE 16.0 ISO 6 BOLT DISC BRAKE... -
Page 119: Et « Compatible Avec Une Courroie
HARMONY - DONNÉES TECHNIQUES 8.5 Systèmes Harmony « À chaîne uniquement » et « Compatible avec une courroie » 2. Comment identifier les systèmes Harmony « compatibles avec une courroie » 1. Comment identifier les systèmes Harmony « à chaîne uniquement » •... -
Page 120: Droits De Propriété Intellectuelle
En achetant et/ou en utilisant ces composants ces composants, en vertu de la législation Les produits Harmony et H|Sync NuVinci Optimized et/ou le vélo qui les en vigueur, Fallbrook Technologies Inc. et comprennent également des logiciels, des intègre, vous acceptez les conditions ses titulaires de permis bénéficieront d'une... -
Page 121: Garantie
: technique et manuel de l'utilisateur du produit ; variable en continu (CVP) NuVinci Optimized N360, du système Harmony et du système -survenant au cours de l’expédition du • et toute unité de commande Harmony ou L'usure normale des pièces sujettes à... -
Page 122: Service Après-Vente En Europe
GARANTIE Limitations de la garantie NuVinci CYCLING North American Office CETTE GARANTIE LIMITÉE EST LA SEULE ET European Support and Service UNIQUE GARANTIE ACCORDÉE PAR FALLBROOK Fallbrook Technologies Inc. CONCERNANT CE PRODUIT ET REMPLACE TOUTE Cedar Park, Texas 78613 USA Popovstraat 12 AUTRE GARANTIE.
Need help?
Do you have a question about the Harmony 330 and is the answer not in the manual?
Questions and answers