Table of Contents
Advertisement
Quick Links
Advertisement
Table of Contents

Subscribe to Our Youtube Channel
Related Manuals for Dieter Knoll Collection DKS38024XK


Summary of Contents for Dieter Knoll Collection DKS38024XK
- Page 1 User Manual Steam oven DKS38024XK...
-
Page 2: Table Of Contents
CONTENTS Safety information Automatic programmes Safety instructions Using the accessories Installation Additional functions Product description Hints and tips Control panel Care and cleaning Before first use Troubleshooting Daily use Energy efficiency Clock functions Subject to change without notice. SAFETY INFORMATION Before the installation and use of the appliance, carefully read the supplied instructions. -
Page 3: Safety Instructions
Children shall not carry out cleaning and user maintenance • of the appliance without supervision. General Safety Only a qualified person must install this appliance and • replace the cable. WARNING: The appliance and its accessible parts • become hot during use. Care should be taken to avoid touching heating elements. - Page 4 • Keep the minimum distance from other • All electrical connections should be appliances and units. made by a qualified electrician. • Install the appliance in a safe and • The appliance must be earthed. suitable place that meets installation •...
- Page 5 • Do not let sparks or open flames to come in contact with the appliance Cable types applicable for installation or when you open the door. replacement for Europe: • Do not put flammable products or items H07 RN-F, H05 RN-F, H05 RRF, H05 VV- that are wet with flammable products F, H05 V2V2-F (T90), H05 BB-F in, near or on the appliance.
-
Page 6: Installation
Internal lighting • Before maintenance, deactivate the appliance and disconnect the mains WARNING! Risk of electric plug from the mains socket. shock. • Make sure the appliance is cold. There is the risk that the glass panels can • The type of light bulb or halogen lamp break. - Page 7 Building In min. 550 min. 560 min. 550 min. 560 Securing the oven to the cabinet...
-
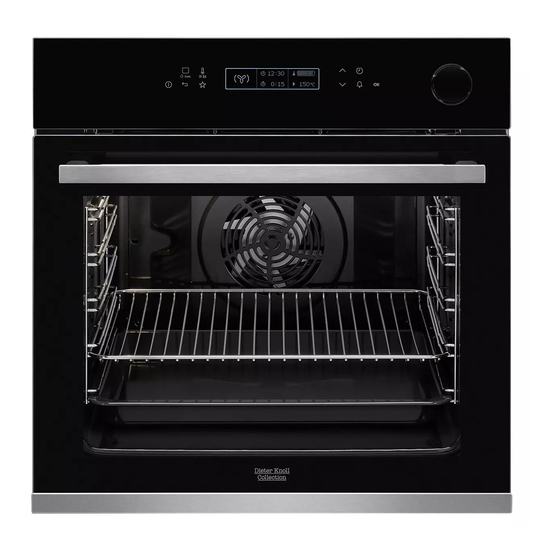
Page 8: Product Description
PRODUCT DESCRIPTION General overview Control panel Electronic programmer Water drawer Heating element Lamp Cavity embossment Shelf support, removable Draining pipe Water outlet valve Shelf positions Steam inlet Accessories For cakes and biscuits. To bake and roast or as a pan to collect fat. •... - Page 9 Sensor Function Comment field Back To go back one level in the menu. To show the main menu, touch the field for 3 seconds. Temperature se‐ To set the temperature or show the current temper‐ lection/ Fast ature in the oven. Press the field for 3 seconds to Heat Up turn on or off the function: Fast Heat Up.
-
Page 10: Before First Use
Symbol Function End Time The display shows when the cooking time is complete. Temperature The display shows the temperature. Time Indication The display shows how long the heat‐ ing function works. Press at the same time to reset the time. Heat-up Indicator The display shows the temperature in the oven. - Page 11 Submenu for: Basic Settings 2. Press to select the menu option. Symbol / Menu Description 3. Press to move to the submenu or item accept the setting. Sets the current time At each point you can go back on the clock. Set Time of Day to the main menu with When ON, the display...
- Page 12 Symbol / Menu Description Heating func‐ Application item tion Activates and deacti‐ To bake and roast food vates the alarm tones. on one shelf position. Alarm/Error Tones Conventional Cooking Activation / deactiva‐ tion code: 2468. To prepare tender, suc‐ DEMO mode culent roasts.
- Page 13 Heating func‐ Application Heating func‐ Application tion tion To make convenience To rise the yeast food (e.g. french fries, dough before baking. potato wedges or Frozen Foods Dough Proving spring rolls) crispy. To preheat plates for To grill flat food and to serving.
- Page 14 Dish Dish Chicken wings, Hare fresh • Leg of hare • Saddle of hare Chicken wings, fro‐ Venison • Haunch of veni‐ Chicken Game Chicken legs, fresh • Saddle of veni‐ Chicken legs, fro‐ Chicken, 2 halves Roast game Food Category: Meat Food Category: Oven Dishes Dish Dish...
- Page 15 Food Category: Cake / Pastry Dish Dish Short pastry flan Ring cake base Flan base Apple cake, cov‐ Sponge mixture ered flan base Sponge cake Short pastry fruit Apple pie flan Cheese cake, tin Fruit flan Sponge mixture fruit flan Brioche Yeast dough Madeira cake...
- Page 16 6. Set the temperature. WARNING! Wait a minimum of 7. Press to confirm. 60 minutes after each use of the steam cooking in order to Setting a steam function prevent hot water from exiting the water outlet valve. The water drawer cover is in the control panel.
-
Page 17: Clock Functions
Do not use the drained water to fill the water tank again. Heat-up indicator When you turn on a heating function, the bar on the display comes on. The bar shows that the temperature increases. When temperature is reached the buzzer sounds 3 times and the bar flashes and then disappears. -
Page 18: Automatic Programmes
• The set temperature is more than 80 If you use the clock functions: °C. Duration, End Time, the oven • The function: Duration is set. turns off the heating elements The function: Heat + Hold keeps prepared after 90 % of the set time. The food warm at 80 °C for 30 minutes. -
Page 19: Using The Accessories
Recipes with Weight Automatic The automatic programme starts. 6. You can change the weight at any This function automatically calculates the time. Press to change the roasting time. To use it, it is necessary to weight. input the food weight. 7. - Page 20 Accessories for steam cooking Injector tube (C) The dietary baking dish for steam cooking functions The dish consists of a glass bowl, a lid with a hole for the injector tube (C) and a steel grill to put at the bottom of the baking dish.
- Page 21 • Do not use the baking dish on a hot cooking surface. 2. Put the baking dish onto the second shelf position from the bottom. 3. Put the other end of the injector tube into the steam inlet. • Do not clean the baking dish with abrasives, scourers and powders.
-
Page 22: Additional Functions
2. Put the baking dish onto the first or WARNING! Be careful when second shelf position from the bottom. you use the injector when the Make sure that you do not crush the oven operates. Always use injector tube or let it touch a heating oven gloves to touch the element on the top of the oven. - Page 23 5. Press again and again until the Activating the programme display shows: Set + Go. 1. Turn on the oven. 6. Press to confirm. 2. Select the menu: Favourites. Press any symbol (except for ) to start 3. Press to confirm. the function: Set + Go.
-
Page 24: Hints And Tips
Safety thermostat – if the oven is turned off and you set the function: Minute Minder. When Incorrect operation of the oven or the function ends, the display goes defective components can cause back to the night brightness. dangerous overheating. To prevent this, the oven has a safety thermostat which Cooling fan interrupts the power supply. - Page 25 CAKES / PASTRIES (°C) (min) Tarts, preheating is 30 - 40 Cake mould, Ø 26 cm not needed Fruit cake, preheating 80 - 90 Cake mould, Ø 26 cm is not needed Panettone 150 - 160 70 - 100 Cake mould, Ø 20 cm Plum cake 40 - 50 Bread tin...
- Page 26 MEAT FISH (°C) (min) (°C) (min) Roast beef, 65 - 75 Tuna, 4 - 6 fil‐ 35 - 50 well done, 1 kg lets, 1.2 kg Hake 20 - 30 Use the second shelf position. Cooking in the dietary baking dish Use the function: True Fan + Steam.
- Page 27 MEAT SIDE DISHES (min) (min) Poached chicken breast 25 - 35 Boiled potatoes, quar‐ 35 - 45 tered Cooked ham 55 - 65 Polenta 40 - 45 Kasseler 80 - 100 Unpeeled potatoes, medi‐ 50 - 60 Set the temperature to 130°C. Steam Regenerating FISH Preheat the empty oven.
- Page 28 CAKES Conventional True Fan Cook‐ Cooking (min) (°C) (°C) Shortbread 3 (2 20 - 30 Cake mould dough and 4) Buttermilk 80 - Cake mould, Ø 26 cheesecake Strudel 60 - 80 Baking tray Jam tart 30 - 40 Cake mould, Ø 26 Christmas 90 - Cake mould, Ø...
- Page 29 Preheat the empty oven. BREAD AND PIZZA Conventional Cook‐ True Fan Cooking (min) (°C) (°C) White bread, 60 - 70 1 - 2 pieces, 0.5 kg each Rye bread, 30 - 45 Bread tin preheating is not needed Bread rolls, 6 2 (2 and 25 - 40 Baking tray...
- Page 30 MEAT Conventional True Fan Cooking Cooking (min) (°C) (°C) Beef 50 - 70 Pork 90 - 120 Veal 90 - 120 English roast beef, rare 50 - 60 English roast beef, medium 60 - 70 English roast beef, well done 70 - 75 MEAT Conventional Cook‐...
- Page 31 FISH Conventional True Fan Cook‐ Cooking (min) (°C) (°C) Trout / Sea bream, 3 - 4 fish 40 - 55 Tuna / Salmon, 4 - 6 fillets 35 - 60 Bread Baking Preheat the empty oven. Use the second shelf position unless specified otherwise. BREAD (kg) (°C)
- Page 32 PIZZA (°C) (min) Pizza, thin crust 200 - 220 20 - 30 Baking tray Mini pizza 200 - 220 15 - 20 Baking tray Apple pie 150 - 170 50 - 70 Cake mould, Ø 20 cm Tarts 170 - 190 35 - 50 Cake mould, Ø...
- Page 33 Turbo Grilling Preheat the empty oven. VEAL Use the first or the second shelf position. To calculate the roasting time multiple the time given in the table below by the centimetres of thickness of the fillet. (°C) (min) Roast veal, 1 kg 160 - 90 - 120 BEEF...
- Page 34 Slow Cooking This function allows you to prepare lean, POULTRY tender meat and fish. It is not applicable for: poultry, fatty roast pork, pot roast. . 1. Sear the meat for 1 - 2 minutes on each side in a pan over high heat. (°C) (min) 2.
- Page 35 (kg) Defrosting Further defrost‐ time (min) ing time (min) Meat 100 - 140 20 - 30 Turn halfway through. 90 - 120 Cream 2 x 0.2 80 - 100 10 - 15 Cream can also be whipped when still slightly frozen in places.
- Page 36 VEGETABLES VEGETABLES (min) (min) (°C) Cooking Continue Peppers 60 - 70 5 - 6 time until to cook at simmer‐ 100 °C Vegetables for 60 - 70 5 - 6 soup Carrots 50 - 60 5 - 10 Mushrooms 50 - 60 6 - 8 Cucumbers 50 - 60...
- Page 37 Ramekins Pizza pan Baking dish Flan base tin Ceramic Dark, non-reflective Dark, non-reflective 8 cm diame‐ Dark, non-reflective 28 cm diameter 26 cm diameter ter, 5 cm 28 cm diameter height Moist Fan Baking For the best results follow suggestions listed in the table below.
- Page 38 (°C) (min) Poached meat, baking tray or dripping 35 - 45 0.25 kg Shashlik, 0.5 kg baking tray or dripping 25 - 30 Cookies, 16 baking tray or dripping 20 - 30 pieces Macaroons, 24 baking tray or dripping 25 - 35 pieces Muffins, 12 baking tray or dripping...
- Page 39 (°C) (min) Small True Fan Baking 150 - 20 - 35 cakes, Cooking tray 20 per tray Small True Fan Baking 150 - 20 - 35 cakes, Cooking tray 20 per tray Apple Conven‐ Wire 70 - 90 pie, 2 tional shelf tins...
-
Page 40: Care And Cleaning
(°C) (min) Toast, 4 Grill Wire max. 2 - 3 minutes Preheat the oven shelf first side; 2 - for 3 minutes. pieces 3 minutes second side Beef Grill Wire max. 20 - 30 Put the wire shelf burger, shelf on the fourth lev‐... - Page 41 Stainless steel or aluminium Install the removed accessories in the ovens opposite sequence. Clean the oven door with a damp cloth or Cleaning the water tank sponge only. Dry it with a soft cloth. WARNING! Do not put water Do not use steel wool, acids or abrasive into the water tank during the materials as they can damage the oven cleaning procedure.
- Page 42 CALCIUM QUANTITY TABLE INDICATED FROM W.H.O. (World Health Organization) Calcium de‐ Water hardness Water classifi‐ Run decalcifi‐ posit cation cation every (French de‐ (German de‐ grees) grees) 0 - 60 mg/l 0 - 6 0 - 3 Sweet of soft 75 cycles - 2.5 months 60 - 120 mg/l...
- Page 43 6. Put the door on a soft cloth on a stable surface. 7. Hold the door trim (B) on the top edge of the door at the two sides and push inwards to release the clip seal. 8. Pull the door trim to the front to 4.
-
Page 44: Troubleshooting
Replacing the lamp WARNING! Risk of electric shock. The lamp can be hot. 1. Turn off the oven. Wait until the oven is cooled down. 2. Disconnect the oven from the mains. 3. Put a cloth on the bottom of the cavity. CAUTION! Always hold the halogen lamp with a cloth to prevent grease residue from... - Page 45 Problem Possible cause Remedy The oven does not heat up. The fuse is blown. Make sure that the fuse is the cause of the malfunc‐ tion. If the fuse is blown again and again, contact a qualified electrician. The lamp does not operate. The lamp is defective.
-
Page 46: Energy Efficiency
......... Serial number (S.N.) ......... ENERGY EFFICIENCY Product Information Sheet Product information according to EU 65-66/2014 Supplier's name Dieter Knoll Collection Model identification DKS38024XK 949494260 Energy Efficiency Index 81.2 Energy efficiency class Energy consumption with a standard load, conventional 0.93 kWh/cycle... - Page 47 the heating elements automatically turn off meal warm. The residual heat indicator or earlier in some oven functions. temperature appears on the display. The fan and lamp continue to operate. Cooking with the lamp off When you turn off the oven, the display Turn off the lamp during cooking.
- Page 48 867355776-A-262019...
Need help?
Do you have a question about the DKS38024XK and is the answer not in the manual?
Questions and answers