Subscribe to Our Youtube Channel
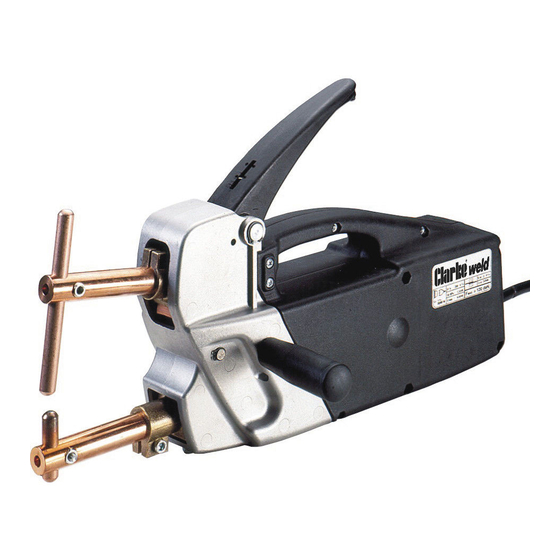
Summary of Contents for Clarke CSW6T
- Page 1 SPOT WELDER SPOT WELDER Models CSW6T & CSW13T Part Nos. 6030005 & 60300010 0204 OPERATING & MAINTENANCE INSTRUCTIONS...
- Page 2 © Copyright Clarke International. All rights reserved. October, 2001...
-
Page 3: Table Of Contents
GUARANTEE This CLARKE product is guaranteed against faulty manufacture for a period of 12 months from the date of purchase. Please keep your receipt as proof of purchase. This guarantee is invalid if the product is found to have been abused or tampered with in any way, or not used for the purpose for which it was intended. -
Page 4: Electromagnetic Interference (Emc)
ELECTROMAGNETIC INTERFERENCE (EMC) Whilst this unit complies with EMC regulations, the user is responsible for installing and using the welding equipment according to the manufacturers instructions. If electromagnetic disturbances are detected then it shall be the responsibility of the user of the welding equipment to resolve the situation. In some cases this remedial action may be as simple as earthing the welding circuit, see ‘Note’. - Page 5 take additional precautions such as filtering of the mains supply. Consideration should be given to shielding the supply cable of permanently installed welding equipment, in metallic conduit or equivalent. Shielding should be electrically continuous throughout its length. The shielding should be connected to the welding power source so that good electrical contact is maintained between the conduit and the welding power source enclosure.
-
Page 6: Safety Precautions
✔ Ensure the working area is clean and well lit. NEVER work in your own shadow. ✔ Use only original CLARKE spare parts and accessories. Improper accessories could be hazardous. ✔ Keep proper footing and balance at all times. -
Page 7: Features
120mm Electrode Arms and standard electrodes are provided. • An eye bolt may be fitted to the machine (see your Clarke dealer), for use in supporting the machines weight when repetitive welds are required (see your Clarke dealer). IMPORTANT! When using the Eye Bolt, Take care NOT to screw... -
Page 8: Unpacking And Parts Identification
UNPACKING & PARTS IDENTIFICATION Unpack and lay out the components, checking against the following list. Please report any damage which may have occurred during transit, to your CLARKE dealer immediately. Welder complete. 2 x Hex. Wrenches - D 1 x Handle - A... -
Page 9: Assembly
ASSEMBLY Screw the handle (2) into the threaded hole provided on either the left or right hand side, as desired. Insert the Electrode Arms, to their fullest extent, into their receptacles and nip up the clamps using the Hex. wrench provided...do not fully tighten at this stage. NOTE: Whenever removing and replacing the holders, ensure they, and the receptacles, are clean and free from oil, grease or other contaminants. -
Page 10: Preparation For Use
Pressure is also dependant upon the length of electrode arms..the longer the arms the lighter the pressure setting. This must be taken into account if/when replacing the electrode arms with any of those available from you Clarke dealer, (see Accessories). -
Page 11: Additional Safety Precautions For Spot Welding
Ensure the electrode tips are correctly formed. They should be checked regularly when welding to ensure they make perfect contact with the work. A Spot Welding Tip dresser is available from your Clarke dealer, please call for details. •... -
Page 12: Maintenance
a. Ensure the work is perfectly clean b. Ensure the welding parameters are all correct. Ensure the microswitch is actually pressed, and held for the duration of the weld. d. Ensure the thermal overload has not been activated. Fig.7 NOTE: THERMAL OVERLOAD is a protection device which operates when the electrical circuits have overheated. -
Page 13: Accessories
ACCESSORIES The following accessories are available from your Clarke dealer. Description Throat Part No. Electrodes ‘L’ 120mm 6030105 Electrodes ‘L’ 250mm 6030107 Electrodes ‘L’ 500mm 6030109 External Profile 6030111 Electrodes Internal Profile 6030113 Electrodes Electrodes 120mm 6030115 Electrodes 350mm 6030117... -
Page 14: Wiring Diagrams
SCHEMATIC WIRING DIAGRAMS CSW6T CSW13T... -
Page 15: Spare Parts
SPARE PARTS CSW6T No. Description Part Number Bush TT322518 Potentiometer (Adjuster) Knob TT112299 Timer PCB TT114236 Microswitch TT122393 Mains Cable TT132104 Transformer TT169152 Adjuster Screw TT121263 Operating Lever TT322512 Pivot Pin TT482887 See Page 13 for full range of Arms... -
Page 16: Spare Parts
SPARE PARTS CSW13T No. Description Part Number Screw TT113908 Control PCB TT114070 Power PCB TT114085 Microswitch TT122393 Mains Cable TT132104 Transformer TT169034 Cable Kit - Bushing, Ring Nut TT990046 Pivot Pin TT482887 Operating Lever TT322512 Adjuster Screw TT212163 Upper Arm Clamp TT522020 Lower Arm Clamp TT522023... -
Page 17: Specifications
Weight ..........10.5kg ......11kg Please note that the details and specifications contained herein, are correct at the time of going to print. However, CLARKE International reserve the right to change specifications at any time without prior notice. Always consult the machine’s data plate... -
Page 18: Explanation Of Electrical Symbols
EXPLANATION OF ELECTRICAL SYMBOLS The meaning of the markings and symbols shown in the table are explained as follows. 50Hz Rated frequency for alternating current Short Circuit Secondary Current Symbol and dimension for the welding current Rated value of the supply voltage IP_ _ Degree of protection (e.g.


Need help?
Do you have a question about the CSW6T and is the answer not in the manual?
Questions and answers