Magellan eXplorist 600 Basic User Manual
Thales operation instructions gps receiver magellan explorist 600
Hide thumbs
Also See for eXplorist 600:
- Quick reference manual (14 pages) ,
- Reference manual (123 pages) ,
- User manual (35 pages)

Related Manuals for Magellan eXplorist 600


Summary of Contents for Magellan eXplorist 600
- Page 1 Magellan eXplorist GPS Receiver Basic User Manual This manual provides basic operation instructions for Magellan eXplorist 600 GPS Receiver.
-
Page 2: License Agreement
LICENSE AGREEMENT Thales Navigation grants you, the purchaser, the right to use the software supplied in and with Thales Navigation GPS products (the “SOFTWARE”) in the normal operation of the equipment. - Page 3 eXplorist GPS Receiver This guide will provide you with the basics of using the Magellan® eXplorist™ GPS receiver. If you require more detailed descriptions of functions not described in this guide, please visit the Magellan eXplorist Support page at the Magellan web(www.magellangps.com).
-
Page 4: Basic Operation
The eXplorist GPS receiver is a handheld personal navigation device that uses information from a constellation of GPS satellites to compute your present position. In its simplest form, you select a destination from the list of POI’s (Points of Interest) and the eXplorist receiver will provide you with the information to arrive at your destination. -
Page 5: Go To Your Destination
Basic Operation 2. Select a destination... Press the GOTO Next you need to select which major category the POI you want to go to resides. My Pts of Interest are POIs you’ve created, Geocache Pts are POIs that have been uploaded using the Magellan Geocaching software, and Background Map contains POIs that were preloaded into your eXplorist with the... -
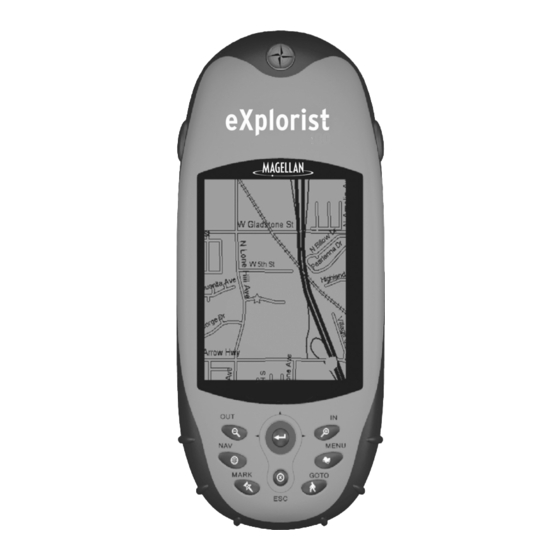
Page 6: Basic Functions
Turning the eXplorist Receiver On Press Power. (Press and hold for 2 - 3 seconds.) After the eXplorist receiver successfully computes your present position, the last viewed navigation screen is displayed. Turning the eXplorist Receiver Off Press Power. Setting the Display Backlight Press Light. - Page 7 Navigational Functions Your eXplorist receiver employs three different navigational screens to assist you in arriving at your destination. Pressing the Nav button allows you to cycle through the navigation screen. The Map screen displays your present position using a map of the area as the background.
-
Page 8: File Structure
destination and the compass points in the direction you are heading. The eXplorist stores data (POIs, routes, track logs, etc.) as ASCII text files to either an SD card or to its internal memory. Files saved internally or to an SD card can be opened and viewed on a personal computer providing you added flexibility in modifying and storing data to be used in your eXplorist. - Page 9 File Structure This is a sample of the My POIs folder. The first item, Up One Level, is used to move around the file hierarchy. The second item, New Folder, provides you the tool to add a new folder at this level. New POI File is used to create a new ASCII text file to save your POI’s too.
-
Page 10: Saving Your Present Position
Your eXplorist receiver comes with preloaded POI’s for a variety of areas. However, you will find that you will want to add your own POI’s to the database. POI’s that you save are accessed from the “My Pts of Interest” option of the databas Saving Your Present Position From any screen, press Mark. -
Page 11: Goto A Destination
GOTO a Destination You can use your eXplorist receiver to go to (“GOTO”) any destination in your POI database. This can be one of the POI’s that was preloaded in your eXplorist receiver, a geocaching point or a POI that you have saved. Once a GOTO route has been defined, your eXplorist receiver will guide you in a straight line to your destination. -
Page 12: Creating A Backtrack Route
Backtrack route. This route will automatically be computed using the track history stored in your eXplorist receiver. Creating a Backtrack Route From any screen, press Menu. Use the joystick to highlight “Track Log” and press Enter. Highlight Active Track. press Menu. -
Page 13: Using Track Logs
Using Track Logs As mentioned earlier, your eXplorist receiver records your track and allows you to use this information to create a route, backtrack or just to provide you with a visual indication of your journeys. Accessing Track Logs From any screen, press Menu. -
Page 14: Track Logs
Track Logs When an active track is saved it becomes one of your stored track logs. Highlight the desired track log and press log options. Follow Track: Navigates from the start of the track log to the end. Reverse Track: Same as Follow track but navigates from the end of the track log to the starting point. -
Page 15: New Route
Using Multileg Routes If you understand the concept of a GOTO route being a straight route with a starting and ending point, then you can understand multileg routes. A multileg route is many GOTO routes linked together. So instead of having a route that only goes from A to B, you can create routes that go from A to B to C to D and so on. - Page 16 Using a Saved Route Highlighting a route you have saved and pressing Menu brings up a list of options you can perform on that route. Activate/Deactivate Route: Assigns the selected route as the route you are wanting to follow or turns off the routing for that route if it was already active.
-
Page 17: The Poi Database
The POI Database The POI database is the place where your saved positions (“My Pts of Interest”) or any preloaded positions are stored for easy access when creating a GOTO or multileg route. Accessing the POI Database From any screen, press Menu. -
Page 18: Need Help
Your eXplorist receiver has a built-in help function that can provide you information to help you while using it. This is a general help function that should answer most of your questions about the eXplorist receiver and its use. Accessing Screen Specific Help From most screens, press “Help”... -
Page 19: Setting User Preferences
Setting User Preferences Accessing Preferences From any Nav screen, press Menu. Use the joystick to highlight “Preferences” and press Enter. Restarting GPS (Initializing) When To Restart GPS: Your eXplorist always starts looking for satellites assuming it is in the same location as when it was turned off. - Page 20 Setting User Preferences Changing Map Units Map Units has four selectable options: Nav Units, North Reference, Coord. System and Map Datum. Highlight the desired option and press Nav Units: Allows you to select the units of measure used for displaying navigation and position measurements.
-
Page 21: Clearing Memory
Setting User Preferences Personalizing Your eXplorist Receiver You can add your name and address information to your eXplorist receiver. Should you lose your eXplorist receiver, this information could be used to aid in its recovery. The name you enter here will also be displayed on the About... -
Page 22: Setting The Clock
Setting User Preferences Setting Alarms & Beeper The eXplorist has five alarms that you can use to provide you with audible alerts when their predefined condition is met. Anchor Alarm: Set a distance that the alarm will sound when the eXplorist has moved from its location. (Example: you have anchored your boat and want to be alerted when it has drifted from its anchor point.) Arrival Alarm: Set the distance from your final destination that... -
Page 23: What Is Mapsend
Using MapSend with eXplorist What is MapSend®? MapSend is the Magellan line of detailed digital maps for Magellan hand held GPS receivers. The core MapSend product line includes street maps for driving, topographic maps for hiking, camping, and hunting, and fresh and salt water maps for fishing and boating. - Page 24 Using MapSend with eXplorist Using MapSend maps with eXplorist eXplorist interfaces with MapSend PC applications differently from previous Magellan GPS receivers. It uses a USB port to transfer data, not a serial port, and eXplorist provides a file management system much like Windows folders, so users can work with multiple maps and personal data files.
- Page 25 Using MapSend with eXplorist on a 64MB SD card and a MapSend DirectRoute routable street map of Switzerland should also fit on a 64MB SD Card. Preparing and storing MapSend map regions on the PC All MapSend CD-ROM products include a Quick Start Guide that explains the basics of defining map regions on the PC.
- Page 26 Using MapSend with eXplorist How to find the software serial number is described next: On the eXplorist, push the Menu key and select "About" from the menu list. The following screen will appear on the unit: Type this serial number into the "Target GPS…" input field in MapSend, then click the Next button in the MapSend upload screen.
- Page 27 Using MapSend with eXplorist The next window in the Conversion Manager will ask you to insert the SD card into the card reader or connect the eXplorist unit to the PC. If you wish to transfer maps to the eXplorist, make sure it is connected, turn it on, and set it to File Transfer mode.
- Page 28 Using MapSend with eXplorist If you don't see the map you want to use in the list box on the left of this screen, you can click the magnifying glass button to search for maps elsewhere on your PC. Click the checkbox next to any map image(s) you wish to copy to eXplorist storage media, and then choose the storage destination from the drop down list on the right.
- Page 29 Using MapSend with eXplorist Summary Following these instructions you will be able to expand the capabilities of your eXplorist to new levels of detail. Not only will you be able to view highly detailed mapping information, you will have the flexibility of switching to different maps, either stored internally or on SD cards.
- Page 30 Calibration is very simple and won’t take more than a few minutes. It is very important that there are no metallic objects near the eXplorist 600 dur- ing this calibration. Remove the eXplorist 600 from any cradle it may be in.
-
Page 31: Accessing The Weather Screen
The eXplorist 600 comes equipped with a thermometer, a barometer, and an altimeter. To access the Weather screen: From any NAV screen, press MENU. Scroll down the list to highlight “Weather” and press ENTER. The Weather screen will appear showing the thermometer, the barometer, and the altitude display. - Page 32 Notes...
-
Page 33: Technical Support
Contacting Magellan The following information is provided so that if you need support for your Magellan eXplorist, you can direct your questions/comments to the proper person at Thales Navigation. Technical Support For Magellan product support in English, French, German, Spanish,... - Page 34 Thales Navigation European Headquarters Z.A.C de la Fleuriaye - B.P. 60433 44474 Carquefou Cedex - France 631245-18...