Table of Contents
Advertisement
Thank you very much for purchasing this product.
To ensure correct and safe usage with a full understanding of this product's performance, please be sure to read through
this manual completely and store it in a safe location.
Unauthorized copying or transferral, in whole or in part, of this manual is prohibited.
The contents of this operation manual and the specifications of this product are subject to change without notice.
The operation manual and the product have been prepared and tested as much as possible. If you find any misprint
or error, please inform us.
Roland DG Corp. assumes no responsibility for any direct or indirect loss or damage which may occur through use of
this product, regardless of any failure to perform on the part of this product.
Roland DG Corp. assumes no responsibility for any direct or indirect loss or damage which may occur with respect to
any article made using this product.
First Step Guide
Advertisement
Table of Contents

Related Manuals for Roland VersaUV LEF-12


Summary of Contents for Roland VersaUV LEF-12
- Page 1 Roland DG Corp. assumes no responsibility for any direct or indirect loss or damage which may occur through use of this product, regardless of any failure to perform on the part of this product.
- Page 2 For EU Countries Manufacturer: ROLAND DG CORPORATION 1-6-4 Shinmiyakoda, Kita-ku, Hamamatsu-shi, Shizuoka-ken, 431-2103 JAPAN The authorized representative in the EU: Roland DG Corporation, German Office Halskestrasse 7, 47877 Willich, Germany...
-
Page 3: Table Of Contents
STEP 3: Start Production Print ....................44 STEP 4: Printing Tests and Normal Cleaning After Daily Operations ........49 STEP 5: Switch Off ........................50 Company names and product names are trademarks or registered trademarks of their respective holders. Copyright © 2011-2016 Roland DG Corporation http://www.rolanddg.com/... -
Page 4: Machine Highlights
This describes how to install and set up VersaWorks, basic usage, and other such matters. White and Gloss Ink Guide Read this after reading Roland VersaWorks Quick Start Guide. It describes the special methods of creating printing data and performing printing when using white ink or gloss ink. -
Page 5: Features
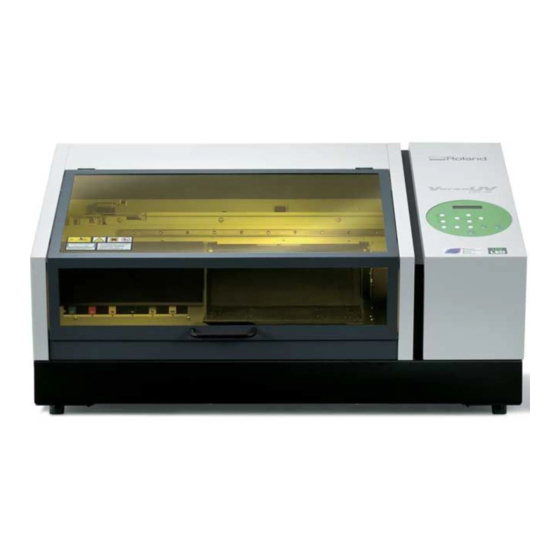
Machine Highlights Features Features of this machine This machine is provided with the following features. This machine also supports printing on thick materials This machine is a printer that can print on a variety of materials from thin paper to thick materials. Using UV ink, this printer can print high-quality images on various types of media (the general name for the material to be printed on). -
Page 6: What You Can Do
Machine Highlights What You Can Do This provides an overview of what you can accomplish using this printer. The illustrations below are just a few examples of printed items using this printer. Created items * There is a limit to the unevenness of the print surface. For more information, see the "Master Guide."... -
Page 7: To Ensure Safe Use
To Ensure Safe Use Improper handling or operation of this machine may result in injury or damage to property. Points which must be observed to prevent such injury or damage are described as follows. About WARNING and CAUTION Notices Used for instructions intended to alert the user to the risk of death or severe WARNING injury should the unit be used improperly. - Page 8 To Ensure Safe Use Incorrect operation may cause injury WARNING WARNING Be sure to follow the operation proce- Never attempt to disassemble, repair, or dures described in this documentation. modify the machine. Never allow anyone unfamiliar with the Doing so may result in fire, electrical shock, usage or handling of the machine to or injury.
- Page 9 Never use if any component is damaged. disconnect the power cord and contact your Continuing to use the machine may result in authorized Roland DG Corp. dealer. fire, electrical shock, or injury. Contact your authorized Roland DG Corp. dealer. Never place any flammable object nearby.
- Page 10 To Ensure Safe Use Important notes about the power cord, plug, and electrical outlet Never place any object on top or subject to dam- Never allow to get wet. age. Never bend or twist with undue force. Never make hot. Never pull with undue force.
- Page 11 To Ensure Safe Use Ink, cleaning liquid, and discharged fluid are flammable and toxic WARNING WARNING Keep open flame away from the work Never drink or sniff ink, cleaning liquid, area. or discharged fluid, or allow them to come in contact with the eyes or skin. Ink and discharged fluid are flammable.
- Page 12 To Ensure Safe Use This machine uses ultraviolet light. CAUTION Caution: Ultraviolet Light This machine is fitted with covers to keep external Never look at the blue-white (ultraviolet) leakage of ultraviolet light at low levels, but incor- light emitted from the print-head area for rect handling or operation can lead to physical injury an extended time.
-
Page 13: Pour Utiliser En Toute Sécurité
Pour utiliser en toute sécurité La manipulation ou l'utilisation inadéquates de cet appareil peuvent causer des blessures ou des dommages matériels. Les précautions à prendre pour prévenir les blessures ou les dom- mages sont décrites ci-dessous. Avis sur les avertissements Utilisé... - Page 14 Pour utiliser en toute sécurité L'utilisation incorrecte peut causer des blessures ATTENTION ATTENTION S'assurer de suivre les procédures Débrancher le câble d'alimentation avant d'utilisation décrites dans la documen- de procéder au nettoyage ou à l'entretien tation. Ne jamais permettre à quiconque de l'appareil, et avant d'y fixer ou d'en ne connaît pas le fonctionnement ou la retirer des accessoires en option.
- Page 15 Caractéristiques ou un choc électrique. Si un objet ou du liquide s'infiltre dans l'appareil, débrancher immédiatement le câble d'alimentation et communiquer avec le représentant Roland DG Corp. autorisé. Ne jamais placer d'objet inflammable à proximité de l'appareil. Ne jamais utiliser de produit inflammable en aérosol à...
- Page 16 électrique ou des blessures. S i u n e r a l l o n g e o u u n e b a n d e Communiquer avec le représentant Roland d'alimentation électrique sont utilisées, s'assurer qu'elles correspondent aux DG Corp.
- Page 17 Pour utiliser en toute sécurité Remarques importantes à propos du câble d'alimentation, de la fiche et de la prise électrique Ne jamais déposer aucun objet sur le câble, sur la Ne jamais laisser l'eau toucher le câble, la fiche ou fiche ou sur la prise car cela risque de les endom- la prise.
- Page 18 Pour utiliser en toute sécurité L'encre, les liquides nettoyants et les liquides usées sont inflam- mables et toxiques ATTENTION ATTENTION Ne pas approcher une flamme nue de Ne jamais boire l'encre, le liquide de l'espace de travail. nettoyage ni les liquides usés, ne pas en respirer les vapeurs et ne pas laisser L'encre et les liquides usés sont inflammables.
- Page 19 Pour utiliser en toute sécurité Le poids total de l'appareil est de 90 kg (198.4 lb.) ATTENTION Installer l'appareil à un endroit stable et plat et capable de supporter son poids. Le poids total de l'appareil peut être d'au moins 90 kg (198.4 lb.). Installer l'appareil à un endroit inapproprié...
- Page 20 Pour utiliser en toute sécurité Vignettes d'avertissement Des vignettes d'avertissement sont apposées pour qu'il soit facile de repérer les zones dan- gereuses. La signification des vignettes est donnée ci-dessous. Respecter les avertissements. Ne jamais retirer les vignettes et ne pas les laisser s'encrasser. Attention : Rayonnement ultraviolet Ne jamais regarder de près et directement pendant une période prolongée.
-
Page 21: Important Notes On Handling And Use
Important Notes on Handling and Use This machine is a precision device. To ensure the full performance of this machine, be sure to observe the following important points. Failure to observe them may not only result in loss of performance, but may also cause malfunction or breakdown. - Page 22 Ink Cartridges Ink cartridges come in various types. Use a type that is compatible with the printer. Also, be sure to use only genuine items from Roland DG Corp. Never subject to impact or attempt to disassemble. Never drop or shake forcefully. The impact may rupture the internal pouch and cause the ink to leak.
-
Page 23: Before Using This Printer
Before Using This Printer STEP 1: Included Items The following items are packed together with the unit. Make sure they are all present and accounted for. SOL INK cleaning car- Power cord (1) Dummy cartridges (2) Mist Filter - small (2) tridges (2) Mist Filter - large (2) Cleaning sticks... -
Page 24: Step 2: Deciding On An Installation Site
Before Using This Printer STEP 2: Deciding On an Installation Site Notice Information is provided in " To Ensure Safe Use " on pages 5 through 18. Be sure to read this guide prior to installing or con- necting the printer. Install in a quiet, stable location offering good operating conditions. - Page 25 Before Using This Printer Installation Space and Height The space shown in the figure is required in order to use this machine. 1,500 mm (60 in.) 1,000 mm (40 in.) The height of installation should be 0.6 m (23.7 in.) or higher above the work floor. This machine is desktop type.
-
Page 26: Step 3: Remove The Packing Materials
Before Using This Printer STEP 3: Remove the Packing Materials Tape and packing materials are attached to the machine to protect it from vibration during transportation. When installation is complete, remove these. WARNING Carry out these operations before you connect the power cord. Inadvertent powerup may result in pinched hands or other injury. -
Page 27: Step 4: Connecting The Cables
Before Using This Printer STEP 4: Connecting the Cables WARNING Perform this task with all power switches left switched off. Otherwise sudden movement of the machine may cause injury. Ethernet Electrical (100Base-TX outlet recommended) Power cord Ethernet cable (Cat- egory 5 or higher) Never insert a telephone cable. -
Page 28: Step 5: Switch On
Before Using This Printer STEP 5: Switch On Check the Operation Panel Display screen BUSY light This lamp lights up during print- ing and other such operations. Cursor keys Used for various menu settings and when moving the flat table and print-head carriage. - Page 29 Before Using This Printer Procedure Close the front cover. Front Cover Turn on the main power switch. The Power-saving Feature (Sleep Mode) This machine is provided with a power-saving feature that switches to a low-power "sleep mode" when a fixed interval passes with no operation.
-
Page 30: Step 6: Installing The Ink Cartridges
Insert each color ink cartridge into the slot labeled with the matching color. If you insert the wrong cartridges, the color inks may be mixed. Be careful not to insert the wrong cartridges. Contact your authorized Roland DG Corp. dealer, if you inserted the wrong cartridges and the color inks were mixed. Make the initial settings ... - Page 31 Before Using This Printer to select the unit of measurement you want LENGTH UNIT (for length). Press to select the unit of measurement you want TEMP. UNIT (for temperature). Press Clean the print heads using the SOL INK cleaning cartridge ...
- Page 32 Before Using This Printer When this screen appears, pull out the cleaning cartridges. REMOVE CL-LIQUID When this screen appears, pull out the dummy cartridges, REMOVE DUMMY CRT. SLOT: 3,4 and press SET CL-LIQUID When a new slot number is displayed, repeat the procedure CHECK DRAIN BOTTLE from Steps 3 to 6 using the cleaning cartridge you just pulled...
- Page 33 Before Using This Printer Close the ink cartridge cover. Make sure the drain bottle is installed, and press CHECK DRAIN BOTTLE When this screen appears, filling with ink is finished. SETUP SHEET ROLL Close the front cover. Be Sure to Keep the Ink Cartridge Cover Closed at All Times The ink cartridge cover prevents the ink cartridges from being exposed to direct sunlight or strong illumination.
-
Page 34: Step 7: Network Settings
Before Using This Printer STEP 7: Network Settings Introduction Make sure the machine is connected to the network by an Ethernet cable. The network settings on the machine must be made manually, using the operation panel. For information about how to make the settings, refer to "Make the Network Settings on the Printer" later in this step. Also, to perform print from this machine, the software raster image processor (RIP) included with the machine must be installed and set up. - Page 35 Before Using This Printer Click [Properties]. The [Ethernet Properties] dialog box appears. (On Windows 7, the [Local Area Connection Status] dialog box appears.) If the [User Account Control] dialog box appears, click [Con- tinue]. Select [Internet Protocol Version 4 (TCP/IPv4)], and then click [Properties].
- Page 36 Before Using This Printer Make the Network Settings on the Printer Important The addresses used in this section are merely example settings. For detailed information about the settings, consult your network administrator. Set the IP address Press Press several times until the screen shown on the MENU SYSTEM INFO.
- Page 37 Before Using This Printer to select the address number. SUBNET MASK 000 . 000 . 000 . 000 [SUBNET MASK]: 255.255.255.000 Note: For the subnet mask, make the setting the same value as the one used by the computer. Here, "255.255.255.000" is entered by way of example. ...
-
Page 38: Step 8: Installation Of Ventilating Equipment
Installing the Ventilating Equipment In preparing ventilating devices, please note the following points. You will be required to use the ventilating devices recommended by Roland DG Corporation. For the details of the recommended products, contact your authorized Roland DG Corp. dealer. -
Page 39: First Time Printing
First Time Printing Overview of Steps Start Production Test Print Print STEP 1 STEP 3 * In Step 3, perform task STEP 2 starting from Step 1. First, start by performing a test print. Then, print using the actual media that you want to try to print on. The ingredients in white ink tend to settle. - Page 40 First Time Printing Do not use media that is charged with static electricity. This printer cannot print on all materials. When selecting media, be sure to carry out testing in advance to make sure that satisfactory print quality can be obtained. ...
- Page 41 First Time Printing Loading media Open the front cover. Secure the media in place. A test print is printing to check whether or not there is dot drop-out. Use media for testing (width 80 mm (3.15 in) x depth 70 mm (2.76 in) or more), and not the media you will actually use. Media Adhesive Media...
- Page 42 First Time Printing Press to move the flat table. Move the print surface to a position 10 mm (0.39 in) away from the media gap sensor. This step can be performed with the front cover open. HEIGHT : Media gap 10 mm sensor Media...
- Page 43 First Time Printing Specify the print area directly “Print-Start Position (print area lower right)," and the "Width" and "Length" of the print area to specify the print area directly. This method is appropriate when the print site is level, and you can clearly specify the print area. During print area setup, the procedure can be performed with the front cover open.
-
Page 44: Step 2: Test Print And Normal Cleaning
First Time Printing Close the front cover when it is open. Check the print area Finally, confirm that the print area that you intended has been specified. Press Press to display the figure on the left. FUNCTION PRINT AREA Press ... - Page 45 First Time Printing Press CLEANING TEST PRINT The test pattern is started. Dot drop-out When the test print results are difficult to make out Check the results in a bright location, changing your line of vision. It is visible using the reflection of the light. If there is dot drop-out, proceed to Step If there is no dot drop-out, proceed to “STEP 3: Start Production Print”.
-
Page 46: Step 3: Start Production Print
Installation of VersaWorks Connecting VersaWorks and this machine Learning the basic operation of VersaWorks "Roland VersaWorks Quick Start Guide" (included) Preparing a print data This section uses data saved as a PS file. For information on file formats that you can read directly with VersaWorks and on how to output from the application, see "VersaWorks Quick Start Guide". - Page 47 First Time Printing Double-click A Input Property appears. (Open the property for the input setting to use.) Click "Get Media Width". Load the print area set on this machine into Versa- Works. Displays the width and length of print area retrieved. Note: When performing other settings, see Quick Start Guide and Help for VersaWorks, or the included "White &...
- Page 48 First Time Printing Click [OK]. Output Print Data Using VersaWorks Click the [A Input] tab in the [Job List], and drag-and-drop the print data to the job list in A Input (if the print setting is done on B Input, this should be the job list in B Input). Details of the data appears on the preview window, and the layout on the media appears on the layout window.
- Page 49 First Time Printing Double click a print job in the job list. [Job Settings] screen appears. The white part in the layout area is the print area that was loaded in STEP The portion of the print data not in the print area will not be printed.
- Page 50 First Time Printing The screen display appears in the opposite orientation. The orientation in the VersaWorks screen display is the opposite of the actual print orientation. Make sure the media orientation is correct. Orientation on the Actual print orientation VersaWorks screen ...
-
Page 51: Step 4: Printing Tests And Normal Cleaning After Daily Operations
First Time Printing Click Start printing. When the printing ends, the screen shown in the figure appears on the FINISHED PRINT control panel. Data from the computer is not accepted while this screen is displayed. (NOTE: If "PRT CONTINUE" is set to "ENABLE", the screen shown in the figure does not appear. -
Page 52: Step 5: Switch Off
First Time Printing STEP 5: Switch Off Hold down the sub power button for one second or longer. The sub power switches off automatically. Switch off after the print is complete. Leave the main power switched on at all times. Never switch off the main power. - Page 53 For China 产品中有毒有害物质或元素的名称及含量 有毒有害物质或元素 部件名称 六价铬 多溴联苯 多溴二苯醚 铅(Pb) 汞(Hg) 镉(Cd) (Cr(Ⅵ)) (PBB) (PBDE) 印刷电路板 × ○ × ○ ○ ○ 头部 × ○ ○ ○ ○ ○ 壳体、底架 × ○ ○ ○ ○ ○ 电源 × ○ × ○ ○...
- Page 55 You can obtain the GPL/LGPL source code used in this product by downloading it from the following website. URL: http://www.rolanddg.com/gpl/ Roland DG Corp. has licensed the MMP technology from the TPL Group. This system (including the housing and safety device) is a Class 1 laser product. Laser specifications of this system (including the housing) Wavelength: 655 nm, maximum output: less than 46.5 µW, pulse duration: 3.0 µs...
- Page 56 R5-160310...