Table of Contents
Advertisement
NATURAL GAS - W255G, W355G, W505G, W255G-3, W355G-3, W505G-3,
W255G-5, W355G-5, W505G-5, W255G-7, W355G-7, W505G-7
!
WARNING: If the information in these instructions is
not followed exactly, a fire or explosion may result causing
property damage, personal injury or loss of life.
— Do not store or use gasoline or other flammable
vapors and liquids in the vicinity of this or any other
appliance.
— WHAT TO DO IF YOU SMELL GAS
• Do not try to light any appliance.
• Do not touch any electrical switch; do not use any
phone in your building.
• Immediately call your gas supplier from a neighbor's
phone. Follow the gas supplier's instructions.
• If you cannot reach your gas supplier, call the fire
department.
— Installation and service must be performed by a
qualified installer, service agency or the gas supplier.
INSTALLER: Leave this manual with the appliance.
CONSUMER: Retain this manual for future reference.
ANSI STANDARD Z21.71 AND SHOULD BE FOLLOWED BY A PROFESSIONAL INSTALLER ONLY.
WARNING: Operation of any furnace without the properly installed, factory furnished vent system & vent cap could result in
Carbon Monoxide (C.O.) poisoning and possible death. For your safety, this furnace & the vent system should be inspected at least
annually by a qualified service technician.
Cozy Heating Systems, LLC | cozyheaters.com | 855-589-5380 | 3230 Industrial Pkwy | Jeffersonville, IN 47130
Installation and Operating Instructions
THE CONTENTS ON THIS MANUAL ARE IN STRICT ACCORDANCE WITH
PILOT PRO MANUAL
Page 1
1018039-B
Advertisement
Table of Contents

Subscribe to Our Youtube Channel
Related Manuals for COZY PILOT PRO Series


Summary of Contents for COZY PILOT PRO Series
- Page 1 Carbon Monoxide (C.O.) poisoning and possible death. For your safety, this furnace & the vent system should be inspected at least annually by a qualified service technician. Cozy Heating Systems, LLC | cozyheaters.com | 855-589-5380 | 3230 Industrial Pkwy | Jeffersonville, IN 47130 Page 1...
-
Page 2: Table Of Contents
CONTENTS READ CAREFULLY BEFORE INSTALLING UNIT Before Installation These installation instructions are a general guide and do not supersede applicable local codes and ordinances. Before planning Standards ........... 2 or making the installation be sure it complies with all phases of the Part List ......... -
Page 3: Part List
PARTS LIST AND REFERENCE Tools Required for Assembly: • Phillips - Head Screwdriver • Needle Nose Pliers • 3/16" Drill Bit • Wire Cutters PART NO. DESCRIPTION PART NO. DESCRIPTION 1018002 Battery Pack 50953 Nut, Wire Gray* 1018000 Control Module 1018045 Label, Ladder Schematic** 1018397 Mounting Plate... -
Page 4: Part List
PARTS LIST AND REFERENCE Do not return product if you are missing parts. Please Call: (855) 589-5380 Illustrations in this section are to scale for faster identification of hardware during assembly: Screw, Phillips Head, #8 8-32 x 3/8" (x2) 50139 ........Screw with Knob (x2) 1018690 . -
Page 5: Installation Steps
PILOT PRO INSTALLATION INSTRUCTIONS Cozy Heating Systems, LLC | cozyheaters.com | 855-589-5380 | 3230 Industrial Pkwy | Jeffersonville, IN 47130 Page 5 1018039-B... -
Page 6: Installation
INSTALLATION Step 1 SAFETY INSPECTION PROCEDURE PER ANSI Z21.71 EXHIBIT A: Recommended procedure for safety inspection of an existing appliance installation as a preliminary step to applying an automatic intermittent pilot system. The following procedure is intended as a guide to aid in determining that an appliance is properly installed and is in a safe condition for continuing use. This procedure is predicated on central furnace and boiler installations equipped with an atmospheric gas burner(s) and not of the direct vent type. -
Page 7: Installation
INSTALLATION Step 2 SAFETY INSPECTION PROCEDURE PER ANSI Z21.71; EXHIBIT B: Procedure for installing automatic intermittent pilot systems. PRIOR TO BEGINNING THIS PROCEDURE, a preliminary examination of the appliance and the automatic intermittent pilot system should be made to determine that the automatic intermittent pilot system can be properly applied to the appliance. This procedure is intended as a guide to aid in safely installing a listed automatic intermittent pilot system on an existing listed appliance equipped with an atmospheric gas burner(s) &... -
Page 8: Installation
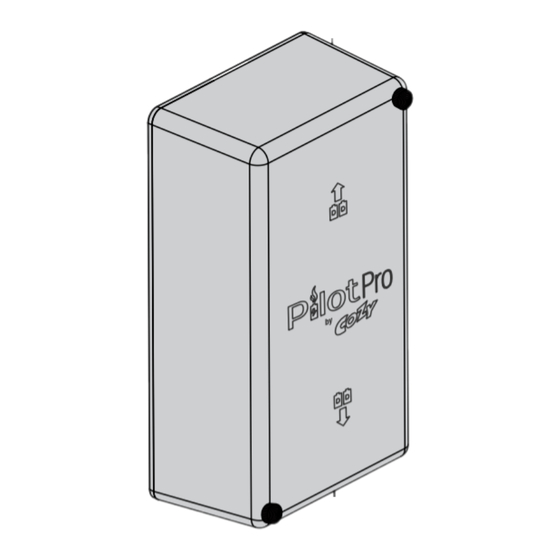
INSTALLATION Step 4 The Pilot Pro may be installed near the base of either side of the heater housing. Choose which side to mount the Pilot Pro. Be sure to leave enough room to remove the pilot pro cover for maintenance access. For easy removal of the cover, allow at least 10" of space from the heater housing. -
Page 9: Installation
INSTALLATION Step 6 - Remove the door from the heater housing. - Locate the Pilot Pro in the carton and remove the cover from baseplate with a screwdriver. - Check the inside of the housing for safety labels. Try to avoid drilling through any pertinent safety information during this step. -
Page 10: Installation
INSTALLATION Step 7 With a Phillips head screw driver, attach the controls assembly to the side of the heater housing using: - x3 Screws #8 x 3/4” (7) - x3 Nuts #8 (9) DO NOT use a powered drill for this step, it could crack the mounting plate. -
Page 11: Installation
INSTALLATION Step 9 Verify again that gas to the appliance has been shut off. Disconnect the gas line from the current valve. PILOT Extract the burner assembly by removing the two screws holding it in place (See illustration to the right). NOTE: Keep screws for re-installation. PILOT Step 10 1. -
Page 12: Installation
INSTALLATION Step 11-A The Pilot Pro valve comes with two outlets. PILOT Prior to installing the valve, seal the outlet that is on the same side as pilot tube outlet, with provided plug (13) and pipe dope (pipe dope not included). -
Page 13: Installation
INSTALLATION Step 11-B Horizontal : Max 30º : To ensure valve (11) does not contact the floor, orient valve from horizontal to a max of 30º. NOTE: Temporarily mount the burner in furnace and ensure valve clears the floor. If ok, remove burner and continue to the next step. -
Page 14: Installation
INSTALLATION Step 12-B Install pilot tube (31) to the pilot assembly using compression nut, small (30). Ensure pilot orifice identified in step 10 is installed into pilot. PILOT pilot orifice CAUTION: Tubing needs to be re-shaped gently. DO NOT KINK! Step 13 Remove thermopile PILOT... -
Page 15: Installation
INSTALLATION Step 14 Insert flame sensor (15) into the same location as the thermopile that was removed on Step 13. Orient flat tab extending from the bottom of the flame sensor (15) parallel to the burner as shown. PILOT PILOT Secure in place using the flame sensor nut (26). -
Page 16: Installation
INSTALLATION Step 16 Check to ensure the ignitor (14) is located properly. - Ignitor probe (14) should be 1/8" under the hood. - Ignitor probe (14) should be 3/16" away from flame sensor (15). - Probe should be bent so that the tip of the probe sparks only against the hood of the pilot. -
Page 17: Installation
INSTALLATION Step 18 Reinstall the burner assembly using the original two screws that held it in place (See illustration to the right). Next, re-connect the gas line to the valve. PILOT Step 19 Ensure flame sensor (15) and flame sensor wire connector (16) Do NOT contact any metal surface such as the heat shield and pilot tube. -
Page 18: Wiring / Electrical
PILOT PRO ELECTRICAL CONNECTION WARNING: PLEASE USE CAUTION WHILE INSTALLING THE ELECTRICAL CONNECTION Cozy Heating Systems, LLC | cozyheaters.com | 855-589-5380 | 3230 Industrial Pkwy | Jeffersonville, IN 47130 1018039-B Page 18... - Page 19 PILOT PRO ELECTRICAL CONNECTION ELECTRICAL CONNECTION WARNING: PLEASE USE CAUTION WHILE INSTALLING THE ELECTRICAL CONNECTION Step 1 Fill out and apply modification sticker (20) with date, name and contact information. WARNING: DO NOT ATTEMPT TO LIGHT THIS APPLIANCE MANUALLY. BURN, INJURY OR ELECTRIC SHOCK MAY RESULT. This appliance has been modified to use an automatic intermittent pilot system.
-
Page 20: Installation
PILOT PRO ELECTRICAL CONNECTION WARNING: PLEASE USE CAUTION WHILE INSTALLING THE ELECTRICAL CONNECTION Step 2 Make sure there are no sharp edges on the rim of the heater Reattach the front panel housing on the heater. NOTE: Leave the access door open until installation has housing that could potentially been complete. damage the wires. - Page 21 PILOT PRO ELECTRICAL CONNECTION WARNING: PLEASE USE CAUTION WHILE INSTALLING THE ELECTRICAL CONNECTION Step 4 - Connect Black TP wire to the TP terminal of valve. - Connect Green TH wire to TH terminal PILOT black wire of the valve. - Connect Orange THTP wire to the THTP terminal of the valve.
- Page 22 PILOT PRO ELECTRICAL CONNECTION WARNING: PLEASE USE CAUTION WHILE INSTALLING THE ELECTRICAL CONNECTION Step 6 Plug the orange wire from Ignitor (14) into the port labeled "I" on the control module (2). Ensure it is firmly seated. Step 7 Plug the black flame sensor wire (16) into the port labeled "S"...
- Page 23 PILOT PRO ELECTRICAL CONNECTION WARNING: PLEASE USE CAUTION WHILE INSTALLING THE ELECTRICAL CONNECTION CAUTION: Label all wires prior to disconnection when servicing controls. Wiring errors can cause improper and dangerous operation. Verify proper operation after servicing and secure wires away from sharp edges, flames or hot surfaces inside and outside the unit.
- Page 24 PILOT PRO ELECTRICAL CONNECTION WARNING: PLEASE USE CAUTION WHILE INSTALLING THE ELECTRICAL CONNECTION FOLLOW STEP 9 IF THE PILOT PRO IS ON THE RIGHT SIDE OF THE HOUSING. (Proceed to step 10 if the Pilot Pro is on the left side of the housing). Make certain wiring connections are tight before proceeding and secure so they will not be able to contact high temperature locations.
- Page 25 PILOT PRO ELECTRICAL CONNECTION WARNING: PLEASE USE CAUTION WHILE INSTALLING THE ELECTRICAL CONNECTION FOLLOW STEP 10 IF THE PILOT PRO IS ON THE LEFT SIDE OF THE HOUSING. (Go back to step 9 if the Pilot Pro is on the right side of the housing). Make certain wiring connections are tight before proceeding and secured so they will not be able to contact high temperature locations.
-
Page 26: Starting Pilot Pro
STARTING PILOT PRO SYSTEM PER ANSI Z21.71 STEP 1 Turn on all gas and electricity to the appliance. - Conduct a gas leakage test of the appliance piping and control system downstream of the shutoff valve in the supply line to the appliance. - Check all furnace connections for gas leaks with leak detector solution, including plug installed into valve body. - Page 27 STARTING PILOT PRO SYSTEM PER ANSI Z21.71 STEP 3 Ensure Ignitor sparks only against the hood of the pilot. Ignitor should not spark against the flame sensor, brackets, heating chamber, burner, etc. Adjust ignitor probe location if required. - DO NOT twist ignitor wire or break from ceramic base. - DO NOT use a broken ignitor. STEP 4 Determine that the pilot is igniting and burning properly and that main burner ignition is satisfactory by turning the thermostat off and back on.
- Page 28 STARTING PILOT PRO SYSTEM PER ANSI Z21.71 Step 8 Slide the Pilot Pro cover (4) over the controls. Secure in place with: x2 Screw with knob (6) NOTE: Hand-tighten only. Do not over tighten. Step 9 WARNING: CARBON MONOXIDE POISONING HAZARD Failure to follow the steps outlined below for each appliance connected to the venting system being placed into operation could result in carbon monoxide poisoning or death.
-
Page 29: Lighting Instructions
LIGHTING INSTRUCTIONS - ( PILOT PRO ) Page 29 1018039-B... -
Page 30: Troubleshooting
TROUBLESHOOTING CHART ( FOR QUALIFIED SERVICE TECHNICIAN ) - MAIN BURNER Please follow the corrective actions in order. SYMPTOM POSSIBLE CAUSES CORRECTIVE ACTION 1. Defective pilot assembly. 1. Inspect pilot assembly for loose or broken components or wires. Replace. Delayed Refer to parts list. Ignition 2. Battery is low. 2. Replace batteries. 1. Defective 1. -
Page 31: Burner Flame Adjustment
BURNER FLAME ADJUSTMENT NOTES ( Stainless Steel Burner ) SHUTTER 1. FLAME TOO SOFT Yellow Flame. Open air shutters until yellow tipping disappears. 2. FLAME TOO HARD Deep Blue Coloration. Closing air shutters to a point where yellow tipping begins, re-open slightly to eliminate yellow tipping. -
Page 32: Warranty
LIMITED WARRANTY Cozy Heating Systems LLC warrants to the original installer, the user should write directly to the manufacturer, and the name of an alternative service source will be user the accompanying product for the period specified supplied. herein, provided said product is installed, operated,...
Need help?
Do you have a question about the PILOT PRO Series and is the answer not in the manual?
Questions and answers