Table of Contents
Advertisement
Available languages
Available languages
Quick Links
Vertrieb von JTS-Produkten – Distribution of JTS products
Bedienungsanleitung
Instruction Manual
Mode d'emploi
Manual de Instrucciones
RU-G3TH / 5
Bestell-Nr. • Order No. 25.9843
Funk-Kondensatormikrofon
Wireless Condenser Microphone
506 – 542 MHz
Microphone main sans fil à condensateur
Micrófono Condensador Inalámbrico
Advertisement
Chapters
Table of Contents

Related Manuals for Monacor JTS RU-G3TH/5


Summary of Contents for Monacor JTS RU-G3TH/5
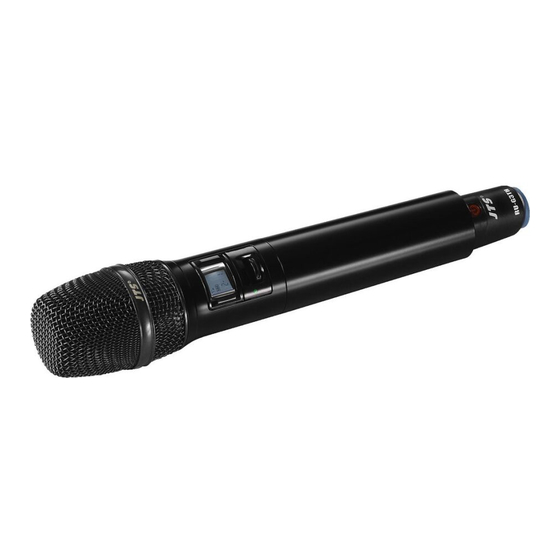
- Page 1 Vertrieb von JTS-Produkten – Distribution of JTS products Bedienungsanleitung Instruction Manual Mode d’emploi Manual de Instrucciones RU-G3TH / 5 Bestell-Nr. • Order No. 25.9843 Funk-Kondensatormikrofon Wireless Condenser Microphone 506 – 542 MHz Microphone main sans fil à condensateur Micrófono Condensador Inalámbrico...
- Page 3 Deutsch Seite English Page Français Page Español Página 22...
-
Page 4: Table Of Contents
Abb. 1 Menü Abb. 2 RU-G3TH / 5 SET (2 s) Group Channel MUTE MUTE Sensitivity −15 dB…15 dB RF Power Low – High Auto OFF 30/10/1 min., OFF Exit REMOSET RU-G3TH RU-G3TH Inhalt Funkmikrofon Diese Anleitung richtet sich an Bediener ohne Übersicht besondere Fachkenntnisse Bitte lesen Sie die Wichtige Hinweise... -
Page 5: Exit
Informieren Sie Tropf- und Spritzwasser und hoher Luftfeuch- sich bitte vor der Inbetriebnahme des Mikrofons tigkeit Der zulässige Einsatztemperaturbe- außerhalb Deutschlands bei der MONACOR- reich beträgt 0 – 40 °C Niederlassung oder der entsprechenden Behörde • des Landes Links zu den nationalen Behörden Verwenden Sie für die Reinigung nur ein tro-... -
Page 6: Inbetriebnahme
4 Inbetriebnahme Leuchtet die LED (2) rot und blinkt im Display das Symbol , sind die Batterien 4.1 Stromversorgung verbraucht Für die Stromversorgung werden zwei 1,5-V-Bat- terien der Größe Mignon (A A) benötigt Blinkt 2) Folgende Informationen können vom Display im Display das Symbol und leuchtet die angezeigt werden:... -
Page 7: 3 1 Einstellungen Über Das Menü
4.3.1 Einstellungen über das Menü Menüpunkt Einstellung 1) Die SET (7) 2 Sek gedrückt halten, bis das Dis- Sendeleistung (RF Power) play kurz SEtUP anzeigt (Abb 1, Seite 4) Hi (high) einstellen = Mit der Taste hohe Leistung (50 mW) für eine große 2) Die Taste SET so oft drücken, bis der ge- Reichweite, jedoch kürzere Betriebsdauer wünschte Menüpunkt erscheint... -
Page 8: Technische Daten
5 Technische Daten 3 Im Display darf das Symbol nicht blinken (= Batterien verbraucht) Mikrofontyp: Handmikrofon mit Kondensatorkapsel 4 Soll das Mikrofon nicht nur auf die Gruppe Richtcharakteristik: Niere und den Kanal bzw auf die Übertragungs- frequenz eingestellt werden, sondern soll Trägerfrequenzbereich: 506 –... -
Page 9: Übersicht Der Gruppen Und Kanäle
CH 21 532,775 CH 21 540,375 CH 21 540,875 CH 21 536,300 CH 21 537,050 CH 22 541,875 Diese Bedienungsanleitung ist urheberrechtlich für MONACOR INTERNATIONAL GmbH & Co. KG geschützt. ® Eine Reproduktion für eigene kommerzielle Zwecke – auch auszugsweise – ist untersagt. -
Page 10: Mute
Fig. 1 Menü Fig. 1 Menu Fig. 2 RU-G3TH / 5 SET (2 s) Group Channel MUTE MUTE Sensitivity −15 dB …15 dB RF Power Low – High Auto OFF 30/10/1 min., OFF Exit REMOSET RU-G3TH RU-G3TH Contents Wireless Microphone These instructions are intended for users without Overview any specific technical knowledge Please read... -
Page 11: Important Notes
The unit corresponds to all relevant directives of microphone outside Germany, please contact the EU and is therefore marked with the MONACOR subsidiary or the corresponding • The unit is suitable for indoor use only Pro- authorities of the respective country Links to... -
Page 12: Operation
4 Operation If the LED (2) lights up in red and if the symbol starts flashing on the display, the 4.1 Power supply batteries are discharged For power supply, two 1 5 V batteries of size AA 2) The display can show the following informa- are required When the symbol on the dis- tion:... -
Page 13: 3 1 Settings Via The Menu
4.3.1 Settings via the menu Menu item Setting 1) Keep the button SET (7) pressed for 2 seconds Transmission power (RF Power) until SEtUP is briefly shown on the display Use the button to set the transmission (fig 1, page 10) power to Hi = high transmission power (50 mW) for a long range, but a short 2) Press the button SET repeatedly until the... -
Page 14: Specifications
5 Specifications 4 If you do not only want to set the microphone to the group and the channel or transmis- Type of microphone: hand-held micro- sion frequency but also want to change the phone with con- microphone sensitivity or the transmission denser cartridge power, for example, change the Remoset Polar pattern:... -
Page 15: Overview Of Groups And Channels
CH 21 532.775 CH 21 540.375 CH 21 540.875 CH 21 536.300 CH 21 537.050 CH 22 541.875 All rights reserved by MONACOR INTERNATIONAL GmbH & Co. KG. No part of this instruction manual may ® be reproduced in any form or by any means for any commercial use. -
Page 16: Vue D'ensemble
Fig. 1 Schéma 1 Menu Schéma 2 RU-G3TH / 5 SET (2 s) Group Channel MUTE MUTE Sensitivity −15 dB …15 dB RF Power Low – High Auto OFF 30/10/1 min., OFF Exit REMOSET RU-G3TH RU-G3TH Table des matières Microphone sans fil Cette notice s’adresse aux utilisateurs sans Vue d’ensemble connaissances techniques particulières Veuil-... -
Page 17: Conseils Importants
Protégez-le de tout type dehors de l’Allemagne, renseignez-vous auprès de projections d’eau, des éclaboussures et de la succursale MONACOR ou des autorités d’une humidité d’air élevée La plage de tem- nationales du pays correspondant Vous trouve- pérature ambiante admissible est de 0 – 40 °C rez les liens permettant d’accéder aux agences... -
Page 18: Utilisation
4 Utilisation Si la LED (2) brille en rouge et si le symbole sur l’affichage clignote, les batteries sont 4.1 Alimentation déchargées Deux batteries 1,5 V de type R6 sont nécessaires 2) Les informations suivantes peuvent être vi- Si le symbole clignote sur l’affichage et si sibles sur l’affichage : la LED (2) brille en rouge, les batteries sont dé-... -
Page 19: 3 1 Réglages Via Le Menu
4.3.1 Réglages via le menu Point Réglage 1) Maintenez la touche SET (7) enfoncée 2 se- de menu condes jusqu’à ce que l’affichage indique Puissance d’émission (RF Power) brièvement SEtUP (schéma 1, page 16) Avec la touche , réglez Hi (high) = ... -
Page 20: Caractéristiques Techniques
5 Caractéristiques techniques 3 Sur l’affichage, le symbole ne doit pas clignoter (= batteries déchargées) Type microphone : microphone main 4 Si vous voulez non seulement régler le mi- avec capsule à crophone sur le groupe et le canal ou la fré- condensateur quence de transmission mais aussi modifier Caractéristique :... -
Page 21: Vue D'ensemble Des Groupes Et Canaux
CH 21 532,775 CH 21 540,375 CH 21 540,875 CH 21 536,300 CH 21 537,050 CH 22 541,875 Notice d’utilisation protégée par le copyright de MONACOR INTERNATIONAL GmbH & Co. KG. Toute repro- ® duction même partielle à des fins commerciales est interdite. -
Page 22: Vista General
Fig. 1 Menú Fig. 2 RU-G3TH / 5 SET (2 s) Group Channel MUTE MUTE Sensitivity −15 dB …15 dB RF Power Low – High Auto OFF 30/10/1 min., OFF Exit REMOSET RU-G3TH RU-G3TH Contenidos Micrófono Inalámbrico Estas instrucciones van dirigidas a usuarios sin Vista General ningún conocimiento técnico específico Lea Notas Importantes... -
Page 23: Notas Importantes
• el sistema de micrófono fuera de Alemania, pón- El micrófono está adecuado sólo para utili- gase en contacto con la filial de MONACOR o zarlo en interiores Protéjalo contra goteos, con las autoridades competentes del país Puede salpicaduras y humedad elevada Rango de encontrar enlaces a las autoridades nacionales temperatura ambiente admisible: 0 –... -
Page 24: Funcionamiento
4 Funcionamiento Si el LED (2) se ilumina en rojo y el símbolo empieza a parpadear en el visualizador, 4.1 Alimentación significa que las baterías están descargadas Para la alimentación, se necesitan dos baterías 2) El visualizador puede mostrar la siguiente de 1,5 V AA Cuando el símbolo del visuali- información:... -
Page 25: 3 1 Ajustes Mediante El Menú
4.3.1 Ajustes mediante el menú Elemento Ajuste 1) Mantenga pulsado el botón SET (7) durante del menú 2 segundos hasta que aparezca brevemente Potencia de transmisión (RF Power) SEtUP en el visualizador (fig 1, página 22) Utilice el botón para ajustar la ... -
Page 26: Especificaciones
5 Especificaciones 2 No hay ningún menú abierto en el micrófono; el receptor no está en el modo de configu- Tipo de micrófono: Micrófono de mano ración con cápsula condensadora 3 El símbolo (= baterías descargadas) del visualizador no parpadea Patrón polar: Cardioide Rango de frecuencias... -
Page 27: Resumen De Grupos Y Canales
CH 21 532,775 CH 21 540,375 CH 21 540,875 CH 21 536,300 CH 21 537,050 CH 22 541,875 Manual de instrucciones protegido por el copyright de MONACOR INTERNATIONAL GmbH & Co. KG. Toda ® reproducción mismo parcial para fines comerciales está prohibida. - Page 28 MONACOR INTERNATIONAL GmbH & Co. KG, Zum Falsch 36, 28307 Bremen, Germany Copyright by MONACOR INTERNATIONAL. All rights reserved. A-1979.99.01.05.2019 ©...
Need help?
Do you have a question about the JTS RU-G3TH/5 and is the answer not in the manual?
Questions and answers