Black & Decker HOME CAFE GT300 Quick Start Manual
One-cup coffeemaker
Hide thumbs
Also See for HOME CAFE GT300:
- Use and care book manual (22 pages) ,
- Use and care book manual (24 pages)
Advertisement
Quick Links
55933Pub1000002353
6/1/05
4:51 PM
Page 1
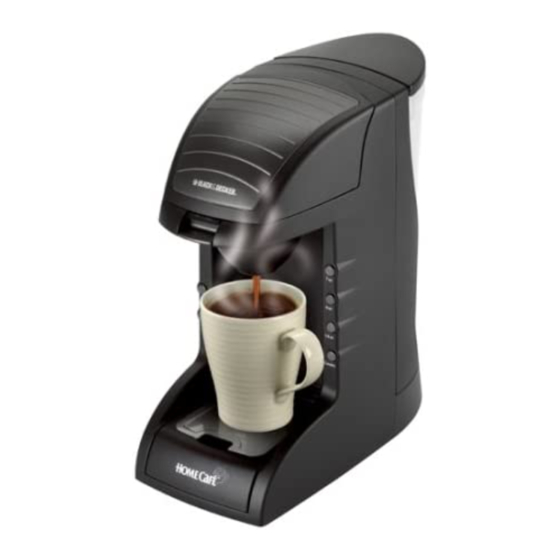
One-Cup Coffeemaker
PREPARING UNIT FOR FIRST USE
1. Remove the water reservoir from the back of the unit (A).
2. Remove reservoir lid and fill reservoir with water to the 7 oz., 9 oz.
& creamy line. Do not overfill.
3. Press the OPEN lid release lever to unlock the lid (B).
4. Insert a pod holder without using any coffee pods (C).
A
5. Close the lid by pressing down until you hear it snap in place (D).
6. Insert splash guard underneath the pod holder (E).
a. Align the splash guard tabs with the side openings on the unit.
b.Turn splash guard counterclockwise until securely in place.
7. With lid in place, slide reservoir down securely in place.
B
8. Place a 9-oz. or larger cup on the cup tray (F).
9. Plug in the unit.
10.Press the 7-oz. brew button. The blue indicator light blinks then
changes to steady blue. Once the priming cycle is finished the unit
beeps 3 times and the blue light goes out.
C
Note: During the priming cycle, the unit may be loud and create a larger
than normal amount of steam. This is normal.
Now your unit is ready for use!
BREWING A CUP OF COFFEE
1. Remove the water reservoir and fill with water according to the cup
size you are using (G).
D
2. Insert water reservoir back into the unit.
3. Unlock the lid by pressing the OPEN release lever to the open position.
4. Place appropriate pod holder in the unit (H).
5. Insert appropriate pod into the pod holder (J).
E
6. Close the lid.
7. Place cup on the cup tray. If using a tall cup or mug, remove the drip
tray (K).
Caution: Cup tray might get hot from previous brew; be sure it has cooled
completely before touching it.
F
8. Press the desired brew button. The brew button light blinks then
it remains on until the brewing cycle is finished.
Important: Make sure that your cup size matches your brew selection
(for example; use a 7-oz. cup for a 7-oz. brew selection), otherwise
Multiple
you might have an overflow (for example; do not use a 7-oz. cup for
brews
a 14-oz. brew selection).
9. When the brew button indicator light goes out, remove the filled
14 oz
cup from the cup tray.
10. To dispose of used pod, unlock lid and remove the pod.
7 oz
Important Tip
9 oz
The lid on your unit automatically stays locked during the brewing
cycle, if there is a power failure or if it stops unexpectedly.
G
To unlock the lid:
1. Press the STOP button.
2. Wait a few seconds then press the OPEN release lever on the lid. The
lid opens and the STOP indicator light goes out.
H
3. Close the lid and start a new brew cycle with an empty cup to avoid
coffee overflow.
Your Home Café™ coffeemaker has been specifically designed to use with
Folgers
®
and Millstone
damage your unit.
J
K
Quick Start Guide
Models
GT300, GT305, GT320
®
coffee pods. Using other brands of coffee pods can
Cafetera de una taza
PASOS PRELIMINARES ANTES DEL PRIMER USO
1. Retire el tanque de agua de la parte trasera del aparato (A).
2. Retire la tapa del tanque y llene el tanque con agua hasta la línea
7 oz., 9 oz. y consistencia cremosa (Creamy). No exceda el nivel
de llenado.
3. Presione la palanca (OPEN) para abrir la tapa (B).
A
4. Inserte un sostenedor de bolsitas, sin colocar una bolsita de café (C).
5. Cierre la tapa, presionando para abajo hasta quedar bien cerrada (D).
6. Inserte la guarda contra salpicaduras debajo del sostenedor de
bolsitas (E).
a. Haga coincidir las guías de la guarda con las aperturas laterales
del aparato.
B
b.Gire la guarda hacia la izquierda hasta encajar bien en su lugar.
7. Coloque la tapa sobre el tanque y deslice el mismo hasta encajar bien
en su lugar.
8. Coloque una taza de 9 oz. o una más grande sobre la bandeja para
las tazas (F).
C
9. Enchufe el aparato.
10.Presione el botón de colado para 7 oz. La luz indicadora azul
parpadea y luego pasa a luz fija. Al finalizar el ciclo, el aparato
produce tres (3) sonidos cortos y la luz azul se apaga.
Nota: Durante el primer ciclo de colado, el aparato puede producir ciertos
D
ruidos más fuertes al igual que mayor cantidad de vapor. Esto es normal.
¡La cafetera se encuentra lista para colar!
COLADO DE UNA TAZA DE CAFÉ
1. Retire el tanque de la cafetera y llene con agua según el tamaño
de la taza que va a usar (G).
E
2. Instale el tanque nuevamente en el aparato.
3. Abra la tapa, presionando la palanca (OPEN) hasta abrirla
por completo.
4. Coloque el sostenedor de bolsitas apropiado en el aparato (H).
5. Inserte la bolsita adecuada en el sostenedor de bolsitas (J).
F
6. Cierre la tapa.
7. Coloque la taza sobre la bandeja para las tazas. Si utiliza una taza
o un jarro alto, retire la bandeja de goteo (K).
Multiple
Advertencia: La bandeja para las tazas podría estar caliente después
brews
del ciclo de colado anterior; asegúrese de que se haya enfriado bien
antes de tocarla.
14 oz
8. Presione el botón de colado deseado. La luz indicadora del botón
de colado parpadea y permanece encendida hasta finalizar el
ciclo de colado.
7 oz
Importante: Asegúrese de que el tamaño de la taza coincida con el
9 oz
ciclo de colado (por ejemplo; utilice una taza de 7 oz. para el ciclo
de colado de 7 oz. De lo contrario, el café se puede derramar. Para el
G
caso, uno no debe de utilizar una taza de 7 oz. para el ciclo de
colado de 14 oz.
9. Cuando la luz indicadora del ciclo de colado se apague, retire la taza
de la bandeja para las tazas.
10. Para desechar la bolsita de café usada, abra la tapa y retire la bolsita.
H
Consejos importantes
La tapa del aparato permanece cerrada automáticamente durante el ciclo
de colado, en caso de una falla eléctrica o si el aparato deja de funcionar
repentinamente.
J
Para quitar el seguro de la tapa:
1. Presione el botón de interrupción (STOP).
2. Espere unos segundos y presione la palanca (OPEN) de la tapa. La tapa
se abre y la luz indicadora STOP se apaga.
3. Cierre la tapa para dar inicio a otro ciclo de colado, utilizando una taza
vacía para evitar que el café se derrame.
La cafetera Home Café™ ha sido diseñada especialmente para funcionar
K
con las bolsitas de café Folgers
otras marcas puede dañar el aparato.
Instrucciones
de inicio rápido
Modelos
GT300, GT305, GT320
®
y Millstone
®
. El utilizar bolsitas de café de
Advertisement

Related Manuals for Black & Decker HOME CAFE GT300


Summary of Contents for Black & Decker HOME CAFE GT300
-
Page 1: Quick Start Guide
STOP indicator light goes out. 3. Close the lid and start a new brew cycle with an empty cup to avoid coffee overflow. Your Home Café™ coffeemaker has been specifically designed to use with Folgers ®... - Page 2 55933Pub1000002353 6/1/05 4:51 PM Page 2 GT300, GT305, GT320 Cafetière de une tasse PREPARATIFS 1. Retirer le réservoir de l'arrière de l'appareil (A). 2. Retirer le couvercle du réservoir et remplir celui-ci jusqu'à la marque de 218 ml (7 oz), 281 ml (9 oz) ou de café crémeux (CREAMY). Éviter de trop remplir.