Table of Contents
Advertisement
Advertisement
Table of Contents

Subscribe to Our Youtube Channel
Summary of Contents for Hatchbox Alpha
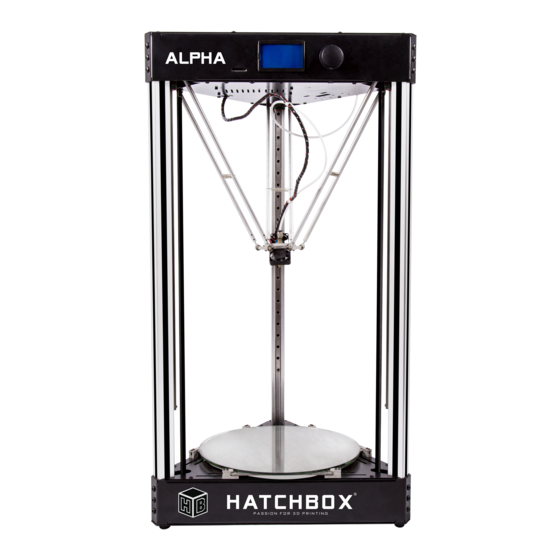
- Page 1 USER MANUAL v 1.0 YOUR CREATIVITY. OUR TOOLS.
- Page 2 About us From professional engineers to designers and hobbyists alike, enter into the world of HATCHBOX for endless innovation and design opportunities in 3D printing. Our printer and extensive collection of filaments cater to a variety of applications suitable for home, business, or anything your creative intellect aspires for.
-
Page 3: Table Of Contents
Welcome ..............Warning and Cautions ..............Specifications ..............How it Works ..............Set Up What’s Included ..............Hatchbox Alpha Diagram ..............Unpacking Printer ..............Build Plate ..............Filament Rack Assembly ..............Powering the Printer ..............Start Up Automatic Leveling .............. -
Page 4: Getting Started
Getting Started... -
Page 5: Welcome
Welcome Getting Started This user guide is designed to start your journey with HATCHBOX ALPHA 3D printer. Follow this guide at a pace that you are comfortable with in order to know how to use and operate the 3D Printer properly. Even if you are familiar with delta type 3D printers, it is essential that you read through this guide thoroughly before starting your creative journey. -
Page 6: Warning And Cautions
• Failure to read this user manual before installing and using the 3D printer may cause personal injury and/or property damage. • HATCHBOX 3D printers generate high temperatures and include moving parts that may cause serious injury. • Always connect 3D printer power cord directly to the wall outlet. -
Page 7: Specifications
Specifications Getting Started Printing: Print Technology: Fused Filament Fabrication (FFF) Build Volume: 300 mm diameter, 330 mm height Print Quality: 0.050 mm – 0.400 mm Position Precision: X, Y, and Z at 0.05 mm Filament Diameter: 1.75 mm Nozzle Diameter: 0.40 mm Print Speed: 20 –... -
Page 8: How It Works
How it Works Getting Started HATCHBOX Alpha 3D Printer makes solid, three-dimensional objects. The control software will translate your 3D drawing from STL, AMF, OBJ format into GCODE, which instructs the 3D printer to print the model via USB cable or SD Card. The 3D printer filament then feeds through the PTFE guide tube to the extruder’s hot end, creating a 3D product layer by layer. -
Page 9: Set Up
Set Up... -
Page 10: What's Included
What’s included - Check list Set Up √ Glass Build Platform 20A 125V Power Cord High Speed 2.0 USB Cable HATCHBOX Alpha 3D Printer Retractable Breakaway 8 Piece Hex Wrench Set Phillips Screw Driver 1 MM Micro Sheer Utility Knife... -
Page 11: Hatchbox Alpha Diagram
Hatchbox Alpha Diagram Set Up Front View 1. LCD Screen 2. Function Button 3. SD Card Input 4. Fan A 5. Fan B 6. Hot End 7. PTFE Tubing 8. Build Plate Side View Filament Extruder USB A to B... -
Page 12: Unpacking Printer
Unpacking Printer Set Up 1. R e m o v e t h e t o p l i d o f t h e shipping box. 2. Remove the shipment padding. 3. Highly suggested: between 2 people, firmly hold the top of the 3D printer and carefully lift upward and away from the packaging. - Page 13 Unpacking Printer (cont) Set Up 4. Remove the 3D printer’s plastic covering. 5. There are 2 layers of zip ties and foam padding protecting the rails. Use scissors to carefully cut the 1st layer of zip ties. Remove the 1st layer of foam padding. Use scissors to carefully cut the 2nd layer of zip ties.
-
Page 14: Build Plate
Build Plate Set Up This is the glass build plate, which is also known as the bed. The build plate can reach a maximum temperature of 110℃ to effectively prevent warping of the model during printing. For PLA filaments it’s recommended to use blue painters tape and ABS filaments it’s recommended to use Kapton tape. Please view the 3D printer filament manufacture recommending setting and use of the build plate in order to properly print your model. -
Page 15: Filament Rack Assembly
Filament Rack Assembly Set Up In this section, you will learn how to set up the provided spool rack. The parts needed will be the 2 Filament Rack Knobs, Filament Rack Stand A, Filament Rack Stand B, Filament Rack Spool, and Filament Rack Rubber Feet. Before starting, ensure that the Filament Rack is set up on an even surface. -
Page 16: Powering The Printer
Powering the Printer Set Up 1. Plug the female end of the Power Cord into the 3D printer’s Power Supply, which is located on the right hand side of the 3D printer (when facing the LCD Screen). Plug the male end of the Power Cord into the wall outlet. -
Page 17: Start Up
Start Up... -
Page 18: Automatic Leveling
Automatic Leveling Start Up HATCHBOX Alpha 3D printer has an Automatic Leveling function that can be controlled by adjusting it within the LCD screen. This is the first step that is required to ensure proper first layer adhesion. Follow the steps below to continue with Automatic Leveling. - Page 19 Automatic Leveling (cont) Start Up Why is automatic leveling important? The distance between the hot end nozzle and the build plate should be adjusted to the proper distance in order to ensure first layer adhesion. If there is an issue, the Z-Offset parameter needs to be corrected.
-
Page 20: Z-Offset
Z-Offset Start Up Warning: If your Z-Offset is not set properly and it is too close to the build plate, it can damage the hot end nozzle and/or the build plate. When correcting and setting the Z-Offset, be ready to power off the 3D printer immediately to prevent damage to the hot end nozzle and build plate. -
Page 21: Loading/Unloading Filament
Loading/Unloading Filament Start Up Before loading the filament into the 3D printer, securely place the filament rack with the filament on top of the 3D printer. Loading Filament: Manually feed the filament into the Filament Extruder while pressing down on the Filament Extruder Handle until the filament reaches about half an inch into the PTFE tubing. -
Page 22: Software
Software... -
Page 23: Software Setup
GCODE. In this section, we will provide you with the necessary information in order to set up HATCHBOX Alpha 3D to properly print with any open source slicing software you choose. - Page 24 *This is a general rule and will vary based on the ambient temperature the 3D printer will be running. Set Up is now complete and you are ready to print with the HATCHBOX Alpha 3D printer. For better print quality, please visit your selected slicing software’s website in order to read the...
-
Page 25: Maintenance
Maintenance... -
Page 26: Lubrication
Lubrication/Screw Tension Maintenance Lubrication To ensure the life of the rail, we recommend lubricating the linear rail every 200 hours or as needed. Screw Tension The 3D printer contains 12 core screws that will need to be fastened. Overtime, due to vibration and movement while printing, these screws may become loose. -
Page 27: Lcd Screen
LCD Screen... -
Page 28: Utilities Menu
Utilities Menu LCD Screen In the Utilities Menu, you can rotate the Function Button to show you the statistical information of your print, as well as the total printing time, and filament printed. Current extrusion temperature / Desired extrusion temperature Current bed temperature / Desired bed temperature Filament extrusion flow rate Printing rate... -
Page 29: Main Menu
Main Menu LCD Screen The Main Menu is where you have access to the features of the 3D printer controls and adjustments. There are 6 options within the Main Menu, as well as Sub Menus for each of the 6 options. This will be explained as a glossary. - Page 30 Main Menu (cont) LCD Screen 4. Extruder: 4.1. Bed Temp: Can be used to preheat the build platform or adjust the temperature during printing. 4.2. Temp. 1: Can be used to preheat the extruder hot end or adjust the temperature during printing.
-
Page 31: Warranty
Warranty... -
Page 32: Warranty 31 Warranty
Who is Covered All warranty claims must be made by the original purchaser of HATCHBOX products and cannot be transferred. The product must be purchased brand new with original invoice/order number directly from Hatchbox or authorized partners, visit hatchbox3d.com for the complete list of authorized partners. - Page 33 HATCHBOX may send out any needed replacement parts as needed. Hatchbox reserves the right to request that defective parts and/or printers be returned back to us in exchange for a replacement. An RMA form must be printed and included in your return package for a warranty claim to be valid.
-
Page 34: Terms Of Service
Terms of Service... -
Page 35: Terms Of Service
Please check hatchbox3d.com frequently for any updates to these terms as HATCHBOX reserves the right to revise these terms at any time. You agree through your purchase and/or use of the product to be bound by any modifications to these terms. - Page 36 “as is” without any representations or warranties, express, or implied. HATCHBOX makes no representations or warranties in relation to the website or the informational materials provided. By using the website and product, you agree that the exclusions and limitations of liability set out in this website disclaimer are reasonable.
Need help?
Do you have a question about the Alpha and is the answer not in the manual?
Questions and answers