Table of Contents
Advertisement
Quick Links
User's
Manual
Fiber-optic FA-bus Module
Fiber-optic FA-bus Type 2 Module
FA-bus Type 2 Module
Applicable Modules:
Model Code
F3LR01-0N
F3LR02-0N
F3LR02-1W
Notice:
KM67 for F3LR02-0N is discontinued by the cable manufacturer in June, 2017.
Therefore, having 500m distance between unit with F3LR02-0N with newly engineering is impossible.
Yokogawa Electric Corporation
Model Name
Fiber-optic FA-bus Module
Fiber-optic FA-bus Type 2 Module
FA-bus Type 2 Module
IM 34M06H45-01E
IM 34M06H45-01E
7th Edition
Advertisement
Table of Contents
Troubleshooting

Related Manuals for YOKOGAWA F3LR02-0N


Summary of Contents for YOKOGAWA F3LR02-0N
- Page 1 Fiber-optic FA-bus Type 2 Module F3LR02-1W FA-bus Type 2 Module Notice: KM67 for F3LR02-0N is discontinued by the cable manufacturer in June, 2017. Therefore, having 500m distance between unit with F3LR02-0N with newly engineering is impossible. IM 34M06H45-01E 7th Edition Yokogawa Electric Corporation...
- Page 2 Blank Page...
-
Page 3: Applicable Product
The document number for this manual is given below. Refer to the document number in all communications, including when purchasing additional copies of this manual. - Document No. : IM 34M06H45-01E IM 34M06H45-01E 7th Edition : Aug.30, 2019-00 All Rights Reserved Copyright © 1999, Yokogawa Electric Corporation... -
Page 4: Precautions
- Every effort has been made to ensure accuracy in the preparation of this manual. However, should any errors or omissions come to the attention of the user, please contact the nearest Yokogawa Electric representative or sales office. Safety Symbols - ”Handle with care.”... - Page 5 WARRANTY that is provided separately. - Yokogawa Electric assumes no liability to any party for any loss or damage, direct or indirect, caused by the use or any unpredictable defect of the product.
- Page 6 Software Supplied by the Company - Yokogawa Electric makes no other warranties expressed or implied except as provided in its warranty clause for software supplied by the company. - Use the software with one computer only. You must purchase another copy of the software for use with each additional computer.
- Page 7 General Requirements for Using the FA-M3 / e-RT3 Controller Set the product in a location that fulfills the following requirements: - INDOOR USE ONLY - This product is an open equipment. The product must be installed in a metallic panel enclosure with an impact rating IK08 or more.
- Page 8 Configure and route cables with noise control considerations: - Perform installation and wiring that segregates system parts that may likely become noise sources and system parts that are susceptible to noise. Segregation can be achieved by measures such as segregating by distance, installing a filter or segregating the grounding system.
- Page 9 - Refer to “A3.5.4 Grounding Procedure” in the “Hardware Manual” for attaching the grounding wiring. Authorized Representative: - The Authorized Representative for this product in the EEA is: Yokogawa Europe B. V. Euroweg 2, 3825 HD Amersfoort, The Netherlands IM 34M06H45-01E...
- Page 10 viii General Requirements for Using the FA-M3 Slave Units (TAH Series) C onnect YHLS cable to SHIELD terminal: - Connect the DRAIN line of the YHLS cable to the SHIELD terminal of the YHLS master module securely. Failing to do so may affect the performance of the YHLS system.
- Page 11 With reference to the equipment types in the WEEE directive, this product is classified as a “Monitoring and Control instruments”. When disposing of products in the EU, contact your local Yokogawa Europe B. V. office. Do not dispose of this product in domestic household waste.
-
Page 12: Introduction
Introduction Overview of the Manual This manual describes the specifications of the Fiber-optic FA-bus Module, Fiber-optic FA-bus Type 2 Module and FA-bus Type 2 Module, as well as how to send or receive data using these modules. These modules are used to control distributed I/O subunits installed at remote locations (approximately 100 to 500 meters away). - Page 13 Structure of the Manual This manual consists of three parts as follows. Part A: Fiber-optic FA-bus Module (F3LR01-0N), Part B: Fiber-optic FA-bus Type 2 Module (F3LR02-0N), and Part C: FA-bus Type 2 Module (F3LR02-1W). Other User’s Manuals For individual sequence CPU modules, please refer to the latest versions of the relevant user's manuals as required.
-
Page 14: Copyrights And Trademarks
Copyrights The copyright of the programs and online manuals contained in the software medium of the Software Product shall remain in YOKOGAWA. You are allowed to print the required pages of the online manuals for the purposes of using or operating the Product; however, reprinting or reproducing the entire document is strictly prohibited by the Copyright Law. -
Page 15: Table Of Contents
TOC-1 Fiber-optic FA-bus Module Fiber-optic FA-bus Type 2 Module FA-bus Type 2 Module IM 34M06H45-01E 7th Edition CONTENTS Applicable Product ....................i Precautions ......................ii Introduction ......................x Copyrights and Trademarks ................xii PART-A Fiber-optic FA-bus Module (F3LR01-0N) Overview....................A1-1 A1.1 Features ...................... - Page 16 A8.2 When RDY LED is Not Lit ................. A8-2 A8.3 When ERR LED is Lit ..................A8-3 Index ...................... Index A-1 Part-B Fiber-optic FA-bus Type 2 Module (F3LR02-0N) Overview....................B1-1 B1.1 Features ......................B1-2 Specifications ..................B2-1 B2.1 Model and Suffix Codes ..................B2-1 B2.2...
- Page 17 TOC-3 Pre-operation Setup and Cable Connection ........B4-1 B4.1 Startup Procedure ..................... B4-1 B4.2 Setting Switches ....................B4-2 B4.2.1 Setting Unit Number ................. B4-3 B4.2.2 Setting Slot Number ................. B4-3 B4.2.3 Enabling/DisablingShutdown Output on Transmission Channel Error Function ..........B4-5 B4.2.4 Setting the Number of Ports .............
- Page 18 TOC-4 Errors and Troubleshooting ............... B7-1 B7.1 Troubleshooting Flowcharts ................B7-1 B7.2 When RDY LED is Not Lit ................. B7-2 B7.3 When ERR1 LED or ERR2 LED is Lit .............. B7-3 Index ..................... Index B-1 PART-C FA-bus Type 2 Module (F3LR02-1W) Overview....................
- Page 19 TOC-5 I/O Refresh Time .................. C5-1 C5.1 Estimating I/O Refresh Time ................C5-1 C5.2 Example of I/O Refresh Time Calculation............C5-2 RAS Functions of FA-bus Type 2 ............C6-1 C6.1 System Operation with Transmission Channel Error ........C6-1 C6.1.1 Run or Stop System ................. C6-1 C6.1.2 Causes of Transmission Channel Errors ..........
- Page 20 Blank Page...
-
Page 21: Part-A Fiber-Optic Fa-Bus Module (F3Lr01-0N)
TOC A-1 Fiber-optic FA-bus Module Fiber-optic FA-bus Type 2 Module FA-bus Type 2 Module Part-A: Fiber-optic FA-bus Module IM 34M06H45-01E 7th Edition Part A of the manual describes the Fiber-optic FA-bus Module (F3LR01-0N). IM 34M06H45-01E 7th Edition : Aug.30, 2019-00... - Page 22 Blank Page...
-
Page 23: A1. Overview
A1-1 A1. Overview The Model F3LR01-0N Fiber-optic FA-bus Module (hereinafter referred to as ‘the module’ or ‘this module’) is an interface module for configuring a distributed control system on a fiber-optic FA bus. A user can configure an efficient remote I/O system by installing Fiber-optic FA-bus modules in the FA-M3 main unit and subunits and connecting them via a fiber-optic FA bus (fiber-optic cable). -
Page 24: A1.2 Application Example
A1-2 A1.2 Application Example In general, configuring a remote I/O system presents many challenges such as configuration (environment) setup, use of specific remote I/O instructions and long I/O refresh time. Using fiber-optic FA-bus modules to configure a remote I/O system, however, totally eliminates such headaches. -
Page 25: A2. Specifications
A2-1 A2. Specifications A2.1 Model and Suffix Codes Table A2.1 Model and Suffix Codes Suffix Style Option Model Remarks Code Code Code Maximum total distance: 200 m F3LR01 Maximum distance between units: 200 m A2.2 Function Specifications General Specifications Table A2.2 General Specifications Item Specifications... -
Page 26: A2.4 Components And Their Functions
A2-2 A2.4 Components and Their Functions Front View RDY indicators: Green when the internal circuitry is functioning normally. ERR indicators: Red when the module fails to detect an input signal SUB UNIT from the fiber-optic connection port. Unit Number Switch (Subunit number) Specifies the unit number (0 to 7). -
Page 27: A2.5 External Dimensions
A2-3 A2.5 External Dimensions External Dimensions Unit:mm 83.2 28.9 SUB UNIT NO . Figure A2.2 External Dimensions Installation Depth When installing the module, always take into consideration space required for bending of cords and cables. Table A2.4 Bending Radius Bending Radius, r (mm) KF-07 (a = 18.3) CF-2071, CF-2071H (a = 35.0) - Page 28 Blank Page...
-
Page 29: A3. System Configuration
A3-1 A3. System Configuration A3.1 Fiber-optic FA-bus System Configuration In a Fiber-optic FA-bus system configuration, FA-bus modules are installed in main unit and subunits, and then connected using fiber-optic cables. Main unit Unit with CPU module installed Subunits Units used for main unit system extension (with no CPU module installed) A3.1.1 Restrictions on System Configuration... - Page 30 A3-2 Note The following figures show example configurations when using both FA-M3 and FA500 modules. Star Configuration FA-M3 Main unit FA500 FA-M3 FA-M3 Subunits (7* max.) *: 6 max. when using F3SP20 or F3SP30) FA0321.VSD Daisy-Chain + Star Configuration FA-M3 Main unit FA500...
-
Page 31: A4. Pre-Operation Setup And Cable Connection
A4-1 A4. Pre-operation Setup and Cable Connection A4.1 Startup Procedure The following figure shows the system startup procedure when using Fiber-optic FA-bus modules. Build system configuration See "Cabling Instructions for Determine instrument layout Fiber-optic Cables" from Sumitomo Electric Industries, Ltd.See “Documents on How to Lay Fiber-optic Cables”... -
Page 32: A4.2 Setting Switches
A4-2 A4.2 Setting Switches A4.2.1 Setting Unit Number Switch For a Fiber-optic FA-bus module, set its unit number decimal rotary switch located on the front face of the module to the number of the unit where it is installed. SUB UNIT FA0421.VSD Figure A4.2 Unit Number Switch Located on Front Face of Module The unit number ranges from 0 to 7*. -
Page 33: A4.2.2 Setting Condition Switches
A4-3 A4.2.2 Setting Condition Switches Use the DIP switch (SW1 to SW4) located on the right side of the module to set up the following functions. Enabling/Disabling Shutdown Output on Transmission Channel Error Function Use SW1 for this setting. This switch is valid only for subunits. -
Page 34: A4.3 Attaching And Detaching Modules
A4-4 A4.3 Attaching and Detaching Modules A4.3.1 Attaching the Module Figure A4.3 shows how to attach this module to the base module. First hook the anchor slot at the bottom of the module to be attached onto the anchor pin on the bottom of the base module. -
Page 35: A4.3.3 Attaching Modules In Intense Vibration Environments
A4-5 A4.3.3 Attaching Modules in Intense Vibration Environments If the module is used in intense vibration environments, fasten the module with a screw. Use screws of type listed in the table below. Insert these screws into the screw holes on top of the module and tighten them with a Phillips screwdriver. -
Page 36: Connecting Fiber-Optic Cables
A4.4 Connecting Fiber-optic Cables A4.4.1 Cable Preparation Use the following fiber-optic cables for connecting Fiber-optic FA-bus modules. Specifications for Fiber-optic Cable Table A4.3 Specifications for Fiber-optic Cable Cores Yokogawa Cable KM60 KM60,KM61,KM62,KM65,KM69 Model Number Fiber-optic Cable DK-HPF200/230 2×CCV-HC-20/07 Model No.(Size)... - Page 37 Note: For information on pulling eyes, see the fiber-optic lead-in cable laying pulling-eye assembly diagram in this manual. Note: KM69 is used for wiring which is required flame-resistance. Note KM6 cables cannot be used in submerged environments. Contact Yokogawa’s sales office for alternative solutions. External Diagram KM60...
- Page 38 A4-8 KM61, KM62, KM69 Protective tape Optical connector Indentification marking Identification marking Optical connector winding or protective coating (End with sheath removed) (End with sheath removed) Fiber-optic cable Tension member Tension member 200±50mm 200±50mm L + tolerance Indentification marking Identification marking Optical connector Optical connector Protective tape winding...
- Page 39 A4-9 Cross-sectional view KM60 ex. Sumitomo Electric Industries Identification mark or Cereal No. Core (quartz glass) Clad (fluorinated acrylate resin) 2.2±0.3mm Cover (fluorine-based resin) Reinforcer (aromatic high tensile fiber) Outer cover (heat-resistant PVC black) FA0443.VSD KM61, KM62, KM65, KM69 Fiber-optic single-core cord Tension member (plastic-covered steel wire) Lacing (plastic lacing)
- Page 40 A4-10 Fiber-optic Lead-in Cable Laying Pulling-Eye Assembly Diagram Unit: mm ① ② ③ ④ ⑤ 30 15 Rigid section ⑦ Approx. 50 Rigid section ⑥ ⑧ Approx. 500 Components Qty. ① Pulling eye ② Stopper screw (M6) ③ Flexible pipe When performing lead-in work, connect the pulling eye to the tow ④...
- Page 41 A4-11 Note Do not use products other than those specified above. Doing so may result in hardware failure, incorrect operation or inability to achieve designed performance. Products to be Used When Laying Cables When laying fiber-optic cables, use the following products from Sumitomo Electric Industries.
-
Page 42: A4.4.2 Attaching And Detaching Connectors
A4-12 A4.4.2 Attaching and Detaching Connectors Attaching Connectors FA0447.VSD Figure A4.6 Attaching Connectors When attaching a fiber-optic cable connector, always hold the connector (never the cable), and then insert it until it clicks into place. Then, hold the connector and pull it lightly to make sure that it is correctly seated. ... -
Page 43: A4.4.3 Precautions When Connecting Fiber-Optic Cables
A4-13 A4.4.3 Precautions When Connecting Fiber-optic Cables Handle fiber-optic cables with care. Before laying fiber-optic cables, read manuals available from Sumitomo Electric Industries. Engage a professional contractor specializing in laying fiber-optic cables. Read Page vii of this manual and the “Fiber-optic Cable Laying Instructions” (IM34M9C92-01E). -
Page 44: A4.5 Pre-Operation Checks
A4-14 A4.5 Pre-operation Checks A4.5.1 Checking Transmission Loss Measure the transmission loss of fiber-optic cables after laying. Exercise care during laying as excessive tension, bending and pressure during cable laying may cause cables to break or crack. The following table shows the transmission loss of fiber-optic cables and permissible transmission loss for the Fiber-optic FA-bus module. -
Page 45: A4.5.2 Led Checks
A4-15 A4.5.2 LED Checks After installing modules and connecting fiber-optic cables, check that the modules are properly connected for communications. There should be no cable discontinuity or improper connection. Apply power to the units and perform the following checks. The RDY (green) LED indicator must be lit If this indicator is not lit, it may be because the Fiber-optic FA-bus module is not properly mounted to the base module. -
Page 46: A4.6 Precautions When Applying Power
A4-16 A4.6 Precautions When Applying Power When turning on the power supply to the main unit and subunits, follow the sequence below. First confirm that the main unit and all subunits are turned off. Then turn on the power supply to the main unit and the subunits simultaneously*, or turn on all subunits before turning on the main unit. - Page 47 A4-17 Module Recognition special registers When a module installed in a main unit or subunit is recognized as accessible, the bit corresponding to its slot position in the Module Recognition special registers is set to 1. If a module cannot be read or written due to I/O module failure, subunit power failure or some other reason, its corresponding bit in the Module Recognition special registers is cleared to 0.
- Page 48 Blank Page...
-
Page 49: A5. Accessing Modules In A Subunit
A5-1 A5. Accessing Modules in a Subunit A5.1 Slot Number in FA-M3 In FA-M3, slot numbers are used for accessing various modules. A slot number indicates the position of the slot where a module is mounted and is a 3-digit integer with the following structure. Slot number* within a unit : 01 to 16... - Page 50 A5-2 Fiber-optic FA-bus module Slot number 001 002 003 004 005 006 007 008 009 010 011 012 015 016 Power supply Main unit module Add-on sequence CPU (up to 3 CPUs) CPU module 102 103 104 105 106 107 108 109 110 111 112 113 114 115 116 Power supply...
-
Page 51: A6. I/O Refresh Time
A6-1 A6. I/O Refresh Time A6.1 Estimating I/O Refresh Time To estimate the I/O refresh time, calculate the I/O refresh time separately for each port of the main unit. For details, refer to the following example. Sum of I/O refresh times I/O refresh time for each type of access ... -
Page 52: A6.2 An Example Of I/O Refresh Time Calculation
A6-2 A6.2 An Example of I/O Refresh Time Calculation This example calculates the I/O refresh time of the following system configuration. F3LR01-0N Power supply module 150m Sub unit Input: 32-point module x 2 Output: 32-point module x 1 FA0621.VSD Figure 6.1 An Example of I/O Refresh Time Calculation (F3SP22, 28, 38, 53, 58, 59, 66 or 67)) Step 1: Calculate the ‘time dependant on transmission distance’... -
Page 53: A7. Ras Functions
A7-1 A7. RAS Functions A7.1 Error Location Detection Function A7.1.1 LED Display When an error occurs in a Fiber-optic FA-bus module, or when a cable discontinuity occurs in a transmission channel, the error (ERR) LED or alarm (ALM) LED of the CPU module turns on to report the error. -
Page 54: Shutdown Output On Transmission Channel Error Function
A7-2 A7.2 Shutdown Output on Transmission Channel Error Function A7.2.1 Overview of Shutdown Output Function The Fiber-optic FA-bus module is equipped with a function, which forcefully shuts down the output of the I/O module when a communications error occurs. This function prevents an error in a powered-off main unit or a Fiber-optic FA-bus module from affecting the entire system or resulting in hazardous or unstable operation of the system. -
Page 55: A7.2.3 Procedure For Setting I/O Conditions
A7-3 A7.2.3 Procedure for Setting I/O Conditions This section describes the procedure for using the Shutdown Output on Transmission Channel Error function. A7.2.3.1 Setting Condition Switches Setting the condition switch on the right side of the module Condition switch: To enable the Shutdown Output function, you need to set the condition switch located on the right side of the Fiber-optic FA-bus module installed in the subunit. - Page 56 A7-4 A7.2.3.2 DIO Setup in CPU Configuration How to Perform DIO Setup using WideField3 To perform DIO Setup using WideField3, use the following procedure. 1. Select [Project]–[Project Settings] from the WideField3 menu bar. 2. Select [Input/Output Setup] from the Configuration pane of the displayed Project Settings/Configuration window.
- Page 57 A7-5 How to Perform [DIO Setup] using BASIC (F3BP) Use a CONTROL statement to select whether to reset or hold the output of output modules. On 16-point and 32-point modules, the setup is made to the control registers in groups of 8 terminals.
- Page 58 A7-6 A7.2.3.3 Operation Control in CPU Configuration How to set up Operation Control using WideField3 To set up Operation Control using WideField3, use the following procedure. 1. Select [Project]–[Project Settings] from the WideField3 menu bar. 2. Select [Error Handling Setup] from the Configuration pane of the displayed Project Settings/Configuration window.
-
Page 59: A8. Errors And Troubleshooting
A8-1 A8. Errors and Troubleshooting A8.1 Troubleshooting Flowcharts This section shows flowcharts that can be used for troubleshooting problems that may occur with the Fiber-optic FA-bus module during operation. ALM LED of CPU Module is lit Error in Fiber-optic FA-bus module? Check the cause for the lit ALM LED for the error module and troubleshoot accordingly. -
Page 60: A8.2 When Rdy Led Is Not Lit
A8-2 A8.2 When RDY LED is Not Lit RDY LED is not lit Is correct voltage supplied to the power supply module? Apply proper voltage Is RDY LED lit on other modules? Replace the power supply module or the base module Is module mounted properly in its slot? Push the module inwards... -
Page 61: A8.3 When Err Led Is Lit
A8-3 A8.3 When ERR LED is Lit ERR LED is lit Is fiber-optic cable connected? Connect fiber-optic cable Are all units switched on? Turn on power to all other units Is there a cable discontinuity? Replace fiber-optic cable Are the side switches set correctly? Set switches inside the... - Page 62 Blank Page...
-
Page 63: Index
Index A FA-M3 Fiber-optic FA-bus, Fiber-optic FA-bus Type 2, FA-bus Type 2 Modules Part A: Fiber-optic FA-bus Module IM 34M06H45-01E 7th Edition INDEX cable bending radius ........A2-3, A4-5 cable discontinuity ....A4-14, A4-15, A7-1 cable list ..........A4-6, A4-10 installation depth ........ - Page 64 Blank Page...
-
Page 65: Part-B Fiber-Optic Fa-Bus Type 2 Module (F3Lr02-0N)
Fiber-optic FA-bus Module Fiber-optic FA-bus Type 2 Module FA-bus Type 2 Module Part-B: Fiber-optic FA-bus Type 2 Module IM 34M06H45-01E 7th Edition Part B of the manual describes the Fiber-optic FA-bus Type 2 Module (F3LR02-0N). IM 34M06H45-01E 7th Edition : Aug.30, 2019-00... - Page 66 Blank Page...
-
Page 67: B1. Overview
B1-1 B1. Overview The Model F3LR02-0N Fiber-optic FA-bus Type 2 Module (hereinafter referred to as ‘the module’ or ‘this module’) is an interface module for configuring a distributed control system on a fiber-optic FA-bus type 2. A user can configure an efficient remote I/O system by installing Fiber-optic FA-bus Type 2 modules in the FA-M3 main unit and subunits and connecting them using fiber-optic cables. -
Page 68: B1.1 Features
B1-2 B1.1 Features The Fiber-optic FA-bus Type 2 module has the following features. High-speed communications The Fiber-optic FA-bus Type 2 module features 10 Mbps high-speed communications. Users no longer have to worry about I/O refresh time during ladder programming. ... - Page 69 B1-3 Support for multi-distributed systems Supports multi-distributed systems, with up to 32 substations per system and up to 56 substations in total. Hence, it is suitable for many applications. *: These figures apply in configurations where only F3BU04 modules are used. ...
- Page 70 Blank Page...
-
Page 71: B2. Specifications
B2-1 B2. Specifications B2.1 Model and Suffix Codes Table B2.1 Model and Suffix Codes Suffix Style Option Model Remarks Code Code Code Maximum total distance: 1.4 km F3LR02 Maximum distance between units: 500 m B2.2 Function Specifications General Specifications Table B2.2 General Specifications Item Specifications... -
Page 72: Components And Their Functions
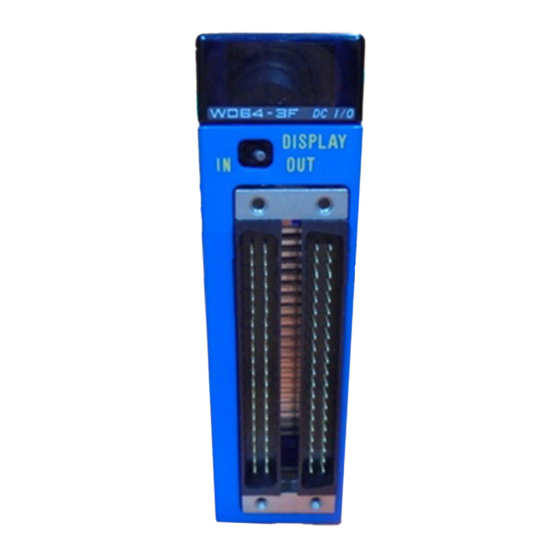
Distance Between Stations (Length of optical fiber) (m) number Port 1 light intensity Port 2 light Some modules may use the intensity following DIP switch instead. FB0232.VSD Figure B2.1 Components and Their Functions (F3LR02-0N) IM 34M06H45-01E 7th Edition : Aug.30, 2019-00... -
Page 73: External Dimensions
LR02-0N REMOTE SUB UNIT LEFT SLOT FB0241.VSD Figure B2.2 External Dimensions of F3LR02-0N Installation Depth When installing the module, always take into consideration space required for bending of fiber-optic cords and cables. Table B2.4 Bending Radius Bending Radius, r (mm) KF-07 (a=18.3) - Page 74 Blank Page...
-
Page 75: B3. Fiber-Optic Fa-Bus Type 2 System Configuration
B3-1 B3. Fiber-optic FA-bus Type 2 System Configuration B3.1 What Is a Substation? A Fiber-optic FA-bus Type 2 system contains the following elements. Element Description Station A unit installed with a Fiber-optic FA-bus Type 2 module. Main unit A unit installed with a CPU module. (master station) Slots without a CPU module installed and are connected to a main unit via a Fiber-optic FA-bus Type 2 modules for... -
Page 76: B3.2 Substation Configuration
B3-2 B3.2 Substation Configuration In a Fiber-optic FA-bus Type 2 system, a user can split a subunit into multiple substations, as shown in Figure B3.1, “Substation Configuration Example”. Logically, a subunit consists of 16 slots. Up to 7 subunits are allowed in a system. Main unit Slot 1 Subunit 1... -
Page 77: System Configuration And Slot Numbers
B3-3 B3.3 System Configuration and Slot Numbers In FA-M3, slot numbers are used for accessing various modules. A slot number indicates the position of the slot where a module is mounted and is a 3-digit integer with the following structure. Slot number* within a unit : 01 to 16 * : Slot number runs sequentially from 01 to 16,... - Page 78 B3-4 The following figure shows a system configuration example without split subunits, that is, one substation equates to one subunit. Such a configuration can be used if the number of substations required in a system is no more than 7. Fiber-optic FA-bus Type 2 module Slot number ...
- Page 79 B3-5 If the number of substations required is more than 7, build a split-subunit configuration. Slot number 001 002 003 004 005 006 007 008 009 010 011 012 014 015 016 Main unit (substation 1) (substation 2) (substation 3) (substation 4) 102 103 104 106 107 108...
-
Page 80: Restrictions On System Configuration
B3-6 B3.4 Restrictions on System Configuration The following table lists some restrictions when configuring a Fiber-optic FA-bus Type 2 system. Table B3.1 Restrictions when Configuring a Fiber-optic FA Bus System Item Specifications Number of Fiber-optic FA-bus Type 2 modules 7 (In case of subunit split : 15) installable in a master station Number of Fiber-optic... - Page 81 Note - Mixing Fiber-optic FA-bus modules (F3LR01-0N) with Fiber-optic FA-bus Type 2 modules (F3LR02-0N) in a loop configuration is not allowed. - In a loop connection, port 2 of a station must be connected to port 1 of the other station.
- Page 82 Note - Mixing Fiber-optic FA-bus modules (F3LR01-0N) with Fiber-optic FA-bus Type 2 modules (F3LR02-0N) in a daisy chain is not allowed. - In a daisy chain connection, port 1 or port 2 of the master station must be connected to port 1 of the substation. Port 2 of a substation must be connected to port 1 of another substation.
- Page 83 Note - Using Fiber-optic FA-bus modules (F3LR01-0N) together with Fiber-optic FA-bus Type 2 modules (F3LR02-0N) is allowed in a star configuration. - In a star connection, port 1 or port 2 of the master station must be connected to port 1 of the each substation.
-
Page 84: B3.6 System Configuration Design
B3-10 B3.6 System Configuration Design Prerequisites Before designing a system configuration, you must first confirm the following information. - the number of substations (the number of distributed substations) - the location of the substations Design Flow System configuration Number of substations (x) required Whether to split subunits depends on whether the... -
Page 85: Total Distance
B3-11 B3.7 Total Distance The maximum total distance for a fiber-optic cable is determined by the number of substations. Table B3.2 shows the mapping between the number of substations and the maximum total distance. Do not lay cables such that the actual fiber-optic cable length exceeds the maximum total distance, or the distance between two stations exceeds the maximum distance allowed between stations (500 m). -
Page 86: B3.8 Precautions When Changing Slot Number
B3-12 B3.8 Precautions When Changing Slot Number - Only the F3BU04, F3BU05 and F3BU06 base modules allow change of slot numbers . For other base modules, the slot number always start from 1. - When setting addresses, do not duplicate unit/slot addresses within a system. - Splitting of the unit is not allowed for the master station (unit number = 0). -
Page 87: B4. Pre-Operation Setup And Cable Connection
B4-1 B4. Pre-operation Setup and Cable Connection B4.1 Startup Procedure The following figure shows the system startup procedure when using Fiber-optic FA-bus Type 2 modules. Build system configuration See "Cabling Instructions for Fiber-optic Cables" from Determine instrument layout Sumitomo Electric Industries, Ltd. See “... -
Page 88: B4.2 Setting Switches
B4-2 B4.2 Setting Switches Before using this module, set its switches according to its installed location, transmission channel configuration, etc. Table B4.1 gives an overview of the module components and settings. Subsequent subsections describe the setup of individual switches. For details on the location of switches, see Section B2.4, “Components and Their Functions.”... -
Page 89: B4.2.1 Setting Unit Number
B4-3 B4.2.1 Setting Unit Number Set the unit number using the unit number switch. This unit number will be used as an address in programs. The following table lists the valid preset values. Table B4.2 Unit Number Switch Settings Switch Setting Description For modules installed in the main unit (Factory setting: 0) - Page 90 B4-4 F3BU04 Left Slot Number Slot Number — — — — — — — — — — — — B (11) — D (13) — — — F (15) Power supply module FB0422.VSD F3BU05 Left Slot Number Slot Number -...
-
Page 91: Enabling/Disablingshutdown Output On
B4-5 B4.2.3 Enabling/Disabling Shutdown Output on Transmission Channel Error Function This switch is used to specify whether to shutdown the output of the I/O modules in a subunit in the event of a transmission channel error (cable discontinuity, subunit power off, etc.). -
Page 92: B4.2.5 Setting Transmission Channel Configuration
B4-6 B4.2.5 Setting Transmission Channel Configuration This switch sets the communication behavior of the Fiber-optic FA-bus Type 2 module to support various transmission channel configurations. Value Used Ports Star configuration or daisy-chain configuration Loop configuration Note - All Fiber-optic FA-bus Type 2 modules (master station and substations) in the same system should have the same transmission channel configuration setting. -
Page 93: B4.3 Attaching And Detaching Modules
B4-7 B4.3 Attaching and Detaching Modules B4.3.1 Attaching the Module Figure B4.2 shows how to attach this module to the base module. First hook the anchor slot at the bottom of the module to be attached onto the anchor pin on the bottom of the base module. -
Page 94: B4.3.3 Attaching Modules In Intense Vibration Environments
B4-8 B4.3.3 Attaching Modules in Intense Vibration Environments If the module is used in intense vibration environments, fasten the module with a screw. Use screws of type listed in the table below. Insert these screws into the screw holes on top of the module and tighten them with a Phillips screwdriver. -
Page 95: Connecting Fiber-Optic Cables
Cable Preparation Use the following fiber-optic cables to connect Fiber-optic FA-bus Type 2 modules. Specifications for Fiber-optic Cables to be Used Table B4.4 Specifications for Fiber-optic Cable Cores Yokogawa Cable Model Number KM60 KM60,KM61,KM62,KM65,KM69 KM67 Fiber-optic Cable Model No. - Page 96 (F3LR02) if the cable length exceeds 200 m. Using KM62 cables beyond 200 m will affect normal operation. *: KM67 is Discontinued. - KM6□ cables cannot be used in submerged environments. Contact Yokogawa’s sales office for alternative solutions. External Diagram KM60...
- Page 97 B4-11 KM61, KM62, KM67*, KM69 Optical connector Indentification marking Identification marking Optical connector Protective tape winding or protective coating (End with sheath removed) (End with sheath removed) Fiber-optic cable Tension member Tension member 200±50mm 200±50mm L + tolerance Indentification marking Identification marking Optical connector Optical connector...
- Page 98 B4-12 Cross-sectional view KM60 ex. Sumitomo Electric Industries Identification mark or Cereal No. Core (quartz glass) Clad (fluorinated acrylate resin) 2.2±0.3mm Cover (fluorine-based resin) Reinforcer (aromatic high tensile fiber) Outer cover (heat-resistant PVC black) FB0443.VSD KM61, KM62, KM65, KM67* Fiber-optic single-core cord Tension member (plastic-covered steel wire) Lacing (plastic lacing)
- Page 99 B4-13 Fiber-optic Lead-in Cable Laying Pulling-Eye Assembly Diagram Unit: mm ① ② ③ ④ ⑤ 30 15 Rigid section ⑦ Rigid section Approx. 50 ⑥ ⑧ Approx. 500 Components Qty. ① Pulling eye ② Stopper screw (M6) ③ Flexible pipe When performing lead-in work, connect the pulling eye to the tow ④...
- Page 100 B4-14 Note Do not use products other than those specified above. Doing so may result in hardware failure, incorrect operation or inability to achieve designed performance. Products to be Used When Laying Cables When laying fiber-optic cables, use the following products from Sumitomo Electric Industries.
-
Page 101: B4.4.2 Attaching And Detaching Connectors
B4-15 B4.4.2 Attaching and Detaching Connectors Attaching Connectors Fiber-optic cable connector FB0447.VSD Figure B4.5 Attaching Connectors When attaching a fiber-optic cable connector, always hold the connector (never the cable), and then insert it until it clicks into place. Then, hold the connector and pull it lightly to make sure that it is correctly seated. ... -
Page 102: B4.4.3 Precautions When Connecting Fiber-Optic Cables
B4-16 B4.4.3 Precautions When Connecting Fiber-optic Cables Handle fiber-optic cables with care. Before laying fiber-optic cables, read manuals available from Sumitomo Electric Industries. Engage a professional contractor specializing in laying fiber-optic cables. Read “Documents on How to Lay Fiber-optic Cables” under “Introduction” of this manual and the “Fiber-optic Cable Laying Instructions”... -
Page 103: B4.4.4 Connecting Fiber-Optic Cables
B4-17 B4.4.4 Connecting Fiber-optic Cables When connecting modules using fiber-optic cables, there are no restrictions on the sequence of unit numbers and slot numbers. The connection sequence is independent of station addresses. How the modules are connected, however, depends on the transmission channel configuration. - Page 104 B4-18 Example of Loop Configuration In a loop configuration, form a loop with one master station. u0-s1 u1-s1 u2-s1 Master station Substation Substation u3-s1 u3-s5 Substation Substation Always form a loop with one master station module. FB044B.VSD Figure B4.8 Loop Configuration Note (1) When configuring a daisy-chain (including star configuration) When connecting a master station and a substation...
-
Page 105: Pre-Operation Checks
B4-19 B4.5 Pre-operation Checks B4.5.1 Checking Transmission Loss Measure the transmission loss of fiber-optic cables after laying. Exercise care during laying as excessive tension, bending and pressure during cable laying may cause cables to break or crack. The following table shows the transmission loss of fiber-optic cables and permissible transmission loss for the Fiber-optic FA-bus Type 2 module. -
Page 106: B4.5.2 Led Checks
B4-20 B4.5.2 LED Checks After installing modules and connecting fiber-optic cables, check that the modules are properly connected for communications. There should be no cable discontinuity or improper connection. Apply power to the units and perform the following checks: (1) The RDY (green) LED indicator must be lit If this indicator is not lit, it may be because the Fiber-optic FA-bus Type 2 module is not properly mounted to the base module. -
Page 107: B4.6 Precautions When Applying Power
B4-21 B4.6 Precautions When Applying Power When turning on the power supply to the main unit and subunits, follow the sequence below. First confirm that the main unit and all subunits are turned off. Then turn on the power supply to the main unit and the subunits simultaneously*, or turn on all subunits before turning on the main unit. - Page 108 Subunit 6 Subunit 7 *1: When this module (F3LR02-0N) installed in a main unit or subunit is recognized as accessible, the bit corresponding to its slot position in the Module Recognition special registers is set to 1. However a module cannot be read or written due to I/O module failure, subunit power failure or some other reason, its corresponding bit of this module in the Module Recognition special registers is not cleared.
-
Page 109: B5. I/O Refresh Time
B5-1 B5. I/O Refresh Time B5.1 Estimating I/O Refresh Time Calculate the I/O refresh time separately for each port of the main unit. For details, refer to the following example. Sum of I/O refresh times I/O refresh time for each type of access ... -
Page 110: B5.2 Example Of I/O Refresh Time Calculation
B5-2 B5.2 Example of I/O Refresh Time Calculation This example calculates the I/O refresh time for the following system configuration. Main unit F3LR02-0N (Master station) Power supply module 150m Subunit 1 Subunit 2 (Substation 1) (Substation 2) Power Power supply... -
Page 111: B6. Ras Functions Of Fiber-Optic Fa-Bus Type 2
B6-1 B6. RAS Functions of Fiber-optic FA-bus Type 2 B6.1 System Operation with Transmission Channel Error B6.1.1 Run or Stop System You can set the module to either stop the system or continue operation when a transmission channel error occurs in a Fiber-optic FA-bus Type 2 system. B6.1.2 Causes of Transmission Channel Errors A transmission channel error of a Fiber-optic FA-bus Type 2 system may be due to the... - Page 112 B6-2 When using F3SP05/08/21/25/35 Rev.8 or later, or F3SP22, 28, F3SP38, F3SP53, F3SP58 F3SP59, F3SP66, F3SP67, F3SP71 or F3SP76. Migration from a loop configuration to a daisy-chain configuration involves data loss. In situations where the system continues operation, check the Subunit Line Switchover special register and handle any loss of data accordingly.
- Page 113 B6-3 The figure below shows an example of channel migration when an error occurs. Normal operation (communications via primary loop) Data flow Subunit Primary loop Subunit Main unit Secondary loop Port 1 Port 2 Subunit Subunit Error (Discontinuity in primary loop) Main unit Subunit Subunit...
-
Page 114: B6.1.5 Transmission Channel Loop-Back Function
B6-4 B6.1.5 Transmission Channel Loop-back Function When a transmission channel error occurs in a daisy-chain configuration, the channel loop-back function automatically isolates the inaccessible substation and continues system operation. To enable this function, setup the system to continue operation in the event of a transmission channel error. -
Page 115: B6.2 Shutdown Output On Transmission Channel Error Function
B6-5 B6.2 Shutdown Output on Transmission Channel Error Function B6.2.1 Overview of Shutdown Output Function The Fiber-optic FA-bus Type 2 module is equipped with a function, which shuts down the output of the I/O module of a substation when a transmission channel error occurs. This function prevents an error in the Fiber-optic FA-bus type 2 or a powered-off main unit or a powered-off Daisy chain upstream unit from affecting the entire system or resulting in hazardous or unstable system operation. - Page 116 B6-6 Table B6.1 shows the operation of the output module and FAIL signal contact for different setup configurations and transmission channel error locations. In the table, substation A and substation B are defined as follows. Substation A: A substation that is nearer to the master station than the location of a channel error so that a transmission channel is still established between the substation and master station Substation B: A substation that is further from the master station than the location of a...
- Page 117 B6-7 Note As shown on *1 in Table B6.1, FAIL contacts’ condition is different between the substation A and B if the DIPSW1 of the F3LR02 is set OFF for Hold and [Output When Stopped] setting of [DIO Setup] in Project is ‘Hold’. As shown on *2 in Table B6.1, output cannot be shut down in multi CPU system even though DIPSW1 of the F3LR02 is set ON for Shutdown and [Output When Stopped] setting of [DIO Setup] in Project is ‘Reset (OFF)’.
-
Page 118: B6.3 Procedure For Setting Condition Switches
B6-8 B6.3 Procedure for Setting Condition Switches To enable the Shutdown Output on Transmission Channel Error function, use the following procedure. B6.3.1 Setting Condition Switches Setting the Condition Switches Located on the Right Side of the Module Condition switch: To enable the Shutdown Output function, you need to set the condition switch located on the right side of the fiber-optic FA-bus Type 2 module installed in the subunit. -
Page 119: B6.3.2 Dio Setup In Cpu Configuration
B6-9 B6.3.2 DIO Setup in CPU Configuration How to Perform DIO Setup using WideField3 To perform DIO Setup using WideField3, use the following procedure. 1. Select [Project]–[Project Settings] from the WideField3 menu bar. 2. Select [Input/Output Setup] from the Configuration pane of the displayed Project Settings/Configuration window. - Page 120 B6-10 How to Perform [DIO Setup] using BASIC (F3BP) Use a CONTROL statement to select whether to reset or hold the output of an output module. On 16-point and 32-point modules, the setup is made to the control registers in groups of 8 terminals.
-
Page 121: B6.3.3 Operation Control In Cpu Configuration
B6-11 B6.3.3 Operation Control in CPU Configuration How to set up operation control using WideField3 To set up operation control using WideField3, use the following procedure. 1. Select [Project]–[Project Settings] from the WideField3 menu bar. 2. Select [Error Handling Setup] from the Configuration pane of the displayed Project Settings/Configuration window. -
Page 122: B6.4 Error Location Detection Function
B6-12 B6.4 Error Location Detection Function B6.4.1 LED Display When an error occurs with the Fiber-optic FA-bus type 2 module, or when a cable discontinuity occurs in a transmission channel, the error (ERR) LED or alarm (ALM) LED of the CPU module turns on to report the error. Table B6.2 Status of CPU’s LEDs Condition Setting in Configuration Status of... - Page 123 B6-13 Daisy-chain Configuration (Cable discontinuity example 1) ALM lit* ERR lit* Master station ERR2 lit Substation 1 Cable discontinuity ERR1 lit Substation 2 FB0641.VSD The statuses of the ERR and ALM LEDs depend on the configuration setup as shown in Table B6.2, “Status of CPU’s LEDs”.
- Page 124 B6-14 Daisy-chain Configuration (Cable discontinuity example 2) ALM lit* ERR lit* Master station ERR2 lit Substation 1 Cable discontinuity Substation 2 FB0642.VSD The statuses of the ERR and ALM LEDs depend on the configuration setup as shown in Table B6.2, “Status of CPU’s LEDs”.
- Page 125 B6-15 Daisy-chain Configuration (Cable discontinuity example 3) ALM lit* ERR lit* Master station ERR2 lit Substation 1 Cable discontinuity ERR1 lit Substation 2 FB0643.VSD The statuses of the ERR and ALM LEDs depend on the configuration setup as shown in Table B6.2, “Status of CPU’s LEDs”.
- Page 126 B6-16 Loop Configuration (Cable discontinuity example 1) ALM lit* Master station Substation 1 Cable discontinuity ERR1 lit Substation 2 FB0644.VSD A “subunit line switchover” alarm is output. The ALM LED is lit but the ERR LED is not lit and operation continues. Figure B6.10 Relationship between Fiber-optic Cable Discontinuity Location and Status of LEDs (4)
- Page 127 B6-17 Loop Configuration (Cable discontinuity example 2) ALM lit* Master station ERR2 lit Substation 1 Cable discontinuity Substation 2 FB0645.VSD * A “subunit line switchover” alarm is output. The ALM LED is lit but the ERR LED is not lit and operation continues. Figure B6.11 Relationship between Fiber-optic Cable Discontinuity Location and Status of LEDs (5) IM 34M06H45-01E...
- Page 128 B6-18 Loop Configuration (Cable discontinuity example 3) ERR lit* Master station ERR2 lit Substation 1 Cable discontinuity ERR1 lit Substation 2 FB0646.VSD The statuses of the ERR and ALM LEDs depend on the configuration setup as shown in Table B6.2, “Status of CPU’s LEDs”.
-
Page 129: B6.4.2 Logging Of Transmission Channel Error Location
B6-19 B6.4.2 Logging of Transmission Channel Error Location When an error occurs in a transmission channel, an error is logged and a fiber-optic FA-bus transmission channel error location notification is generated. There are two types of notification, namely, subunit communication error and subunit line switchover. (1) Subunit communication error This is an error caused by a transmission channel error or power interruption to a substation (module installed in a subunit). - Page 130 B6-20 On/Off timing of special relays when the power supply of a subunit is interrupted (cable is disconnected) Channel normal M210 Channel error M211 Channel switched All subunits Subunit Subunit Setup switched on swtiched on switched off operation, or cable or cable check replaced...
- Page 131 B6-21 Example 1: System Log Display A system log contains an entry only for the first transmission channel error detected after the program starts execution or after alarms are checked. FB064A.VSD Figure B6.13 System Log Display ERR2 lit Master station Substation Substation Substation...
- Page 132 B6-22 Example 2: Alarm Display FB064C.VSD Figure B6.14 Alarm Display ERR2 lit Master station Substation Substation Substation Cable discontinuity u1-s1 Cable u2-s1 u3-s1 discontinuity Port 1 Port 2 FB064D.VSD Figure B6.15 Example of Cable Discontinuity Note A slot number displayed on the alarm display screen indicates the slot where a Fiber- optic FA-bus Type 2 module is installed.
- Page 133 B6-23 Example 3: System Log Display FB064E.VSD Figure B6.16 System Log Display ERR2 lit* ERR1lit Terminal Master Substation station Substationi Substation station Cable discontinuity u1-s1 u2-s1 u3-s1 u4-s1 Port 1 Port 2 FB064F.VSD *1: ERR is lit when U2-S1 stops the output. Figure B6.17 Example of Cable Discontinuity Note A slot number displayed on the system log screen indicates the slot where a Fiber-optic...
- Page 134 Blank Page...
-
Page 135: B7. Errors And Troubleshooting
B7-1 B7. Errors and Troubleshooting B7.1 Troubleshooting Flowcharts This section shows flowcharts that can be used for troubleshooting problems that may occur with the Fiber-optic FA-bus Type 2 module during operation. CPU module ALM or ERR LED is lit (check error log) I/O error Subunit in I/O module of the... -
Page 136: B7.2 When Rdy Led Is Not Lit
B7-2 B7.2 When RDY LED is Not Lit RDY LED is not lit Is correct voltage applied to the power supply module? Apply proper voltage Is RDY LED lit on other modules? Replace the power supply module or the base module Is module mounted properly in its slot? Push in the module until... -
Page 137: B7.3 When Err1 Led Or Err2 Led Is Lit
B7-3 B7.3 When ERR1 LED or ERR2 LED is Lit ERR1 or ERR2 LED is lit Is fiber-optic cable connected? Connect fiber-optic cable Are all units switched on? Turn on power to all units Is there a cable discontinuity? Replace fiber-optic cable Are the side switches set correctly? - Page 138 Blank Page...
- Page 139 Index B FA-M3 Fiber-optic FA-bus, Fiber-optic FA-bus Type 2, FA-bus Type 2 Modules Part B: Fiber-optic FA-bus Type 2 Module IM 34M06H45-01E 7th Edition system INDEX daisy chain configuration ......B3-8 loop configuration ......... B3-7 ............B6-20 star configuration .......... B3-9 cable stops ............
- Page 140 Blank Page...
- Page 141 TOC C-1 Fiber-optic FA-bus Module Fiber-optic FA-bus Type 2 Module FA-bus Type 2 Module Part-C: FA-bus Type 2 Module IM 34M06H45-01E 7th Edition Part C of the manual describes the FA-bus Type 2 Module (F3LR02-1W). IM 34M06H45-01E 7th Edition : Aug.30, 2019-00...
- Page 142 Blank Page...
-
Page 143: C1. Overview
C1-1 C1. Overview The Model F3LR02-1W FA-bus Type 2 Module (hereinafter referred to as ‘the module’ or ‘this module’) is an interface module for configuring a distributed control system on an FA-bus type 2. A user can configure an efficient remote I/O system by installing FA-bus Type 2 modules in the FA-M3 main unit and subunits and connecting them to each other. -
Page 144: C1.1 Features
C1-2 C1.1 Features The FA-bus Type 2 module has the following features. High-speed communications The FA-bus Type 2 module features 10 Mbps high-speed communications. Users no longer have to worry about I/O refresh time during ladder programming. Simple Wiring FA-bus Type 2 modules can be easily connected using a two-pair (4 wire) shielded twisted cable. -
Page 145: C2. Specifications
C2-1 C2. Specifications C2.1 Model and Suffix Codes Table C2.1 Model and Suffix Codes Suffix Style Option Model Remarks Code Code Code Maximum number of subunits: 7 Maximum distance between stations: 10 m F3LR02 Maximum total distance: 70 m Uses twisted-pair cable C2.2 Function Specifications ... -
Page 146: Components And Their Functions
C2-2 C2.4 Components and Their Functions For details, see Section C4.2, “Setting Switches”. Front View LED indicators ERR1 ERR2 : Lit (green) when the internal circuit is functioning normally. LR02-1W REMOTE ERR1, ERR2 : Lit (red) when the module fails to detect an input signal from port 1 and port 2 respectively. -
Page 147: C2.5 External Dimensions
C2-3 C2.5 External Dimensions External Dimensions unit: mm ERR1 ERR2 LR02-1W REMOTE SUB UNIT SHIELD FC0241.VSD Figure C2.2 External Dimensions of F3LR02-1W IM 34M06H45-01E 7th Edition : Aug.30, 2019-00... - Page 148 Blank Page...
-
Page 149: C3. Fa-Bus Type 2 System Configuration
C3-1 C3. FA-bus Type 2 System Configuration C3.1 System Elements and Terminology The FA-bus Type 2 system contains the following elements. Table C3.1 System Elements Element Description Main unit The unit installed with a CPU module. The unit with no CPU module, which is connected to the Subunit main unit for system expansion through FA-bus Type 2 modules. -
Page 150: System Configuration And Slot Numbers
C3-2 C3.2 System Configuration and Slot Numbers In FA-M3, slot numbers are used for accessing various modules. A slot number indicates the position of the slot where a module is mounted and is a 3-digit integer with the following structure. Slot number* within a unit : 01 to 16 * : Slot number runs sequentially from 01 to 16,... - Page 151 C3-3 System configuration example: FA-bus Type 2 module Slot number 001 002 003 004 005 006 007 008 009 010 011 012 013 014 015 016 Power Main unit supply (Main station) module Add-on CPU (up to 3 CPUs) CPU module 101 102 103 104 105 106 107...
-
Page 152: C3.3 Restrictions On System Configuration
C3-4 C3.3 Restrictions on System Configuration The following table lists some restrictions when configuring an FA-bus Type 2 system. Table C3.3 Restrictions when Configuring an FA-bus Type 2 System Item Specifications Number of FA-bus Type 2 modules installable in a main unit Number of FA-bus Type 2 modules installable in a... -
Page 153: Connection Topology
C3-5 C3.4 Connection Topology FA-bus Type 2 modules can be connected using a loop, daisy chain or star configuration. The following pages show examples for each of the configurations. Loop Configuration One main unit and multiple subunits are connected together in a loop. Port 2 of the own station must be connected to port 1 of the other station. - Page 154 C3-6 Daisy-chain Configuration One main unit and multiple subunits are connected to form a line. Port 1 or port 2 of the FA-bus Type 2 module in the main unit must be connected to port 1 of the FA-bus Type 2 module in a subunit.
- Page 155 C3-7 Star Configuration A star configuration consists of one-to-one connections between the main unit and each subunit. Port 1 or port 2 of the FA-bus Type 2 module in the main unit must be connected to port 1 of the FA-bus Type 2 module in a subunit. In this configuration, a cable discontinuity or subunit shutdown will not affect the communication between the main unit and the other subunits.
- Page 156 Blank Page...
-
Page 157: C4. Pre-Operation Setup And Cable Connection
C4-1 C4. Pre-operation Setup and Cable Connection C4.1 Startup Procedure The following figure shows the system startup procedure when using FA-bus Type 2 modules. Build system configuration Determine instrument layout Set switches of …………… (See Section C4.2) FA-bus Type 2 module Mount FA-bus Type 2 …………… (See Section C4.3) module on base module... -
Page 158: C4.2 Setting Switches
C4-2 C4.2 Setting Switches Before using this module, set its switches according to its installed location, transmission channel configuration, etc. Table C4.1 gives an overview of the module components and settings. Subsequent subsections describe the setup of individual switches. For details on the location of switches, see Section C2.4, “Components and Their Functions.”... -
Page 159: C4.2.1 Setting Unit Number
C4-3 C4.2.1 Setting Unit Number Set the unit number using the unit number switch. This unit number will be used as an address in programs. The following table lists the valid preset values. Table C4.2 Unit Number Switch Settings Switch Setting Description For modules installed in the main unit (Factory setting: 0) -
Page 160: Enabling/Disabling Shutdown Output On Transmission Channel Error
C4-4 C4.2.2 Enabling/Disabling Shutdown Output on Transmission Channel Error This switch is used to specify whether to shutdown the output of the I/O modules in a subunit in the event of a transmission channel error (cable discontinuity, subunit power off, etc.). Set operations for individual I/O modules to Hold or Reset using WideField3 or CONTROL statements in BASIC programs. -
Page 161: C4.2.4 Setting Transmission Channel Configuration
C4-5 C4.2.4 Setting Transmission Channel Configuration This switch sets the communication behavior of the FA-bus Type 2 module to support various transmission channel configurations. Table C4.5 Transmission Channel Configuration Value Used Ports Star configuration or daisy-chain configuration Loop configuration Note - All FA-bus Type 2 modules (on main unit and subunits) in the same system should have the same transmission channel configuration setting. -
Page 162: C4.3 Attaching And Detaching Modules
C4-6 C4.3 Attaching and Detaching Modules C4.3.1 Attaching the Module Figure C4.2 shows how to attach this module to the base module. First hook the anchor slot at the bottom of the module to be attached onto the anchor pin on the bottom of the base module. -
Page 163: C4.3.3 Attaching Modules In Intense Vibration Environments
C4-7 C4.3.3 Attaching Modules in Intense Vibration Environments If the module is used in intense vibration environments, fasten the module with a screw. Use screws of type listed in the table below. Insert these screws into the screw holes on top of the module and tighten them with a Phillips screwdriver. -
Page 164: Connecting Transmission Cables
Use the cable given below to connect FA-bus Type 2 modules. Specification Two pair (4 wire) shielded cable (impedance: 100 ). C4.4.2 Recommended Cables Yokogawa supplies both fixed and flexible two-pair (4-wire) shielded cables. Model and Suffix Codes Table C4.6 Model and Suffix Codes Suffix Style Option... -
Page 165: C4.4.3 Wiring Of Recommended Cables
C4-9 Cable Flexibility Performance (for KM81 only) Table C4.8 Cable Flexibility Performance Test Test Conditions Performance - Cable bearer bending radius (R) is 50 mm. Withstanding more U-bend test simulating the - Cable bearer stroke is 800 mm. than 4 million times movement of a cable bearer - The cable bearer is moved 28 cycles per minute where one of flexing... -
Page 166: C4.4.4 Usage Precautions For Fixed Cable (Km80)
C4-10 C4.4.4 Usage Precautions for Fixed Cable (KM80) Note Minimum bending radius Do not bend the cable beyond the minimum bending radius (see the table below). Otherwise, the cable wires may break or be disconnected from the connector. Table C4.10 Minimum Bending Radius (for KM80) Outer Model Item... -
Page 167: C4.4.5 Usage Precautions For Flexible Cable (Km81)
C4-11 C4.4.5 Usage Precautions for Flexible Cable (KM81) Note Minimum bending radius Do not bend the cable beyond the minimum bending radius (see the table below). Otherwise, the cable wires may break or be disconnected from the connector. Table C4.11 Minimum Bending Radius (for KM81) Outer Model Item... - Page 168 C4-12 Exposure to direct sunlight or ultraviolet rays Polyethylene insulation may deteriorate or even crack, thus leading to insulation breakdown, if exposed to direct sunlight or fluorescent light over an extended period of time. If the cable is to be used in such environments, protect the polyethylene insulation with UV-resistant tube or tape (such as black adhesive polyethylene insulation tape).
-
Page 169: C4.4.6 Provided Connectors
C4-13 C4.4.6 Provided Connectors Connector Pin Assignment The FA-bus Type 2 modules are connected together with a transmission cable cross- connected between them. The FA-bus Type 2 module comes with connectors for cable connection. If more connectors are needed, you can purchase the following connector: - Model: FMC1,5/5-ST3,5-RF (from Phoenix Contact) Port 1 Port 2 Pin 5... -
Page 170: C4.5 Pre-Operation Checks
C4-14 C4.5 Pre-operation Checks C4.5.1 LED Checks After installing modules and connecting transmission cables, check that the modules are properly connected for communication. There should be no cable discontinuity or improper connection. Apply power to the units and perform the following checks: (1) The RDY (green) LED indicator must be lit If this indicator is not lit, it may be because the FA-bus Type 2 module is not properly mounted to the base module. -
Page 171: C4.6 Precautions When Applying Power
C4-15 C4.6 Precautions When Applying Power When turning on the power supply to the main unit and subunits, follow the sequence below. First confirm that the main unit and all subunits are turned off. Then turn on the power supply to the main unit and the subunits simultaneously*, or turn on all subunits before turning on the main unit. - Page 172 C4-16 Module Recognition special registers When a module installed in a main unit or subunit is recognized as accessible, the bit corresponding to its slot position in the Module Recognition special registers is set to 1. If a module cannot be read or written due to I/O module failure, subunit power failure or some other reason, its corresponding bit in the Module Recognition special registers is cleared to 0.
-
Page 173: C5. I/O Refresh Time
C5-1 C5. I/O Refresh Time C5.1 Estimating I/O Refresh Time Calculate the I/O refresh time separately for each port of the main unit. For details, refer to the following example. Sum of I/O refresh times I/O refresh time for each type of access There are 2 types of access, namely, 'read input' and 'write output Calculate the I/O refresh time for each access type using the following formula and sum the values. -
Page 174: C5.2 Example Of I/O Refresh Time Calculation
C5-2 C5.2 Example of I/O Refresh Time Calculation This example calculates the I/O refresh time for the following system configuration. F3LR02-1W Main unit Power supply module 10 m Subunit 1 Subunit 2 Power Power supply supply module module 10 m Input: 32-point module x 2 Input: 32-point module x 3 FC0521.VSD... -
Page 175: C6. Ras Functions Of Fa-Bus Type 2
C6-1 C6. RAS Functions of FA-bus Type 2 C6.1 System Operation with Transmission Channel Error C6.1.1 Run or Stop System You can set the module to either stop the system or continue operation when a transmission channel error occurs in an FA-bus Type 2 system. C6.1.2 Causes of Transmission Channel Errors A transmission channel error of an FA-bus Type 2 system may be due to the following... - Page 176 C6-2 To enable loop switching, perform the following setup. Table C6.2 Loop Switching [Operation Control] Condition Switches of in the CPU Module’s Configuration Setup F3LR02 Module Subunit I/O Module Error Communication Error Run (default) See Also C6.3.3 C6.3.3 C4.2.2 C4.2.4 Note - For F3BP, when the system switches to the secondary loop in the event of a cable discontinuity in the primary loop, and when the system switches to 2 daisy-...
- Page 177 C6-3 The figure below shows an example of channel migration when an error occurs. The bold line indicate the active line after migration. Normal operation (communications via primary loop) Data flow Primary loop Subunit Subunit Main unit Secondary loop Port 1 Port 2 Subunit Subunit...
-
Page 178: C6.1.5 Transmission Channel Loop-Back Function
C6-4 C6.1.5 Transmission Channel Loop-back Function When a transmission channel error occurs in a daisy-chain configuration, the channel loop-back function automatically isolates the inaccessible subunit and continues system operation. To enable this function, setup the system to continue operation in the event of a transmission channel error. -
Page 179: C6.2 Shutdown Output On Transmission Channel Error Function
C6-5 C6.2 Shutdown Output on Transmission Channel Error Function C6.2.1 Overview of Shutdown Output Function The FA-bus Type 2 module is equipped with a function, which shuts down the output of the I/O module of a subunit when a transmission channel error occurs. This function prevents an error in the FA-bus type 2 or a powered-off main unit or a powered-off intermediate station from affecting the entire system or resulting in hazardous or unstable system operation. - Page 180 C6-6 Subunit B: A subunit that is further from the main unit than the location of a channel error where receiving from the main unit is still available through the transmission channel between the subunit and main unit Subunit C: A subunit that is further from the main unit than the location of a channel error where only sending to the main unit is available or neither sending to nor receiving from the main unit is available through the transmission...
- Page 181 C6-7 In case of using FAIL contact of power supply module, choose one in the main unit while program stops, and take external measures of the PLC to operate system safely. Example 1: ERR2 lit ERR1 lit Subunit 1 (A) Subunit 2 (C) Subunit 3 (C) Main unit...
-
Page 182: C6.3 Procedure For Setting Condition Switches
C6-8 C6.3 Procedure for Setting Condition Switches To enable the Shutdown Output on Transmission Channel Error function, use the following procedure. C6.3.1 Setting Condition Switches Setting the Condition Switches Located on the Right Side of the Module Condition switch: To enable the Shutdown Output function, you need to set the condition switch located on the right side of the FA-bus Type 2 module installed in the subunit. -
Page 183: C6.3.2 Dio Setup In Cpu Configuration
C6-9 C6.3.2 DIO Setup in CPU Configuration How to Perform DIO Setup using WideField3 To perform DIO Setup using WideField3, use the following procedure. 1. Select [Project]–[Configuration] from the WideField3 menu. 2. Select the DIO Setup tab from the Configuration dialog box. 3. - Page 184 C6-10 How to Perform [DIO Setup] using BASIC (F3BP) Use a CONTROL statement to select whether to reset or hold the output of an output module. On 16-point and 32-point modules, the setup is made to the control registers in groups of 8 terminals.
-
Page 185: C6.3.3 [Operation Control] In Cpu Configuration
C6-11 C6.3.3 Operation Control in CPU Configuration How to set up Operation Control using WideField3 To setup Operation Control using WideField3, use the following procedure. 1. Select [Project]–[Configuration] from the WideField3 menu. 2. Select the Operation Control tab from the Configuration dialog box. 3. -
Page 186: C6.4 Error Location Detection Function
C6-12 C6.4 Error Location Detection Function C6.4.1 LED Display When an error occurs with the FA-bus Type 2 module, or when a cable discontinuity occurs in a transmission channel, the error (ERR) LED or alarm (ALM) LED of the CPU module turns on to report the error. - Page 187 C6-13 Daisy-chain Configuration (Cable discontinuity example 1) ALM lit* ERR lit* Main unit Bold line indicates active line ERR2 lit Subunit 1 Cable discontinuity ERR1 lit Subunit 2 FC0641.VSD The statuses of the ERR and ALM LEDs depend on the configuration setup as shown in Table C6.7, “Status of CPU’s LEDs”.
- Page 188 C6-14 Daisy-chain Configuration (Cable discontinuity example 2) ALM lit* ERR lit* Main unit Bold line indicates active line ERR2 lit Subunit 1 Cable discontinuity Subunit 2 FC0642.VSD The statuses of the ERR and ALM LEDs depend on the configuration setup as shown in Table C6.7, “Status of CPU’s LEDs”.
- Page 189 C6-15 Daisy-chain Configuration (Cable discontinuity example 3) ALM lit* ERR lit* Main unit Bold line indicates active line ERR2 lit Subunit 1 Cable discontinuity ERR1 lit Subunit 2 FC0643.VSD The statuses of the ERR and ALM LEDs depend on the configuration setup as shown in Table C6.7, “Status of CPU’s LEDs”.
- Page 190 C6-16 Loop Configuration (Cable discontinuity example 1) ALM lit* Main unit Bold line indicates active line Subunit 1 Cable discontinuity ERR1 lit Subunit 2 FC0644.VSD A “subunit line switchover” alarm is output. The ALM LED is lit but the ERR LED is not lit and operation continues. Figure C6.10 Relationship between Transmission Cable Discontinuity Location and Status of LEDs (4)
- Page 191 C6-17 Loop Configuration (Cable discontinuity example 2) ALM lit* Bold line Main unit indicates active line ERR2 lit Subunit 1 Cable discontinuity Subunit 2 FC0645.VSD * A “subunit line switchover” alarm is output. The ALM LED is lit but the ERR LED is not lit and operation continues. Figure C6.11 Relationship between Transmission Cable Discontinuity Location and Status of LEDs (5) IM 34M06H45-01E...
- Page 192 C6-18 Loop Configuration (Cable discontinuity example 3) ALM lit* ERR lit* Bold line Main unit indicates active line ERR2 lit Subunit 1 Cable discontinuity ERR1 lit Subunit 2 FC0646.VSD The statuses of the ERR and ALM LEDs depend on the configuration setup as shown in Table C6.7, “Status of CPU’s LEDs”.
-
Page 193: C6.4.2 Logging Of Transmission Channel Error Location
C6-19 C6.4.2 Logging of Transmission Channel Error Location When an error occurs in a transmission channel, an error is logged and the FA-bus transmission channel error location notification is generated. There are two types of notification, namely, subunit communication error and subunit line switchover. (1) Subunit communication error This is an error caused by a transmission channel error or power interruption to a subunit. - Page 194 C6-20 On/Off timing of special relays when the power supply of a subunit is interrupted (cable is disconnected) Channel normal M210 Channel error M211 Channel switched All subunits Subunit Subunit Setup switched on swtiched on switched off operation, or cable or cable check replaced...
- Page 195 C6-21 Example 1: System Log Display A system log contains an entry only for the first transmission channel error detected after the program starts execution or after alarms are checked. FB064A.VSD Figure C6.14 System Log Display ERR2 lit Main unit Subunit 1 Subunit 2 Subunit 3...
- Page 196 C6-22 Example 2: Alarm Display FB064C.VSD Figure C6.16 Alarm Display ERR2 lit ERR1 lit Main unit Subunit 1 Subunit 2 Subunit 3 Cable discontinuity Cable discontinuity Port 1 Port 2 FC064D.VSD Figure C6.17 Example of Cable Discontinuity Note A slot number displayed on the alarm display screen indicates the slot where the FA-bus Type 2 module is installed.
- Page 197 C6-23 Example 3: System Log Display FB064E.VSD Figure C6.18 System Log Display ERR2 lit* ERR1lit Subunit 3 Subunit 4 Subunit 1 Subunit 2 Main unit Cable discontinuity Port 1 Port 2 FC064F.VSD *1: ERR2 is lit when FA-bus Type 2 module of subunit 2 stops its output. Figure C6.19 Example of Cable Discontinuity Note A slot number displayed on the system log screen indicates the slot where the FA-bus...
- Page 198 Blank Page...
-
Page 199: C7. Errors And Troubleshooting
C7-1 C7. Errors and Troubleshooting C7.1 Troubleshooting Flowcharts This section shows flowcharts that can be used for troubleshooting problems that may occur with the FA-bus Type 2 module during operation. CPU module’s ALM LED is lit (check error log) I/O error in I/O module of the subunit accessed by Subunit communication... -
Page 200: C7.2 When Rdy Led Is Not Lit
C7-2 C7.2 When RDY LED is Not Lit RDY LED is not lit Is correct voltage applied to the power supply module? Apply proper voltage Is RDY LED lit on other modules? Replace the power supply module or the base module Is module mounted properly in its slot? Push in the module until... -
Page 201: C7.3 When Err1 Led Or Err2 Led Is Lit
C7-3 C7.3 When ERR1 LED or ERR2 LED is Lit ERR1 or ERR2 LED is lit transmission cable connected? Connect transmission cable Are all units switched on? Turn on power to all units Is there a transmission cable discontinuity? Replace transmission cable Are the side switches... - Page 202 Blank Page...
-
Page 203: Appendix C: Km8 Cable Preparation
Appx. C-1 Appendix C: KM8 Cable Preparation (1) Components and tools - Connector Example: Manufacturer: Phoenix Contact Model: FMC 1,5/5-ST-3,5-RF Connector Applicable wire size: AGW16-24 - Insulation tube Insulation tube For cable insulation and drain insulation (example): Approx. 8 mm diameter for fixed cable with 22 AWG drain, or Approx. - Page 204 Appx. C-2 - Wire stripper Wire stripper (Example 1) Manufacturer: Hozan Tool Industrial Model: P-90-A (with green handle) (Example 2) Manufacturer: Vessel Co., Inc. Model: 3000A or 3000C Note: The picture shows wire stripper model P-911 with black handle from Hozan Tool Industrial. Model P-90-A has a green handle instead.
- Page 205 Appx. C-3 (2) Preparing a cable-connector set (1) Peel off about 60-mm length of outer vinyl insulation from the cable. Tin-plated soft-copper braided shield Vinyl insulation (2) Remove the exposed tin-plated soft- copper braided shield, aluminum-mylar Drain wire Aluminum-mylar tape tape, and plastic stuffing.
- Page 206 Appx. C-4 (5) Strip off a sufficient length of the insulation of each wire to allow good Pin terminal electrical contact with a pin terminal. Then put and crimp a pin terminal onto each wire using a crimping tool. Check that the pin terminal size is compatible with the wire size.
-
Page 207: Index
Index C FA-M3 Fiber-optic FA-bus, Fiber-optic FA-bus Type 2, FA-bus Type 2 Modules Part C: FA-bus Type 2 Module IM 34M06H45-01E 7th Edition subunit ............. C3-1, C3-4 INDEX communication error ..C6-1, C6-5, C6-11, C6-19 communication error special registers ..C6-19 communication status special relays .. - Page 208 Blank Page...
-
Page 209: Revision Information
■For Questions and More Information If you have any questions, you can send an E-mail to the following address. E-mail: plc_message@cs.jp.yokogawa.com ■Written by Yokogawa Electric Corporation ■Published by Yokogawa Electric Corporation 2-9-32 Nakacho, Musashino-shi, Tokyo, 180-8750, JAPAN IM 34M06H45-01E 7th Edition : Aug.30, 2019-00... - Page 210 Blank Page...
Need help?
Do you have a question about the F3LR02-0N and is the answer not in the manual?
Questions and answers