
Subscribe to Our Youtube Channel
Related Manuals for Schüco DCS

Summary of Contents for Schüco DCS
- Page 1 Doc. No. 10000436501_01_de / 02.2016 Aluminium systems Schüco DCS Touch Display Commissioning instructions...
- Page 2 Schüco Commissioning instructions – Schüco DCS Touch Display Commissioning instructions Dok-Nr.10000432116_01...
- Page 3 2.2. Laws, regulations and technical rules 2.3. Proper use 2.4. General safety instructions 3. Contents of delivery, transportation and storage 3.1. Contents of delivery for Schüco DCS Touch Display 3.2. Contents of delivery for Schüco IP secure connector 3.3. Transportation and storage 4. Technical data 4.1.
- Page 4 Schüco Commissioning instructions – Schüco DCS Touch Display 9. Web interface 9.1. Accessibility 9.2. Calling up the web interface 9.3. Logging in 9.4. Configuration 9.5. Message boxes 9.6. Overview when logged in 9.7. Network 9.8. SIP 9.8.1. SIP settings 9.8.2. SIP server 9.8.3.
- Page 5 Schüco Commissioning instructions – Schüco DCS Touch Display 9.17. Remote maintenance 10. Replacing an IP secure connector 11. Faults and troubleshooting 12. Care and maintenance 13. Decommissioning 14. Service and support Dok-Nr.10000432116_01...
- Page 6 Schüco Commissioning instructions – Schüco DCS Touch Display 1. Notes on this document 1.1. Target groups and qualifications This document is intended for qualified personnel, such as trained fitters and electricians. Before installing and commissioning, read through this document thoroughly and adhere to the specified sequence of the instructions.
- Page 7 Schüco Commissioning instructions – Schüco DCS Touch Display 2. Security 2.1. About the safety instructions KEY WORD Type / source / consequence of the danger Pictograms and key words advise of the type of danger and the level of danger:...
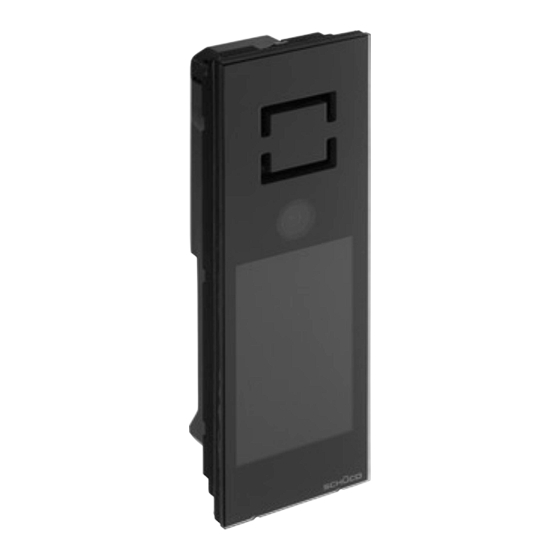
- Page 8 It is intended for door communication inside and outside as well as for access control. The DCS Touch Display must be flush-fitted, whereby it is integrated into the existing DCS profile, for example, or alternatively installed on a panel or a wall. In addition to the 4.3 inch colour touchscreen, it has a camera with motion detection, two voice-optimised microphones and a protected loudspeaker.
- Page 9 Schüco Commissioning instructions – Schüco DCS Touch Display 2.4. General safety instructions Follow the safety instructions in this document so as not to endanger your own life or that of others and to ensure error-free operation. DANGER Imminent danger resulting in death or severe injuries.
- Page 10 3.1. Contents of delivery for Schüco DCS Touch Display Open all the packing units. Check that no components are missing and familiarise yourself with the components. Supplied with the Schüco DCS Touch Display are the following: Art. No. Description 263 267 Schüco DCS Touch Display...
- Page 11 Commissioning instructions – Schüco DCS Touch Display 4. Technical data 4.1. Schüco DCS Touch Display General data Integrated in the profile in the DCS unit, leaf and outer frame, Installation type wall mounting and panel mounting Material Aluminium, PVC-U, toughened safety glass...
- Page 12 Inputs 1 input Outputs 1 potential-free output, can be freely configured Commissioning and maintenance properties Basic settings on the DCS Touch Display, further settings Configuration via the web interface Dimensions Housing 212 x 70 x 46 mm (H x W x D)
- Page 13 Temperature range +5°C to +45°C Air humidity 5% to 93%, non-condensing Integrated in the DCS door profile or by the customer on the Installation inside of the building Key electrical data 12 - 30 V DC (+/-15 %) stabilised ,...
- Page 14 Schüco Commissioning instructions – Schüco DCS Touch Display 5. System overview 5.1. Overview of system components Junction box Switch / router Pos. Description Art. No. DCS Touch Display 263 267 IP secure connector 263 268 Outer frame installation 263 278...
- Page 15 6. IP secure connector INFORMATION The DCS Touch Display can also be operated without the IP secure connector. Note that a suitable PoE+ switch must be provided by the customer in this case. If no IP secure connector is provided for the installation, you can skip this chapter.
- Page 16 The „100M“ LED indicates whether a transmission speed of 100 Mbps has been achieved between the IP secure connector and the DCS Touch Display at the „DISPLAY“ RJ45 socket. The „INK/ACT“ LED indicates whether data is being transmitted between the „LAN“ RJ45 socket and the building’s internal switch.
- Page 17 The „100M“ LED indicates whether a transmission speed of 100 Mbps has been achieved between the IP secure connector and the building’s internal switch at the „LAN“ RJ45 socket. The IP secure connector is connected to the DCS Touch Display via the „DISPLAY“ connection.
- Page 18 Schüco Commissioning instructions – Schüco DCS Touch Display 6.2. Connections for Schüco IP secure connector The connections are located on the rear of the IP secure connector. The corresponding connectors are supplied with the product or are included in the cable kits.
- Page 19 Schüco Commissioning instructions – Schüco DCS Touch Display INFORMATION SELV electrical circuit The relay output must only be used for SELV electrical circuits. A SELV electrical circuit in accordance with IEC/EN 60950-1 must be securely isolated (e.g. by means of double insulation) from a dangerous electrical circuit (e.g.
- Page 20 Schüco Commissioning instructions – Schüco DCS Touch Display 6.2.1. Configuration of „OUT2“ on IP secure connector Using the „OUT2“ switch, you can select whether the „OUT2“ relay is to function as a closer (NO) or as an opener (NC). Depending on the device connected, a closer can be used for an external lamp and an opener for function monitoring, for example.
- Page 21 Basic settings, such as the brightness of the screen, can be carried out directly on the DCS Touch Display. The DCS Touch Display is equipped with inputs and outputs to which, for exam- ple, an electric strike for internal doors can be connected.
- Page 22 The voice-optimised microphones are concealed. The two USB 2.0 ports turn the DCS Touch Display into a host for additional devices. The RJ45 socket is used for the connection to the building‘s internal PoE+ switch or to the IP secure connector, whereby the DCS Touch display is supplied with power in the form of PoE+.
- Page 23 7.2. Connections to Schüco DCS Touch Display On the underside there is a 2 x 5-pole socket with the inputs and outputs for the Schüco DCS Touch Display. A suitable plug is supplied. The connections are assigned as follows: A3 A4 A5...
- Page 24 60 V DC or 42.4 V ACpeak (30 V ACeff). 7.2.1. Connection to lock technology If no IP secure connector is used, proceed as follows to connect an electric lock to the DCS Touch Display: 1. Connect the green control wires (ST) of the SafeMatic to the „A4“ socket („OUT COM“) and the wires that supply power to the „A3“...
- Page 25 1. Guide the unlocking nibs of the Schüco DCS Touch Display installation tool into the top loudspeaker opening of the DCS Touch Display. 2. To release the unlocking mechanism, slide the DCS Touch Display installation tool upwards as far as possible.
- Page 26 Schüco Commissioning instructions – Schüco DCS Touch Display 3. Carefully push the bottom end of the DCS Touch Display installation tool towards the DCS unit in order to release the Schüco DCS Touch Display from its fixed position. 4. Carefully remove the Schüco DCS Touch Display from the Schüco DCS unit. Disconnect the plug from the device and remove the entire electronics assembly.
- Page 27 The DCS Touch Display can be operated via the 4.3 inch touchscreen. The DCS Touch Display is divided into the following five main screens (from left to right): ● Start screen: Here you can display the house number or any desired image in 480 x 800 pixel format.
- Page 28 Schüco Commissioning instructions – Schüco DCS Touch Display 8.1. Start screen In the „Start screen“ view, the house number or an image can be displayed. To exit the „Idle“ device status, the screen must be tapped or a movement detected by the integrated camera of a configured motion detector (see „9.11 Motion detection“).
- Page 29 „Doorbell list“ view are listed according to the option which has been selected. The scroll bar on the right of the DCS Touch Display screen only appears once the buttons have been sorted by first name or surname. You can find more information about sorting contacts in the „Doorbell list“ view under „9.15 Contacts“.
- Page 30 Schüco Commissioning instructions – Schüco DCS Touch Display Proceed as follows to scroll through the „Doorbell list“ view: 1. For optimum scrolling upwards and downwards, position your finger in the middle of the scroll bar. 2. Swipe upwards or downwards. The alphabet on the scroll bar shows the direction in which you are scrolling.
- Page 31 Schüco Commissioning instructions – Schüco DCS Touch Display 8.2.1. Making a call Tap the desired contact in order to make a call. Depending on how the counterpart intercom station (e.g. SIP telephone, SIP app) was configured, the call is promptly accepted or ringing continues until the call is accepted or automatically ended after a time-out of 45 seconds.
- Page 32 Tap the „Mouth“ symbol in the bottom part of the screen to end the call. As soon as the call is ended by you or the person at the counterpart intercom station, the DCS Touch Display shows the „Doorbell list“ once again.
- Page 33 Schüco Commissioning instructions – Schüco DCS Touch Display For security reasons, the „Code entry“ view allows access codes of up to eight digits to be entered. However, only four or six-digit access codes can be generated in the web interface (see „9.18.8 Changing the access code“).
- Page 34 Schüco Commissioning instructions – Schüco DCS Touch Display If the access code entered was correct, there are two options: 1. If the user has only been granted permission for one action sequence, this is carried out immediately (e.g. actuate the door opener or display the „Configuration“ view).
- Page 35 ● Test: Here you can initiate the self-test for the DCS Touch Display. ● Clean display: Here you can deactivate the screen of the DCS Touch Display for 30 seconds. ● IP secure connector: Here the DCS Touch Display can be paired with or separated from an IP secure connector.
- Page 36 Commissioning instructions – Schüco DCS Touch Display 8.4.1. Error messages The DCS Touch Display displays error messages in the form of message boxes in the bottom part of the screen as soon as an error has been detected (e.g. connection errors, incorrect configuration or server errors).
- Page 37 Assigning an IP address Only IPv4 addresses can be assigned to the DCS Touch Display. Manually assigned IP addresses are only assigned to the DCS Touch Display once you tap „Save“. In order to discard an entry, you can either tap „Cancel“ or On delivery, DHCP is activated for the DCS Touch Display.
- Page 38 Schüco Commissioning instructions – Schüco DCS Touch Display 3. Tap the „IP address“ field and enter an IP address using the keypad that appears. 4. Tap „Save“. 5. Repeat steps „2“ and „3“ for the „Subnet mask“ and „Default gateway“...
- Page 39 2. Adjust the volume by means of the „Loudspeaker“ and/or „Microphone“ controls. INFORMATION Applying settings Settings are applied and saved immediately when adjusting a control. Display of the value The set value is displayed only in the web interface and not on the screen of the DCS Touch Display. Dok-Nr.10000432116_01...
- Page 40 INFORMATION Display of the value The set value is displayed only in the web interface and not on the screen of the DCS Touch Display. Proceed as follows to adjust the screen brightness in the DCS Touch Display: 1. Open the „Screen“ configuration view.
- Page 41 To enable recommissioning of the DCS Touch Display, it must be put back in its original position and the „PAIRING“ button pressed on the IP secure connector. If necessary, the anti-theft device must be reactivated, as this function is deactivated in the alarm mode.
- Page 42 Schüco Commissioning instructions – Schüco DCS Touch Display Proceed as follows to deactivate the anti-theft device of the DCS Touch Display: 1. Open the „Alarm“ configuration view. 2. Tap „Deactivate“ to avoid the DCS Touch Display from switching to the alarm mode when it is removed.
- Page 43 Commissioning instructions – Schüco DCS Touch Display 8.4.7. Test In the „Test“ configuration view, it is possible to perform the self-test for the DCS Touch Display. This is subdivided into the following three steps: ● Self-test 1/3 (audio): Here the loudspeaker and microphones of the DCS Touch Display can be test- ed for perfect functionality.
- Page 44 Schüco Commissioning instructions – Schüco DCS Touch Display 3. During this time, an animation is played on the screen. If an audio test is successful, a checkmark is displayed in the middle of the screen. 4. Tap „Next“. 5. Tap to start the video test.
- Page 45 Schüco Commissioning instructions – Schüco DCS Touch Display 6. If a video test is successful, the video image from the internal camera is displayed on the screen. It may be that the video image is displayed with a time delay. However, it is free from faults if a video image can be seen.
- Page 46 In the „Clean display“ configuration view it is possible to deactivate the screen of the DCS Touch Display for 30 seconds. This prevents any buttons on the screen from being pressed inad- vertently during cleaning (e.g. wiping with a cloth). While the screen is deactivated, a countdown can be seen.
- Page 47 Commissioning instructions – Schüco DCS Touch Display In order to connect the DCS Touch Display to an associated IP secure connector, it is necessary to search for the IP secure connector. If the DCS Touch Display or the IP secure connector is removed or replaced, the connection must be dissolved once more.
- Page 48 In this case, check the ethernet connection and the power supply of the IP secure connector. If the IP secure connector has been removed and a new one installed, disconnect the connection and connect the new IP secure connector to the DCS Touch Display. 8.4.10. Remote maintenance It is possible for Support to carry out remote maintenance on the DCS Touch Display.
- Page 49 Schüco Commissioning instructions – Schüco DCS Touch Display 3. Tap „Stop“. The status changes to „Not active“. NOTE Damage to property. ► Do not stop remote maintenance under any circumstances unless you are told to do so by Support. INFORMATION Safety information The remote maintenance is not a permanent interface for contacting Schüco.
- Page 50 Schüco Commissioning instructions – Schüco DCS Touch Display 8.5. Select action If multiple action sequences have been stored for a single user, the “Select action” view appears after the access code is entered. In the “Select action” view, it is possible to carry out an action sequence or return to the “Start screen”...
- Page 51 Commissioning instructions – Schüco DCS Touch Display 8.6. Symbols The DCS Touch Display can display seven different symbols in total. Depending on the configured action sequence, these are displayed either immediately after the access code is entered or after an action sequence is selected.
- Page 52 Commissioning instructions – Schüco DCS Touch Display INFORMATION Symbol view For as long as a symbol is displayed, the screen of the DCS Touch Display is deactivated. The time for which a symbol is displayed depends on the configuration of the action sequence. 9. Web interface The web interface is a browser-based application via which it is possible to configure the DCS Touch Display and the IP secure connector as well as read all relevant data.
- Page 53 Ability to be called up The web interface of the DCS Touch Display can only be called up after the device has booted up. If the connection between the DCS Touch Display and the building‘s network is broken while the web...
- Page 54 Schüco Commissioning instructions – Schüco DCS Touch Display 3. If there are multiple action sequences to select from, tap „Configuration view“. 4. Open the „Network“ configuration view. 5. Note the IP address and enter this into your browser (e.g. „192.168.1.150“). If the web interface can be reached by means of your browser, the homepage will be dislpayed.
- Page 55 ● Schüco FW version: The official software version of the DCS Touch Display is shown here. ● Image version: The image of the official software version of the DCS Touch Display is shown here. ● Device type: The type of intercom station is shown here („DCS Touch Display“).
- Page 56 Schüco Commissioning instructions – Schüco DCS Touch Display 9.4. Configuration The menu bar of the web interface is subdivided into the following sections in order to enable us- er-friendly and intuitive operation: ● Overview: View the most important data and settings.
- Page 57 As soon as a configuration shows changes, a message box appears with a change notice. INFORMATION Applying changes Changes are not saved automatically. The DCS Touch Display only applies the settings made once the „Save“ button is clicked. Click on this button to apply all changes.
- Page 58 ● Schüco FW version: Displays the official software version of the DCS Touch Display. ● Image version: Displays the image of the official software version of the DCS Touch Display. ● Version: The software version of the DCS Touch Display is shown.
- Page 59 Schüco Commissioning instructions – Schüco DCS Touch Display Dok-Nr.10000432116_01...
- Page 60 Changes to the IP address In the event of a change to the IP address of the DCS Touch Display, the web interface must be called up again with the new IP address. Therefore, if necessary make a note of the new address before saving to enable you to call up the web interface again.
- Page 61 Schüco Commissioning instructions – Schüco DCS Touch Display Dok-Nr.10000432116_01...
- Page 62 Schüco Commissioning instructions – Schüco DCS Touch Display 9.8. SIP On the „SIP“ page, it is possible to make all relevant settings in order to connect the DCS Touch Dis- play to an SIP server. 9.8.1. SIP settings In the „SIP settings“ section, settings can be made which allow the Touch Display to communicate via SIP (Session Initiation Protocol).
- Page 63 Commissioning instructions – Schüco DCS Touch Display 9.8.2. SIP server In the „SIP server“ section, settings can be made which enable a connection between the DCS Touch Display and an SIP server. The following options are available in the „SIP server“ section: ●...
- Page 64 ● Registered: The DCS Touch Display is connected to an SIP server. ● Not registered: The DCS Touch Display is not connected to an SIP server. ● Connection failed: It was not possible to establish a connection between the DCS Touch Display and the SIP server.
- Page 65 Schüco Commissioning instructions – Schüco DCS Touch Display 9.9. Device 9.9.1. Device On the „Device“ page, it is possible to make display settings for the screen of the DCS Touch Display. Dok-Nr.10000432116_01...
- Page 66 Commissioning instructions – Schüco DCS Touch Display 9.9.1.1 Basic settings In the „Basic settings“ section, basic settings can be made for the screen of the DCS Touch Display. The following options are available in the „Basic settings“ section: ● Start screen: In this selection list, choose which view you want the DCS Touch Display to show in the device status „Idle“.
- Page 67 Here the following options are available: • Door installation: If the DCS Touch Display is installed in a door, this option must be selected to prevent the anti-theft device from activating the alarm mode by mistake due to the movements of the door when opening and closing.
- Page 68 To avoid black borders at the top and bottom or at the sides, only images of size 480 x 800 pixels (or a corresponding ratio) should be uploaded. The DCS Touch Display only supports images in the file formats JPG and PNG. The maximum file size is 6 MB.
- Page 69 Schüco Commissioning instructions – Schüco DCS Touch Display Dok-Nr.10000432116_01...
- Page 70 : Click on this button to search for an IP secure connector in the network and connect it to the DCS Touch Display. Note that the „PAIRING“ button on the IP secure connector must be pressed for a successful connection.
- Page 71 „0“ and „12“. Microphone volume: Adjust the sensitivity of the microphone Output volume: Adjust the output volume of the loudspeaker on the DCS Touch Display between „0“ and „12“. ● Microphone volume: Adjust the sensitivity of the microphone for the DCS Touch Display between „0“...
- Page 72 If the checkbox is checked, it is only possible to make a call using video streaming via a com- puter within a network if the DCS Touch Display is „Ringing“ or call without video is configured. The video stream is shown in the browser in the format 480 x 640 pixels.
- Page 73 Schüco Commissioning instructions – Schüco DCS Touch Display Dok-Nr.10000432116_01...
- Page 74 For best results, only activate boxes in the area of the video image in which a movement can only be detected when a person approaches the DCS Touch Display. If necessary, deactivate boxes in the area of the video image in which a road, trees or other movements that are undesirable for motion detection may be detected.
- Page 75 Schüco Commissioning instructions – Schüco DCS Touch Display 3. Adjust the sensitivity of the motion detection via the „Sensitivity“ control. 4. Click on Dok-Nr.10000432116_01...
- Page 76 • Play audio file: Here an audio file is played which has already been uploaded via the „Media“ page. • Output: Here an output (relay) on the DCS Touch Display („DCS Touch Display - OUT 1“ or „DCS Touch Display - DC-OUT 2“) or IP secure connector („IP secure connector - OUT 1“, „IP secure connector - OUT 2“...
- Page 77 • Switch video: This option currently has no function. • Show view: Here the screen of the DCS Touch Display switches to a configurable view. • Show symbol: Here a configurable symbol is shown on the screen of the DCS Touch Display. INFORMATION Action sequences It is also possible to select an action sequence in the „Action or action sequence“...
- Page 78 Schüco Commissioning instructions – Schüco DCS Touch Display 9.9.5.1 Adding a new contact to the doorbell list Call destinations, which have been entered on the „Contacts“ page, are not displayed automatically in the „Doorbell list“ view. Consequently it is possible to manage contacts without having to delete them on the „Contacts“...
- Page 79 Schüco Commissioning instructions – Schüco DCS Touch Display 2. Wählen Sie in der Auswahlliste „Aktion oder Aktionssequenz“ die Option „Ruf“ aus. Dok-Nr.10000432116_01...
- Page 80 Schüco Commissioning instructions – Schüco DCS Touch Display 3. In the „Select contacts“ selection list, select the desired contact. The „Overwrite settings?“ dialog box appears. Dok-Nr.10000432116_01...
- Page 81 Schüco Commissioning instructions – Schüco DCS Touch Display 4. Click on „Yes“ to automatically copy over the fields „First name“ and „Surname“ as well as the profile picture of the contact. Dok-Nr.10000432116_01...
- Page 82 Schüco Commissioning instructions – Schüco DCS Touch Display 5. Ensure that the checkboxes „Activate audio“ and „Activate video“ are checked to enable audio and images for a call. If you do not want to use video transmission, uncheck the „Activate video“...
- Page 83 „Media“ page can be played when trying to call a contact using the DCS Touch Display. The aim here is to store an audio file for a contact that has already been created which informs a visitor that the contact is currently on holiday.
- Page 84 Schüco Commissioning instructions – Schüco DCS Touch Display 2. In the „Action or action sequence“ selection list, select the „Play audio file“ option. Dok-Nr.10000432116_01...
- Page 85 Schüco Commissioning instructions – Schüco DCS Touch Display 3. In the „Media file“ selection list, select the corresponding audio file option. 4. Click on Dok-Nr.10000432116_01...
- Page 86 Schüco Commissioning instructions – Schüco DCS Touch Display 9.9.5.2 Adding an action sequence On the „Buttons“ page, previously configured action sequences can be selected in the „Action or action sequence“ selection list. The following example will help to explain how an action sequence is created on the „Action sequences“...
- Page 87 Schüco Commissioning instructions – Schüco DCS Touch Display 6. Click on 7. Check the checkboxes for the days „Monday“ to „Friday“ and enter the time at which the action sequence is to be available in the fields „From“ and „To“ (e.g. from „09:00“ to „18:00“).
- Page 88 Schüco Commissioning instructions – Schüco DCS Touch Display 9. In the „Action“ selection list, select the „Output“ option. 10. In the „Output“ selection list, select the output to which the door opener is connected (e.g. „DCS Touch Display - OUT1“).
- Page 89 Schüco Commissioning instructions – Schüco DCS Touch Display 18. Click on and upload an appropriate image, if available. 19. In the „Action or action sequence“ selection list, select the action sequence previously created (e.g. „Door opener“). 20. Click on 9.9.5.3 Adding a contact in company mode In company mode, contacts can be displayed „Doorbell view“...
- Page 90 Schüco Commissioning instructions – Schüco DCS Touch Display 2. In the „Action or action sequence“ selection list, select the „Call“ option. Dok-Nr.10000432116_01...
- Page 91 Schüco Commissioning instructions – Schüco DCS Touch Display 3. In the „Select contacts“ selection list, select the desired contact. The „Overwrite settings?“ dialog box appears. 4. Click on „Yes“ to automatically copy over the fields „First name“ and „Surname“ as well as the profile picture of the contact 5.
- Page 92 Schüco Commissioning instructions – Schüco DCS Touch Display 7. Click on Dok-Nr.10000432116_01...
- Page 93 Schüco Commissioning instructions – Schüco DCS Touch Display 9.10. Activity On the „Activity“ page, it is possible to configure triggers which trigger an action sequence after a cer- tain event. As a result, the „Doorbell list“ or „Code entry“ view can be displayed automatically in the event of an input change at an input, for example.
- Page 94 • Outgoing call: The trigger is only triggered by outgoing calls. • Error: The trigger is only triggered by a device error. • Input change: The trigger is only triggered by an input change (inputs of the DCS Touch Display and, if present, IP secure connector).
- Page 95 As soon as you have clicked on for an activity, you can edit it. The following options are available under “Edit activity”: ● Device status: Choose the status in which the DCS Touch Display is to trigger. The following options are available for this: •...
- Page 96 The aim here is to display the “Doorbell list” view when the integrated camera of the DCS Touch Display detects a movement in the “Idle” device status. To create an action sequence to display the “Doorbell list” view and then an activity as a trigger, pro- ceed as follows: 1.
- Page 97 Schüco Commissioning instructions – Schüco DCS Touch Display 5. Click on 6. Click on 7. In the “Action” selection list, select the “Show view” option. 8. In the “Show view” selection list, select the “Contacts” option. 9. Check the “Only in idle mode” checkbox.
- Page 98 Schüco Commissioning instructions – Schüco DCS Touch Display 15. Click on 16. Click on 17. In the “Implementing action sequence” selection list, select the action sequence previously created (e.g. “Doorbell list”). 18. Click on Dok-Nr.10000432116_01...
- Page 99 Schüco Commissioning instructions – Schüco DCS Touch Display INFORMATION Motion detection settings More detailed information about the configuration of motion detection can be found under „9.11 Motion detection“. Dok-Nr.10000432116_01...
- Page 100 The following activities are preconfigured in the factory and may be adopted, changed or deleted as required: ● DCS Touch Display - IN 1 one: If a DCS proximity switch is provided for installation, the “Motion detection” action sequence is triggered via this activity so that the “Doorbell list” view is dis- played in the event of an input change (see also “9.15.6 Preconfigured action sequences”).
- Page 101 Schüco Commissioning instructions – Schüco DCS Touch Display 9.11. Action sequences On the “Action sequence” page, it is possible to configure logical command sequences which can be triggered through specific activities or the entry of the access code. As a result, it is possible, for example, to display the “Configuration”...
- Page 102 Schüco Commissioning instructions – Schüco DCS Touch Display 9.11.1. Action sequences In the “Action sequences” section, action sequences can be created, edited and deleted. ● : Click on this button to add an action sequence. ● : Click on this button to delete one or more selected action sequences.
- Page 103 Schüco Commissioning instructions – Schüco DCS Touch Display Dok-Nr.10000432116_01...
- Page 104 • Play audio file: Here an audio file is played which has already been uploaded via the “Media” page. • Output: Here an output (relay) on the DCS Touch Display (“DCS Touch Display - OUT 1” or “DCS Touch Display - DC-OUT 2”) or IP secure connector (“IP secure connector - OUT 1”, “IP secure connector - OUT 2”...
- Page 105 Schüco Commissioning instructions – Schüco DCS Touch Display Dok-Nr.10000432116_01...
- Page 106 Schüco Commissioning instructions – Schüco DCS Touch Display 9.11.4. Creating an action sequence The following example will help to explain how an action sequence is created on the “Action sequences” page. The aim here is to configure a door opener in order to be able to actuate it after the access code is entered in the “Code entry”...
- Page 107 The following example will help to explain how you create an action sequence which is triggered as soon as the DCS Touch Display switches to alarm mode. The aim here is to produce a snapshot and send an e-mail with the notification “I am being stolen” to two recipients.
- Page 108 10. Enter the recipient’s e-mail address in the “Recipient” field. 11. Enter a meaningful subject in the “Subject” field (e.g. “I am being stolen”). 12. Enter meaningful text in the “Contents” field (e.g. “At this moment your DCS Touch Display is being removed without permission.”).
- Page 109 Schüco Commissioning instructions – Schüco DCS Touch Display 16. Open the “Activity” page via “Activity”. 17. In the “Device status” selection list, select the “All” option. 18. In the “Trigger” selection list, select the “Anti-theft alarm” option. Dok-Nr.10000432116_01...
- Page 110 Schüco Commissioning instructions – Schüco DCS Touch Display 19. Click on 20. Click on 21. Click on .In the selection list, select the action sequence just created (e.g. “Anti-theft sequence”). 22. Click on Dok-Nr.10000432116_01...
- Page 111 Schüco Commissioning instructions – Schüco DCS Touch Display Dok-Nr.10000432116_01...
- Page 112 • Only in idle mode: Checkbox checked ● Image storage: As soon as a call is triggered on the DCS Touch Display, the internal camera takes a snapshot (see “7.10.5 Preconfigured activities”). This snapshot can be downloaded on the “Photos”...
- Page 113 ● SafeMatic for DCS Touch Display: If a SafeMatic is provided for installation, the output “DCS Touch Display - OUT 1” is switched via this action sequence with the aid of the activity “DTMF tone received 1” and the “Door” symbol is shown for 4 seconds (see also “7.7.4 Creating an activity”).
- Page 114 Schüco Commissioning instructions – Schüco DCS Touch Display ● SafeMatic for IP secure connector: If a SafeMatic is provided for installation, the output “IP secure connector - OUT 3” is switched via this action sequence with the aid of the activity “DTMF tone re- ceived 1”...
- Page 115 Schüco Commissioning instructions – Schüco DCS Touch Display 9.12. Contacts On the “Contacts” page, it is possible to create, edit and delete contacts. These can be both displayed in the “Doorbell list” view (see “7.6.1 Adding a new contact to the doorbell list”) and used as users for the web interface or entry of the access code (see “7.12.5 Changing a password”).
- Page 116 Schüco Commissioning instructions – Schüco DCS Touch Display 9.12.1. Editing a contact As soon as you have clicked on next to a contact, you can edit it. The following options are available for this: ● Profile picture: Check whether the correct profile picture for the contact has been uploaded.
-
Page 117: Table Of Contents
Schüco Commissioning instructions – Schüco DCS Touch Display 9.12.2. Adding a contact The following example will help to explain how a new contact is added on the “Contacts” page. To add a new contact, proceed as follows: 1. Open the “Contacts” page. - Page 118 Schüco Commissioning instructions – Schüco DCS Touch Display 5. Select the desired profile picture and click on “Open”. Once the profile picture has been uploaded, the new contact is automatically saved. Dok-Nr.10000432116_01...
-
Page 119: Open The "Contacts" Page
Schüco Commissioning instructions – Schüco DCS Touch Display 9.12.3. Exporting contacts The following example will help to explain how contacts that have already been created can be exported as an XLSX file. To export contacts, proceed as follows: 1. Open the “Contacts” page. -
Page 120: Click On
Schüco Commissioning instructions – Schüco DCS Touch Display 9.12.4. Kontakte importieren The following example will help to explain how contacts can be imported from an XLSX file. To this end, the details of the contacts must be entered into the columns of an XLSX file as follows: ●... - Page 121 Schüco Commissioning instructions – Schüco DCS Touch Display Dok-Nr.10000432116_01...
- Page 122 Schüco Commissioning instructions – Schüco DCS Touch Display 4. If necessary, edit the imported contacts by uploading a profile picture for the respective contact, for example (see “9.15.1 Editing a contact”). Dok-Nr.10000432116_01...
-
Page 123: Enter The Name Of The Contact In The "First Name" And "Surname" Fields
9.12.5. Editing a preconfigured contact On the “Contacts” page, two preconfigured contacts have already been created for the DCS Touch Display in the factory, which are also displayed in the “Doorbell list” view. These can be added to, changed or deleted as required. - Page 124 Schüco Commissioning instructions – Schüco DCS Touch Display 4. Click on . 5. Select the desired profile picture and click on “Open”. Once the profile picture has been uploaded, the new contact is automatically saved. 6. In the menu bar, click first on “Device” and then on “Buttons”.
- Page 125 Schüco Commissioning instructions – Schüco DCS Touch Display 7. Click on the button of the contact that has just been amended to display the settings area. 8. In the “Select contact” selection list, first select another contact at random and then return to the contact that has just been amended in order to reconnect it.
- Page 126 Schüco Commissioning instructions – Schüco DCS Touch Display 10. Ensure that the checkboxes “Activate audio” and “Activate video” are checked to enable audio and images for a call. If you do not want to use video transmission, uncheck the “Activate video”...
- Page 127 What is Peer-to-Peer? A Peer-to-Peer connection allows direct communication between two equivalent end devices. In this way, no SIP server is needed in this case and the DCS Touch Display can be operated without a registrar if required (see „9.8 SIP“).
- Page 128 Schüco Commissioning instructions – Schüco DCS Touch Display 9.12.7. Hidden contact The following example explains how a call can be made to an existing contact exclusively by means of entering the access code. The aim here is to allow visitors to be able to make a call to a hidden contact only by entering the access code in the “Code entry”...
- Page 129 Schüco Commissioning instructions – Schüco DCS Touch Display 10. Click on 11. Via “System”, open the “User administration” page. 12. Click on 13. Enter the name of the contact in the “Username” field. 14. Click on 15. Click on 16. to generate a four or six-digit access code.
- Page 130 Schüco Commissioning instructions – Schüco DCS Touch Display INFORMATION Multiple hidden contacts If multiple hidden contacts exist, there are three options which can also be used in combination: Each hidden contact is assigned an individual access code (described as follows). All hidden contacts are assigned a common access code, whereby a user is stored and all checkboxes for hidden con- tacts are activated for them in the „Profile“...
- Page 131 : Enter a search term in this field and press the “Enter” button to search for a contact that has already been created. INFORMATION Alarm.wav The audio file „Alarm.wav“ is already on the DCS Touch Display as standard. This is used for provi- ding an acoustic alarm signal when the alarm mode is activated. Dok-Nr.10000432116_01...
- Page 132 Schüco Commissioning instructions – Schüco DCS Touch Display 9.13.1. Adding an audio file The following example will help to explain how an audio file can be uploaded to the DCS Touch Dis- play. INFORMATION Audioeigenschaften Auf das DCS Touch Display können nur Dateien in den Formaten WAV und MP3 geladen werden.
- Page 133 Schüco Commissioning instructions – Schüco DCS Touch Display Dok-Nr.10000432116_01...
- Page 134 Schüco Commissioning instructions – Schüco DCS Touch Display 9.13.2. Photos On the “Photos” page, all snapshots of the DCS Touch Display are stored which were produced via the internal camera. The following options are available in the “Photos” section: ●...
- Page 135 Schüco Commissioning instructions – Schüco DCS Touch Display 9.14. System On the “Systems” page it is possible to make basic settings for the DCS Touch Display. Dok-Nr.10000432116_01...
- Page 136 If the DCS Touch Display is additionally connected to an IP secure connector, both devices must be paired to one another once again so that it is possible to use the DCS Touch Display again in the network (see „5.1 Pairing the IP secure connector with the DCS Touch Display“).
- Page 137 In the “E-mail settings” section, an SMTP e-mail address can be entered. This function is used with the anti-theft device, for example: As soon as an attempt is made to remove the DCS Touch Display improperly, an e-mail with the notification “At this moment your DCS Touch Display is being stolen”...
- Page 138 Schüco Commissioning instructions – Schüco DCS Touch Display 3. Select the desired ZIP file and then click on “Open”. The “Overwrite settings?” dialog box appears. 4. Leave the “Network settings” checkbox checked if you do not want the network settings to be overwritten when importing a configuration.
- Page 139 Schüco Commissioning instructions – Schüco DCS Touch Display 5. Click on “Yes”. The ZIP file will now be imported and the DCS Touch Display will subsequently be restarted. Dok-Nr.10000432116_01...
- Page 140 Schüco Commissioning instructions – Schüco DCS Touch Display 6. Wait until the DCS Touch Display has performed a restart, and then log back into the web interface using the appropriate access data. Dok-Nr.10000432116_01...
- Page 141 Commissioning instructions – Schüco DCS Touch Display 9.15. User administration On the “User administration” page, it is possible to manage users for the DCS Touch Display and the web interface. Here a distinction is made between the sections “Users” and “Roles”. Under “Users”, the user data is managed, while the actions permitted are defined under “Roles”.
- Page 142 • English ● Access code: Here the access code for the “Code entry” view is displayed on the DCS Touch Dis- play. If required, enter a four or six-digit access code into this field. The access code can only be entered manually by users who have been assigned the role “Code”...
- Page 143 Schüco Commissioning instructions – Schüco DCS Touch Display Dok-Nr.10000432116_01...
- Page 144 Schüco Commissioning instructions – Schüco DCS Touch Display 9.15.3. Roles In the “Roles” section, user roles can be created, edited and deleted. The user role “admin” has al- ready been created by default. Folgende Optionen stehen im Abschnitt „Benutzer“ zur Verfügung: : Click on this button to create a new role.
- Page 145 Schüco Commissioning instructions – Schüco DCS Touch Display 9.15.4. Editing a role As soon as you have clicked on next to a role, you can edit it. The following options are available in the “Roles” section: ● Role name: Enter a meaningful role name.
- Page 146 Schüco Commissioning instructions – Schüco DCS Touch Display • Remote maintenance: This enables the “remote maintenance” page to be called up (see “7.18 Remote maintenance”). • Free code entry: This enables the free entry of access codes in the “Access code” field.
- Page 147 Schüco Commissioning instructions – Schüco DCS Touch Display INFORMATION Roles The roles determine which pages and functions can be called up by a user. If a user is assigned a role, for example, in which “User administration” is not activated, this user cannot access the “User administration”...
- Page 148 “Contacts” page. The aim is to assign a six-digit access code for the DCS Touch Display to the user, upload a profile picture and allow the “Configuration view” action sequence, which enables the user to access the “Configuration” view directly on the screen of the DCS Touch Display.
- Page 149 Schüco Commissioning instructions – Schüco DCS Touch Display 5. Click on 6. Enter the first name and surname of the user in the “First name” and “Surname” fields. 7. Enter the SIP telephone number of the user in the “Address” field.
- Page 150 Schüco Commissioning instructions – Schüco DCS Touch Display 11. Select the appropriate image for the user and click on “Open”. 12. Check the “Configuration view” checkbox under “Permitted action sequences”. 13. Click on 9.15.6. Creating a role The following example will help to explain how a role is created. The aim is to create the new role “Telephony”...
- Page 151 Schüco Commissioning instructions – Schüco DCS Touch Display 3. In the “Role name” field, enter a meaningful name (e.g. “User”). 4. Check all checkboxes for the pages and functions which are to be assigned to the new role. 5. Click on 6.
- Page 152 Schüco Commissioning instructions – Schüco DCS Touch Display Dok-Nr.10000432116_01...
- Page 153 Schüco Commissioning instructions – Schüco DCS Touch Display 7. Click on next to the appropriate user. 8. Under “Roles” check the checkbox of the role you have just created (e.g. “User”). 9. Click on 9.15.7. Changing a password The following example will help to explain how the password for the web interface is changed for a user.
- Page 154 Schüco Commissioning instructions – Schüco DCS Touch Display 4. Enter the current password in the “Old password” field (“schueco” by default). 5. Enter the new password in the “New password” field and repeat the entry in the “Repeat new password” field (e.g. “0123456789”).
- Page 155 Schüco Commissioning instructions – Schüco DCS Touch Display Dok-Nr.10000432116_01...
- Page 156 9.15.8. Changing the access code The following example will help to explain how the access code for the “Code entry” view on the DCS Touch Display is changed for a user. The aim is to assign a six-digit access code to the user “admin”.
- Page 157 Schüco Commissioning instructions – Schüco DCS Touch Display 4. Click on Dok-Nr.10000432116_01...
- Page 158 Schüco Commissioning instructions – Schüco DCS Touch Display 9.16. Codecs On the “Codecs” page, it is possible to activate and deactivate available audio and video codecs and define the priority of the formats used. The following options are available in the “Audio codecs” section: ●...
- Page 159 Schüco Commissioning instructions – Schüco DCS Touch Display 9.17. Remote maintenance On the “Remote maintenance” page, it is possible to have remote maintenance carried out on the DCS Touch Display. The following information is available in the “Network status” section: Status: Here the status of the remote maintenance is displayed.
- Page 160 Schüco Commissioning instructions – Schüco DCS Touch Display 10. Replacing an IP secure connector If an IP secure connector has to be replaced, the connection between the DCS Touch Display and IP secure connector must be disconnected. INFORMATION More detailed information More detailed information about disconnecting the connection between the IP secure connector and DCS Touch Display can be found under “8.4.9 IP secure connector”.
- Page 161 Damage to property ► Prevent water getting inside the device. ► Do not use any aggressive or abrasive cleaning agents. Clean DCS modules using a dry or damp cloth. Remove more stubborn dirt using a domestic cleaning agent for glass. 13. Decommissioning The materials used can be recycled.
- Page 162 Schüco Commissioning instructions – Schüco DCS Touch Display 14. Service and support At Schüco, a high level of customer satisfaction is our priority. Should you require further information or encounter problems not dealt with in detail in this document, you can request the requisite information from Building Automation Technical Support.
- Page 163 Original operating instructions or (and) translation of original operating instructions Schüco International KG Karolinenstraße 1-15 33609 Bielefeld Tel. +49 521 783-0 Fax +49 521 783-451 www.schueco.de...
Need help?
Do you have a question about the DCS and is the answer not in the manual?
Questions and answers