Table of Contents
Advertisement
Quick Links
INSTRUCTIONS
CKX-CCSW
Confluency checker
NOTE:
This instruction manual is for the Olympus confluency checker CKX-CCSW.
To ensure the safety, obtain optimum performance and to familiarize yourself fully with the use of this
software, we recommend that you study this manual thoroughly before using the software, and always
keep this manual at hand when using the software.
Keep this instruction manual in a safe place.
Software for research/education
This software is designed to use in research and or education fields.
Optical Microscope Accessory
Advertisement
Table of Contents

Subscribe to Our Youtube Channel
Related Manuals for Olympus CKX-CCSW


Summary of Contents for Olympus CKX-CCSW
- Page 1 Confluency checker NOTE: This instruction manual is for the Olympus confluency checker CKX-CCSW. To ensure the safety, obtain optimum performance and to familiarize yourself fully with the use of this software, we recommend that you study this manual thoroughly before using the software, and always keep this manual at hand when using the software.
-
Page 2: Table Of Contents
Contents Introduction ............................... 1 Handling Precautions ..........................2 Cautions in use ................................2 System compatibility ..............................2 PC and software ................................3 1 System diagram ............................4 2 Installation ..............................5 2-1 Installation................................5 2-2 Activation .................................. 8 2-3 Uninstallation ................................ 8 3 Basic operations ............................. - Page 3 CKX-CCSW 5 Screen flow ............................... 38 5-1 [Main] screen ..............................38 5-2 Displaying the submenu .......................... 39 5-3 Displaying the [Setting] screen ......................39 6 Various settings ............................. 40 6-1 [Main] screen ..............................40 Setting the source ..................................40 6-2 Submenu ................................41 Setting the area of culture vessel ..........................41...
- Page 4 7 Effective measurement of cell count/confluency ........... 53 7-1 Zoom area ................................53 7-2 Using the cell scale bar effectively ....................53 Setting the cell scale bar ..............................54 8 Specifications ............................55 9 Troubleshooting ............................ 56...
-
Page 5: Introduction
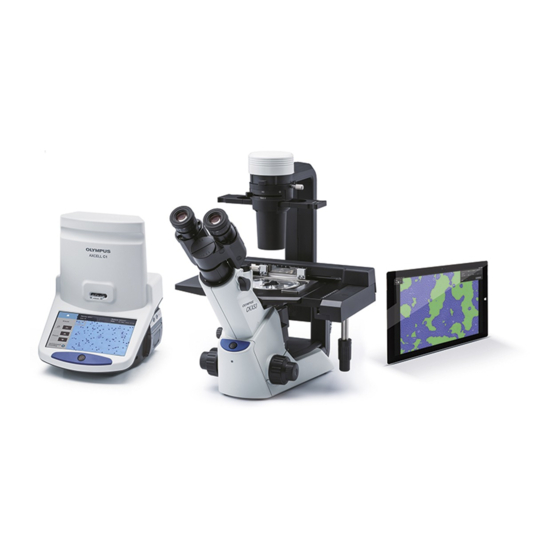
CKX-CCSW Introduction The confluency checker CKX-CCSW is a product to measure the cell count and the confluency from the image where the culture cells are acquired with the Olympus microscope digital camera DP22/DP27 or other cameras. Contents in this instruction manual This instruction manual covers only the contents concerning the confluency checker CKX-CCSW. -
Page 6: Handling Precautions
Cautions in use Image data 1. The recorded image data may be lost (destroyed) in the following cases. Olympus is not liable for the loss (destruction) of the recorded data. • When the user or a third party carried out a repair to the product. -
Page 7: Pc And Software
PCs whose performances in combination use with this system were confirmed. 1. The PC data may be lost (corrupted) unexpectedly, so make frequent backups of the data you acquired. Olympus is not liable for any damage due to the use or disability in use of this product, including compensation for lost data. -
Page 8: System Diagram
} Consult Olympus for the compatible microscope and camera adapter. The camera head may not work properly in combination with some PCs. Refer to Olympus website to check the PCs whose performances in combination use with this system were confirmed. -
Page 9: Installation
(For the change of user account, refer to the Help of Windows.) 2-1 Installation The procedures to install this product is described below. Open (decompress) the file downloaded from the Olympus web site on the desktop screen of PC where this product will be installed. Click "Setup.exe". - Page 10 Select the folder to install the software and click [Next]. The following folder is specified as the initial setting. 32-bit version C:\Program Files\Olympus\Micro\CKX-CCSW 64-bit version C:\Program Files (x86)\Olympus\Micro\CKX-CCSW Click [Install]. The installation starts. During the installation process, if "Would you like to install this device software?] regarding the...
- Page 11 CKX-CCSW Click [Finish]. This is the end of the installation.
-
Page 12: Activation
2-2 Activation If passing 30 days of more after the date of installation, you must activate this product using the serial code. Without activation, you will not be able to use this software. The procedures to activate this product is described below. Click on the desktop. -
Page 13: Basic Operations
· Windows 7 Click on the desktop screen. Or click in the order of [Start] button - [All programs] - [Olympus] - [CKX-CCSW]. If the error or the warning screen appears after the software starts, click [OK]. · Windows 8/8.1 Display the desktop screen and click Or on the start screen, click [CKX-CCSW.exe] in [All applications]. -
Page 14: Exiting The Software
Button to minimize Minimizes the screen. Button to close Closes CKX-CCSW * These fields may not be displayed depending on the camera to be used and software settings. Exiting the software Exit this product according to the procedures described below. -
Page 15: Initial Settings
CKX-CCSW Initial settings This section describes the initial setting procedures of this product. This operation is necessary when you start this product for the first time. After the second time, the product starts in the status reflecting the last settings when exiting the software. - Page 16 Click [Main] d . The [Main] screen appears. In [Source], click e and select the source. Select the source from followings. · [DP]: Appears when DP22/DP27 is connected. (Keep this status when measuring while acquiring the image with DP22/ DP27.) ·...
-
Page 17: Measuring While Acquiring The Image With Dp22/Dp27
CKX-CCSW 3-2 Measuring while acquiring the image with DP22/DP27 You can measure the cell count and the confluency in the culture vessel while acquiring the image with DP22/DP27. Measuring the cell count in the culture vessel while acquiring the image with DP22/DP27 Start this product according to the procedures described on page 9. - Page 18 If the submenu is not opened, click [Configuration] b to open the submenu. Click c of [Area of Culture Vessel] to display the items, and select the area of the culture vessel to be used. Items to be displayed are described below. If [Custom] is selected, input the numerical value in the d field.
- Page 19 CKX-CCSW While viewing the cell image displayed in the preview area, adjust the threshold on the [Cell Count Setting] screen so that the point (shown in red as default) is displayed one by one in the cell. There are two ways to adjust the threshold: one is to click h or drag i to adjust the slider and the other is to input the numerical value into j directly.
- Page 20 Bring the cell into focus again according to the procedure in Click [Snap] o on the [Measurement Result View] screen. The image is acquired and the measurement results are displayed in p . Move the culture vessel with your hand to change the acquisition position, and repeat Each time you acquire the image, the value displayed in p changes.
-
Page 21: Measuring The Confluency In The Culture Vessel While Acquiring The Image With Dp22/Dp27
CKX-CCSW Measuring the confluency in the culture vessel while acquiring the image with DP22/DP27 Start this product according to the procedures described on page 9. The [Main] screen appears in the control area. Click a in [Source] and select [DP]. - Page 22 If the submenu is not opened, click [Configuration] b to open the submenu. Click c of [Area of Culture Vessel] to display the items, and select the area of the culture vessel to be used. Items to be displayed are described below. If [Custom] is selected, input the numerical value in the d field.
- Page 23 CKX-CCSW Click [OK] h on the [Step 1] screen and drag the cell part in the image displayed on the preview area. The dragged line (shown in blue as default) appears and the [Step 2] screen is displayed. Click [OK] i on the [Step 2] screen and drag the non-cell part (background part) in the image displayed on the preview area.
- Page 24 On the [Main] screen, set the number of images to be measured while acquiring. In [Number of Images], input the numerical value into the m field directly or click [+] or [-] in the n field. The more the number of images is increased, the higher the measurement accuracy becomes, but it takes longer time.
-
Page 25: Measuring From The Acquired Image
CKX-CCSW 3-3 Measuring from the acquired image You can measure the cell count and the confluency from the acquired image. Measuring the cell count from the acquired image Start this product according to the procedures described on page 9. The [Main] screen appears in the control area. - Page 26 If the submenu is not opened, click [Configuration] f to open the submenu. Click g of [Area of Culture Vessel] to display the items, and select the area of culture vessel used for acquiring the image. Items to be displayed are described below. If [Custom] is selected, input the numerical value in the h field.
- Page 27 CKX-CCSW While viewing the cell image displayed in the preview area, adjust the threshold on the [Cell Count Setting] screen so that the point (shown in red as default) is displayed one by one in the cell. There are two ways to adjust the threshold: one is to click l or drag m to adjust the slider and the other is to input the numerical value into n directly.
-
Page 28: Measuring The Confluency From The Acquired Image
Measuring the confluency from the acquired image Start this product according to the procedures described on page 9. The [Main] screen appears in the control area. Click [Setting] a . The [Setting] screen appears. Click [General] b . Click c . The screen to select the folder appears. Select the folder where the image to be used for measurement is saved and click [Select Folder]. - Page 29 CKX-CCSW If the submenu is not opened, click [Configuration] f to open the submenu. Click g of [Area of Culture Vessel] to display the items, and select the area of culture vessel used for acquiring the image. Items to be displayed are described below.
- Page 30 Click [OK] l on the [Step 1] screen and drag the cell part in the image displayed on the preview area. The dragged line (shown in blue as default) appears and the [Step 2] screen is displayed. Click [OK] m on the [Step 2] screen and drag the non-cell part (background part) in the image displayed on the preview area.
- Page 31 CKX-CCSW When measuring multiple images, select all images to be used for measurement from images displayed in the thumbnail area. Clicking the image in the thumbnail area will change between the selected status (framed in blue) and the unselected status (not framed in blue).
-
Page 32: Measuring While Acquiring The Image With Cameras Other Than Dp22/Dp27
DP27 3-4 Measuring while acquiring the image with cameras other than DP22/ You can measure the cell count and the confluency in the culture vessel while acquiring the image with cameras other than DP22/DP27. Measuring the cell count in the culture vessel while acquiring the image with cameras other than DP22/DP27 Start this product according to the procedures described on page 9. - Page 33 CKX-CCSW If the submenu is not opened, click [Configuration] b to open the submenu. Click c of [Area of Culture Vessel] to display the items, and select the area of the culture vessel to be used. Items to be displayed are described below.
- Page 34 While viewing the cell image displayed in the preview area, adjust the threshold on the [Cell Count Setting] screen so that the point (shown in red as default) is displayed one by one in the cell. There are two ways to adjust the threshold: one is to click h or drag i to adjust the slider and the other is to input the numerical value into j directly.
- Page 35 CKX-CCSW Move the culture vessel with your hand to change the acquisition position and bring the cell into focus according to the procedure in . Then, acquire the image of the specimen according to the operating procedures of the camera in use. Repeat this operation.
-
Page 36: Measuring The Confluency In The Culture Vessel While Acquiring The Image With Cameras Other Than Dp22/Dp27
Measuring the confluency in the culture vessel while acquiring the image with cameras other than DP22/DP27 Start this product according to the procedures described on page 9. The [Main] screen appears in the control area. Click a in [Source] and select [Folder]. Place the culture vessel of the specimen to be measured on the stage of the microscope. - Page 37 CKX-CCSW If the submenu is not opened, click [Configuration] b to open the submenu. Click c of [Area of Culture Vessel] to display the items, and select the area of the culture vessel to be used. Items to be displayed are described below.
- Page 38 Click [OK] h on the [Step 1] screen and drag the cell part in the image displayed on the preview area. The dragged line (shown in blue as default) appears and the [Step 2] screen is displayed. Click [OK] i on the [Step 2] screen and drag the non-cell part (background part) in the image displayed on the preview area.
- Page 39 CKX-CCSW On the [Main] screen, set the number of images to be measured while acquiring. In [Number of Images], input the numerical value into the m field directly or click [+] or [-] in the n field. The more the number of images is increased, the higher the measurement accuracy becomes, but it takes longer time.
-
Page 40: Measuring The Cell Count And The Confluency At The Same Time
3-5 Measuring the cell count and the confluency at the same time You can measure the cell count and the confluency at the same time by ticking both [Count] and [Confluency] on the [Main] screen in the control area. Refer to the respective operating procedures for details. 3-6 Re-using the measurement settings When you measure other culture cells under the same conditions, you don't need to set [Area of Culture Vessel] or [Objective Magnification] specified during measurement and to calibrate [Count] or [Confluency] again. -
Page 41: Camera Connection (When Using Dp22/Dp27)
・ Always use the interface cable (USB 3.0 cable) provided by Olympus. Using commercially available USB 3.0 cables or hubs does not guarantee the operation of the equipment. ・ Keep the interface cables well away from the equipment generating heat, such as the lamp housing of microscope. -
Page 42: Screen Flow
Screen flow 5-1 [Main] screen The flow from the [Main] screen of this product is shown below. [Main] screen [Cell Count Setting] screen Zoom area [Property] screen [Measurement Result View] screen Re-calibration [Setting] screen, [Confluency Checker] tab [Setting] screen, [General] tab... -
Page 43: Displaying The Submenu
CKX-CCSW 5-2 Displaying the submenu This section describes the procedure to display the submenu of the [Main] screen. Display the [Main] screen. Click [Configuration] a . The submenu is displayed. Clicking a again closes the submenu. 5-3 Displaying the [Setting] screen This section describes the procedure to display the [Setting] screen. -
Page 44: Various Settings
Various settings 6-1 [Main] screen This section describes the settings available on the [Main] screen. You can display the [Main] screen by clicking the [Main] tab a in the control area. Minimize Save Save destination Exp. time Select image source Source Configuration Area of... -
Page 45: Submenu
CKX-CCSW 6-2 Submenu Setting the area of culture vessel This section describes the procedures to set the area of culture vessel of the cell. Display the [Main] screen. Click a , and select from the items displayed. Items to be displayed are described below. -
Page 46: Setting The Adapter Magnification
Setting the adapter magnification This section describes the procedures to set the adapter magnification. Display the [Main] screen. a , and select from the items displayed. Click Items to be displayed are described below. Magnification X0.5 (Initial setting) X1.0 Setting the size of image sensor This section describes the procedures to set the size of image sensor. -
Page 47: Setting The Number Of Images
CKX-CCSW Setting the number of images This section describes the procedures to set the number of images to be measured. Display the [Main] screen. In [Number of Images], input the numerical value into the a field directly or click b to display the value in the left field, and set it. -
Page 48: Setting The File Format Used For Saving Results
[General] screen Click [General] c to display the [General] screen. Working Folder File Name Language DP Image Format Calibration About Setting the file format used for saving results This section describes the procedures to set the file format to be used for saving the results. -
Page 49: Setting The Count Color
CKX-CCSW Setting the count color This section describes the procedures to set the color used for measuring the cell count. Display the [Setting] screen. Click the [Confluency Checker] tab a . Click b , and select from the list displayed. -
Page 50: Setting The Confluency Color
Setting the confluency color This section describes the procedures to set the cell color and the background color used when measuring the confluency. Display the [Setting] screen. Click the [Confluency Checker] tab a . Click b in [Cell] and select from the list displayed. You can select from following colors. -
Page 51: Displaying The Focus Indicator
CKX-CCSW Displaying the focus indicator The focus indicator is displayed when DP22/DP27 is connected. It shows the contrast level of the live image as a focusing guide. This section describes the procedure to display the focus indicator. Display the [Setting] screen. -
Page 52: Setting The Working Folder
Setting the working folder This section describes the procedures to set the working folder. Display the [Setting] screen. Click [General] tab a . Click The screen to select the folder appears. Select the working folder and click [Select Folder]. Setting the file name This section describes the procedures to set the file names of the acquired images or measurement results. -
Page 53: Setting The Language
CKX-CCSW Setting the language This section describes the procedures to change the language of displays such as menus to different language. Display the [Setting] screen. Click [General] tab a . b , and select from the list displayed. Click The selected language is displayed in the field on the right. -
Page 54: Setting The Calibration Of Dp22/Dp27
Setting the calibration of DP22/DP27 If the difference in brightness or color between the right half and the left half of the image acquired using DP22/DP27 is noticeable, you can correct the image to the normal status by calibrating DP22/DP27. If DP22/DP27 is not connected, this item is not displayed. -
Page 55: Property] Screen
CKX-CCSW 6-4 [Property] screen On the [Property] screen, you can confirm the contents specified in the [Main] screen and [Setting] screen. This section describes the items displayed on the [Property] screen. Clicking [ Default ] will return the settings to the initial values. -
Page 56: Saving The Settings
6-5 Saving the settings You can save the items displayed on the [Property] screen as the setting file. This section describes the procedures. Display the [Main] screen. Click a to display the screen to select the folder. Set the folder and the file name to save settings and click [Save]. -
Page 57: Effective Measurement Of Cell Count/Confluency
CKX-CCSW Effective measurement of cell count/confluency 7-1 Zoom area This section describes the procedures to operate the zoom area. Item Description Click this icon to zoom out. The same operation can be performed by pinching in on the tablet PC. -
Page 58: Setting The Cell Scale Bar
Setting the cell scale bar This section describes the procedures to set the cell scale bar. Display the [Setting] screen. Click the [Confluency Checker] tab a . Tick [Display] b to display the cell scale bar. Tick [Small Cell Mode] c if you want to measure the small cell (approx. -
Page 59: Specifications
CKX-CCSW Specifications Item Specifications Function Cell count measurement, confluency measurement Controllable camera DP22, DP27 Normal mode: 20 to 200 μm (30 to 60 μm is recommended) Small cell mode: 10 to 20 μm Measurable cell size * 130 to 200 μm: Measurable only for colony of the iPS/ES cell... -
Page 60: Troubleshooting
Troubleshooting Under certain conditions, performance of CKX-CCSW may not be given properly. If problems occur, please review the following list and take remedial action as needed. If the phenomena are not improved, contact Olympus for assistance. Phenomena or error message... - Page 61 CKX-CCSW Phenomena or error message Cause Remedy Page The image is not displayed when The folder where the acquired Set the folder where the acquired measuring while acquiring the image with image file is saved is not set as a...
- Page 62 Or the system received the PC. If the same message still failure notification from the camera appears, contact Olympus. while this product is running. PC was in the sleep mode once. Shutdown PC once and restart PC.
- Page 63 Manufactured by Shinjuku Monolith, 2-3-1 Nishi-Shinjuku, Shinjuku-ku, Tokyo 163-0914, Japan Distributed by 48 Woerd Avenue Waltham, MA 02453, U.S.A. 8F Olympus Tower, 446 Bongeunsa-ro, Gangnam-gu, Seoul, Korea 135-509 AX8857 01...
Need help?
Do you have a question about the CKX-CCSW and is the answer not in the manual?
Questions and answers