Table of Contents
Advertisement
Quick Links
Installation & Operation Manual
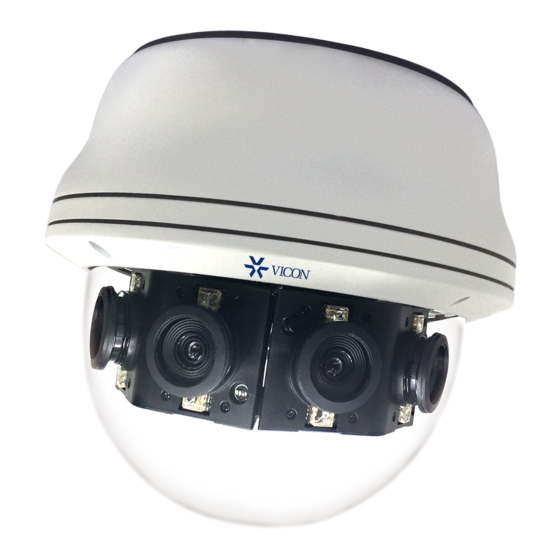
V1008-WIR-180
Multi-Sensor Camera
Vicon Industries Inc. does not warrant that the functions contained in this equipment will meet your requirements or
that the operation will be entirely error free or perform precisely as described in the documentation. This system has not
been designed to be used in life-critical situations and must not be used for this purpose.
Document Number: 8009-8300-00-00 Product specifications subject to change without notice.
Issued: 10/18 Copyright © 2018 Vicon Industries Inc. All rights reserved.
XX300-00
Vicon Industries Inc.
Tel: 631-952-2288) Fax: 631-951-2288
Toll Free: 800-645-9116
24-Hour Technical Support: 800-34-VICON
(800-348-4266) UK: 44/(0) 1489-566300
www.vicon-security.com
Advertisement
Table of Contents

Related Manuals for Vicon V1008-WIR-180


Summary of Contents for Vicon V1008-WIR-180
- Page 1 XX300-00 Vicon Industries Inc. Vicon Industries Inc. does not warrant that the functions contained in this equipment will meet your requirements or Tel: 631-952-2288) Fax: 631-951-2288 that the operation will be entirely error free or perform precisely as described in the documentation. This system has not Toll Free: 800-645-9116 been designed to be used in life-critical situations and must not be used for this purpose.
-
Page 2: Table Of Contents
Stitch Tool ..................13 System Settings ................37 How to Install Stitch Tool ..............13 Network - Basic ..................38 Starting to Use Stitch Tool ..............15 IPv6 Settings ..................38 Web Browser .................19 Copyright © 2018 Vicon Industries Inc. All Rights Reserved. V1008-WIR-180 User Manual... - Page 3 Alarm/Motion/Sabotage Detection Settings ........68 User List ..................53 Record Type Selected: Video ............68 User Information ................54 Trigger Scheduled Settings .............69 Event - Alarm Handler ................55 Day/Time Inclusion Filter ..............69 Copyright © 2018 Vicon Industries Inc. All Rights Reserved. V1008-WIR-180 User Manual...
-
Page 4: Preface
▪ Follow all warnings and cautions in this manual. in any form or by any means without the prior written consent from Vicon ▪ Do not place the unit on an unstable surface, cart, or stand. -
Page 5: Rohs Compliance
(Cr6+) < 0.1% or 1,000ppm, Polybrominated biphenyls (PBB) < 0.1% or 1,000ppm, and Polybrominated diphenyl Ethers (PBDE) < 0.1% or 1,000ppm. In order to meet the RoHS compliant directives, Vicon has established an engineering and manufacturing task force to implement the introduction of green products. -
Page 6: Installation Recommendations
Technical Support and Assistance Ensure you have a stable, clean working environment. Dust and dirt can get 1. For the most updated information of Vicon products, visit Vicon’s website into components and cause a malfunction. Use containers to keep small at www.vicon-security.com. -
Page 7: Conventions Used In This Manual
This will prevent injury to yourself when performing a task. Caution: CAUTION! CAUTION! CAUTION! Information to avoid damaging components or losing data. Note: Provides additional information to complete a task easily. Copyright © 2018 Vicon Industries Inc. All Rights Reserved. V1008-WIR-180 User Manual... -
Page 8: Package Contents
Preface Package Contents The V1008-WIR-180 package contains the following accessories: Name Quantity IP camera Quick installation guide Accessory pack viii Copyright © 2018 Vicon Industries Inc. All Rights Reserved. V1008-WIR-180 User Manual... -
Page 9: Chapter 1: Product Introduction
Chapter 1: Product Introduction 1: p hapter roduCt ntroduCtIon Overview Cable Power IN (DC12V 2.5A/AC24V 1.5A) RJ45 Alarm OUT Alarm IN Audio OUT Audio IN Reset to default button Copyright © 2018 Vicon Industires Inc. All Rights Reserved. V1008-WIR-180 User Manual... -
Page 10: Hardware Specifications
HTTP, HTTPS, LDAP (client), SSL, SMTP, FTP, RTSP, UPnP, DNS, NTP, RTP, RTCP, DynDNS, Zero Configure ▪ ONVIF: Profile S, Q, G ▪ Users: Live viewing/Administrator for up to 10 clients ▪ Browsers: Internet Explorer, Google Chrome, Mozilla, Firefox Copyright © 2018 Vicon Industires Inc. All Rights Reserved. V1008-WIR-180 User Manual... -
Page 11: Hardware Installation
1. Use an Allen key to remove the cap on the bottom of the camera. 2. Loosen the 4 screws on the iron sheet and remove the iron sheet. External Network Cable External Network Cable Iron sheet Iron Sheet Copyright © 2018 Vicon Industires Inc. All Rights Reserved. V1008-WIR-180 User Manual... - Page 12 4. After opening the dome, use the tool provided to loosen the 4 screws and remove the bottom cover. Top Cover Top cover Main Body Main body with Modules with modules Bottom Cover Bottom cover Copyright © 2018 Vicon Industires Inc. All Rights Reserved. V1008-WIR-180 User Manual...
- Page 13 5.4 Use the 4 screws provided in the screw installation package and screw them into the expansion bolts to fix the bottom cover in the installation location (wall or ceiling). Copyright © 2018 Vicon Industires Inc. All Rights Reserved. V1008-WIR-180 User Manual...
- Page 14 Gear Gear Gear Gear Manual Easing Manual Easing Manual Easing Manual Easing Gear Gear Gear Gear Right or Left Right or Left Up or Down Up or Down Copyright © 2018 Vicon Industires Inc. All Rights Reserved. V1008-WIR-180 User Manual...
- Page 15 Chapter 1: Product Introduction 9. Retighten the 4 captive screws on the dome to secure it in place. Copyright © 2018 Vicon Industires Inc. All Rights Reserved. V1008-WIR-180 User Manual...
-
Page 16: Chapter 2: Camera Configuration
1. Download the IP-Finder installer file; the IP-FINDER tool (Discovery tool) find the device IP, as shown in the following section. can be gotten from the Vicon website, Software Downloads.. 2. Unzip the IP-FINDER file to a location on the hard drive. - Page 17 6. To check the available drives you can install the software to and their available and required disk space, click on the Disk Cost button. User accounts 8. Click on the Next button to continue. Copyright © 2018 Vicon Industires Inc. All Rights Reserved. V1008-WIR-180 User Manual...
- Page 18 9. Click on the Next button to begin installation. 10. Once the installation process is complete, click on the Close button to finish. A shortcut will be created on the desktop. Next button Close button Copyright © 2018 Vicon Industires Inc. All Rights Reserved. V1008-WIR-180 User Manual...
-
Page 19: Ip-Finder
2. When the program is launched, it will begin searching the network for IP cameras automatically (the search will last for up to 90 seconds). You can also manually search cameras by clicking on the Search button. Camera List Copyright © 2018 Vicon Industires Inc. All Rights Reserved. V1008-WIR-180 User Manual... -
Page 20: Introduction To The Ip-Finder User Interface
Device Mark IP” and “Firmware Upgrade” functions. NOTE: Different IP camera models use different firmwares, please do NOT update the firmware of different models using the same firmware. Copyright © 2018 Vicon Industires Inc. All Rights Reserved. V1008-WIR-180 User Manual... -
Page 21: Stitch Tool
2. Follow the installation process step by step. If your computer operating system is Windows 10, right click on the setup file and select Run as administrator to execute this setup file with full functionality Copyright © 2018 Vicon Industires Inc. All Rights Reserved. V1008-WIR-180 User Manual... - Page 22 5. The installation is completed automatically. Press Finish to close the window message. The shortcut of Stitch Tool is displayed on the screen. Click this icon to open the dialog window and begin using the tool. Copyright © 2018 Vicon Industires Inc. All Rights Reserved. V1008-WIR-180 User Manual...
-
Page 23: Starting To Use Stitch Tool
The settings will be kept as the last time input. Our standard default IP address, user account and password are as below: IP address: 192.168.1.168 User: admin Password: 9999 Copyright © 2018 Vicon Industires Inc. All Rights Reserved. V1008-WIR-180 User Manual... - Page 24 Note 1 on page 18) is also displayed on the dialog window as below. Switchable with [ Live view ] Snapshot mode: The stitched image is in jpg format. Live-view mode: The stitched image is for live view. Copyright © 2018 Vicon Industires Inc. All Rights Reserved. V1008-WIR-180 User Manual...
- Page 25 7. Press [ Save Param ] and the stitched information (information for H and V) will be saved to C:\Users\Username\Desktop\StitchTool\*.ini. You can re-name the file name of .ini to keep many different stitched parameters. Copyright © 2018 Vicon Industires Inc. All Rights Reserved. V1008-WIR-180 User Manual...
- Page 26 H and V will be displayed. 10. After confirming the selection, press [ Save to Camera ] and the stitching parameters will be written into the camera directly. Copyright © 2018 Vicon Industires Inc. All Rights Reserved. V1008-WIR-180 User Manual...
-
Page 27: Web Browser
5. If no video is displayed on the screen, make sure you have VLC Media Player installed on the computer. If not, download and install it; then the video will display from the web browser. Copyright © 2018 Vicon Industires Inc. All Rights Reserved. V1008-WIR-180 User Manual... -
Page 28: Main Screen Overview
“Admins” indicates administrator account and “User” indicates user account. Logs out from the current login session. Copyright © 2018 Vicon Industires Inc. All Rights Reserved. V1008-WIR-180 User Manual... -
Page 29: Configuring The Camera's Setting
Chapter 2: Camera Configuration Configuring the Camera’s Setting 1. To configure the camera’s setting, click on the Setup button on the main screen to enter the configuration menu. Setup Copyright © 2018 Vicon Industires Inc. All Rights Reserved. V1008-WIR-180 User Manual... -
Page 30: Browsing Through The Configuration Menu
– Network Storage – Basic – Relay Handler – FTP – SD Record – SSL – 802.1x – SNMP – Firewall – LDAP – DDNS – RTSP – GB28181 Copyright © 2018 Vicon Industires Inc. All Rights Reserved. V1008-WIR-180 User Manual... -
Page 31: Video - Video Configuration
FPS will be reduced to save bandwidth. GOP Length Configures the GOP length of the stream; the range is 1~120. Users can enter the value or adjust it through the slider bar. Copyright © 2018 Vicon Industires Inc. All Rights Reserved. V1008-WIR-180 User Manual... -
Page 32: Secondary Stream
Bit Rate Configures the bit rate; the range is 2~4000. User can enter the value or adjust it through the slider bar. Copyright © 2018 Vicon Industires Inc. All Rights Reserved. V1008-WIR-180 User Manual... -
Page 33: Third Stream
Save button to apply the configurations. Click on this button once to confirm all the settings for the new changes to take effect. Reset Click the Reset button to discard all the settings and revert to the previous settings. Copyright © 2018 Vicon Industires Inc. All Rights Reserved. V1008-WIR-180 User Manual... -
Page 34: Audio Settings
Save button applies the configurations. Click on this button once to confirm all the settings for the new changes to take effect. Reset Click the Reset button to discard all the settings and revert to the previous settings. Copyright © 2018 Vicon Industires Inc. All Rights Reserved. V1008-WIR-180 User Manual... -
Page 35: Image - Exposure
Disable Global Mode (OFF) Set up the parameters for each image channel independently. Each image channel can be adjusted individually. After setting up the parameters, press Save to keep the configurations. Copyright © 2018 Vicon Industires Inc. All Rights Reserved. V1008-WIR-180 User Manual... - Page 36 Select User Define to enter the value of Maximum Gain (the range is 1~512) manually. Gain The range is 1~512. It can only be edited when Lock is selected as the AE Mode. Copyright © 2018 Vicon Industires Inc. All Rights Reserved. V1008-WIR-180 User Manual...
- Page 37 RG Gain or BG Gain. The range is 0.00~10.00. Noise Reduction Enable this function to reduce noise. The available options are OFF and 1~11. Copyright © 2018 Vicon Industires Inc. All Rights Reserved. V1008-WIR-180 User Manual...
-
Page 38: Day/Night Settings
Save button applies the configurations. Click on this button once to confirm all the settings for the new changes to take effect. Reset Click the Reset button to discard all the settings and revert to the previous settings. Copyright © 2018 Vicon Industires Inc. All Rights Reserved. V1008-WIR-180 User Manual... -
Page 39: Image - Basic Settings
On the center of each image channel, a text box is available for entering a number from 1 to 9. Each step is moved by pixels depending on the value entered. Copyright © 2018 Vicon Industires Inc. All Rights Reserved. V1008-WIR-180 User Manual... -
Page 40: Basic Settings Cont
Configures the brightness of the image; the range is 0 ~ 100, with 0 being the lowest brightness. Enter the values or adjust the bar to increase or decrease the values. The default value is 50. Copyright © 2018 Vicon Industires Inc. All Rights Reserved. V1008-WIR-180 User Manual... - Page 41 Discards all the settings applied to the image and resets to the default settings. Default All Image Settings Discards all the settings applied to the image and reverts to the previous settings. Copyright © 2018 Vicon Industires Inc. All Rights Reserved. V1008-WIR-180 User Manual...
-
Page 42: Image - Roi
5. Press the Set Area button for the setting to take effect. The ROI area will then be seen on the video stream. 6. Press the Del Area button or select OFF to delete the ROI area. Copyright © 2018 Vicon Industires Inc. All Rights Reserved. V1008-WIR-180 User Manual... -
Page 43: Image - Privacy Zone
Mask will be seen on the video stream. 4. Press the Del Area button or select OFF to delete the privacy zone. Copyright © 2018 Vicon Industires Inc. All Rights Reserved. V1008-WIR-180 User Manual... -
Page 44: Image - Osd
Save button applies the configurations. Click on this button once to confirm all the settings for the new changes to take effect. Reset Click the Reset button to discard all the settings and revert to the previous settings. Copyright © 2018 Vicon Industires Inc. All Rights Reserved. V1008-WIR-180 User Manual... -
Page 45: Network - Basic
Configures the HTTP port number of the web configuration menu. HTTPS Port Configures the HTTPS port number of the web configuration menu. Hardware Address Unique MAC address for each camera device. Copyright © 2018 Vicon Industires Inc. All Rights Reserved. V1008-WIR-180 User Manual... -
Page 46: Network - Basic
Save button applies the configurations. Click on this button once to confirm all the settings for the new changes to take effect. Reset Click the Reset button to discard all the settings and revert to the previous settings. Copyright © 2018 Vicon Industires Inc. All Rights Reserved. V1008-WIR-180 User Manual... -
Page 47: Network - Ftp
Save button applies the configurations. Click on this button once to confirm all the settings for the new changes to take effect. Reset Click the Reset button to discard all the settings and revert to the previous settings. Copyright © 2018 Vicon Industires Inc. All Rights Reserved. V1008-WIR-180 User Manual... -
Page 48: Network - Ssl
Save button applies the configurations. Click on this button once to confirm all the settings for the new changes to take effect. Reset Click the Reset button to discard all the settings and revert to the previous settings. Copyright © 2018 Vicon Industires Inc. All Rights Reserved. V1008-WIR-180 User Manual... -
Page 49: Network - 802.1X
Save button applies the configurations. Click on this button once to confirm all the settings for the new changes to take effect. Reset Click the Reset button to discard all the settings and revert to the previous settings. Copyright © 2018 Vicon Industires Inc. All Rights Reserved. V1008-WIR-180 User Manual... -
Page 50: Network - Snmp
Save button applies the configurations. Click on this button once to confirm all the settings for the new changes to take effect. Reset Click the Reset button to discard all the settings and revert to the previous settings. Copyright © 2018 Vicon Industires Inc. All Rights Reserved. V1008-WIR-180 User Manual... -
Page 51: Network - Firewall
Save button applies the configurations. Click on this button once to confirm all the settings for the new changes to take effect. Reset Click the Reset button to discard all the settings and revert to the previous settings. Copyright © 2018 Vicon Industires Inc. All Rights Reserved. V1008-WIR-180 User Manual... -
Page 52: Network - Ldap
Save button applies the configurations. Click on this button once to confirm all the settings for the new changes to take effect. Reset Click the Reset button to discard all the settings and revert to the previous settings. Copyright © 2018 Vicon Industires Inc. All Rights Reserved. V1008-WIR-180 User Manual... -
Page 53: Network - Ddns
Save button applies the configurations. Click on this button once to confirm all the settings for the new changes to take effect. Reset Click the Reset button to discard all the settings and revert to the previous settings. Copyright © 2018 Vicon Industires Inc. All Rights Reserved. V1008-WIR-180 User Manual... -
Page 54: Network - Rtsp
Default URL Path of Stream 1 to Stream 3 Stream 1: rtsp://cameraIP/stream1 Stream 2: rtsp://cameraIP/stream2 Stream 3: rtsp://cameraIP/stream3 Copyright © 2018 Vicon Industires Inc. All Rights Reserved. V1008-WIR-180 User Manual... -
Page 55: Multicast (Stream 1 To Stream 3)
Configures the port number of the audio stream. Meta IP Configures the multicast address for the html meta. Meta Port Configures the port number of the html meta. Copyright © 2018 Vicon Industires Inc. All Rights Reserved. V1008-WIR-180 User Manual... - Page 56 Save button applies the configurations. Click on this button once to confirm all the settings for the new changes to take effect. Reset Click the Reset button to discard all the settings and revert to the previous settings. Copyright © 2018 Vicon Industires Inc. All Rights Reserved. V1008-WIR-180 User Manual...
-
Page 57: Network - Gb28181
Save button applies the configurations. Click on this button once to confirm all the settings for the new changes to take effect. Reset Click the Reset button to discard all the settings and revert to the previous settings. Copyright © 2018 Vicon Industires Inc. All Rights Reserved. V1008-WIR-180 User Manual... -
Page 58: System - Date/Time
Save button applies the configurations. Click on this button once to confirm all the settings for the new changes to take effect. Reset Click the Reset button to discard all the settings and revert to the previous settings. Copyright © 2018 Vicon Industires Inc. All Rights Reserved. V1008-WIR-180 User Manual... -
Page 59: System - Maintenance
Records all the status information of the camera in list format when the camera is connecting to the PC. Downloads the log file to the computer as a text file. Copyright © 2018 Vicon Industires Inc. All Rights Reserved. V1008-WIR-180 User Manual... -
Page 60: Backup
Update and Restore Click on the Choose a file button and locate the backup file; once the file is selected, press the Update and Restore button to restore camera settings. Copyright © 2018 Vicon Industires Inc. All Rights Reserved. V1008-WIR-180 User Manual... -
Page 61: System - User Management
User Information. Press Give Up to delete the new user if you do not want to continue the setup. To delete an account, press the Del User button. Copyright © 2018 Vicon Industires Inc. All Rights Reserved. V1008-WIR-180 User Manual... -
Page 62: User Information
Save button applies the configurations. Click on this button once to confirm all the settings for the new changes to take effect. Reset Click the Reset button to discard all the settings and revert to the previous settings. Copyright © 2018 Vicon Industires Inc. All Rights Reserved. V1008-WIR-180 User Manual... -
Page 63: Event - Alarm Handler
Save button applies the configurations. Click on this button once to confirm all the settings for the new changes to take effect. Reset Click the Reset button to discard all the settings and revert to the previous settings. Copyright © 2018 Vicon Industires Inc. All Rights Reserved. V1008-WIR-180 User Manual... -
Page 64: Event - Motion Detection
3. Repeat the above steps to create motion areas for zones 2 to 5. To delete an area, find the motion zone number you would like to remove, and press the Del Area button. Copyright © 2018 Vicon Industires Inc. All Rights Reserved. V1008-WIR-180 User Manual... -
Page 65: Motion Schedule Settings
Save button applies the configurations. Click on this button once to confirm all the settings for the new changes to take effect. Close Press to leave this schedule setting page. Copyright © 2018 Vicon Industires Inc. All Rights Reserved. V1008-WIR-180 User Manual... -
Page 66: Event - Sabotage Detection
Save button applies the configurations. Click on this button once to confirm all the settings for the new changes to take effect. Close Press to leave this schedule setting page. Copyright © 2018 Vicon Industires Inc. All Rights Reserved. V1008-WIR-180 User Manual... -
Page 67: Event - Ftp Upload
Save button applies the configurations. Click on this button once to confirm all the settings for the new changes to take effect. Reset Click the Reset button to discard all the settings and revert to the previous settings. Copyright © 2018 Vicon Industires Inc. All Rights Reserved. V1008-WIR-180 User Manual... -
Page 68: Event - Smtp Notification
▪ Trigger Sabotage Detection Message Specifies the message content. Subject Specifies the subject of the message. Attach JPEG Snapshot Enables or disables email delivery of trigger event snapshots. Copyright © 2018 Vicon Industires Inc. All Rights Reserved. V1008-WIR-180 User Manual... -
Page 69: Smtp Server
Save button applies the configurations. Click on this button once to confirm all the settings for the new changes to take effect. Reset Click the Reset button to discard all the settings and revert to the previous settings. Copyright © 2018 Vicon Industires Inc. All Rights Reserved. V1008-WIR-180 User Manual... -
Page 70: Event - Network Storage
Specifies the IP address of the network storage server. Share Specifies the shared folder name on the network storage server. Record Type Specifies the event trigger action. The options are Snapshot and Video. Copyright © 2018 Vicon Industires Inc. All Rights Reserved. V1008-WIR-180 User Manual... -
Page 71: Login Certificate
Save button applies the configurations. Click on this button once to confirm all the settings for the new changes to take effect. Reset Click the Reset button to discard all the settings and revert to the previous settings. Copyright © 2018 Vicon Industires Inc. All Rights Reserved. V1008-WIR-180 User Manual... -
Page 72: Event - Relay Handler
Save button applies the configurations. Click on this button once to confirm all the settings for the new changes to take effect. Reset Click the Reset button to discard all the settings and revert to the previous settings. Copyright © 2018 Vicon Industires Inc. All Rights Reserved. V1008-WIR-180 User Manual... -
Page 73: Event - Sd Record
Displays whether an SD card is installed or not. If an SD card is detected, ok will be displayed; if an SD card is not detected (or a faulty SD card is used), not_mounted will be displayed. Copyright © 2018 Vicon Industires Inc. All Rights Reserved. V1008-WIR-180 User Manual... - Page 74 Save button applies the configurations. Click on this button once to confirm all the settings for the new changes to take effect. Reset Click the Reset button to discard all the settings and revert to the previous settings. Copyright © 2018 Vicon Industires Inc. All Rights Reserved. V1008-WIR-180 User Manual...
-
Page 75: Alarm/Motion/Sabotage Detection Settings
Motion_yyyymmddhhmmss Sabotage_yyyymmddhhmmss Server Path Configures a folder name on the SD card. The default folder names for Alarm, Motion and Sabotage Detection are Alarm, Motion and Sabotage, respectively. Copyright © 2018 Vicon Industires Inc. All Rights Reserved. V1008-WIR-180 User Manual... -
Page 76: Alarm/Motion/Sabotage Detection Settings
Configures the length of the post-event recording. The range is 5~100 seconds. Server Path Configures a folder name on the SD card. The default folder names for Alarm, Motion and Sabotage Detection are Alarm, Motion and Sabotage, respectively. Copyright © 2018 Vicon Industires Inc. All Rights Reserved. V1008-WIR-180 User Manual... -
Page 77: Trigger Scheduled Settings
Save button applies the configurations. Click on this button once to confirm all the settings for the new changes to take effect. Reset Click the Reset button to discard all the settings and revert to the previous settings. Copyright © 2018 Vicon Industires Inc. All Rights Reserved. V1008-WIR-180 User Manual... - Page 78 VICON INDUSTRIES INC. For office locations, visit the website: www.vicon-security.com...
Need help?
Do you have a question about the V1008-WIR-180 and is the answer not in the manual?
Questions and answers