Table of Contents
Advertisement
Quick Links
Advertisement
Table of Contents

Subscribe to Our Youtube Channel
Related Manuals for Bartscher M 7110G


Summary of Contents for Bartscher M 7110G
- Page 1 M 7110G / 1166281 M 10110G / 1166311 Original-Gebrauchsanleitung V1/0516...
-
Page 2: Table Of Contents
Settings ....................66 5.2.5 Tips and advice ..................72 6. Cleaning and maintenance ..................72 7. Possible Malfunctions .................... 75 8. Waste disposal ......................76 Bartscher GmbH Franz-Kleine-Str. 28 D-33154 Salzkotten phone: +49 (0) 5258 971-0 Germany fax: +49 (0) 5258 971-120... -
Page 3: Safety
Read this instruction manual before using and keep them available at all times! This instruction manual contains information about the installation, operation and maintenance of the device and should be consulted as an important source of information and reference guide. Awareness of the safety instructions and instructions for use in this manual will ensure the safe and correct use of the device. - Page 4 • Prevent access of children to the package materials like plastic bags and foamed polystyrene elements. Suffocation hazard! • Only a qualified technician and using original spare parts and accessories should carry out repairs and maintenance of the device. Do not attempt to repair the device yourself. •...
- Page 5 • Never open the housing of the device. If the electrical connections are damaged or electrical or mechanical design is changed, there is a risk of electrical shock. • Never immerse the connecting cable and the the power plug in water or other liquids.
- Page 6 Hot liquid in container! Danger of burns! To avoid the hazard results please follow the safety instructions below. • When preparing the meals or liquids that are in the containers you should remember that they can boil over or splatter, both while cooking and when removing the containers from the steamer oven cooking compartment.
-
Page 7: Key To Symbols
1.2 Key to symbols In this manual, symbols are used to highlight important safety instructions and any advice relating to the device. The instructions should be followed very carefully to avoid any risk of accident, personal injury or material damage. WARNING! This symbol highlights hazards which could lead to injury. -
Page 8: Proper Use
1.3 Proper use CAUTION! This device has been designed and built for commercial use and can be operated in kitchens by the qualified personnel only! The operational safety of the device is assured only in case of proper use, according to the operation manual. -
Page 9: General Information
2. General information 2.1 Liability and Warrantees All the information and instructions in this manual take into account standard safety regulations, current levels of technical engineering as well as the expertise and experience we have developed over the years. The instruction manual was translated with all due care and attention. However, we do not accept liability for any translation errors. -
Page 10: Transport, Packaging And Storage
3. Transport, packaging and storage 3.1 Delivery check Please check the delivery upon completeness and transport damage immediately after receipt. In case of visible damage do not accept or accept the delivery with reservation only. Note the extent of damage on the carrier’s bill of delivery. Trigger off the complaint. Hidden damages should be reclaimed immediately after notice, as claims for damages can only be asserted within the effective period for complaints. -
Page 11: Technical Data
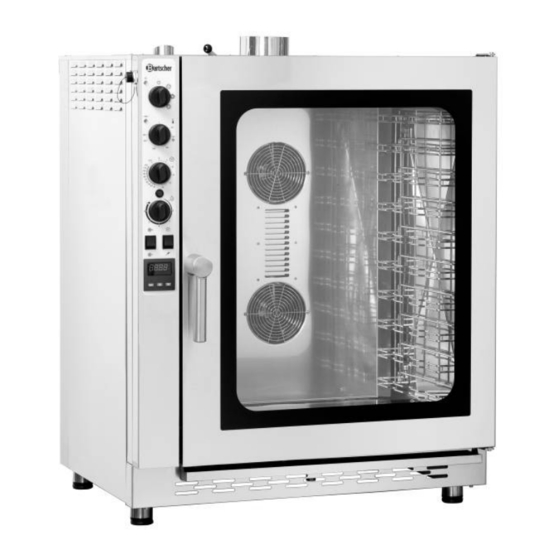
4. Technical data 4.1 Combi steamer properties • Produced from 18/10 chrome-nickel steel • Operated by dials • Maximum capacity of 10 1/1 GN or 600 x 400 mm baking trays • Functions: recirculated air, steam cooking, convection-cooking • Reversing engine direction (clockwise and counter clockwise rotation) ensuring optimal cooking compartment temperature •... -
Page 12: Technical Specification
4.2 Technical specification Name Gas steam convection oven M 7110G M 10110G Model: 1166281 1166311 Code-No.: max. 7 x 1/1 GN max. 10 x 1/1 GN Capacity: or 600 x 400 mm bakery trays or 600 x 400 mm bakery trays... - Page 13 Additional equipment (not included with device) Core temperature sensor set STL The set includes the core temperature sensor and relevant handle to fix it at the combi steamer • Cord length: approx. 1.8 m • Magnetic handle: W 130 x D 35 x H 30 mm •...
- Page 14 Safety pressure stop for convection ovens and combi steamer • Made of chromed brass • 3/4” connector • Initial setting at 3 bar, adjustable from 1 to 6 bar • Input pressure max. 16 bar • Maximum working temperature 65 ° C Code-no.: 533051 Base for combi steamer 1/1 GN •...
-
Page 15: Installation And Operation
5. Installation and operation 5.1 Instructions for the installer CAUTION! Any operation related to installation, assembly, operation and maintenance must be performed by the specialized personnel who has appropriate qualifications (manufacturer’ or seller’s authorisation). The required activities need to be performed while taking into account the installation regulations valid in a given country as well as the product safety legislation and health and safety regulations. -
Page 16: Installation Place
5.1.2 Installation place • The device must be installed in closed and well ventilated rooms (not outdoor). • Check the dimensions and the exact position of connections for electricity, water and extractor connections before installation of the combi steamer. • We recommend to install the device under an extractor or to ensure the discharge outside the hot vapours and odours which emerge from the cooking space. -
Page 17: Electrical Connection
Adjustment of the feet • The adjustable feet are enclosed to the device and must be screwed under the device. The correct flatness of the device ensures a smooth operation. This flatness is obtained by adjusting the feet and verification by a spirit level. It is sufficient, to screw them in or screw out to change their settings. -
Page 18: Water Connection
Potential difference connection • Installation for connection of device of different potentials using the clip indicated as . The clip is located at the rear of the device. • The clip is used to connect the potential difference wire (yellow-green) of a diameter from 4 to 10 mm •... -
Page 19: Drain Connection
5.1.6 Drain connection • At the condensate-collecting tray located in front of the oven, there is a drain hose (with an inner diameter of 10 mm). This hose drains excess liquids from the condensate-collecting tray away and runs in the rear part below the device (see A - picture on the right). - Page 20 CAUTION! The device only functions properly when the pressure in the gas installation is within the values presented in the table below for various gas types. Gas pressure Country of destination Categories Type of gas (mbar) 20 - 28-30/37 2H3+ Albania G20 - G30/G31 20 - 30/30...
- Page 21 Gas pressure Country of destination Categories Type of gas (mbar) Czech Republic G20 - G30/G31 20 - 28-30/37 2H3+ G20 - G30/G31 20 - 28-30/37 2H3+ Macedonia G20 - G30/G31 20 - 30/30 2H3B/P G20 - G30/G31 20 - 30/30 2H3B/P Romania G20 - G30/G31...
- Page 22 Nozzle changes (changes in gas type) 1166281 (7 GN 1/1) Gas type + pressure Gas type + pressure Nozzle G30 28--30 mbar G31 30..37 mbar G30 37 mbar G31 37 mbar G30 50 mbar G31 50 mbar G20 20 mbar 195R G25 25 mbar 215R...
- Page 23 WARNING! Only use original nozzles! It is forbidden to make any alterations! If the device is to be connected to gas that is not listed in the power rating table, change the burner nozzle in the following way: • Unscrew the nozzle and replace it with the appropriate nozzle according to the gas type table.
-
Page 24: Activation And Acceptance Of Gas Devices
If the device is installed under a fume hood, the following conditions must be met: a) The volume of air removed must exceed the volume of exhaust produced (see regulations); b) Material of the filter in the fume hood must be adapted to exhaust temperatures that may reach up to 300 °... - Page 25 During acceptance of the gas device a test cooking cycle should be conducted, in order to ensure the device is functioning without defects or other problems. Set the temperature dial to 150 ° C, and the time di al to 10 min. Inspect the following thoroughly: →...
-
Page 26: Instructions For The User
5.2 Instructions for the user CAUTION! Read the following instructions carefully, because it provides notes concerning safety and use of the combi steamer. Keep the instruction manual carefully for later use. Any incorrect installation, operation, maintenance and cleaning as well as possible changes and modifications may cause malfunctions, damages or injuries. -
Page 27: Operation
• Should the combi steamer be installed on table of stainless steel or other combi steamer, it is not recommendable, to use the higher insertions than those, at which the user can look into the container. • For safety reasons, after installation of the device, the label „Hot liquid in container! Danger of burns! “, which is located in the package must be attached to the combi steamer at a height of 1600 mm from the floor. -
Page 28: Functions Of The Control Elements And Displays
5.2.3 Functions of the control elements and displays Function dial Cooking/baking with recirculated air LED 1 Cooking/baking with steam Steam convection cooking Temperature dial Max. cooking/baking temperature with steam (approx. 110 ° C) LED 2 Temperature range in ° C (50 °... -
Page 29: Settings
5.2.4 Settings Cooking/baking with recirculated air To set cooking/baking with the use of RECIRCULATED AIR, turn the M 1 function dial clockwise to the position Next, set the cooking/baking temperature by turning the temperature dial clockwise to the desired value. Lastly, set the cooking/baking time by turning the time dial clockwise to the... - Page 30 Cooking/baking using steam To set cooking/baking with the use of STEAM, turn the function dial clockwise to the position Next, set the cooking/baking temperature by turning the temperature dial clockwise to the desired value. For traditional cooking/baking with steam, it is recommended to set a temperature of 110 °...
- Page 31 Steam convection cooking (cooking/baking with the use of recirculated air/ steam) To set STEAM CONVECTION cooking (cooking/baking with the use of recirculated air/steam) turn the function dial clockwise to the position Next, set the cooking/baking temperature by turning the temperature dial clockwise to the desired value.
- Page 32 Cooking/baking with the use of core temperature sensor After selecting the desired cooking/baking mode and setting the function dial in one of I 2 – I 3 – I 4 the positions , set the temperature. Turn the temperature dial clockwise to the desired value.
- Page 33 Securing / removing the core temperature sensor To connect the core temperature sensor take out the plug (image on the left) from the opening at the top left side of the oven, press and hold the red detent and insert the core temperature sensor into the opening provided.
- Page 34 Gas burner button CAUTION! In the event of a malfunction of the main gas burner, after three failed attempts to light the burner the red button for gas burner will light up. Pressing this button may remove the problem (reset). If the malfunction recurs, contact a service center.
-
Page 35: Tips And Advice
5.2.5 Tips and advice Hot liquid in container! Danger of burns! When preparing the meals or liquids that are in the containers you should remember that they can boil over or splatter, both while cooking and when removing the containers from the oven cooking compartment. It is recommended to use the levels where the user can see the inside of the containers. - Page 36 o Remove the rails from the device and wash them thoroughly with warm water and a mild cleaning agent; rinse in clean water and dry. o For washing the cooking compartment, use lukewarm water and appropriate cleaning agents. Rinse the compartment thoroughly with clean water and ensure no residue remains.
- Page 37 Maintenance performed by the technical service o At least once a year the gas devices must undergo the maintenance inspection performed by a qualified technician in accordance with the applicable standards. Under the maintenance, the exhaust gas analysis and heating efficiency inspection are performed.
-
Page 38: Possible Malfunctions
7. Possible Malfunctions In case of a disturbance disconnect the device from the power supply and close the gas and water supply. Before contacting customer service, check the possible malfunctions of the device in the table below. Problem Possible solution •... -
Page 39: Waste Disposal
NOTE! For the disposal of the device please consider and act according to the national and local rules and regulations. Bartscher GmbH Franz-Kleine-Str. 28 D-33154 Salzkotten phone: +49 (0) 5258 971-0 Germany fax:...
Need help?
Do you have a question about the M 7110G and is the answer not in the manual?
Questions and answers