
Related Manuals for DseeLab Dsee-65H


Summary of Contents for DseeLab Dsee-65H
- Page 1 Dsee-65H Holographic INSTRUCTION MANUAL Intelligent Display Nanjing DseeLab Digital Technology Ltd.
- Page 2 Catch Your Eyes with Great Varieties Nanjing DseeLab Digital Technology Ltd.
- Page 3 Do not dismantle the device, plug in or take out the TF card without permission! To keep the device from damage, please use the following delivery services if forwarding is needed: SF Express Deppon Express...
- Page 4 Nanjing DseeLab Digital Technology Ltd. reserves the right to revise and explain this instruction manual. This instruction manual may be revised without further notice.
- Page 5 Device Parameter List 65cm Device Size Number of Blades Number of LEDs per Blade Display Resolution 720*720 0.283m Display Area Light Intensity 1200cd/m Device Thickness 50mm Device Weight 600g Input Voltage Power Rating(MAX) 700RPM Device Rotational Speed Communication Method 2.4G WiFi 802.11b/g/n Memory Space Picture:jpg, jpeg, png, gif Video:mp4, Supported Format...
- Page 6 Device Checklist Item Quantity Holographic Intelligent Display Dsee-65H Power Adapter Remote Control Wall Hanging Fastener Wall Hanging Fixing Expansion Screws Warranty Card Certificate User Manual...
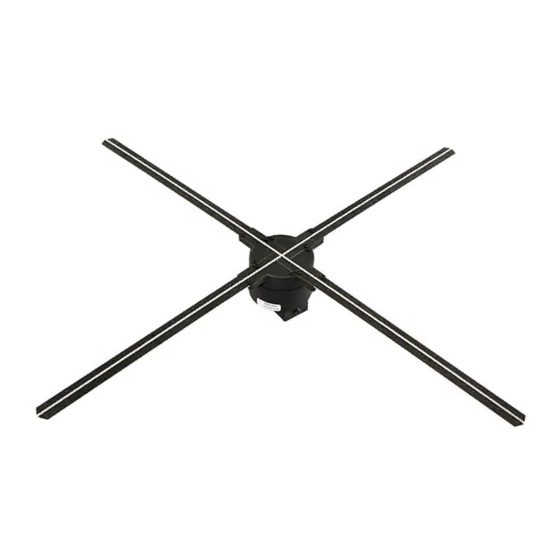
- Page 7 Product Overview Holographic Intelligent Display Dsee-65H is a kind of display device that uses the persistence of vision technology (POV) with a blade of high-density LEDs spinning at high speed to form tridimensional images. This kind of device has characteristics such as low power consumption, high visual attractiveness, portability, high cost performance and etc.
- Page 8 Back Interface Instructions PAIR Indicator: Indicate modes and operations. PAIR Button:Switch between the master and slave mode, pair the remote control. AP/STA Button:Press the AP/STA button for 2 seconds to reset the device to normal mode (AP mode, the device itself provides WiFi hotspot).
- Page 9 Indicator Light Instructions PAIR Indicator Light Instructions Indicator Light Color Master mode, motor stops Constantly Red Constantly Pink Master mode, motor starts Light Off Slave mode, motor stops Constantly Blue Slave mode, motor starts Blue Flickers Pairing the remote control AP/STA Indicator Light Indicator Light Color Instructions...
- Page 10 Remote Control Instructions Stop STOP Next Previous Start Over Brightness 25% 50% 100% Adjustment Area Start the device and switch from standby mode Run: to running mode. Stop: Stop the device and switch from running mode to standby state. Previous: Switch to display the previous video in the playlist.
- Page 11 Operation Steps Power Supply Connection Take out the battery adapter, plug it in the power interface for electrical power supply. The indicator LEDs behind the device will blink and off, and the PAIR indicator will be red constantly after a short time. Remote Control Pairing When device is in stand-by status, push the PAIR button on the backside, indicator light turns red to blue,...
- Page 12 Video Control Aim the remote control at the display machine and press the ">>" button to switch back One material, play the next content; Aim the remote control at the display and press the "<<" button to switch forward One material, play the last one. Screen Union of Multiple Devices The display machine can switch two modes, host mode and slave mode.
- Page 13 Four Devices’ Connection Illustration WiFi Mode Reset Press the AP/STA button for a while will switch the device from network mode to normal mode. When success, the AP/STA indicator will change from blue to green, and the WiFi provided by the device can be found on cell phones and computers at the same time.
- Page 14 Installation Instructions The Dsee-50s supports wall hanging and bracket installation, with the following only The method of wall hanging installation is introduced. For vertical mounting of bracket, please consult dealers. Wall Hanging Fastener Installation Illustration Install the Fastener Wall mounting fasteners are fixed directly to the wall using expansion screws or ordinary screws On, make sure the sheet metal parts are installed firmly to prevent vibration when the equipment is rotating...
- Page 15 Dsee.Lab Cloud Platform This device supports remote control and management through the Dsee.Lab cloud platform. The cloud platform website address is: cloud.dseelab.com Before connecting to the cloud platform, the device's WiFi mode should be switched to network mode(STA mode) manually. Detailed operation steps of switching to the network mode and switching back to the normal mode can be referred to the part about connection mode switch on Page 16.
- Page 16 Mobile Software Instructions...
-
Page 17: Wifi Connection
Operation Steps Download Software Log in to http://www.dseelab.com and download the software. WiFi Connection Device is in normal mode Keep the smartphone connect to the device WiFi, type in the corresponding passwords. Click tart or stop the device. 2. Device is in network mode... - Page 18 WiFi Mode Switch 1. Switch from normal mode to network mode. Click to start the WiFi mode switch, type in the WiFi SSID and password of the router. Click on the switch button. If the device connects to the network successfully, then the AP/STA indicator at the back of the device turns blue.
- Page 19 Clear the Playlist The Playlist is Updated Click button, click button to clear the Playlist playlist. Number of displaying:1 xxxx.mp4 Number of displaying:4 xxxx.mp4 Delete Number of xxxx.mp4 Swipe left on the chosen displaying:1 video in the playlist, and Number of xxxx.mp4 click displaying:4...
- Page 20 Adjust the Playlist Order Number of xxxx.mp4 Long press on the displaying:1 chosen video, drag it Number of xxxx.mp4 displaying:4 upward or downward to Number of xxxx.mp4 the corresponding displaying:4 position to adjust the order of the playlist. Number of xxxx.mp4 displaying:10 xxxx.mp4...
- Page 21 FCC Statement This equipment has been tested and found to comply with the limits for a Class B digital device, pursuant to part 15 of the FCC rules. These limits are designed to provide reasonable protection against harmful interference in a residential installation.
Need help?
Do you have a question about the Dsee-65H and is the answer not in the manual?
Questions and answers