Advertisement
Quick Links
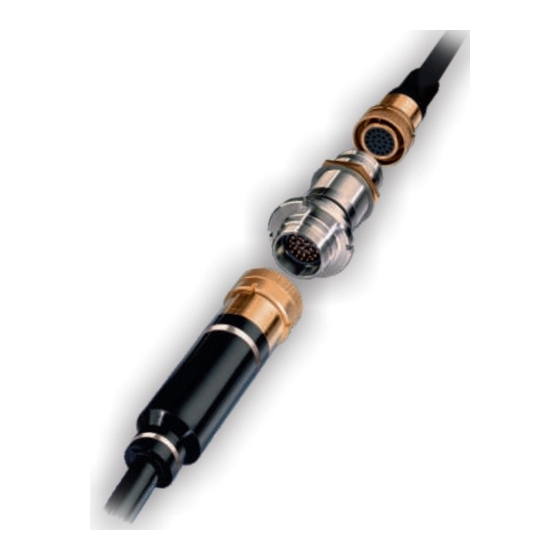
CABLING INSTRUCTIONS - SERIES 10 + 22
CABLING INSTRUCTIONS
VERKABELUNGSANLEITUNG
FÜR AUSSENBORDSTECKER
BAUREIHE 10 + 22
CABLING INSTRUCTIONS
FOR OUTBOARD PLUGS
SERIES 10 + 22
Cabling Instructions series 10+22 Revision F - 11/2018
E-Mail: info@gisma-connectors.de
1
Leinestraße 25
D-24539 Neumünster
Tel. +49 - 4321 - 98 35 - 30
Fax +49 - 4321 - 98 35 - 55
www.gisma-connectors.de
www.gisma-connectors.de
Advertisement

Subscribe to Our Youtube Channel
Related Manuals for GISMA 22 Series

Summary of Contents for GISMA 22 Series
- Page 1 FOR OUTBOARD PLUGS SERIES 10 + 22 Leinestraße 25 D-24539 Neumünster Tel. +49 - 4321 - 98 35 - 30 Fax +49 - 4321 - 98 35 - 55 www.gisma-connectors.de E-Mail: info@gisma-connectors.de Cabling Instructions series 10+22 Revision F - 11/2018 www.gisma-connectors.de...
- Page 2 CABLING INSTRUCTIONS - SERIES 10 + 22 FIRMENPORTRAIT COMPANY PROFILE GISMA ist heute einer der führenden Hersteller von Today GISMA is one of the leading manufacturers of high- elektrischen, Lichtwellenleiter- und Hybrid-Steckverbindungen performance electrical, fibre-optical and hybrid underwater für die Meerestechnik.
- Page 3 Mit Erscheinen dieser Anweisung verlieren alle früheren This instruction supersedes all previous editions. Anweisungen ihre Gültigkeit. Produktänderungen behalten wir uns vor ohne zur GISMA reserves the right to modify products because of Ersatzlieferung älterer Ausführungen verpflichtet zu sein. technical improvements and development without prior notice.
- Page 4 Es wird dringend empfohlen, dass die Verkabelungs- und We highly recommend that the termination- and moulding Vergussarbeiten durch GISMA-Spezialisten oder von bei work should be carried out by GISMA-specialists or by GISMA ausgebildetem und zertifiziertem Fachpersonal specialist staff qualified by GISMA.
- Page 5 22.15.14 Größe 5 / Size 5 22.15.15 Größe 7 / Size 7 22.15.17 5. Elektro-Feinlötkolben ca. 60 - 80 W 22.12.47 5. electric fine soldering iron approx. 60 - 80 W Cabling Instructions series 10+22 Revision F - 11/2018 www.gisma-connectors.de...
- Page 6 Größe 4 - 7 / Size 4 - 7 22.12.05 12. Schellenzange 21.11.03 12. clamping pliers 13. Spitzzange 22.12.43 13. long-nosed pliers Bei Sonderendgehäusen werden gegebenenfalls Sonderwerkzeuge benötigt. Special tools are required for special endbells. Cabling Instructions series 10+22 Revision F - 11/2018 www.gisma-connectors.de...
- Page 7 Nur zusammen mit Schellenband verfügbar / Only available together with clamping band Edelstahl 10 mm (100 Stück) / stainless steel 10 mm (100 pieces) 21.10.7.9.10 Titan 10 mm (1 Stück) / titanium 10 mm (1 piece) 23.10.7.9.10 5. GISMA Fett GISMA-Fett EK2 5. GISMA grease 6. Loctite 648 LOCTITE 648 6.
- Page 8 Entscheidungsgrundlage: Klebeversuch (nicht geeignet für Polyethylen) PRIMER 1 4. Primer 1 (30 ml) for optimal adhesion between moulding compound and outer jacket of cable decivise factor: adhesion test (unsuitable for polyethylene) Cabling Instructions series 10+22 Revision F - 11/2018 www.gisma-connectors.de...
- Page 9 9. PUR-Vergussmasse (250 g) für den äußeren Endgehäuseverguss Aushärtungszeit ca. 36-48 Stunden bei 25 °C PUR-VERGUSSMASSE 9. PUR moulding (250 g) for the outer endbell mounting cure-time approx. 36-48 hours at 25 °C Cabling Instructions series 10+22 Revision F - 11/2018 www.gisma-connectors.de...
- Page 10 1-3, wie in nebenstehender Skizze gezeigt, auf den Kabelmantel zu schieben. After degreasing push the endbell parts (item 1-3) onto the outer cable jacket in the order shown in the drawing. Cabling Instructions series 10+22 Revision F - 11/2018 www.gisma-connectors.de...
- Page 11 (ca. mm/approx. mm) b (mm) shell size 0 - 2 35 - 40 3 - 4 Kabelenden b verzinnen. Kabelschirm Coat the cable ends b with tin. screen Klebeband adhesive tape Cabling Instructions series 10+22 Revision F - 11/2018 www.gisma-connectors.de...
- Page 12 1-3, wie in nebenstehender Skizze gezeigt, auf den Kabelmantel zu schieben. After degreasing push the endbell parts (item 1-3) onto the outer cable jacket in the order shown in the drawing. Cabling Instructions series 10+22 Revision F - 11/2018 www.gisma-connectors.de...
- Page 13 90 (2x) Absetzlänge d gemäß Maßblätter GISMA Rohrkabelschuhe 1 und GISMA Kabelschuhe DIN 46235. Dimension d according to drawings GISMA Rohrkabelschuhe 1 and GISMA Kabelschuhe DIN 46235. Kabelschirm screen Krimpkabelschuh mit dem entsprechenden Krimpwerkzeug an die Ader krimpen.
- Page 14 Schritt 3: Step 3: Den O-Ring des Steckergehäuses mit GISMA-Fett EK2 Smear the O-ring of the plug shell with grease GISMA-Fett benetzen. Zusätzlich sollte der Anlagerezess der EK2. The friction surface between plug shell and locking Überwurfmutter (Reibfläche zwischen Steckergehäuse und sleeve should also be smeared with grease GISMA-Fett Überwurfmutter) mit GISMA-Fett LP430 benetzt werden.
- Page 15 Anschliessend wird der Krimpkabelschuh an den consideration. Finally screw the crimp terminal onto the Kontakt geschraubt. contact. Hierzu bitte die Angaben in der GISMA Crimping Please pay attention to the GISMA Crimping Instruction Instruction beachten! for further information. Schritt 3: Step 3: Die Schrumpfschläuche über die Anschlussstelle und die...
- Page 16 The press nut X1 and the endbell adapter X2 must be entfetten. degreased again. Schritt 1 Schritt 2 Schritt 3 Schritt 4 Schritt 5 step 1 step 2 step 3 step 4 step 5 Cabling Instructions series 10+22 Revision F - 11/2018 www.gisma-connectors.de...
- Page 17 (see document the endbell snaps into the "Torque overview") slot of the plug. The desired keyway position can be selected in 45 ° increments. Cabling Instructions series 10+22 Revision F - 11/2018 www.gisma-connectors.de...
- Page 18 - The strain relief has to be bunched and crimped with the copper tubes (only Kevlar-/Aramid-Zugentlastung) und im Epoxid vergossen. for kevlar-/aramid strain relief). Strain relief has to be moulded in epoxy. Cabling Instructions series 10+22 Revision F - 11/2018 www.gisma-connectors.de...
- Page 19 Luft durch vorsichtiges possibly enclosed air out by pushing the plunger carefully. Herausdrücken des Kolbens entweichen lassen. Schritt 1 Schritt 2a Schritt 2b step 1 step 2a step 2b Cabling Instructions series 10+22 Revision F - 11/2018 www.gisma-connectors.de...
- Page 20 (siehe Punkt 3a). Für besondere Kabel und (see step 3a). In case of special cables and applications Anwendungen sind spezielle Endgehäuseadapter GISMA offers individual endbell adapters. verfügbar. Zunächst muss der Endgehäuseadapter mit Schottverguss- First the endbell adapter must be filled with hard moulding masse gefüllt werden (dafür wird die Spritze in die Einfräsung...
- Page 21 4 must be repeated. Nach dem Aushärten oberes Schellenband montieren. After completion of the hardening process, the upper clamps are to be fitted. Schritt 4 Schritt 5 step 4 step 5 Cabling Instructions series 10+22 Revision F - 11/2018 www.gisma-connectors.de...
- Page 22 Die Zange wird ca. 6 - 10 mm hinter dem Schellenschloss auf das Ende des Schellenbandes aufgesetzt. Attachment of the clamping pliers: The pliers are placed approx. 6 - 10 mm behind the clasp at the end of the band. Cabling Instructions series 10+22 Revision F - 11/2018 www.gisma-connectors.de...
- Page 23 Rundung der Kabelmanschette angepasst. Bend the overlapping band just beneath the eye of the clasp. Afterwards the clasp has to be fit with a plastic tip hammer on the radius of the protective sheath. Cabling Instructions series 10+22 Revision F - 11/2018 www.gisma-connectors.de...
- Page 24 Leinestraße 25 D-24539 Neumünster Tel. +49 - 4321 - 98 35 - 30 Fax +49 - 4321 - 98 35 - 55 www.gisma-connectors.de E-Mail: info@gisma-connectors.de Cabling Instructions series 10+22 Revision F - 11/2018 www.gisma-connectors.de Catalogue SERIES 40 Revision A - 09/2015...
Need help?
Do you have a question about the 22 Series and is the answer not in the manual?
Questions and answers