Table of Contents
Advertisement
Quick Links
209 Citation Drive, Units 5 & 6
Concord, ON, Canada, L4K 2Y8
Telephone (905) 264-1414
Fax (905) 264-1147
E-mail:
info@airmaxtechnologies.com
Web Site:
www.airmaxtechnologies.com
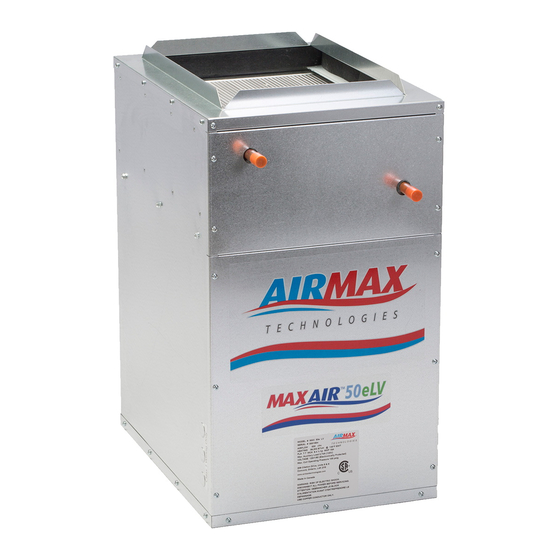
MaxAir 30(e), 50(e), 70(e), 100(e) Low
Velocity (LV) Fan Coil Systems
Combination Heating/Cooling Equipment
Design, Installation and Maintenance
Instructions
AirMax Technologies Mini Ducted
MaxAir(e) fan coil systems
Important: Read and save these instructions.
Install in accordance with CEC and NEC; All wiring shall conform to CEC, NEC, and
local building and electrical codes.
CERTIFIED
FAN COIL UNITS
Brochure I0607B – Rev. 04-03-19
Advertisement
Table of Contents

Subscribe to Our Youtube Channel
Related Manuals for Airmax MaxAir 30 LV

Summary of Contents for Airmax MaxAir 30 LV
- Page 1 Velocity (LV) Fan Coil Systems Combination Heating/Cooling Equipment Design, Installation and Maintenance Instructions AirMax Technologies Mini Ducted MaxAir(e) fan coil systems Important: Read and save these instructions. Install in accordance with CEC and NEC; All wiring shall conform to CEC, NEC, and local building and electrical codes.
-
Page 2: Table Of Contents
Table of Contents INTRODUCTION ........5 ..........................5 BENEFITS ........................5 APPLICATIONS PRODUCT DESCRIPTION ........6 ..........................6 CABINET ........................6 HEATING COILS ........................6 COOLING COILS ............................. 6 ..................... 6 OFF SEASON CIRCULATION ........................6 WATER HEATER .......................... - Page 3 ........................16 THERMOSTAT ....................16 ELECTRICAL INFORMATION ..................... 16 CONNECTION LOCATIONS ..................16 CHANGING MOTOR SPEED SETTINGS ..................16 FIGURE CONNECTION LOCATIONS ELECTRICAL (MAXe UNITS) ........18 7235 ................... 18 LAYOUT AND CONNECTIONS ........................18 POWER INPUT ....................18 CONTROL SYSTEM INPUTS ...........................
- Page 4 ……………………41 2, 2.5 TON EVAPORATOR COIL SIZES SAMPLE PIPING SCHEMATICS ......42 TERMS AND CONDITIONS OF SALE ......46 WARRANTY REGISTRATION ......47 WARRANTY PARTS REQUEST ......48...
-
Page 5: Introduction
Water heaters, boilers and air handlers can be purchased from a wholesale supplier, rented from your Gas Utility, or purchased from Airmax Technologies as part of a complete heating package. Benefits of the MaxAir(e)™ Low Velocity systems are: ... -
Page 6: Product Description
Make sure the water heater being All Airmax accessory slab cooling coils are used is approved for combo applications. (Most manufacturers’ heaters are approved.) shipped with the liquid and suction lines piped to the exterior of the unit casing. -
Page 7: Accessories
ACCESSORIES AirMax can include a valve, at additional check valve cost, with each air handler for field installation. Check valves serve two purposes: protect against back-flow of water to Combo heating systems function poorly if the temperature drop through the air handler’s avoid short circuiting around the water coil is not maintained between 20-30°F (11-... - Page 8 MaxAir™ model unit that will properly meet the load requirements. Table 1 Unit Performance Ratings Model MaxAir 30 LV MaxAir 30e LV Btuh Heating @180F E.W.T. 48,393 46,236 Btuh Heating @170F E.W.T. 43,938 41,983 Btuh Heating @160F E.W.T.
-
Page 9: Selecting The Fan Coil
MaxAir 70e LV Model MaxAir 50e LV MaxAir 70e LV Btuh Heating @180F E.W.T. 72,850 95,496 103,541 Btuh Heating @170F E.W.T. 66,085 86,566 93,833 Btuh Heating @160F E.W.T. 59,334 77,662 84,156 Btuh Heating @150F E.W.T. 52,601 68,790 74,518 Btuh Heating @140F E.W.T. 45,888 59,957 64,924... -
Page 10: Indoor Air Quality
combination MaxAir™ and hydronic return air duct design notes heating The return air is to be sized as per local building codes and good practices. It is good One of the benefits of using a hydronic design practice to line the first five feet of the system is the versatility that you have when return air duct with a sound acoustic designing the heating system. -
Page 11: Installation
higher water temperature will increase cooling coil capacities system capacity, and the anti-scald valve will Possible cooling coil capacities are given in reduce the risk of scalding. Since some the Table 1. areas have specific regulations regarding combo systems, check your local building code for details on water tank temperatures, tempering valves, and pump timers. -
Page 12: Anti - Scald Valve
& TX valve service. Ensure the water heater has been The Airmax accessory slab cooling coil is refilled, and all air is purged from the system shipped loose. A factory installed TX valve before turning on the water heater. -
Page 13: Fan Coil Placement
Minimizing all duct runs. Maximizing usable floor space. condensation Reducing structural changes. On units supplied with an Airmax Accessory Serviceability and access to the unit. slab external cooling coil, a drain connection Location of heat/cool source to fan coil. -
Page 14: Condensing Unit
It should be Airmax Accessory slab coil directly to the mounted on the top half of the pipe in the 2 side of a Airmax vertical airflow fan coil. This o’clock or 10 o’clock position. Page 14... -
Page 15: Refrigeration Piping
proper operation of the system. Insulate the suction line as per condenser manufacturer’s instructions Install the refrigeration lines as per local codes and good piping practices, supporting the pipe every 5 feet. Run the pipes in the most direct route possible, taking into account structural integrity and building finishing details. -
Page 16: Electrical (Standard Units)
microns and ensure that the system holds at service valves (suction first) on pre-charged the vacuum pressure. If not, check for leaks condensing units, or add refrigerant to the and evacuate again. If the vacuum is system until the proper operating charge is maintained, add refrigerant to raise the obtained. -
Page 17: Electrical (Maxe Units)
PSC MOTOR CONTROL BOARD Figure 1 - Connection Locations ELECTRICAL (MAXe UNITS) The DCC7235 is a microcontroller-based electronic volume controller for brushless dc motor-driven fan coils, furnaces or other systems. It commands discrete or variable blower speeds, torques or airflow in heating, cooling and ventilation modes from inputs provided from a discrete or proportional thermostat or controller whose switched 24VAC signal outputs activate a blower's air volume. -
Page 18: Dcc 7235 Layout And Connections
DCC7235 LAYOUT FIG 1 FIG 1 POWER: 24VAC (nominal) supplied by a Class II transformer between terminals "R" (“24VAC LINE”) and "C" (“24VAC RET”). The RED “POWER” LED illuminates when the control is powered. Transformer rating: 20VA minimum Voltage: 22.5Vac Minimum, 30Vac Maximum Current: <100ma (All outputs and relays active) NOTE: SUPPLY 24VAC POWER FROM THE SECONDARY OF AN NEC CLASS-2 TRANSFORMER ONLY. -
Page 19: Outputs
ON/OFF: ON = input VDC > 0.5VDC +/- 0.1V OFF = input VDC <0.4VDC +/- 0.1V FIG 2 b.) Switched 24VAC INPUTS (SW3-1 IN "DISCRETE POSITION": (see para. 5.) – Fan Only MODE – HIGH COOL MODE Y2 & O & G –... - Page 20 (SEE FIG 3): J5–pin-1: START/STOP: When the Blower motor is commanded to operate this signal enables motor operation. (Use is optional. Use if the system requires a separate enable.) 0VDC = not enabled, 22VDC (nom) = enabled 10ma maximum sourced current. J5–pin-2: COMMON –...
-
Page 21: Outputs With Dip Switch
“W” call (W1 or W2). As shipped, SHUNT H2 connects Zp to "R", i.e. THE W RELAY CONTACTS ARE NOT "DRY" AS SHIPPED. See diagram below. iii. WHEN H2 is removed the contacts are "DRY" and be connected to a second, separate, isolated 24VAC power source. - Page 22 TABLE A (SW2-1) SWITCH “OFF” POSITION: "L1,L2" SELECTIONS WITH DISCRETE INPUT TABLE A SELECTED SET MAX AIRFLOW Y2 & Y1 & Y2 & Y1 & W1 & W2 & (W1 or (ONLY) SEL 1&2 G & /O G & /O G &...
- Page 23 L1,L2 SELECTIONS WHEN 0-10V INPUT ACTIVE SET MAX COMMAND INPUT COMMAND AIRFLOW RANGE OUTPUT RANGE (DIP-SW2) L1,L2=0 0-10V 0-100% L1=1,L2=0 0-10V 0-83% L1=0,L2=1 0-10V 0-66% L1,L2=1 0-10V 0-50% TABLE3 NOTE: POWER TO THE CONTROLLER MUST BE CYCLED FOR THE DISCRETE OR 0- 10V SWITCH STATE TO BE RECOGNIZED.
- Page 24 1-stage Wiring: Single stage operation can still be achieved by wiring only W1 from the thermostat to W1 of the DCC7235 for LOW airflow, or W2 from the thermostat to W2 of the DCC7235 for HIGH airflow. W1 and W2 can also be connected (jumpered) for HIGH Airflow in 1-stage systems.
- Page 25 PUMP SWITCH (A1, A2, A3) TIMING AND FUNCTION LOCKOUT. THE FOLLOWING DIAGRAM SHOWS THE TIMING OF THE PUMP RELAY. ITS OPERATES WITH THE TIMING AND BLOWER AND X1,X2 RELAY LOCKOUT PERIODS SHOWN. NOTE: POWER MUST BE CYCLED TO ENTER OR TO LEAVE THE TEST MODE. THE SELECTED STATE (TEST OR NORMAL OPERATION) BECOMES EFFECTIVE ONLY AFTER POWER IS RESTORED.
-
Page 26: Typical Hookup
TYPICAL HOOKUP FIG 3 DIMENSIONS and MOUNTING: PC Board Dimensions: 4.8” x 5.66” Mounting: 5 Nylon standoff snap-in feet Hole centers: 4 at: corners spaced 4.5” x 5.26” 1 at: down 1.40”, and in-board (left) 0.960” from center of top right corner standoff. - Page 27 purge air. Open the return leg isolation the temperature in the tank may drift, causing valve and then close the drain valve. If no error in the calculated temperature isolation valves are installed, open drain difference, if readings are taken more than 4 fully to purge air and let run for at least 30 minutes apart.
-
Page 28: Sequence Of Operation
1. Thermostat calls for heat, connection is thermostat wire. made between the (“R” terminal) red and 4. When thermostat satisfied, connection “W” terminal) white thermostat wires. between red and yellow broken at 2. Heating relay is energized; closes thermostat. providing power to the heating speed 5. -
Page 29: Service And Maintenance
Cooling condenser circuit energized energized. Fan shuts off (or switches provided field supplied freeze to continuous run speed when thermostat is closed. continuous run employed). After Time delay fan motor starts at Continuous Run Cycle (Fan ON) value selected by installer and 1 Connection is made between (“G”... -
Page 30: External Pump
TROUBLESHOOTING Restricted or improperly installed supply external pump does not run tube in water heater; check and replace. Water heater thermostat set too low or In areas where hard water is present the not calibrated properly; check water pump may “stick”... -
Page 31: Wiring Diagram (Standard Units)
WIRING DIAGRAM (STANDARD UNITS) Page 31... -
Page 32: Wiring Diagram (Maxe Units)
WIRING DIAGRAM (MAXe UNITS) Page 32... -
Page 33: Fan Coil Dimensions And Return Air Size And Location
FAN COIL DIMENSIONS AND RETURN AIR SIZE & LOCATION Page 33... - Page 34 Page 34...
- Page 35 Page 35...
- Page 36 Page 36...
-
Page 37: Horizontal Air Flow Space Constrained
COIL DIMENSIONS All drains are ½” copper. Care must be taken when mounting the Airmax Accessory slab coil to the side or back of a Airmax fan coil. This is acceptable only with the use of a minimum 6” spacer/transition. -
Page 38: 50/70/100 Cooling Coil Filter Frame Cabinet
50/70/100 CCFF-001 COOLING COIL FILTER FRAME CABINET Cooling Coil Filter Frame: Cooling coil filter frames accept a standard dimensional 1” filter. The coil section has dimples pressed into the top and bottom of the cabinet to ensure proper coil slope. 50-CCFF-001 cooling coil/filter frame 20”... -
Page 39: Vertical Air Flow Evaporator Coils
VERTICAL AIR FLOW EVAPORATOR COILS AIRMAX INTAKE PLENUM/A-COIL MODEL 50-IPCE-18A 1.0 Ton Split-System Component Compatibility ① Airmax ACU Condensing Unit Model ACU-12e-1 MAXAIR™ Air Handler Model 30e (LV) Cooling Indoor Airflow CFM 350 - 425 1.5 Ton Split-System Component Compatibility ①... -
Page 40: 1, 1.5, 2 Ton Evaporator Coil Sizes
The coil comes with a self adjusting thermal expansion valve shipped loose for field installation. An anti-ice control is sold as an option. The anti-ice control must be secured to the suction line as per instructions. Note: All coils are to be sized to match the air handler. -
Page 41: 2, 2.5 Ton Evaporator Coil Sizes
2 AND 2.5 TON EVAPORATOR COIL SIZES (70-IPCE-24/30A) Page 41... -
Page 42: Sample Piping Schematics
SAMPLE PIPING SCHEMATICS Page 42... - Page 43 Page 43...
- Page 44 Page 44...
- Page 45 Page 45...
-
Page 46: Terms And Conditions Of Sale
AirMax Technologies. Special or custom order equipment may not be returned for credit. Any products or components must be returned to AirMax Technologies Inc. free and clear of liens or other encumbrances. -
Page 47: Warranty Registration
Date of Purchase _____________________ Date of Start up _____________________ Installer ______________________________________________________________ Purchased From: Company Name __________________________________________________________ Contact Name ____________________________________________________________ Signature _________________________________ Date ______________________ To insure your warranty protection, please complete and return this form to AirMax Technologies Inc. attention Product Registration. Page 47... -
Page 48: Warranty Parts Request
Warranty Parts Request Form E-mail: info@airmaxtechnologies.com Web Site: www.airmaxtechnologies.com Homeowner Name: Date: Address: Unit # City: Prov. Postal Code: Phone # Other # Contractor Name: Address: Unit # City: Prov. Postal Code: Phone # Other # Email: Distributor / Rental Provider Name: Address: Unit # City:...
Need help?
Do you have a question about the MaxAir 30 LV and is the answer not in the manual?
Questions and answers