Table of Contents
Advertisement
Advertisement
Table of Contents

Related Manuals for Motortech DetCon series


Summary of Contents for Motortech DetCon series
- Page 1 DetCon –Detonation Controller Operating Manual P/N 01.30.002 | Rev. 02/2019...
- Page 2 Information contained in this publication may be changed without prior notice. Trademarks MOTORTECH products and the MOTORTECH logo are registered and/or common law trademarks of the MOTORTECH GmbH. All further trademarks and logos displayed or used in this publication are the property of the respective entitled person.
-
Page 3: Table Of Contents
Table of Contents 1 General Information ....................6 1.1 What Is the Purpose of this Operating Manual? ............6 1.2 Who Is this Operating Manual Targeted to? ............... 6 1.3 Which Symbols Are Used in the Operating Manual? ........... 6 ... - Page 4 Table of Contents 6 Wiring of the Device ....................57 6.1 Wiring of the Detonation Sensors ................57 6.2 Wiring for Ignition Controller with ASO Output ............58 6.3 Wiring of the Ignition Sensor Unit (ISU) ..............60 ...
- Page 5 Table of Contents 10 Disturbances ......................85 11 Maintenance ......................86 11.1 Spare Parts and Accessories ................. 86 12 Index ........................87 Rev. 02/2019...
-
Page 6: General Information
1 General Information Read through this operating manual carefully before use and become familiar with the product. Installation and start-up should not be carried out before reading and understanding this document. Keep this manual readily available so that you can reference it as needed. 1.1 What Is the Purpose of this Operating Manual? This manual serves as an aid for the installation and operation of the product and supports the technical staff with all operating and maintenance tasks to be performed. -
Page 7: Which Abbreviations/Acronyms Are Used In The Operating Manual
1.4 Which Abbreviations/Acronyms Are Used in the Operating Manual? In the manual or the user interface, the following abbreviations / acronyms are used. Abb. Term Description Explanation Auxiliary Output of the MOTORTECH Synchroni- ignition controllers for zation Output synchronization with the DetCon Controller Area... - Page 8 1 General Information Abb. Term Description Explanation Light Emitting Diode Light emitting electronic semi- conductor MOTORTECH Ignition Controller Universal Serial Bus Serial wiring system to connect a computer to external equipment Rev. 02/2019...
-
Page 9: Safety Instructions
Mark the operating location of the ignition system with the corresponding standardized warning symbol. MOTORTECH equipment is manufactured as state of the art and therefore safe and reliable to operate. Nevertheless the equipment can cause risks or damage can occur, if the following instructions are not complied with: –... -
Page 10: Electrostatic Discharge Hazards
2 Safety Instructions – Avoid all activities that can impair the function of the equipment. – Operate the equipment only while it is in proper condition. – Investigate all changes detected while operating the gas engine or ignition system. – Ensure compliance with all laws, directives and regulations applicable to the operation of your system, including such not expressly stated herein. -
Page 11: Special Safety Instructions For The Device
2 Safety Instructions 2.3 Special Safety Instructions for the Device High voltage! Danger to life! There is danger to life while the engine is operating due to high voltage. The following safety instructions must therefore be observed when the engine is running: –... -
Page 12: Proper Disposal
2.4 Proper Disposal After the expiration of its service life, MOTORTECH equipment can be disposed of with other commercial waste, or it may be returned to MOTORTECH. We will ensure its environmentally friendly disposal. -
Page 13: Intended Use
3 Intended Use 3.1 Functional Description Pos. Designation Valve Spark plug Piston Normal Combustion The graphics show the desired type of combustion of the gas/air mixture in the combustion chamber. The ignition spark ignites the gas/air mixture. The flame front spreads out evenly in the combustion chamber with the specific laminar flame speed of the gas/air mixture. - Page 14 3 Intended Use Detonation Control System – Overview Pos. no Description Pos. no Description DetCon detonation controller Wiring rail (ignition) Detonation sensor wiring PowerView3 Detonation sensor ALL-IN-ONE Ignition controller Laptop Detonation Controller The task of the DetCon detonation controller is to avoid engine damage from knocking combustion.
- Page 15 3 Intended Use The following diagram and the explanations below it illustrate the basic control process of the system: Term used in diagram Description Knocking Level Example of the progression of knocking energy IMMEDIATE STOP LIMIT The maximum value at which the engine is stopped IGNITION REDUCTION LIMIT The maximum value upon which an ignition timing reduction is performed...
- Page 16 3 Intended Use The measured knocking energy (Knocking Level curve) is compared in every cycle with a preset maximum value (IGNITION REDUCTION LIMIT). If this maximum value is reached, the binary output ENGINE KNOCKING is activated. At the same time, the analog outputs change their values (Timing Reduction curve).
-
Page 17: Applications
– Gas engines: – MOTORTECH ignition controllers with auxiliary synchronization output ASO (e. g. MIC6) The ignition timing is determined via the signal on the ASO output. No other sensor is required. –... -
Page 18: European Union
3 Intended Use 3.3.2 European Union The DetCon detonation controller in ATEX enclosure is certified according to ATEX directive 2014/34/EU for use in a potentially explosive atmosphere in the European Union: II 3G Ex ec IIA T4 Labeling Description Symbol for explosion protection, the product complies with ATEX directive 2014/34/EU Device group II = Ex-areas with the exception of mines at risk of firedamp... - Page 19 3 Intended Use Instructions for handling the DetCon20 detonation controller in hazardous areas Danger of explosion! Only use the detonation sensor approved by MOTORTECH and the required number of blocking capacitor boards for operation in hazardous areas. Description 43.20.001 Detonation sensor without sensor lead, two-pole 43.30.004-60...
-
Page 20: Product Description
4 Product Description 4.1 Technical Data 4.1.1 Certifications The detonation controller of the DetCon series are certified as per the following regulations: The DetCon detonation controllers can be supplied in a CSA certified enclosure. The applied requirements are: – Class I, Div. 2, Group C,D; T4 –... - Page 21 4 Product Description The DetCon detonation controllers P/N 43.00.002, P/N 43.00.020 and P/N 43.50.033 comply with the following EU directives: – EMC Directive 2014/30/EU – EN 61000-6-1:2007 Electromagnetic compatibility (EMC) - Part 6-1: Generic standards – Immunity to interference for residential, commercial and light-industrial environments –...
- Page 22 4 Product Description The DetCon detonation controller can be supplied in an ATEX-certified enclosure (P/N 93.43.220) and additionally complies with the following directive: – ATEX Directive 2014/34/EU – EN 60079-0:2012 + A11:2013 Potentially explosive atmospheres – Part 0: Equipment – General requirements –...
- Page 23 4 Product Description Rev. 02/2019...
- Page 24 4 Product Description Rev. 02/2019...
- Page 25 4 Product Description Rev. 02/2019...
- Page 26 4 Product Description Rev. 02/2019...
- Page 27 4 Product Description Rev. 02/2019...
-
Page 28: Mechanical Data
4 Product Description 4.1.2 Mechanical Data The DetCon has the following mechanical characteristics: Feature Value DetCon2 Dimensions of the electric unit (incl. DIN rail clamps) 160 mm x 147 mm x 52 mm (6.3" x 7.36" x 2.05") (length x width x height) DetCon20 160 mm x 187 mm x 52 mm (6.3"... -
Page 29: Warning Notices On The Device
4 Product Description 4.1.3 Warning Notices on the Device The safety instructions on the device or on the enclosure are valid for the DetCon and all connected components. Variant Information text ATEX and CSA WARNING – EXPLOSION HAZARD – Substitution of components may impair suitability for Class I, Division 2. -
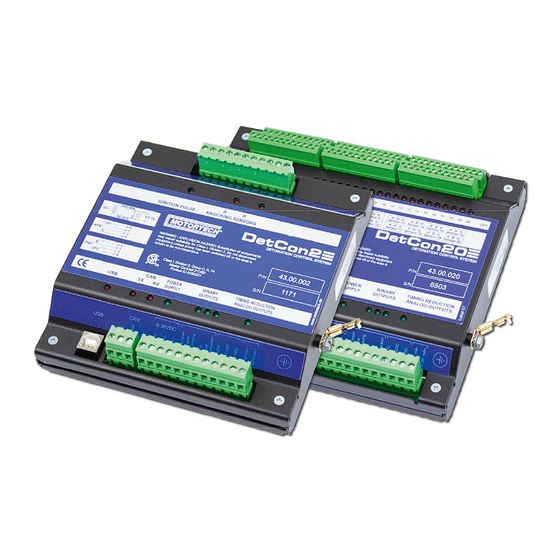
Page 30: Product Identification - Labels On The Device
4 Product Description 4.1.4 Product Identification - Labels on the Device On the device you will find the necessary numbers for a clear product identification: Example: DetCon in ATEX-certified enclosure Abbreviation Description Part number of the device Serial number of the device 2019 Year of construction of the device Rev. -
Page 31: Electrical Data
4 Product Description 4.1.5 Electrical Data The DetCon has the following electrical characteristics: Feature Value Rated current 0.1 A to 0,3 A Power consumption 0.1 A at 24 V 0.1 A at 36 V 0.3 A at 9 V Supply voltag 9 V DC to 36 V DC ATEX: Protective conductor cross- 4 mm... -
Page 32: Interfaces
MOTORTECH detonation sensors (piezoelectric acceleration transducers). The use of other sensors entails a new calibration of the engine. Danger of explosion! Only use the detonation sensor approved by MOTORTECH and the required number of blocking capacitor boards for operation in hazardous areas. Description 43.20.001... - Page 33 4 Product Description The MOTORTECH detonation sensors have the following technical data: Feature Value Sensor principle Piezoelectric acceleration transducer Sensor type MOTORTECH Frequency range 1 kHz to 20 kHz Resonance frequency > 20 kHz Temperature range –40 °C to +130 °C (–40 °F to +266 °F)
-
Page 34: Technical Data Of The Ignition Sensor Unit (Isu)
The ignition sensor unit has the following technical data: Feature Value Sensor principle Signal transducer Sensor type MOTORTECH Voltage 90 V DC to 300 V DC supply Temperature range –25 °C to +70 °C (–13 °F to +158 °F) Dimensions, Sensor 75.5 mm x 44.25 mm x 49 mm (2.97"... -
Page 35: Requirements For External Equipment
4 Product Description 4.1.10 Requirements for External Equipment External equipment shall fulfill the input and output specifications of the DetCon. 4.1.11 Overview Drawings DetCon2 – Dimensions Rev. 02/2019... - Page 36 4 Product Description DetCon2 – Ports/Connections and LEDs For the functions of the individual ports/connections and LEDs, please refer to the table following the drawings accompanying the DetCon20. Rev. 02/2019...
- Page 37 4 Product Description DetCon20 – Dimensions Rev. 02/2019...
- Page 38 Labeling Function LOAD RESISTANCE Jumper which must be removed if no ignition sensor unit (ISU) is used (when using a camshaft sensor or MOTORTECH ignition controllers with ASO output) Sensor A-B (DetCon2) Connections of the detonation sensors (A=white, B=brown, Sensor 1-20...
- Page 39 4 Product Description Labeling Function KNOCKING SENSORS The LEDs flash if knocking has been detected on the associated (LEDs) cylinders. If the checkbox Enable knock LED latch (switch ON/OFF to reset) is activated in the Output options tab, the LEDs light up permanently as soon as a knock has occurred, instead of flashing.
- Page 40 4 Product Description DetCon Model in Enclosure – Dimensions (CSA Certified) DetCon variant in ATEX enclosure – Dimensions Rev. 02/2019...
-
Page 41: Installation Instructions
5 Installation Instructions Unpack the equipment, taking care not to damage it, and ensure that the operating manual is always stored with the equipment and is easily accessible. Check the contents for completeness and verify that the device type meets your application requirements. Scope of Supply The supply scope of the device consists of the following components: –... - Page 42 5 Installation Instructions ATEX Protection! Some versions of the ATEX-certified DetCon20 have an external ATEX protection connected to the CAN bus and the inputs. This external ATEX protection must not be removed in order to prevent possible flying sparks. If you do not see this protection externally, it is installed internally. Risk of Destruction! When mounting the device, it must be ensured that no vibrations occur during operation and that temperatures are not exceeded.
-
Page 43: Ground Connection / Protective Conductor Connection On Atex Enclosure
5 Installation Instructions 5.1 Ground Connection / Protective Conductor Connection on ATEX Enclosure The external protective conductor connection is located on the outside of the DetCon20 detonation controller enclosure. Requirements EN 60439-1:2014-06, 15.3 to be observed! The external protective conductor must always be connected. Connect the external protective conductor to the corresponding connection as shown in the following figure. - Page 44 5 Installation Instructions Pos. no Description Blind rivet nut for M8 Enclosure Washer ISO 7092-8.4 External protective conductor: Minimum cross section is 4 mm Observe EN 60079-0:2014-06, 15.3! Ring lead lugs DIN 46234, nominal cross section > 2.5 mm 35 mm Tubular lead lugs DIN 46235, nominal cross section 10 mm - 35 mm Spring washer DIN 127-B8...
-
Page 45: Lead Bushings Through The Enclosure Wall On The Atex Enclosure
5 Installation Instructions Observe requirements EN 60439-0 – The protective conductor connection parts are designed for a minimum cross-section of 4 mm – When installing the external protective conductor connection, care must be taken to ensure that the conductors are secured against twisting and loosening. - Page 46 5 Installation Instructions Maximum number of lead bushings The maximum number of lead bushings depends on their size. The maximum number for each side of the enclosure is selected according to the following table so that the side walls are not weakened and the stability of the enclosure is not impaired. Screw size Side A Side B Side C...
- Page 47 5 Installation Instructions Type examination certificate All lead bushings and cable bushings must have a separate EC type examination certificate. Dummy plugs used require a separate EC type examination certificate. Operational safety All lead bushings must be mounted with a metal locknut. When using lead bushings with strain relief and bending protection, the number of possible standard lead glands is reduced.
- Page 48 5 Installation Instructions Tightening torques The tightening torques must be observed when installing the cable bushings. If no specific information is available, the following values must be used. Size Tightening torque Tightening torque of Tightening torque of Core- of connecting piece cap nuts [Nm (lb-ft)] locknut [Nm (lb-ft)] perforated-...
-
Page 49: Mounting The Detonation Sensors
5 Installation Instructions 5.3 Mounting the Detonation Sensors Danger of explosion! Only use the detonation sensor approved by MOTORTECH and the required number of blocking capacitor boards for operation in hazardous areas. Description 43.20.001 Detonation sensor without sensor lead, two-pole 43.30.004-60... - Page 50 5 Installation Instructions Dimensions of the Required Bore An M6 screw can also be used as an alternative to M8 screw for the mounting of the detonation sensor. In this case, however, an adapter sleeve must be used in the sensor to close in the resultant hollow space, thus ensuring optimal signal transmission.
- Page 51 5 Installation Instructions Risk of Destruction! The fastening screws of the knock sensors must not be tightened too much, otherwise the sensors will be damaged and will no longer function properly. Observe the following information for sensor mounting: – Torque: 20 Nm ± 5 Nm (14.8 ± 3.7 lb-ft) for mounting screws: –...
- Page 52 5 Installation Instructions – On the cylinder head screws Especially when it comes to engine conversions, it has proven to be worthwhile to attach the knocking sensors on cylinder head screws or -bolts. Drill an M6-hole with a maximum depth of 12 mm (0.47") in the cylinder head screw and fix the detonation sensor with a screw of type M 6x25-10.9 and an adapter sleeve to fill the hollow space –...
- Page 53 5 Installation Instructions Mounting the blocking capacitor board for use in hazardous areas A blocking capacitor board has four outputs. If all 20 possible knock sensor inputs are used with a DetCon20, then five blocking capacitor boards are required. One blocking capacitor board is used for each of the four knock sensors required. Plug the required blocking capacitor boards into the connectors (marked red in the figure) for the knock sensors on the DetCon20.
-
Page 54: Mounting The Ignition Sensor Unit (Isu)
(ISU). Refer to the section Mounting the Camshaft Sensor on page 55. No ignition sensor unit is needed when using a MOTORTECH ignition sensor unit with ASO (e. g. MIC6) output either. You can find information in the section Wiring for Ignition Controller with ASO Output on page 58. - Page 55 5 Installation Instructions No ignition sensor unit is required for the ASO output If you use a MOTORTECH ignition controller (e. g. MIC6) with auxiliary synchronization output (ASO), you do not need any ignition sensor unit (ISU). In this case, the ignition pulse is transmitted to the DetCon via the ASO output.
-
Page 56: Mounting The Camshaft Sensor
(i. e. the Load Resistance jumper is removed). The following photo shows an example of such an installation. Calibration for diesel and pilot injection engines For diesel and pilot injection engines, calibration must be performed by MOTORTECH service personnel. Rev. 02/2019... -
Page 57: Wiring Of The Device
6 Wiring of the Device Tightening torque of the connection terminals The tightening torque for the connection terminals in the DetCon is 0.5 Nm. 6.1 Wiring of the Detonation Sensors Mount the detonation sensors in accordance with the firing order of the cylinders. To do this, enter the firing order of your engine in the following table and connect the sensors with the assigned cylinders and the corresponding inputs on the DetCon according to the resulting sequence. -
Page 58: Wiring For Ignition Controller With Aso Output
No ignition sensor unit (ISU) is required when you use the ignition controller with ASO output from MOTORTECH (e. g. MIC6). In this case, the ignition pulse is transmitted to the DetCon via the auxiliary synchronization output (ASO). The jumper identified with Load Resistance must be removed. - Page 59 MIC3, MIC4, MIC5, MIC6 connection Configuration of the ignition controller In the configuration software (MICT) for the MOTORTECH ignition controllers with ASO output, the adjustments for the DetCon can be easily made using the button Configuration for DetCon2/20. This can be found on the configuration page Input/Outputs –...
-
Page 60: Wiring Of The Ignition Sensor Unit (Isu)
6 Wiring of the Device 6.3 Wiring of the Ignition Sensor Unit (ISU) In order to transfer the ignition pulse of the first cylinder in the firing order to the ignition input of the DetCon, the ignition sensor unit (ISU) is installed between the ignition output of the first cylinder and the primary side of the ignition coil of the first cylinder. - Page 61 6 Wiring of the Device Connections on the Ignition Sensor Unit Connection DetCon ignition input (Timing1, black) DetCon ignition input (Timing2, brown) Not used Primary side of ignition coil of first cylinder Ignition controller ignition output of the first cylinder Connections on the DetCon The ignition sensor unit is connected to the DetCon via the connector Ignition Pulse.
-
Page 62: Wiring Of The Camshaft Sensor (For Diesel And Pilot Injection Engines Only)
Jumper set: 220 – – Jumper removed: 1 k It is on the upper left of the device Calibration for diesel and pilot injection engines For diesel and pilot injection engines, calibration must be performed by MOTORTECH service personnel. Rev. 02/2019... - Page 63 6 Wiring of the Device Connections on the DetCon The ignition sensor unit is connected to the DetCon via the connector Ignition Pulse. – NPN sensor connection – PNP sensor connection Rev. 02/2019...
-
Page 64: Wiring Of The Binary Outputs
6 Wiring of the Device 6.5 Wiring of the Binary Outputs Example Configuration K1 = Relay Engine Knocking (Knocking Warning) K2 = Relay Trip (Engine Stop) K3 = Relay Load Reduction The following illustrations show examples of two alternatives for wiring the output Trip. Rev. -
Page 65: Wiring Of The Analog Outputs For Ignition Timing Reduction
Connection on the Ignition Controller * 0–5 V signal The precise connection assignment on the ignition controller can be found in section Input Wiring – Ignition Timing & Safety Devices in the operating manual for your MOTORTECH ignition controller. Rev. 02/2019... -
Page 66: Wiring Can Bus
6 Wiring of the Device 6.7 Wiring CAN Bus First device Second-to-last device Second device Last device CAN bus wiring Note the following when connecting the CAN bus: – Each bus end must be fitted with a terminating resistor of 120 Ω (see drawing). -
Page 67: Functions
7 Functions 7.1 Ignition Timing Reduction The DetCon has two analog outputs for ignition timing reduction: – 4-20 mA current loop – 0-5 V voltage output Both analog outputs operate simultaneously. Use the output designated for ignition timing reduction for the ignition controller you are using (if necessary, ask the manufacturer of the ignition system). -
Page 68: Denedit Settings
Knock detection mode Measurement Mode The measurement mode is used for engine calibration. Calibration is only required for engine types for which a parameter file has not yet been created and is executed by MOTORTECH service personnel. Interface Diagnostics Mode The interface diagnostics mode can be used to test the output signals at the binary and analog inputs. -
Page 69: Installation And First Steps In Denedit
8 DenEdit Settings 8.2 Installation and First Steps in DenEdit Install DenEdit The software you need for installing DenEdit is located on the CD-ROM included with the device. To install the program, proceed as follows: Start the installation. Copy the executable file to your PC. The installation is started by executing the file. 2. - Page 70 CD-ROM supplied with the device contains files for engines which have already been calibrated. If there is no parameter file for the desired engine, a calibration must be performed. This can only be carried out by MOTORTECH service personnel. Calibration for diesel and pilot injection engines For diesel and pilot injection engines, calibration must be performed by MOTORTECH service personnel.
- Page 71 8 DenEdit Settings Proceed as follows: Connect the device to the PC with the USB cable. 2. Start up DenEdit. 3. Establish a connection between the software and the device via the menu entry Connection - > Connect USB. 4. Load the parameter file corresponding to your engine via the menu entry Connection -> Open Parameters.
-
Page 72: User Interface Overview
8 DenEdit Settings 8.3 User Interface Overview The user interface is divided into different areas: Area Menu bar Toolbar Display area of the analog output signal and the knocking intensity Error and status displays Tabs for process monitoring Tabs for the Process Parameters Status bar Rev. -
Page 73: Menu Bar And Toolbar
If you forget your password, you can receive an Controller -> Get encrypted password with this function. Please contact encrypted password MOTORTECH service personnel with this password and the serial number of the device. Switches to two sensors mode in order to operate the Controller -> Two sensors DetCon2. -
Page 74: Display Area Of The Analog Output Signal And The Knocking Intensity
8 DenEdit Settings 8.5 Display Area of the Analog Output Signal and the Knocking Intensity The output signal of the analog outputs and the knocking intensity are displayed using two graphic indicating instruments. Normalized analog output The left display shows the value of the signal currently present at the analog outputs. The value is displayed as a percentage of the output range (0-5 V / 4-20 mA). - Page 75 8 DenEdit Settings STATUS – ENGINE KNOCKING The selected knocking level Ignition reduction limit has been exceeded in at least one cylinder. The binary output Engine Knocking is activated. – TRIP The knocking level has exceeded the value Immediate stop limit. The binary output Trip is activated.
-
Page 76: Tabs For Process Monitoring
8 DenEdit Settings 8.7 Tabs for Process Monitoring The following tabs are available for process monitoring: – Actual knocking values This tab shows the current knocking intensities detected by all detonation sensors. – Knocking history In this tab, you can see the curve of the knocking intensities registered over the last minute. 8.7.1 Tab: Actual Knocking Values Display Area In the display area, the current knocking values for every cylinder are shown as bars. -
Page 77: Tab: Knocking History
This tab shows both engine settings and the parameters for knocking analysis. These settings are either specified by the parameter file or, if required, determined by MOTORTECH service personnel during calibration. In order to ensure the correct functioning of the detonation controller, these values may not be altered. -
Page 78: Tab: Mode
Sound recording If the device is connected to the running engine, you can make sound recordings of the signal of a detonation sensor. This is generally executed by MOTORTECH service personnel and should only be performed upon their request. Proceed as follows: Set the desired detonation sensor in the field Selected sensor. -
Page 79: Tab: Knocking Params
In this area, the values are entered for the frequency range in which knocking is likely to occur. These settings are either specified by the parameter file or, if required, determined by MOTORTECH service personnel during calibration. In order to ensure the correct functioning of the detonation controller, these values may not be altered. -
Page 80: Tab: Input Gains
8 DenEdit Settings – Ref. filter frequency Normal frequency of the engine without knocking. – Attenuation Balance between the reference signal (background noises and normal engine vibration) and the knocking signal. – KNOCK, REF Selection of whether the knocking signal (in %) or the reference signal (in %) should be shown on the knocking intensity display. -
Page 81: Tab: Output Options
8 DenEdit Settings 8.8.5 Tab: Output Options Settings made in this tab influence the signals of the analog and binary outputs. Please refer to the section Functional Description on page 13 for more information on the limits you can set here. -
Page 82: Tab: Can Params
8 DenEdit Settings Enable max. output setting Activate the checkbox to limit the signal of the analog outputs to the value in the field Maximum output value. Enable knock LED latch (switch ON/OFF to reset) Activate the checkbox so that the status display ENGINE KNOCKING remains lit when knocking is detected which falls below the Ignition reduction limit. -
Page 83: Status Bar
8 DenEdit Settings Communication with ALL-IN-ONE Select the following settings for communication with the ALL-IN-ONE gas engine controller: – Select Intelli-controller – CAN address: 79 – Bus speed: 250 kBit/s Communication with PowerView3 Select the following settings for communication with the HMI module PowerView3: –... -
Page 84: Operation
9 Operation 9.1 Start-up Before you start up the DetCon detonation controller, take note of the following: – Has the parameter file corresponding to the engine and the DetCon device type been loaded to the device? – Have the detonation sensors been wired in accordance with the firing order of the engine? –... -
Page 85: Disturbances
10 Disturbances Detonation Sensor Errors If the checkbox Enable bad sensor detect is activated in the tab Output Options, defective detonation sensors are indicated via the status display BAD SENSOR. This function only detects sensors which provide faulty signals. If a wire has ruptured or a sensor gives no signals for some other reason, it is not indicated on this display. -
Page 86: Maintenance
When operating the ATEX enclosure, the applicable national regulations of the country of use must be observed. 11.2 Spare Parts and Accessories For spare parts and accessories, please refer to our current Product Guide, which is available for you to download on the internet at www.motortech.de. Rev. 02/2019... -
Page 87: Index
12 Index 0 E 0-5 V output Engine Data ............31 Calibrating ..........79 Display ............. 74 Engine knocking Wiring ............65 Declaration ..........13 Engine Stop 4 Declaration ........... 13, 67 4-20 mA output Engine type Data ............31 Setting ............ - Page 88 12 Index K General ............9 Software Knocking frequency Installation ..........69 Setting ............. 79 Menu ............73 Knocking intensity Overview ........... 72 Display ..........74, 76 Symbols ........... 73 History............77 Detonation sensor System Requirements ........ 68 Sound recording ..........78 Activate ............
Need help?
Do you have a question about the DetCon series and is the answer not in the manual?
Questions and answers