Advertisement
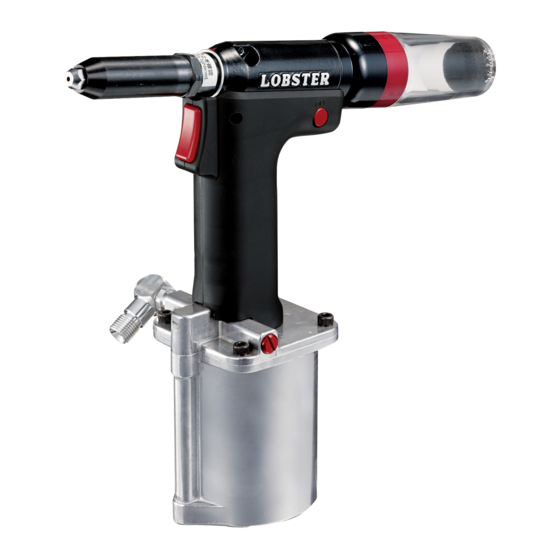
Professional model of air riveter to install blind rivets.
Thank you very much for purchasing "LOBSTER" air riveter.
To ensure correct operation, please read this instruction manual carefully, and keep it in a safe place
for later reference.
In case you have some trouble and failure, please refer "Troubleshooting" in the Instruction Manual.
Lobtex Co.,Ltd. has the copyright of this manual. It is prohibited to publish, copy or translate to other
language without prior consent.
MANUFACTURER
International Marketing & Sales Division
12-8 Shijo-cho, Higashi-Osaka City
Osaka 579-8053, Japan
Telephone: +81(72)981-7466
Telefacs: +81(72)981-9420
URL http://www.lobtex.co.jp/
AIR RIVETER
INSTRUCTION MANUAL
BUILT-IN ON-DEMAND
VACUUM SYSTEM
R1A1
CONTENTS
IMPORTANT SAFETY
INSTRUCTIONS .................................1
NOMENCLATURE .............................4
TECHNICAL DATA ...........................5
PREPARATION BEFORE USE .......6
MAINTENANCE .................................9
TROUBLESHOOTING .....................16
EXPLODED VIEW............................17
PARTS LIST .....................................18
STORAGE .......................................19
ORDERING PARTS .........................19
(A)
PRINTED IN JAPAN
Advertisement
Table of Contents

Subscribe to Our Youtube Channel
Related Manuals for LOBSTER R1A1


Summary of Contents for LOBSTER R1A1
-
Page 1: Table Of Contents
ORDERING PARTS ......19 Professional model of air riveter to install blind rivets. Thank you very much for purchasing “LOBSTER” air riveter. To ensure correct operation, please read this instruction manual carefully, and keep it in a safe place for later reference. -
Page 2: Important Safety Instructions
IMPORTANT SAFETY INSTRUCTIONS Be sure to read the following Important Safety Instructions carefully and make sure that you understand them thoroughly before using this tool. Always wear eye-protection at all times during use. If this is not observed, the cut mandrels may eject out when the rivets are cut and cause serious injury. - Page 3 Repair work should only be carried out by a qualified technician. Please contact your nearest “LOBSTER” distributor, representative, or direct to Lobtex Co., Ltd., Osaka. If the tool is repaired by someone without the necessary qualifications and experience, the tool may not perform to optimum standards, and accidents or injury may result.
- Page 4 CAUTION 18. The production date of this product is shown brevity code below the tools.(on page5) (Example) year: 2 0 1 4 month: 8 How to check manufactured date A year/month of manufacture An English character 19. This product is a tool for exclusive use of the professional business. When you are the one who uses this tools for the first time, please receive an instruction from the one who have already used this tools before, also please read the Instruction Manual carefully and understand the content.
-
Page 5: Nomenclature
NOMENCLATURE Frame Head ‘CJM’ Tank Joint Bleed Plug Nosepiece Tank Case Unit Trigger Vacuum Button Grip Cover Cylinder Cap Rotary Joint (Screw size: Parallel pipe thread G1/4) Cylinder Cup FRAME HEAD INTERNAL PARTS O-ring S10 O-ring P9 Jaw Case ‘CJM’ Jaw Pusher chamfered O-ring P6... -
Page 6: Technical Data
TECHNICAL DATA Model No. R1A1 Weight kg (lbs) 1.1 (2.43) Operating air pressure 0.5 ~ 0.6 MPa (5 ~ 6 kgf/cm , 71 ~ 85 psi.) Dimensions (Length Height Width) mm 297 265 106 Air consumption per minute (cu.ft.) 68 (2.4) (on the occasion of vacuum is working.) -
Page 7: Preparation Before Use
PREPARATION BEFORE USE Set the Tank Case Unit to the Tank Joint. WARNING Always attach the tank case unit before use. If you work without attaching the tank case unit, there is a risk that the mandrel of rivet that has been cut is not discharged, and will be clogged inside exhaust pipe, causing a fault of the equipment. - Page 8 Use the air regulator to adjust the operating air pressure to 0.5 ~ 0.6MPa (5 ~ 6kgf/cm 71 ~ 87psi). WARNING The air pressure should be kept within the range of 0.5 to 0.6 MPa (5 to 6 kgf/cm , 71 to 87 psi). If an air pressure which is greater than this is used, the tool may become damaged, and injury or damage to property may result.
-
Page 9: Operating The Air Riveter
OPERATING THE AIR RIVETER Select a suitable size of rivet for the workpiece to be riveted. Replace the nosepiece with one which matches the size of the rivet to be used. (Refer to item in “Preparation Before Use” on page 7.) Drill a hole of appropriate size (0.1 to 0.2mm larger than the diameter of the rivet) into the workpiece. -
Page 10: Maintenance
Jaw Case Head. (Cross section) In the end, attach the Frame Head‘CJM’. Note Apply LOBSTER lubricant oil JO-50 (separately sold: ISO VG150 containing molybdenum disulfide) to the back of Jaws or the inside of Jaw Case Head. Apply jaw lube... - Page 11 Replacement of the Nosepiece Note If the Nosepiece is damaged, replace it with a new one. If you change the rivet size, replace with an applicable Nosepiece. CAUTION Before starting maintenance or disassembling the unit to replace parts, be sure to stop air supply.
- Page 13 CAUTION Avoid skin contact with substances such as hydraulic oil, lubricating oil and grease. Such substances may cause inflammation of the skin. If they come into contact with your skin, wash the affected area thoroughly. Maintain the tool with due care. Refer to the Instruction Manual for details on replacing parts and attachments, otherwise injury may occur.
- Page 14 Cleaning and Oil Supply of Air Valve Note If the Air Valve is clogged with cut swarf, it has adverse influence on smooth operation and durability. CAUTION Before starting maintenance or disassembling the unit to replace parts, be sure to stop air supply.
- Page 15 Attach the Air Valve and the Air Valve Head, and mount the Air Valve Head Lock Plate to the body by pinching it with pliers, etc. Note Push the Air Valve Head securely to the end. When mounting the Air Valve Head Lock Plate, move the Urethane Tube aside by pushing it with a finger.
- Page 16 Remove two hex socket bolts in the Tank Joint by using a hex key wrench (AF 2.5mm). Remove the Tank Joint, Outer shaft of frame cap, Helical torsion spring of shutter, Shutter Unit, Shutter Lever in this sequence. Shutter Lever Hex socket bolt Shutter Unit (x2)
-
Page 17: Troubleshooting
If a problem occurs, check the followings. If the problem persists after checking the items in the table below, contact your nearest “LOBSTER” dealer or direct to us. In making any enquiries about this product or requests for repair work, first check the trouble- shooting items below, and then make a note of the model number, the usage conditions and the trouble symptoms in as much detail as possible. -
Page 20: Storage
“LOBSTER” brand Hydraulic Oil is supplied in a plastic filler bottle with the tool, and can also be obtained from your “LOBSTER” dealer or agent in your town. If this is not possible, a good quality mineral oil with the following properties should also be used. - Page 21 ROUTINE MAINTENANCE AND REPAIR OF LOBSTER RIVET TOOLS CAN BE PERFORMED BY AN AVERAGE MECHANIC. HOWEVER, IF YOU HAVE A LOBSTER RIVET TOOL THAT IS IN NEED OF MAJOR REPAIR WE RECOMMEND THAT IT BE SENT DIRECTLY TO US POSTAGE PAID FOR SERVICE AT A REASONABLE CHARGES.
- Page 22 M E M O...
Need help?
Do you have a question about the R1A1 and is the answer not in the manual?
Questions and answers