Table of Contents
Advertisement
Quick Links
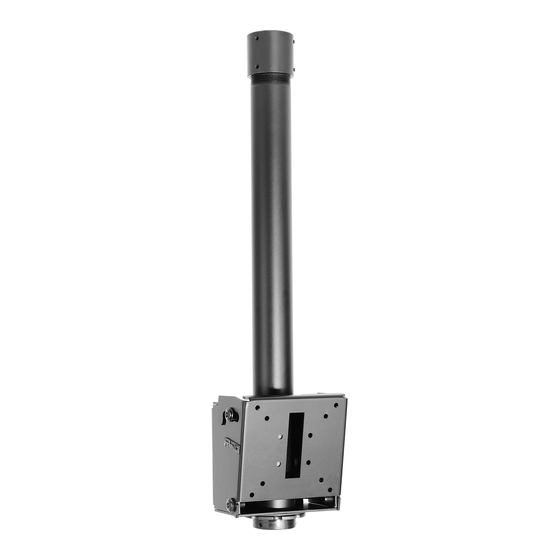
Installation and Assembly: Flat Panel Conversion Kit For
up to 50" LCD and Plasma Screens
Models: PLCK-UNL, PLCK-1
Read instruction sheet before you start installation and assembly.
• Do not begin to install your Peerless product until you have read and understood the instructions and warnings
contained in this Installation Sheet. If you have any questions regarding any of the instructions or warnings, for US
customers please call Peerless customer care at 1-800-865-2112, for all international customers, please contact
your local distributor.
• This product should only be installed by someone of good mechanical aptitude, has experience with basic building
construction, and fully understands these instructions.
• Make sure that the supporting surface will safely support the combined load of the equipment and all attached
hardware and components.
• Never exceed the Maximum Load Capacity.
• Always use an assistant or mechanical lifting equipment to safely lift and position equipment.
• Tighten screws firmly, but do not overtighten. Overtightening can damage the items, greatly reducing their holding
power.
• This product is intended for indoor use only. Use of this product outdoors could lead to product failure and personal
injury.
Table of Contents
Parts List.................................................................................................................................................................................2
Attaching Extension Column To Ceiling Plate Or Existing Extension Column ........................................................................3
Attaching Ceiling Arm Box To Extension Column ....................................................................................................................4
Plck-1 Installation .................................................................................................................................................................5
Plck-Unl Installation ........................................................................................................................................................ 6-8
Visit the Peerless Web Site at www.peerlessmounts.com
Maximum Load Capacity: 125 lb (57 kg)
WARNING
1 of 8
For customer care call 1-800-729-0307 or 708-865-8870.
ISSUED:02-22-07
SHEET #: 202-9197-3 12-10-09
Advertisement
Table of Contents

Subscribe to Our Youtube Channel
Related Manuals for PEERLESS PLCK-1


Summary of Contents for PEERLESS PLCK-1
- Page 1 Attaching Extension Column To Ceiling Plate Or Existing Extension Column ................3 Attaching Ceiling Arm Box to Extension Column ........................4 PLCK-1 Installation .................................5 PLCK-UNL Installation ................................ 6-8 1 of 8 ISSUED:02-22-07 SHEET #: 202-9197-3 12-10-09 Visit the Peerless Web Site at www.peerlessmounts.com For customer care call 1-800-729-0307 or 708-865-8870.
- Page 2 (6) 580-1036 M8 x 40 mm (4) 520-1152 I.D. .22" (5.6 mm) (4) I.D. .34" (8.7 mm ) (4) 540-1057 540-1059 2 of 8 ISSUED:02-22-07 SHEET #: 202-9197-3 12-10-09 Visit the Peerless Web Site at www.peerlessmounts.com For customer care call 1-800-729-0307 or 708-865-8870.
- Page 3 Ceiling plate L or M extension column (not supplied) (not supplied) Small Hole slot L or M retaining collar Slot slot 3 of 8 ISSUED:02-22-07 SHEET #: 202-9197-3 12-10-09 Visit the Peerless Web Site at www.peerlessmounts.com For customer care call 1-800-729-0307 or 708-865-8870.
- Page 4 Insert and tighten one M5 x 10 mm penta-pin screw (E) through the hole of the retaining collar (D) and slot of exten- sion column (A) as shown in figure 3.1. Insert one M5 x 10 mm penta-pin screw (E) through the tab on the back of ceiling arm box (A) as shown in rear view. Use the M5 penta-pin tool (I) to tighten screws. Rear View fig. 3.1 4 of 8 ISSUED:02-22-07 SHEET #: 202-9197-3 12-10-09 Visit the Peerless Web Site at www.peerlessmounts.com For customer care call 1-800-729-0307 or 708-865-8870.
- Page 5 UNL models) PLASMA SCreeN ADAPTER PLATE ADAPTER PLATE fig. 4.2 fig. 4.3 Hang The Tilt Bracket on the Ceiling Arm Box For PLCK-1 Hang tilt bracket (B) onto ceiling arm box (A). Adjust tilt as desired and tighten four M10 x 1.5 x 15 mm penta-pin screws (G) securely using M10 penta-pin tool (H). WARNING • For a safe assembly be sure to fully tighten four screws (G).
- Page 6 • Use the corresponding hole in the multi- LArge hOLe FOr M6 SCrewS washer that matches your screw size. NOTE: For flat back screens proceed to step 4-1. For bump-out or recessed back screen skip to step 4-2 6 of 8 ISSUED:02-22-07 SHEET #: 202-9197-3 12-10-09 Visit the Peerless Web Site at www.peerlessmounts.com For customer care call 1-800-729-0307 or 708-865-8870.
- Page 7 For Bump-out or Recessed Back Screen refer to Screen Compatibility Chart to determine the proper fastener to use. Visit www.peerlessmounts.com/2 for a full screen compatibility chart for this mount. Begin with longer length screw, hand thread through multi-washer, adapter bracket and spacer in that order into screen as shown below. Screw must make at least three full turns into the mounting hole and fit snug into place. Do not over tighten. If screw cannot make three full turns into the screen, select a longer length screw from the baffled fastener pack. repeat for remaining mounting holes, level brackets and tighten screws. SCREEN MULTI-wASher SPACER SCREW ADAPTER BRACKET (BB) If you have any questions, please call Peerless customer care at 1-800-865-2112. 7 of 8 ISSUED:02-22-07 SHEET #: 202-9197-3 12-10-09 Visit the Peerless Web Site at www.peerlessmounts.com For customer care call 1-800-729-0307 or 708-865-8870.
- Page 8 NOTE: It is important to lock screen down! To lock the screen down, tighten screws to deep bracket (BB) as shown in detail 2. To remove screen from mount, loosen screws, swing screen away from mount, and lift screen off of mount. SCREWS DETAIL 2 8 of 8 ISSUED:02-22-07 SHEET #: 202-9197-3 12-10-09 Visit the Peerless Web Site at www.peerlessmounts.com For customer care call 1-800-729-0307 or 708-865-8870. © 2009, Peerless Industries, Inc. All rights reserved. All other brand and product names are trademarks or registered trademarks of their respective owners. Peerless Industries, Inc. 3215 w. North Ave. Melrose Park, IL 60160 www.peerlessmounts.com...
Need help?
Do you have a question about the PLCK-1 and is the answer not in the manual?
Questions and answers