Condair DA Series Installation And Operation Manual
Desiccant dryer
Hide thumbs
Also See for DA Series:
- Installation and operation manual (128 pages) ,
- Installation, operation and maintenance manual (96 pages) ,
- Installation, operation and maintenance manual (58 pages)

Subscribe to Our Youtube Channel
Related Manuals for Condair DA Series


Summary of Contents for Condair DA Series
- Page 1 READ AND SAVE THESE INSTRUCTIONS INSTALLATION AND OPERATION MANUAL Desiccant dryer Condair DA 160 - 440 Dehumidification and Drying...
- Page 2 Condair Group AG, except to the extent required for installation or maintenance of recipient's equipment. Liability Notice Condair Group AG does not accept any liability due to incorrect installation or operation of the equipment or due to the use of parts/components/equipment that are not authorized by Condair Group AG.
-
Page 3: Table Of Contents
Contents Introduction To the very beginning Notes on the installation and operation manual For your safety Important notes Inspection of the delivery Storing/Transportation/Packaging Product overview Product designation Applications Method of operation Product description 4.4.1 Casing 4.4.2 Rotor 4.4.3 Filters 4.4.4 Fan for process- and reactivation air 4.4.5 Heater for reactivation air... - Page 4 Product specification Technical data Dimensions Condair DA 160 Dimensions Condair DA 250 - 440 Performance chart Condair DA 160 Performance chart Condair DA 250 Performance chart Condair DA 440 Spare parts 10.1 Spare parts Condair DA 160 10.2 Spare parts Condair DA 250 10.3...
-
Page 5: Introduction
Introduction To the very beginning We thank you for having purchased a Condair DA 160 - 440 desiccant dryer (for short: Condair DA). The Condair DA desiccant dryers incorporate the latest technical advances and meets all recognized safety standards. Nevertheless, improper use of the Condair DA desiccant dryer may result in danger to the user or third parties and/or damage to property. - Page 6 If the desiccant dryer changes hands, the documentation must be passed on to the new operator. If the documentation gets misplaced, please contact your Condair representative. Language versions This installation and operation manual is available in other languages. Please contact your Condair representative for information. Introduction...
-
Page 7: For Your Safety
For safety and warranty reasons any action beyond the scope of this manual must be carried out only by qualified personnel authorised by the manufacturer. It is assumed that all persons working with the Condair DA desiccant dryer are familiar and comply with the appropriate regulations on work safety and the prevention of accidents. - Page 8 DANGER! Danger of electric hazard! The Condair DA desiccant dryer is mains powered. Live parts may be exposed when the unit is open. Touching live parts may cause severe injury or danger to life. Prevention: Before carrying out any work set the Condair DA desiccant dryer out of operation (switch off the unit, disconnect it from the mains) and secure the unit against inadvertent power-up.
- Page 9 – if the Condair DA desiccant dryer is no longer operating correctly All persons working with the Condair DA desiccant dryer must report any alterations to the unit that may affect safety to the owner without delay. Prohibited modifications to the unit No modifications must be undertaken on the Condair DA 160 - 440 desiccant dryers without the express written consent of Condair.
-
Page 10: Important Notes
Check packing slip to ensure all parts has been delivered. All material shortages are to be reported to your Condair supplier within 48 hours after receipt of the goods. Condair assumes no responsibility for any material shortages beyond this period –... -
Page 11: Product Overview
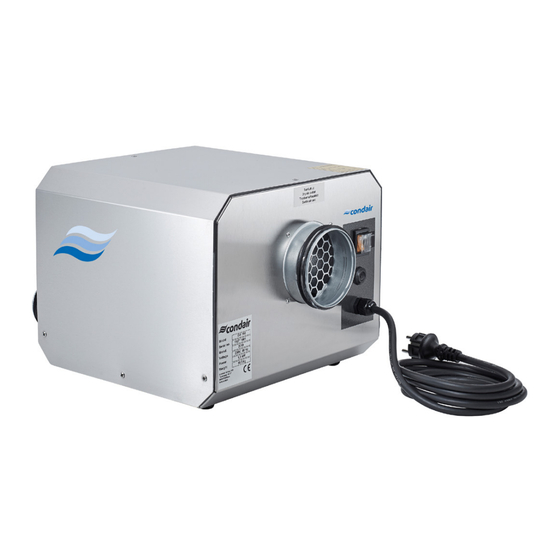
Abb. 1: Specification label Applications The Condair desiccant dryers is of the solid desiccant wheel type designed to dry air of atmospheric pressure. The desiccant dryer can be used for drying air of up to 100 % relative humidity (RH) with air temperatures from -30°C to+40°C. -
Page 12: Method Of Operation
Method of operation The desiccant dryer operates with two air streams. A larger air stream to be dehumidified, and a smaller air stream to exhaust the moisture out of the desiccant rotor. Both airstreams are created by one com- mon fan which pressurises a compartment of the desiccant dryer creating two separate airstreams. The larger air volume, the process air, passes through the slowly rotating silica gel rotor. -
Page 13: Product Description
Product description 4.4.1 Casing The casing is fabricated from 304 stainless steel. The top of the desiccant dryer has a top hood that can be removed for service access to electrical and mechanical components. All duct connections to the desiccant dryer are designed for connections to standard size spiral ducts except for the process air inlet. 4.4.2 Rotor The desiccant dryer has a drying rotor fabricated from 82% desiccant material, 16% fibreglass and 2%... -
Page 14: Electrical Panel
4.4.6 Electrical panel The electrical panel is located inside the desiccant dryer and is accessible through the service hood. Switches and indications for operation are mounted at the front of the electrical panel. 4.4.7 Operation Options Using the operation switch on the front side of the desiccant dryer, different running options can be selected: –... -
Page 15: Installation
Installation Installation and service access The Condair DA 160 - 440 desiccant dryers are designed for indoor installation. All components in the desiccant dryer are accessible from the top of the unit. For inspection and service, a space of 500 mm must be left free above the desiccant dryer to accommodate for servicing of filters, fans and rotor. -
Page 16: Process- And Dry Air With The Desiccant Dryer Installed Outside The Dehumidified Room
5.2.3 Process- and dry air with the desiccant dryer installed outside the dehumidified room When the desiccant dryer is installed in a separate plant room all inlet and outlet openings are usually ducted. The desiccant dryer draws ambient air from the place of installation. The dry air from the desiccant dryer can be connected for post treatment or ducted back to the dehumidified room. -
Page 17: Commissioning
Commissioning On initial start-up, the following steps should be taken in this order: 3. Ensure that the external isolation switch is isolating the unit from the mains, or that the power plug is disconnected. 4. Select the OFF position on the main switch (orange) at the front of the desiccant dryer. 5. -
Page 18: Maintenance
DANGER! Danger of electric hazard! The Condair DA desiccant dryer is mains powered. Live parts may be exposed when the unit is open. Touching live parts may cause severe injury or danger to life. Prevention: Before carrying out any work set the Condair DA desiccant dryer out of operation (switch off the unit, disconnect it from the mains) and secure the unit against inadvertent power-up. -
Page 19: Filters
The rotor is maintenance free. However should it be necessary to clean the rotor the first choice should be careful use of compressed air. With severe contamination, the rotor can be washed with water. Cleaning with water is no routine matter; please contact your Condair representative. Check the rotor bearing and the rotor surface once a year. -
Page 20: Rotor Seals
Rotor seals Check that the seals are in the right position and not damaged. There is a service alarm in the PLC that will be activated after certain period in order to ensure that the rotor seals are checked regularly. General summary of maintenance intervals Rotor Rotor... -
Page 21: Troubleshooting
Troubleshooting Malfunction Possible cause of trouble Corrective action None, or reduced Filter dirty. Clean or replace filters. dehumidification capacity Electrical heater faulty. Check fuses. Airflow reduced. Check openings and dampers. No rotation of rotor. Check belt tensioning or PLC alarms. Internal leakage in unit. Check seals and springs. -
Page 22: Product Specification
Product specification Technical data DA 160 DA 250 DA 440 Drying capacity at 20°C - 60%rh kg/h Nominal dry air volume Nominal reactivation air volume Nominal ext. pressure processair Freiblasend Freiblasend Freiblasend Nominal ext. pressure reactivationair Freiblasend Freiblasend Freiblasend Electrical connected load Current 4.30 5.65... -
Page 23: Dimensions Condair Da 160
Dimensions Condair DA 160 ø100 ø63 Abb. 16: Dimensions Condair DA 160 Dimensions Condair DA 250 - 440 356.6 ø125 ø80 Abb. 17: Dimensions Condair DA 250 - 440 Product specification... -
Page 24: Performance Chart Condair Da 160
Dry air: X = 5,8 g/kg, t = 20 + 12,2 = 32,2°C = Absolute humidity process air = Absolute humidity dry air = Temperature process air = Temperature dry air Abb. 18: Performance chart Condair DA 160 Product specification... -
Page 25: Performance Chart Condair Da 250
Dry air: X = 6,1 g/kg, t = 20 + 8,5 = 28,5°C = Absolute humidity process air = Absolute humidity dry air = Temperature process air = Temperature dry air Abb. 19: Performance chart Condair DA 250 Product specification... -
Page 26: Performance Chart Condair Da 440
Dry air: X = 6,0 g/kg, t = 20 + 8,5 = 28,5°C = Absolute humidity process air = Absolute humidity dry air = Temperature process air = Temperature dry air Abb. 20: Performance chart Condair DA 440 Product specification... -
Page 27: Spare Parts
Spare parts 10.1 Spare parts Condair DA 160 Part Part No. Technical specification Numbers Numbers of installed recommended spare parts Drive motor Gear motor 230-240 V 50 Hz 3 rpm, low temp grease Belt pulley DA 160-belt-pulley Drive belt DA 160-drive-belt... -
Page 28: Spare Parts Condair Da 440
10.3 Spare parts Condair DA 440 Part Part No. Technical specification Numbers Numbers of installed recommended spare parts Drive motor Gear motor 230-240 V 50 Hz 4 rpm low temp grease Belt pulley DA 440-belt-pulley Drive belt DA 440-drive-belt Process air fan... -
Page 29: Electrical Wiring Diagrams
11.1 Electrical wiring diagram Condair DA 160 Hygrostat brown blue yellow/green brown blue yellow/green Abb. 21: Electrical wiring diagram Condair DA 160 Pos. Component Type Number Manufacturer Gear motor 230 V, 50 Hz, 3 rpm 823055BJ Crouzet AB Radial fan, K2E 190-RA26-09... -
Page 30: Electrical Wiring Diagram Condair Da 250
11.2 Electrical wiring diagram Condair DA 250 Hygrostat brown blue yellow/green brown blue yellow/green Abb. 22: Electrical wiring diagram Condair DA 250 Pos. Component Type Number Manufacturer Gear motor 230 V, 50 Hz, 3 rpm 823055BJ Crouzet AB Radial fan, K2E 190-RA26-09... -
Page 31: Electrical Wiring Diagram Condair Da 440
11.3 Electrical wiring diagram Condair DA 440 Hygrostat brown blue yellow/green brown blue yellow/green Abb. 23: Electrical wiring diagram Condair DA 440 Pos. Component Type Number Manufacturer Gear motor 230 V, 50 Hz, 3 rpm 823055BJ Crouzet AB Radial fan, K3G190-RD45-03... -
Page 32: Eu Declaration Of Conformity
8808 Pfäffikon SZ Switzerland declare under own responsibility that the product: Condair Dehumidifier DA 160, DA 250, DA 440, DA 210, DA 400 and DA 450 which is detailed in this declaration complies to the following harmonized European standards and technical specifications:... - Page 33 Notes...
- Page 34 Notizen...
- Page 36 CONSULTING, SALES AND SERVICE: CH94/0002.00 Condair Group AG Gwattstrasse 17, 8808 Pfäffikon SZ, Switzerland Phone +41 55 416 61 11, Fax +41 55 588 00 07 info@condair.com, www.condair-group.com...
Need help?
Do you have a question about the DA Series and is the answer not in the manual?
Questions and answers