Seca 954 User Manual
Electronic scale
Hide thumbs
Also See for 954:
- Instruction manual and guarantee (297 pages) ,
- Service manual (67 pages) ,
- Instruction manual and guarantee (13 pages)
Table of Contents
Advertisement
Advertisement
Table of Contents

Related Manuals for Seca 954


Summary of Contents for Seca 954
-
Page 2: Table Of Contents
7.1 Introduction ....73 Assembling the push handle . . 58 seca wireless groups..73 Assembling the display housing 58 Channels. - Page 3 English 13. Spare parts ....83 15. Warranty ....84 14.
-
Page 4: Full Certification
1. FULL CERTIFICATION With products from seca you are not only purchasing technology developed over a century, but also quality that has been validated by official bodies, the legal sys- tem and relevant institutes. seca products comply with European directives, standards and national laws. With seca you are buying into the future. -
Page 5: Description Of Device
954 purchased a highly precise and simultaneously robust weighing instrument. seca has put its experience at the service of health care for over 170 years and as a market leader in many countries, is constantly setting new standards with its innovative developments for weighing and measure- ment. -
Page 6: Safety Information
• Have the scales serviced regularly (see "Maintenance" on page 81). • Make sure that maintenance and repair are only carried out by an authorised service partner. You can find your local service partner at www.seca.com or just send an e-mail to service@seca.com. 50 •... -
Page 7: Use Of Measured Results
English • Make sure you only use genuine seca accessories and spare parts. Otherwise the warranty provided by seca will become null and void. • Make sure RF equipment such as mobile phones is kept at a minimum distance of approx. 1 metre to prevent incorrect measurements or interference with radio transmission. -
Page 8: Handling (Rechargeable) Batteries
3.3 Handling (rechargeable) batteries This instrument is delivered with a rechargeable battery block. Heed the following safety instructions. WARNING! Personal injury with improper handling Batteries contain harmful substances which may explode if not handled properly. – Do not try to recharge such batteries. –... -
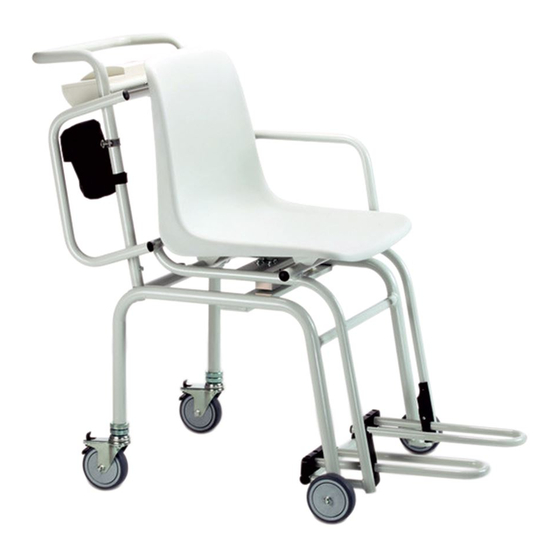
Page 9: Overview
English 4. OVERVIEW 4.1 Controls/Features No. Control/Feature Function To switch scales off and on Arrow key • While weighing: - Short press: Activate hold function - Long press: Activate tare function tare • On the menu: - Select submenu, select menu element - Increase value Arrow key •... -
Page 10: Symbols In Display
No. Control/Feature Function Enter key While weighing (if wireless network is set up): - Short press: Send measurement result to receive- ready instruments (PC with USB wireless adapter) - Long press: Print out measurement result (wireless printer) • On the menu: - Confirm selected menu element - Save set value Display element for measured results and for device... -
Page 11: Information On Rating Plate
English 4.3 Information on rating plate Text/Symbol Meaning Model Model number Type Type designation Ser. No. Serial number Refer to user manual Type B electromedical device Class II totally insulated appliance For USA: FCC ID Device licensing number issued by US authority FCC (Federal Communications Commission) For Canada: Device licensing number issued by authority Industry... -
Page 12: Menu Structure
360° *Wireless network • wireless • Group (ID): Autoprint • HI_MA Max. 3 seca wireless groups: 0, 1, 2 • Maximum configuration per *Funknetzwerk seca 360° Wireless: wireless group: • Year Raum (ID): - 1 set of baby scales •... -
Page 13: Before You Get Started
Hexagon nut M4 self-locking Sheet metal screw, hexagon socket, 6.3 x 38 Box nut, M10 Washer 10.5 mm Power pack carrier pouch seca 471 Power pack Rechargeable battery block Allen wrench, SW5 mm, not shown Instructions for use, not shown... -
Page 14: Assembling The Instrument
5.2 Assembling the instrument Assembling the push handle 1. Put the push handle on the pins of the lower frame. 2. Screw the handle to the lower frame (2 x hexagon screw M6x16 with washer 6.4 mm). Assembling the display 1. -
Page 15: Fastening The Weighing Cell
English Fastening the weighing cell cable ATTENTION! Malfunction due to assembly error If the cables are assembled so that they are under voltage, e.g. if they are bent sharply or plugs are snapped off, this can cause faulty dis- plays and failure of the display. –... -
Page 16: Assembling The Seat
Assembling the seat 1. Position the seat on the seat frame. 2. Screw the seat to the seat frame (4x sheet metal screw, hexagon socket, 6.3 x 38). Assembling the armrests 60 •... -
Page 17: Establishing The Power Supply
English ATTENTION! Malfunction due to assembly error If the armrest is positioned incorrectly before assembly, it cannot be folded down after assembly. – Position the armrest as depicted in the figure. 1. Insert the bolt for the armrest through the hinge sleeve of the seat frame. -
Page 18: Connect The Power Supply Unit
This may cause the scales to overheat, catch fire, melt or short-circuit. – Only use genuine seca plug-in power supply units with 9 V or a controlled 12 V output voltage. 1. Insert the power plug necessary for your power supply in the power supply unit. -
Page 19: Operation
English 6. OPERATION 6.1 Weighing CAUTION! Patients can be injured if they fall People with limited mobility can fall if they try to sit down on the scale. – Make sure that the scale’s wheel brakes are set. – Assist people with limited mobility when they are sitting down. -
Page 20: Start Weighing
Start weighing 1. Set the wheel brakes of the rear transport rollers. 2. Fold the armrest toward the back in order to make it easier for the patient to sit down. 3. Make sure that the scale has no load. 4. -
Page 21: Tare Off Additional Weight
English Tare off additional You can use the TARE function to prevent the weighing weight (TARE) result from being affected by an additional weight (e.g. a towel or pad on the weighing surface). ATTENTION! Incorrect measurement with force shunt If an additional weight (e.g. large towel) is in contact with the surface on which the scales are standing, the weight will not be measured correctly. -
Page 22: Determine And Evaluate Body Mass Index (Bmi)
The display will flash until a stable weight is mea- sured. The weighing value will then be displayed continuously. The symbol (non-calibratable func- tion) and the message "HOLD" will be displayed. 5. To disable the HOLD function, briefly press the ar- row key (hold/tare). -
Page 23: Transmit Measured Results To A Radio Receiver
NOTE: The prerequisite for this function is that the equipment devices are logged into a wireless group (see "seca 360° wireless Network" on page 73). 1. Carry out weighing. 2. Briefly press the Enter key (send/print) on the scales. -
Page 24: Switch Off Scales
4. Hold down the Enter key (send/print) on the length measuring device. The measured value is sent to the wireless printer. The BMI is calculated. The height, weight and BMI will be printed out. Switch off scales Press the Start key. NOTE: In rechargeable battery operation, the scale switches off after a short time if there is no load... -
Page 25: Navigate In The Menu
English Navigate in the menu 1. Switch on the scales. 2. Hold down the arrow key (bmi/menu) until the menu is called up. The last menu item selected is shown in the display (here: Autohold "Ahold"). 3. Keep pressing one of the arrow keys until the re- quired menu item appears in the display (here: at- tare tenuation "Fil"). -
Page 26: Permanently Store Additional Weight (Pt)
Permanently store You can use the Pre-Tare function to permanently store additional weight (Pt) an additional weight and automatically deduct it from the measured result. You can for example store a flat- rate figure as the weight of shoes and clothing and then always deduct it from the measured result when a patient is weighed fully dressed. -
Page 27: Activate Acoustic Signals (Beep)
English 1. Select the item "Ahold" in the menu. 2. Confirm the selection. The current selection is displayed. 3. Select the setting you require: – On – Off 4. Confirm your selection. You will leave the menu automatically. Activate acoustic You can select whether an acoustic signal is to be signals (BEEP) emitted whenever a key is pressed or a stable weighing... -
Page 28: Switch Weight Unit (Unit)
3. Select an attenuation level. – 0: no attenuation – 1: moderate attenuation – 2: high attenuation 4. Confirm the selection. You will leave the menu automatically. Switch weight unit With uncalibrated scales you can select the unit you wish to use for displaying the weight. (Unit) 1. -
Page 29: Seca 360° Wireless Network
The following combination of devices is possible per wireless group: • 1 set of baby scales • 1 set of personal scales • 1 length measuring device • 1 seca wireless printer • 1 PC with seca USB wireless module seca 360° wireless Network • 73... -
Page 30: Channels
MO 3). The meaning of the numbers is as follows: • 1: Personal scales • 2: Length measuring device • 3: Wireless printer • 4: PC with seca USB wireless module • 7: Baby scales • 5, 6 and 8-12: Reserved for system expansion 74 •... -
Page 31: Operate Scales In A Wireless Group (Menu)
English 7.2 Operate scales in a wireless group (menu) All functions required to operate the device in a seca wireless group can be found in the submenu "rF". Information how to navigate in the menu can be found onpage 69. - Page 32 3. Select the item "rF" in the menu. 4. Confirm the selection. 5. Select the menu item "lrn" (learn) in the "rf" submenu. 6. Confirm the selection. The wireless group currently selected (here: wireless group 0 "ID 0") is displayed. If the wireless group "0"...
-
Page 33: Activate Automatic Transmission (Asend)
(APrt)" on page 78). 1. Switch the device on. 2. Select the menu item "ASend" in the "rf" submenu and confirm your selection. 3. Select "on" and confirm your selection. You will leave the menu automatically. seca 360° wireless Network • 77... -
Page 34: Select Print Option (Aprt)
NOTE: This function is only available if the "learn" func- tion has been used to integrate a seca wireless printer in the wireless group. 1. Switch the device on. 2. Select the menu item "APrt" in the "rf" submenu and confirm your selection. -
Page 35: Cleaning
English 7. Confirm your selection each time. After confirming your selection for Minute you will leave the menu automatically. These selections will be automatically transmitted to the wireless printer. The wireless printer automatically adds the date and time to every printout. NOTE: For further operation of the wireless printer see its user manual. - Page 36 • The instrument was not able to send any mea- surement results to the wireless receiver (seca wireless printer or PC with seca USB wireless adapter). – Check that the scales are integrated in the wireless network.
-
Page 37: Maintenance
(Lrn)" on page 75). played? 10.MAINTENANCE Your seca scales leave the factory with an accuracy greater than ±0.3%. To preserve this level of accuracy the product must be set up carefully and serviced regu- larly. We recommend having it serviced every 3 to 5 years depending on how often the scales are used. - Page 38 Technical data for seca 954 Height of figures 25 mm Rechargeable battery block Power supply Power pack Power consumption • with wireless module disabled approx. 32 mA • with wireless module activated approx. 50 mA Maximum runtime in rechargeable battery operation •...
-
Page 39: Accessories
264 Wireless printer • country-specific variants seca 360° Wireless Printer 465 • country-specific variants seca 360° Wireless Printer Advanced 466 PC software • application-specific licence seca analytics 105 packages 456-00-00-009 seca 360° Wireless USB adapter 456 13.SPARE PARTS... - Page 40 The warranty shall become null and void where the device is opened by persons not expressly authorised to do so by seca. We ask customers based abroad to contact their local sales agent direct in the case of warranty claims.
- Page 42 Konformitätserklärung declaration of conformity Certificat de conformité Dichiarazione di conformità Declaratión de conformidad Overensstemmelsesattest Försäkran om överensstämmelse Konformitetserklæring vaatimuksenmukaisuusvakuutus Verklaring van overeenkomst Declaração de conformidade Δήλωση Συμβατότητας Prohlášení o shodĕ Vastavusdeklaratsioon Megfelelőségi nyilatkozat Atitikties patvirtinimas Atbilstības apliecinājums Oświadczenie o zgodności Izjava o skladnosti Vyhlásenie o zhode Onay belgesi...
- Page 43 Die nichtselbsttätige Personenwaage The non-automatic personal scales Le pèse-personnes non automatique La bilancia pesapersone non automatica La báscula no automática pesapersona Den ikke-automatiske personvægt Den icke automatisk personvåg Den ikke-automatiske personvekten Ei-automaattinen henkilövaaka De niet-automatische personenweegschaal A balança não automática para pessoas Η...