
Related Manuals for JT2D Deluxe

Summary of Contents for JT2D Deluxe
- Page 1 TRAMPOLINES INSTRUCTIONS’ MANUAL TRAMPOLINES WITH INSIDE AND OUTSIDE NETS BEFORE FIRST USE, READ THE SAFETY INSTRUCTIONS CAREFULLY Instructions’ Manual available in more languages (FR, EN, ES, IT, DE) on : www.jump4fun.fr/notices...
- Page 2 SOMMAIRE Page 3 Introduction Page 5 General instruction Page 10 Inventory of the parts of your trampoline Page 14 Trampoline assembly Page 17 Springs graphics Page 23 Setting the springs Page 24 Settings the protective foam Page 25 Assembly of the safety net Page 28 Tests and checking the safety net Page 29 Fundamental bouncing techniques Page 30 Guarantees Page 31 Standards and after sales service...
- Page 3 INTRODUCTION We thank you for purchasing this trampoline. This instruction Manual is valid for all our trampolines classic and deluxe 6FT, 8FT, 10FT, 12FT, 13FT, 14FT. Before using the trampoline, read this manual to assess the precautions of use and assembly.
- Page 4 Before you start using this trampoline, you should read all the information in this manual. As with any type of physical activity, the use of this trampoline requires special attention because participants can be injured. To reduce the risk of injury, please read the appropriate safety rules and advice carefully.
- Page 5 GENERAL INSTRUCTIONS Placing the trampoline The minimum space around the trampoline must be 2m, this space must be clear of any object (walls, electrical wires, tree branches, fence, fence, garage etc.). Please note the following tips : Place the trampoline on a non-slip horizontal surface Clear the space around the trampoline No obstruction under the trampoline No obstruction above the trampoline...
- Page 6 The metal structure of the trampoline can conduct electricity. Lightning, extension cords and all electrical equipment must never come into contact with the trampoline. When mounting or dismounting, please use gloves to protect your hands. For added stability, you can place sandbags on the trampoline feet. This will prevent the trampoline from tipping over in the event of lateral force.
- Page 7 commercial warranty. Do not use the trampoline under the influence of alcohol or drugs. Do not sit or lean on the cushion as it must be flexible to be able to move with the jumping mat. Be careful that small children do not get up using the cushions. Tears caused by bearing blockage are not covered by the commercial warranty.
- Page 8 Loss of control : When users lose control, they may not land properly on the mat, chassis or springs. Always keep the protective foams on top of them. Before performing more complicated jumps, you must first master the basic jumps. If the user is tired or tries to make a jump that exceeds his or her abilities, there is a risk of injury.
- Page 9 Warnings Be careful. The maximum authorized weight is between 75kg and 120kg; Maximum weight for each trampoline model 6 FT - 1,85m 8 FT - 2,44m 10 FT - 3,05m 12 FT - 3,66m 13 FT - 4,00m 14 FT - 4,27m 75 kg 75 kg 150 kg...
- Page 10 INVENTORY OF THE PARTS OF YOUR TRAMPOLINE IMPORTANT: For inventory, please refer to the column corresponding to characteristics of the controlled trampoline - depending on the number of support stockings, also called feet and the number of poles. DESCRIPTIONS QUANTITIES 1,85 2,44 Trampoline diameter in meters 3,05m 3,66m 4,00m 4,27m Size of the trampoline in FT 6FT 8FT 10FT 12FT 13FT 14FT A Bottom structure tubes B Bottom structure extension tubes 10 10 12 12 12 12 C Circular tubes 10 10...
- Page 11 DESCRIPTIONS IMAGES QUANTITIES Bag of screws for bottom 6FT 8FT 10FT 12FT 13FT 14FT structure Screws M8 x 16* 20* 20* 16 24* 24* 16 24* 24* 12mm O2 Rings 8mm 20 16 24 16 24 Clamping wrench Bag of screws for net 6FT 8FT 10FT 12FT 13FT 14FT structure Screws M6 x 10 16 12 16 12 75mm...
- Page 13 TECHNICAL CHARACTERISTICS OF YOUR TRAMPOLINE Diameter of the 6FT = 8FT = 10FT = 12FT = 13FT = 14FT = jumping mat 186 cm 244 cm 305 cm 366 cm 400 cm 427cm Maximum weight 75 kg 75 kg 150 kg 150 kg 150 kg 150 kg Height floor- 55cm 65cm 75cm 80cm 80cm 80cm carpet Height carpets- 143cm 163cm 183cm 183cm 183cm 183cm top poles Height floor – top 198cm 228cm 258cm 263cm...
- Page 14 4. In a second step, assemble the feet to the top circular frame. Attach the feet using the screws on the top frame. Use the small screws (O1) and the rings (O2). Please use the 2 middles holes ( one each side) located on the tubes to secure the safety net bars using the wrench (O3). 6. When finished, here's how your trampoline should look. 7. To attach the jumping mat, the sewing section should be face down, then put it (I) inside. Finally, attach a spring (D) in one of the holes. Join the other end of the spring to the frame. The carpet should be logo up. Use the key (E) to put the springs. Repeat the steps directly in front of where you connected the first spring. Then attach two more...
- Page 15 springs on one side and after, fix the other sides of these 2 springs. This will ensure equal tension between each spring. Please respect each step of the trampoline assembly. TYPES OF TRAMPOLINES...
- Page 16 SPRINGS GRAPHICS IMPORTANT: this procedure must be rigorously followed, if this is not the case, the base structure may bend and will not fall within the scope of the warranty. Please refer to the graphics below for the rest of the setup, depending on the trampoline you purchased. Trampoline 1,85 m = 6FT - 36 springs...
- Page 17 Trampoline 2,44 m = 8FT - 48 springs Trampoline 3,05 m = 10FT – 3 feet - 60 springs...
- Page 18 Trampoline 3,05 m = 10FT – 4 feet - 64 springs Trampoline 3,66 m = 12FT – 5 feet - 70 springs...
- Page 19 Trampoline 3,66 m = 12FT – 4 feet - 72 springs Trampoline 4m = 13FT – 4 feet - 80 springs...
- Page 20 Trampoline 4m = 13FT – 6 feet - 84 springs Trampoline 4,27 m = 14FT – 4 feet - 80 springs...
- Page 21 Trampoline 4,27 m = 14FT – 6 feet - 84 springs...
- Page 22 SETTING THE SPRINGS 8. Repeat the process for each spring (D). Use the T-shaped tool to make it easier for you (part E of the Notice). 9. Be sure to follow the assembly steps in the order established as below depending on the size of your trampoline. Always put the springs in front of each other so as not to twist the frame. 10. Here is the presentation once all springs laid - Trampoline 8FT model:...
- Page 23 SETTINGS THE PROTECTIVE FOAM 11. You can now put the protective foam (H) over the springs. 12. Attach the protective foam (H) with the elastic ties. 13. Perform the verification. Your trampoline should be this way.
- Page 24 ASSEMBLY OF THE SAFETY NET Please check the list of parts that make up the entire safety net for inventory. Caution: 2 people in good physical condition may be necessary for the assembly of the safety net. The following images may differ depending on the model and are non-contractual. Insert tubes / poles (F and G) together, put foam pads on top and bottom. Repeat for each tube.
- Page 25 Attach each bar / pole (steps 1 & 2) to the trampoline frame. Use the parts of the Screw Bag Inventory for the Net Structure (P). Pass the 2 screws (P1) in the locations of the tube G. On the other side, put the plastic end (P4), pass the assembly in the existing reinforcement, add the washer (P2), then the nut (P3), and screw together with a wrench (P5). Insert the protective foam as above. Repeat for each tube. Repeat step # 3 for all tubes. Make sure that each tube is correctly inserted. Once all these steps are complete, remove your shoes, climb onto the jump mat, then add pole tops (piece L - for the inner threads) or plugs (piece M - to the outer threads) on each pole. Piece L Piece M...
- Page 26 Steps 6 to 10 for the Trampoline with inner thread : Using the straps provided, please secure the safety net. Pass the straps inside the room L, pass the end (where there is no loop) in the loop, so that the strap is attached to the piece L. On the net, there is a double stainless-steel location, pass the end of the strap in the 2 loops, then between the 2 on the way back. Tighten the ensemble. Repeat steps 6 and 7 according to the number of fasteners to be positioned. Secure the bottom of the net with the string provided with the Safety Net (J). Thread the string through the safety net, then into each loop of the jump mat. Once you have walked around the trampoline, tighten slightly so that the entire net is tight.
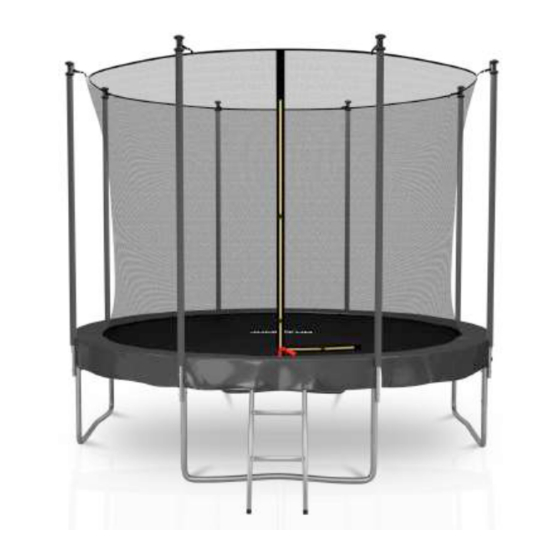
- Page 27 Steps 6 to 8 for the trampoline with external net : 6. Thread the covers of the safety net poles onto them. First, place the first 40 centimetres on each pole and then lower the 20 cm covers into 20 centimetres on each pole, and so on. 7. Secure the bottom of the net with the clips on the base of the safety net. Assemble the clips to the loop of the jump mat. The safety net must pass outside the protective foams (G). 8. Your trampoline should now look like this. The number of poles and feet may vary depending on the model purchased.
- Page 28 TRAMPOLINE TESTS After assembling the trampoline, it is important to perform the following safety checks: - Make sure that each screw is correctly screwed with a screwdriver. - Look under the trampoline and check that all springs and hooks are properly put. - Using both hands, press a part of the trampoline and then release, to check that it does not take off from the ground. - Check the installation of protective foams covering the springs. - Make sure the ropes and elastics are well maintained. CHECKING THE SAFETY NET - Check the correct holding of the poles holding the net by shaking them. - Make sure that no clothing or projecting object is likely to damage the protective foams or the net. - Check the correct operation of the zipper and the entrance of the net. - Check that the hooks of the fasteners of the net are well placed, looking below the jumping mat. After all tests have been successfully completed, it is possible for an adult to test the trampoline by jumping in the centre continuously for 5 minutes. If the trampoline does not show any sign of instability then your trampoline can be used by the whole family.
- Page 29 JUMPING TECHNIQUES It is recommended to read this to understand and improve in basic jumps. The basic jump : • Start by positioning as the figure shows, feet apart in the extension of the shoulders. • Swing your arms forward and up and around in a circular motion. • Join your feet by pointing your toes down. • Keep your legs apart by shoulder width. Control manoeuvre: • It happens to lose control during a jump and to rebound in an uncontrolled way. The following manoeuvre will allow the user to regain control.
- Page 30 GUARANTEES Your Trampoline has a 1 year warranty for normal use and following the assembly instructions. The warranty is not valid against bad weather. Beyond the warranty period, you can visit the website for any spare parts or accessories. Legal guarantees: Article L.217-4 of the Consumer Code: The seller delivers a good in accordance with the contract and responds to defects of conformity existing at the time of delivery. He also responds to the lack of conformity resulting from the packaging, assembly instructions or the installation when it was charged to him by the contract or was carried out under his responsibility.
- Page 31 Commercial warranty: Our Jump4Fun trampolines and all their parts have a commercial warranty of 2 years when purchased directly on the following websites www.jump4fun.fr or www.jt2d.com, from the date of delivery, under normal conditions of use. The warranty is limited to the exchange of the product or to the delivery of the spare parts, subject to the presentation of the purchase invoice by the buyer. The warranty does not cover damage due to negligence, misuse, poor maintenance or natural wear of the product. There is a one-year commercial warranty on the Jump4Fun trampoline frame (feet, leg extensions, circular tubes, springs) as well as on the trampoline jumping mat purchased from one of our online retailers (Showroomprive.com, Venteprivee.com, Cdiscount.com, Amazon.fr, etc ...) from the date of delivery, under normal conditions of use.
Need help?
Do you have a question about the Deluxe and is the answer not in the manual?
Questions and answers