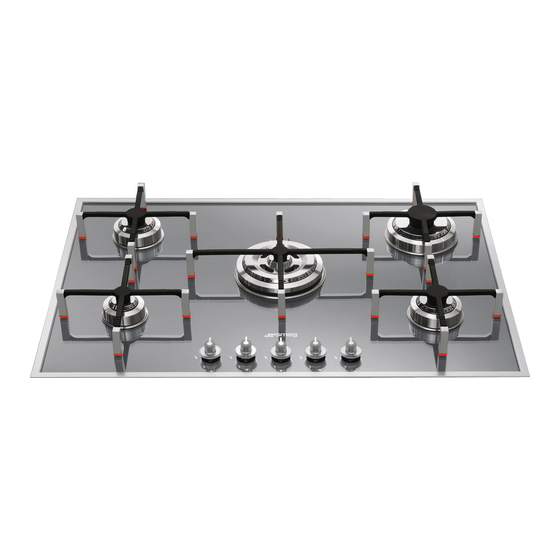
Smeg PVA750BE Instruction Manual

Smeg PVA750BE Instruction Manual

Smeg cooking hob instruction manual

Advertisement

1. Precautions for safety and use________________________ 22
2. Fitting the appliance in the top ________________________ 23
2.1 Fixing to the supporting structure _______________________________________23
2.2 Fitting the adhesive foam rubber strip____________________________________24
2.3 Fitting the fixing clips ________________________________________________24
2.4 Fitting the hob into the hole in the work-top _______________________________25
3. Electrical connection _______________________________ 26
4. Gas connection ___________________________________ 27
4.1 Bottled gas connection _______________________________________________27
4.2 Room ventilation ____________________________________________________27
4.3 Combustion gas discharge ____________________________________________27
5. Adapting to different types of gas______________________ 28
5.1 Removing the hob skin _______________________________________________28
5.2 Adjusting for bottled gas ______________________________________________29
5.3 Adjusting for natural gas ______________________________________________29
5.4 Adjusting the primary air flow __________________________________________30
5.5 Reassembling the hob skin____________________________________________31
5.6 Adjusting the minimum setting for natural ga ______________________________31
5.7 Adjusting the minimum for bottled gas ___________________________________31
5.8 Hob burner layout ___________________________________________________31
5.9 Greasing the gas taps________________________________________________31
6. Description of controls ______________________________ 32
6.1 The front panel _____________________________________________________32
7. Using the hob _____________________________________ 33
7.1 Fitting the pan stands ________________________________________________33
7.2 Lighting burners with safety device______________________________________36
7.3 Practical hints for using the burners _____________________________________36
7.4 Pan diameters______________________________________________________36
Cleaning and maintenance ____________________________ 37
7.5 Cleaning the hob____________________________________________________37
7.7 Cleaning the components _____________________________________________37
THESE INSTRUCTIONS ONLY APPLY TO THE COUNTRIES OF DESTINATION WHOSE
IDENTIFICATION SYMBOLS ARE LISTED ON THE COVER OF THIS MANUAL.
THIS BUILT-IN HOB IS CLASSIFIED AS CLASS 3.
INSTRUCTIONS FOR THE INSTALLER: these are intended for the qualified
engineer who is to check the gas supply system and install, commission and test the
appliance.
INSTRUCTIONS FOR THE USER: these provide recommendations for use, a
description of the controls and the correct procedures for cleaning and maintaining the
appliance.
Contents
21

Advertisement

Table of Contents
loading

Summary of Contents for Smeg PVA750BE

  • Page 1: Table Of Contents

    1. Precautions for safety and use________________________ 22 2. Fitting the appliance in the top ________________________ 23 2.1 Fixing to the supporting structure _______________________________________23 2.2 Fitting the adhesive foam rubber strip____________________________________24 2.3 Fitting the fixing clips ________________________________________________24 2.4 Fitting the hob into the hole in the work-top _______________________________25 3.
  • Page 2: Precautions For Safety And Use

    Precautions for Safety and Use Precautions for safety and use THIS MANUAL IS AN INTEGRAL PART OF THE APPLIANCE. TAKE GOOD CARE OF IT AND KEEP IT TO HAND THROUGHOUT THE HOB'S LIFE CYCLE. USERS ARE ADVISED TO READ THIS MANUAL AND ALL THE INSTRUCTIONS IT CONTAINS BEFORE USING THE HOB.
  • Page 3: Fitting The Appliance In The Top

    Instructions for the Installer Fitting the appliance in the top If the hob has to be adapted for a type of gas different from the one for which it is preset in the factory, make this adjusting before building it into the unit, following the instructions in point “5.
  • Page 4: Fitting The Adhesive Foam Rubber Strip

    Instructions for the Installer 2.2 Fitting the adhesive foam rubber strip Fit the adhesive foam rubber strip (supplied with the hob) around the outside edge of its surround. It will act as a cushion between the surface of the surround and that of the cabinet.
  • Page 5: Fitting The Hob Into The Hole In The Work-Top

    Instructions for the Installer 2.4 Fitting the hob into the hole in the work-top Take special care when fitting the hob into the work-top. If the procedures are not carried out correctly, exactly as described, the hob may be damaged. Before fitting the hob, remove the pan stands (if fitted) and the burners from the hob.
  • Page 6: Electrical Connection

    Instructions for the Installer Electrical connection Check that the power supply line voltage and size are as specified on the nameplate underneath the appliance's casing. This nameplate must never be removed. The plug on the end of the power supply lead and the wall socket must be of the same type and comply with the relevant regulations.
  • Page 7: Gas Connection

    Instructions for the Installer Gas connection If the appliance is installed above an oven, the gas hose must be passed around the back of the oven to prevent overheating. The connection to the gas mains may be made using a copper pipe or a continuous-wall steel hose in accordance with the relevant regulations.
  • Page 8: Adapting To Different Types Of Gas

    Instructions for the Installer Adapting to different types of gas The operations described below must be carried out with the appliance not built-in and not connected to the gas or electricity supply. The appliance is tested with G20 (2H) natural gas at the pressure of 20 mbar. If it is to be used with other types of gas, the burner nozzles have to be changed and the primary air flow adjusted.
  • Page 9: Adjusting For Bottled Gas

    Instructions for the Installer 5.2 Adjusting for bottled gas Undo the screw C and push the air regulator D fully down. Remove the nozzle E with a 7 mm spanner and fit the suitable one, following the instructions in the tables referring to the type of gas to be used.
  • Page 10: Adjusting The Primary Air Flow

    Instructions for the Installer 5.4 Adjusting the primary air flow Refers to the gap “X” in mm. BURNER Auxiliary Semi rapid Rapid Ultra Rapid To identify the burners on your hob, refer to the drawings in point “5.8 Hob burner layout”.
  • Page 11: Reassembling The Hob Skin

    Instructions for the Installer 5.5 Reassembling the hob skin Reverse the procedure described in point “5.1 Removing the hob skin”. When replacing the cover plates, check that the seals are fitted correctly. Fit the pan stands as described in point 5.6 Adjusting the minimum setting for natural ga Reassemble the components on the burner and fit the knobs onto the tap rods.
  • Page 12: Description Of Controls

    Instructions for the User Description of controls 6.1 The front panel All the hob's control and monitoring devices are placed together on the front panel. KNOB OPERATING MODE To light the flame, press the knob and at the same time turn it anti-clockwise to the minimum flame symbol .
  • Page 13: Using The Hob

    Instructions for the User Using the hob Check that the fixing cover plates E, the burners, the flame diffuser rings and the pan stands are fitted correctly. The projections A on the flame diffuser rings must be fitted into the recesses B in the burner. The holes C in the burner must mate with the ignition plugs and thermocouples D on the hob.
  • Page 14 Instructions for the User At the ends of the legs of the racks there are silicone rests with a hole that must be centred onto the matching fixing pins on the hob. Make sure that the pan stands are simply fitted over their burners, and are not left in a raised or tilted position;...
  • Page 15 Instructions for the User After performing the operations described above (for each pan stand), the hob will be as shown below, with the feet of the pan stands forming a pattern of horizontal and vertical lines. If a pan wobbles noticeably, check that the pan stands have not been fitted incorrectly.
  • Page 16: Lighting Burners With Safety Device

    Instructions for the User 7.2 Lighting burners with safety device The burner it controls is shown next to each knob (the example here shows the front left-hand burner). The appliance is equipped with electronic ignition. Simply press the knob and turn it anti-clockwise to the minimum flame symbol pressed down for about 2 seconds to keep the flame alight and prime the safety device.
  • Page 17: Cleaning And Maintenance

    Instructions for the User Cleaning and maintenance Before carrying out any operations, disconnect the appliance from the electricity supply. Never use a jet of steam for cleaning the appliance. 7.5 Cleaning the hob To keep the hob in good condition, it must be cleaned regularly, after each use, first allowing it to cool.
  • Page 18 Instructions for the User 7.7.3 The flame diffuser rings The burner caps and flame diffuser rings can be removed for easier cleaning; wash them in hot water and non-abrasive detergent, taking care to remove all deposits, and wait for them to dry completely. The burner pins A must be fitted into the recesses B in the flame diffuser ring.

Table of Contents