
Related Manuals for Roland VersaStudio BT-12


Summary of Contents for Roland VersaStudio BT-12
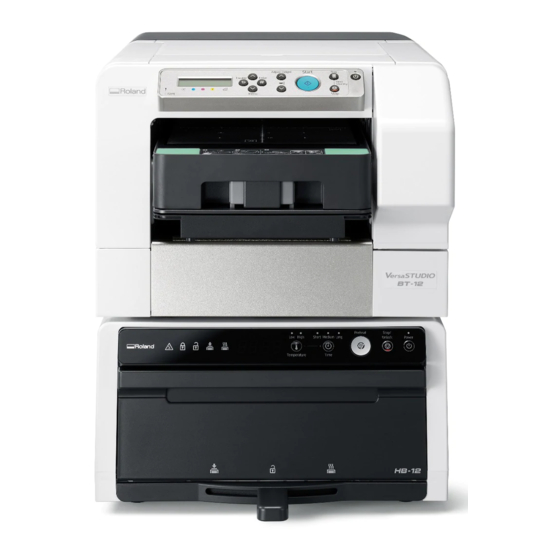
- Page 1 Operating Instructions For safe and correct use, be sure to read Safety Information before using the machine. ...
-
Page 3: Table Of Contents
TABLE OF CONTENTS Notice .............................. 7 Important ............................ 7 User's Notes ........................... 7 How to Read This Manual ........................ 1 0 Symbols ............................ 1 0 Notes ............................ 1 0 Model‐Specific Information ....................... 1 1 Presentation of the Product Names in This Manual .............. 1 1 1. About This Product ...................... 1 3 ... - Page 4 Connecting the Machine via Ethernet Interface ................ 4 5 Network Settings for Ethernet ..................... 4 7 Installing the Printer Driver ...................... 4 8 Installing the Printer Driver Manually Using the Network ............ 5 0 Fabric .............................. 5 6 Usable Fabric .......................... 5 6 Precautions Regarding Fabric....................... 5 6 Loading Fabrics .......................... 5 8 Loading a Fabric in the Standard Tray .................. 5 8 Loading Socks in the Sleeve & Socks Tray .................. ...
- Page 5 Using the [List/Test Print] Menu ...................... 9 6 Printing a Configuration Page ...................... 9 6 Interpreting the Configuration Page .................... 9 7 Using the [Maintenance] Menu ...................... 9 8 Nozzle Check .......................... 9 9 Head‐cleaning .......................... 1 01 Head‐flushing .......................... 1 02 Head Position .......................... 1 04 Registration .......................... 1 07 Setting the Date and Time ...................... ...
- Page 6 Canceling Printing on a Macintosh .................... 1 56 Canceling a Print Job from the Print Job Queue Window ............ 1 56 Opening Help on a Macintosh ...................... 1 57 8. Maintenance ........................ 1 59 Restricting Machine Functions ...................... 1 59 Locking the Keys ......................... 1 59 Unlocking the Keys ........................ 1 59 Replacing an Ink Cartridge ....................... 1 60 Checking the Remaining Ink ...
- Page 7 Removing a Fabric or Foreign Object by Opening the Top Cover .......... 1 93 Print Results Are Not Satisfactory .................... 1 96 Prints are Unsatisfactory ...................... 1 96 Colors Do Not Match the Displayed Image ................ 1 99 Positions Do Not Match the Displayed Image ................ 2 00 Other Problems .......................... 2 00 Checking the Consumables ...................... 2 01 If a Message Appears during Installation .................. 2 02 Error & Status Messages on the Display ...
- Page 8 Where to Inquire .......................... 2 23 Recommended Consumables ...................... 2 24 Options and Consumables ....................... 2 25 Trademarks ............................ 2 26 INDEX .......................... 2 27 6 ...
-
Page 9: Notice
Notice Important In no event will the company be liable for direct, indirect, special, incidental, or consequential damages as a result of handling or operating the machine. For good output quality, the manufacturer recommends that you use genuine ink from the manufacturer. The manufacturer shall not be responsible for any damage or expense that might result from the use of parts other than genuine parts from the manufacturer with your office products. User's Notes High temperatures inside the machine can cause a breakdown. Do not lean anything against • the vent or block it in any way. 1. Vent Warm air from the vent is normal and not a cause for concern. • Do not leave the top or right front cover open. If you do, dust or other matter might get inside • the machine, and this will reduce print quality. During printing, do not move the machine or open its covers. • Do not open the top or right front cover during printing. If you do, printing will stop. • 7 ... - Page 10 Do not touch ink tubes or toothed rubber belt. Also, take care not to catch cables or ink tubes • with your sleeves. DSA504 Toothed rubber b elt 2. Ink tubes Take care not to drop foreign objects inside the machine. • After you install the ink cartridge and turn the machine on for the first time, the print head • priming process will begin. This process sometimes clogs the print head. If this happens, perform the head cleaning procedure. During printing, do not turn off the power or unplug the power cord from the wall outlet. • During printing, do not subject the machine to external shock. • When not using the machine, turn off the power. • You can place up to 10 kg (22.1 lb.) of evenly spread weight on the machine. Do not place any • concentrated weight of more than 2.5 kg (5.6 lb.) on the machine. Do not place unsteady objects on the machine. If they fall, they will cause injury to users • and/or damage to the machine. "Pages Printed" displays the number of pages printed. Use "Pages Printed" to estimate the • number of pages that can be printed within the machine's remaining operational life. The machine's operational life is calculated based on the number of pages that it can print in [Speed] mode. Depending on your printing document, the ink collector unit may fill up sooner than normal. • "Prepare new Ink Collector Unit" message appears shortly before the ink collector unit is full. Although the machine remains usable until the unit is completely full, contact your sales or service representative as early as possible (charge incurred). Ink cartridges should be used up before their expiry date, ideally within six months of being •...
- Page 11 This machine performs regular automatic maintenance, after and during printing, to ensure • consistent print quality. Maintenance is also performed when printing begins after a period of disuse. Color ink may be used even if you print all‐black text or if you specify black and white printing. • It may also be used for print head cleaning and refreshing, which are done to maintain machine performance. If the machine will not be used for a long time, turn its power off, disconnect the USB cable or • Ethernet cable, and unplug the power cord from the wall outlet. If you do not use the machine for three months or longer, clean the internal compartments using the dedicated cleaning cartridge in advance. For the cleaning method, see page 118 "Clean Internals". Because the machine consumes a lot of ink for maintenance and print head cleaning when turned on after a long period of inactivity, we recommend you use the machine at least once a month. Do not move the machine while it is powered. Even when it is off, make sure the machine is • on a level surface and safe from shock and vibration. Do not turn the machine off while it is busy. Make sure the machine is idle before turning it • off. 9 ...
-
Page 12: How To Read This Manual
How to Read This Manual Be sure to read this section before anything else. This guide uses Windows 7 procedures for its examples. Procedures and screens might vary depending on the operating system you are using. Symbols This manual uses the following symbols: Indicates points to pay attention to when using the functions. As this also includes points which may cause loss of data, be sure to read these explanations. Indicates supplementary explanations of the machine's functions, and instructions on resolving user errors. [ ] Indicates the names of keys on the machine's display or control panels. (mainly Europe, Asia, and China) (mainly North America) Differences in the functions of Region A and Region B models are indicated by two symbols. Read the information indicated by the symbol that corresponds to the region of the model you are using. For details about which symbol corresponds to the model you are using, see ... -
Page 13: Model-Specific Information
There is a label on the rear of the machine, located in the position shown below. The label contains details that identify the region your machine belongs to. Read the label. DYX057 The following information is region‐specific. Read the information under the symbol that corresponds to the region of your machine. (mainly Europe, Asia, and China) If the label contains the following, your machine is a region A model: CODE XXXX ‐21, ‐27, ‐29 • 220‐240 V • (mainly North America) If the label contains the following, your machine is a region B model: CODE XXXX ‐17 • 100‐120 V • Dimensions in this manual are given in two units of measure: metric and inch. If your • machine is a Region A model, refer to the metric units. If your machine is a Region B model, refer to the inch units. Presentation of the Product Names in This Manual This section describes the abbreviations of the standard products and options in this manual. Product name Abbreviation Roland CT‐A4 A4 standard tray Roland CT‐A5 A5 tray Tray for Sleeve & Socks Sleeve & Socks Tray Roland HB‐12 Finisher Roland TPG‐BK Ink cartridge ‐ Black 11 ... - Page 14 Product name Abbreviation Roland TPG‐CY Ink cartridge ‐ Cyan Roland TPG‐MG Ink cartridge ‐ Magenta Roland TPG‐YE Ink cartridge ‐ Yellow Ink Collection Unit Ink collector unit Cleaning Liquid Cleaning liquid Cleaning Cartridge K Cleaning cartridge Cleaning Cartridge C Cleaning cartridge Cleaning Cartridge M Cleaning cartridge Cleaning Cartridge Y Cleaning cartridge Cleaning Tool Cleaning tool Cleaning Stick Absorbent Cleaning Absorber Cleaning stick Fan Filter Filter Roland Design Software Design Software 12 ...
-
Page 15: About This Product
1. About This Product This chapter describes the names and functions of the machine's parts and options. Guide to Components Front View DSB065 1. Vent Air is vented here to prevent the inside of the machine from getting too warm. Do not lean anything against the vent or block it in any way. If the inside of the machine gets too warm, a breakdown could occur. 2. Rear Cover 3. Top Cover Normally, keep this cover closed. For safety reasons, opening or closing the top cover will cause the power to turn off immediately. Do not open or close the top cover when not required, such as while printing is performed. When a message prompting you to open the top cover appears on the display, follow the instructions. 4. Filter If a message prompting you to replace the filter appears, replace it. ... -
Page 16: Left Side View
1. About This Product 5. Right Front Cover Normally, keep this cover closed. Open this cover only when you need to install or replace an ink cartridge or replace the ink collector unit. 6. Indentations for Lifting 7. Tray Stand Stand for setting the tray. Left Side View DSB066 Ethernet port Port for connecting the 100BASE‐TX or 10BASE‐T cable. USB port Port for connecting the USB2.0 interface cable. Power cover A cover to protect the power cord. Power inlet Plug the power cord. 14 ... -
Page 17: Tray (A4 Standard Tray)
Guide to Components Manual Pocket Set the "User's Guide" supplied with this machine. Installing the Manual Pocket DYX011 Tray (A4 Standard Tray) You can print within an A4 size (210 × 297 mm) (8.3 × 11.7 inches) area on a garment using this tray. DSA108 Table A stand for setting fabrics. Cover Open the cover when setting fabrics on the table. Unlock Button Press to unlock and open the cover. Tray Positioning Line Align this line with the edge of the machine when installing the tray. 15 ... -
Page 18: Tray (A5 Tray)
1. About This Product Tray (A5 Tray) You can print within an A5 size (148 × 210 mm) (5.9 × 8.3 inches) area on a garment using this tray. DSA109 Table A stand for setting fabrics. Cover Open the cover when setting fabrics on the table. Unlock Button Press to unlock and open the cover Tray Positioning Line Align this line with the edge of the machine when installing the tray. 16 ... -
Page 19: Tray (Sleeve & Socks Tray)
Guide to Components Tray (Sleeve & Socks Tray) You can print sleeve or socks using this tray. DYX061 Table A stand for setting fabrics. Cover Open the cover when setting fabrics on the table. Tray Positioning Line Align this line with the edge of the machine when installing the tray Unlock Button Press to unlock and open the cover. 17 ... -
Page 20: Control Panel
1. About This Product Control Panel 1. Display Displays the current machine status and messages. 2. [Escape] key Press this key to return to the previous condition on the display. [ ], [ /Menu] keys Use these keys to increase or decrease values on the display when making settings. Keep the key pressed to quicken scrolling, and increase or decrease values on the display in units of 10. To apply this function: under [Maintenance], set [Key Repeat] to [On]. See page 98 "Using the [Maintenance] Menu". When the machine is in standby mode, press the [ /Menu] key to make and check the current machine settings. 4. [#Enter] key Press this key to execute menu items selected on the display. 5. [Start] key Start printing. LED of the [Start] key lights up when the machine is ready to start printing and flashes when it is printing. 6. [Tray] key Press this key to move the tray forcibly to the front. Power lamp Lights up when the power is on. Flashes when the machine is receiving data from a computer or if there is data to be printed. Alert indicator Lights up or blinks whenever a machine error occurs. If the red light is on, follow the instructions that appear on the display. See page 203 "Error & Status Messages on the Display". ... - Page 21 Control Panel Cartridge replacement indicator Each color corresponds to an ink cartridge. K, C, M, and Y indicate black, cyan, magenta, and yellow, respectively. The amount of ink remaining in each ink cartridge is indicated on the six‐level display. Waste ink full indicator The amount of waste ink is indicated on the six‐level display. A message appears when it is time to replace the ink collector unit. [Adjust Height ], [Adjust Height ] keys Move the height of the tray up and down to adjust the height. Holding down the key, you can adjust the height of the tray quickly. To apply this function, set [Key Repeat] to [On]. See page 98 "Using the [Maintenance] Menu". [Stop] key When the machine is online, press this key to cancel an ongoing print job. No‐Fuss Head Cleaning When the machine is in standby mode, press the [Stop] and [Tray] keys at the same time to perform head cleaning for all colors. [Power] key Press this key to turn the power on. To turn the power off, press and hold down this key for one second. See page 22 "Turning On/Off the Power". ...
-
Page 22: Loading And Removing The Tray
1. About This Product Loading and Removing the Tray Tray Type The following three types of trays can be used with this machine. For fabrics that can be used for each tray, see page 56 "Usable Fabric". • A4 standard tray Use this tray when printing within an A4 size area on a fabric. DSA334 • A5 tray Use this tray when printing within an A5 size area on a fabric. DSA335 • Sleeve & Socks Tray Use this tray when printing on sleeve or socks. DYX062 Loading the Tray Place the rear side of the tray on the tray stand, and then slowly push it in all the way until you hear it click. When the tray positioning line matches the edge of the machine, the tray is correctly loaded. 20 ... -
Page 23: Removing The Tray
Loading and Removing the Tray DSA063 Removing the Tray After printing is completed, remove the tray once it returns and stops at the position so that you can see the tray positioning line on the left side of the tray. When the [Start] key is lit up, printing has not yet completed. Press the [Start] key again without removing or moving the tray from the machine. Printing starts again. When using the A4 standard tray or A5 tray, insert the protection cover horizontally as illustrated in the figure, and then remove it with the A4 standard tray or A5 tray. This prevents you from coming into contact with the printing surface. Make sure the protection cover is correctly positioned horizontally. DYX008 21 ... -
Page 24: Turning On/Off The Power
1. About This Product Turning On/Off the Power • When you turn the machine off, make sure you press and hold down the [Power] key. If you unplug the Power cord from the wall outlet, ink consumption for maintenance operations may increase. Turning on the power Press the [Power] key. If the machine starts warming up, the power lamp flashes and the "Waiting..." message will be displayed. If the machine becomes printable, the power lamp lights and the "Ready" message will be displayed. Turning off the power Press and hold down the [Power] key for one second. When the machine is in shutdown mode, the "Shutting down..." message is displayed. When the machine stops, the power lamp and the display turn off. • To cut electricity consumption completely, press the [Power] key for one second, and check that the power lamp is turned off. Then, unplug the power cord from the wall outlet. • When switching off the energy saving power strip (power strip with a switch), be sure to turn off the machine before following the above procedures. • Energy Saver mode is available for this machine. If you do not use this machine for a specified time after turning it on, the machine will be in Energy Saver mode automatically, and electricity consumption of the machine will be reduced. To specify a wait period for ... -
Page 25: Preparing For Printing
2. Preparing for Printing This chapter describes installation and setup procedures. Setup Procedure This section explains the tasks necessary for printing. Install and set up the machine by following the steps in the order shown. Step Task Reference for Full Details Check the installation environment. page 24 "Checking the Computer and 1 Installation Area" page 28 "Checking the Supplied Items and Check the supplied items. 2 Unpacking the Machine " Install the ink cartridges. page 31 "Installing the Ink Cartridges" 3 page 34 "Plugging in the Power Cord and Plug in the power cord and turn on the power, 4 Turning the Power On " and then supply ink to the machine. Load a fabric. page 58 "Loading Fabrics" 5 page 96 "Printing a Configuration Page" Perform a test print. 6 Connect the machine and computer and page 38 "Connecting the Computer and 7 Installing the Software (USB Connection)" ... -
Page 26: Checking The Computer And Installation Area
2. Preparing for Printing Checking the Computer and Installation Area The machine's location should be carefully chosen because environmental conditions greatly affect its performance. The area where the machine is to be placed • Do not use flammable sprays or solvents in the vicinity of this machine. Also, avoid placing these items in the vicinity of this machine. Doing so could result in fire or electric shock. • Do not place vases, plant pots, cups, toiletries, medicines, small metal objects, or containers holding w ater o r a ny o ther l iquids, o n o r c lose t o t his m achine. F ire o r e lectric s hock c ould result from spillage or if such objects or substances fall inside this machine. ... - Page 27 Checking the Computer and Installation Area • areas of high/low temperature and high/low moisture • humidifying appliances • oil stoves and ammonia‐emitting appliances (such as diazo copiers) • Do not place the machine on an unstable surface. The vibration of the machine could deteriorate the print quality. Place the machine on a stable surface. Choose a flat, stable area to install the machine. • The surface should be level within two degrees, left to right and front to back. • To prevent condensation, install the machine in an area where temperature and humidity conditions do not exceed those indicated in the diagram below. • The machine may cease to print if these limitations are exceeded. (mainly Europe, Asia, and China) 10°C 90% 40°C 90% 15°C 32°C 15°C 32°C 10°C 5% 40°C 5% °C DSA256 (mainly North America) 50°F 90% 104°F 90% 59°F 89.6°F 89.6°F...
-
Page 28: Checking The Power Source
2. Preparing for Printing DYX042 27 cm (10.6 inches) 10 cm (4.0 inches) 53 cm (20.9 inches) 25 cm (9.9 inches) 10 cm (4.0 inches) Checking the power source • Do not use any power sources other than those that match the specifications shown. Doing so could result in fire or electric shock. • Do not use any frequencies other than those that match the specifications shown. Doing so could result in fire or electric shock. • Do not use multi‐socket adaptors. Doing so could result in fire or electric shock. • Do not use extension cords. Doing so could result in fire or electric shock. • Do not use power cords that are damaged, broken, or modified. Also, do not use power cords that have been trapped under heavy objects, pulled hard, or bent severely. Doing so could result in fire or electric shock. • Touching the prongs of the power cable's plug with anything metallic constitutes a fire and electric shock hazard. • It is dangerous to handle the power cord plug with wet hands. Doing so could result in electric shock. 26 ... -
Page 29: Checking The Computer To Be Connected
Checking the Computer and Installation Area • The supplied power cord is for use with this machine only. Do not use it with other appliances. Doing so could result in fire or electric shock. • If the power cord is damaged and its inner wires are exposed or broken, contact your service representative for a replacement. Use of damaged power cords could result in fire or electric shock.result in fire or electric shock. • Be sure to locate the machine as close as possible to a wall outlet. This will allow easy disconnection of the power cord in the event of an emergency. • Be sure to push the plug of the power cord fully into the wall outlet. Partially inserted plugs create an unstable connection that can result in unsafe buildup of heat occur. (mainly Europe, Asia, and China) Power Source 220‐240V, 0.6A or more, 50/60Hz Please be sure to connect the power cord to a power source as above. (mainly North America) Power Source 100‐120V, 1A or more, 60Hz Please be sure to connect the power cord to a power source as above. Checking the Computer to be Connected To use this machine, computers must meet the following specifications: • PC/AT‐compatible computer with USB or network interface • Operating system: Windows 7/8.1/10 Mac OS X 10.11 and later versions • For the required hard disk free space and amount of memory installed, follow the system requirements of each operating system. ... -
Page 30: Checking The Supplied Items And Unpacking The Machine
2. Preparing for Printing Checking the Supplied Items and Unpacking the Machine • The following explains the warning messages on the plastic bag used in this product's packaging. • Keep the polythene materials (bags, etc.) supplied with this machine away from babies and small children at all times. Suffocation can result if polythene materials are brought into contact with the mouth or nose. • The printer weighs around 24 kg (53.0 lb). • Hold the lift indentations at the base of the machine's sides with two people or more. Lift it slowly and do not strain your body. • When moving the machine, be sure to remove the tray and manual pocket. Lifting the machine forcefully or treating it roughly may break it or result in injury. • Do not turn the machine on until you have read how to do so. Open the box and take out all supplied items. Check that all the following items are present: • A4 standard tray • Protection cover • Maintenance kit • Power Cord • Quick Installation Guide • Safety Information ... - Page 31 Checking the Supplied Items and Unpacking the Machine • Replacing the Ink Collection Unit • CD‐ROM • Manual Pocket Take off the protective covering. Remove the plastic bag. Lift the machine and move it to the place where you want to install it. Grip the indentations for lifting at the base of the machine's sides with two people or more, as shown. Lift and carry the machine slowly and carefully. DSB067 Remove all orange adhesive tapes from the machine body. Remove the protection cover from the tray. DSA191 Remove the adhesive tape from the tray. Remove the adhesive tape partway. ...
- Page 32 2. Preparing for Printing DSA192 Press the unlock button and lift the cover, and then remove the adhesive tape the rest of the way. DSA193 Install the manual pocket. DYX011 Set the "User's Guide" supplied with this machine to the manual pocket. • We recommend you keep the box, so you can use it again when moving the machine. • USB and LAN cables are not supplied. 30 ...
-
Page 33: Installing The Ink Cartridges
Installing the Ink Cartridges Installing the Ink Cartridges • Keep ink and ink containers out of reach of children. • If ink gets into contact with eyes, wash eyes immediately with running water. Consult a doctor if necessary. • When replacing ink, avoid getting ink on your clothing. If ink comes into contact with your clothing, wash the stained area with cold water. Hot water will set the ink into the fabric and make removing the stain impossible. • When replacing ink, avoid getting ink on your skin. If ink comes into contact with your skin, wash the affected area thoroughly with soap and water. • When removing the ink cartridge, avoid putting your hand near the place where the ink cartridge is installed. If ink comes in contact with your hands, wash them thoroughly with soap and water. • Some ink is consumed to fill the print heads when you turn on the machine for the first time. Therefore, the number of pages to be printed will be smaller than when normal cartridges are used. • When installing the ink cartridge, do not touch the inside of the machine. • Do not turn the machine on until you have read how to do so. • Be sure to install the unused ink cartridge that is genuine. Installing any other cartridge could result in incomplete ink filling and malfunction. Remove the packaging from the ink cartridges. Do not touch the ink supply ports or silicon substrates of ink cartridges. ... - Page 34 2. Preparing for Printing Open the right front cover. DYX030 Check the orientation of each cartridge, and then install them gently. DSA159 Install in the following order from the left: black, cyan, magenta, and yellow. Push in each cartridge. DSA160 Repeat steps 3 to 4 for all four cartridges. 32 ...
- Page 35 Installing the Ink Cartridges Close the right front cover. DYX013 ...
-
Page 36: Plugging In The Power Cord And Turning The Power
2. Preparing for Printing Plugging in the Power Cord and Turning the Power On Before connecting the machine to a computer, connect the machine's power cord and turn the machine on. • Do not use any power sources other than those that match the specifications shown in this manual. Doing so could result in fire or electric shock. • Do not use any frequencies other than those that match the specifications shown. Doing so could result in fire or electric shock. • Do not use multi‐socket adaptors. Doing so could result in fire or electric shock. • Do not use extension cords. Doing so could result in fire or electric shock. • Do not use power cords that are damaged, broken, or modified. Also, do not use power cords that have been trapped under heavy objects, pulled hard, or bent severely. Doing so could result in fire or electric shock. • Touching the prongs of the power cable's plug with anything metallic constitutes a fire and electric shock hazard. • It is dangerous to handle the power cord plug with wet hands. Doing so could result in electric shock. • The supplied power cord is for use with this machine only. Do not use it with other appliances. Doing so could result in fire or electric shock. • If the power cord is damaged and its inner wires are exposed or broken, contact your service representative for a replacement. Use of damaged power cords could result in fire or electric shock. ... - Page 37 Plugging in the Power Cord and Turning the Power On • When disconnecting the power cord from the wall outlet, always pull the plug, not the cord. Pulling the cord can damage the power cord. Use of damaged power cords could result in fire or electric shock. • Do not handle the machine while the cartridge is being filled. • Some ink is consumed to fill the print heads when you turn on the machine for the first time. Plug the power cord fully into the machine. DSB068 Open the power cover. DSB069 Set the power cord as shown in the figure, and then close the power cover. DSB070...
- Page 38 2. Preparing for Printing Plug the power cord fully into the wall outlet. CHU251 The surface should be level within two degrees. Make sure the power cord is not trapped under the machine. Press the [Power] key. The machine starts feeding ink into its print heads. Leave the machine idle for about seven minutes until the message "Ready" appears. Do not remove the plug from the wall outlet while the ink is being fed. You might hear a clicking sound while the print heads are being filled. This is not a malfunction and it will stop after a while. When the supplying of ink is complete, the power lamp changes from flashing to remaining lit. 36 ...
-
Page 39: Connecting The Computer And Installing The Printer Driver
Connecting the Computer and Installing the Printer Driver Connecting the Computer and Installing the Printer Driver The machine has two connection methods: USB and wired. Check the flow from connecting the computer to installing the printer driver by looking at the following table: Connection method Reference for full details page 38 "Connecting the Computer and Installing the Software (USB USB Connection)" Connect the machine to the computer via USB Install the driver Wired page 45 "Connecting the Computer and Installing the Software (Network Connection)" Connect the machine to the computer via an Ethernet cable Configure network settings Install the driver ... -
Page 40: Connecting The Computer And Installing The Software (Usb Connection)
2. Preparing for Printing Connecting the Computer and Installing the Software (USB Connection) Connect the machine to the computer via a USB cable. Then, install the printer driver. Finally, configure the network share settings as necessary. This guide uses Windows 7/10 procedures for its examples. Procedures and screens might vary depending on the operating system you are using. Connecting the Machine via USB Make sure the machine is off. Turn on the power of the computer. Quit all applications currently running. If the "Add New Hardware Wizard" appears, click [Cancel], and then turn the machine off. Open the port cover. DYX017 38 ... -
Page 41: Installing The Printer Driver
Connecting the Computer and Installing the Software (USB Connection) Insert the USB cable's hexagonal (type B) plug into the port. Check the shape and direction of the plug and make sure the cable is fully inserted. DYX018 Close the port cover. DYX048 Insert the USB cable's rectangular (type A) plug into the computer's USB port. Check the shape and direction of the plug and make sure the cable is fully inserted. • When also sharing the machine connected via USB over a network, connect the machine to the computer in accordance with the explanation above. For the share settings, see page 43 "Sharing the Printer". Installing the Printer Driver Once the machine is connected to the computer, install the printer driver. There are two installation methods. Install the printer driver using one of these methods. • Quick Install for USB Install the printer driver automatically. See page 40 "Quick Install for USB". • Manual install Configure the settings of the printer driver manually and install it. See page 41 "Installing the printer driver manually using a USB cable". ... - Page 42 2. Preparing for Printing • When sharing the machine connected via USB over a network, configure the share settings upon installing the printer driver. See page 43 "Sharing the Printer". Quick Install for USB Follow the procedure below to install the printer driver. • Do not turn the machine on until you have read how to do so. • Only administrators can perform this installation. Log on as a member of the Administrators group. Notes on the Installation • Ignore the Windows security warning if it appears during installation and continue with the installation. • If the "Add New Hardware Wizard" appears, click [Cancel], and then turn the machine off. Insert the driver CD in the CD‐ROM drive. Quit all other applications currently running. Select a language for the interface, and then click [OK]. Click [Quick Install for USB]. Read the entire license agreement carefully. If you accept its terms, click [I accept the agreement.], and then click [Next >]. Check that the power of the machine is off, and then click [Next >]. Installation starts. Ignore the Windows security warning if it appears during installation and continue with the installation. Make sure that the computer and machine are properly connected, and then press the [Power] key. Click [Yes] to specify the machine as the default printer. 40 ...
- Page 43 Connecting the Computer and Installing the Software (USB Connection) Select whether or not to open the Status Monitor automatically, and then click [Next >]. If you want to make initial settings for the printer, click [Set Now]. Make initial settings, and then click [OK]. Click [Finish]. The printer driver is now installed. When you insert the CD‐ROM, the installer launches. Auto Run might not work automatically • with certain OS settings. If this is the case, double‐click "SETUP.EXE", located on the CD‐ROM root directory, or click [Run SETUP.EXE] in the [AutoPlay] dialog box. • If a message prompting you to restart the computer appears, restart the computer. • In order to confirm that the printer driver is correctly installed, check that the power lamp is lit, and then perform a test print. To perform a test print, open the properties of the printer driver and click [Print Test Page] under the [General] tab. If the test page does not print properly, see page 184 "If Test Print Fails". Installing the printer driver manually using a USB cable This section explains how to install the printer driver manually by connecting the machine to a computer using a USB cable. If you installed the printer driver by performing Quick Install for USB, there is no need to install it again. • Only administrators can perform this installation. Log on as a member of the Administrators group. • Do not turn the machine on until you have read how to do so. Insert the driver CD in the CD‐ROM drive. Quit all other applications currently running. If the "Add New Hardware Wizard" appears, click [Cancel], and then turn the machine off. ...
- Page 44 2. Preparing for Printing When you insert the CD‐ROM, the installer launches. Auto Run might not work automatically with certain OS settings. If this is the case, double‐click "SETUP.EXE", located on the CD‐ROM root directory, or click [Run SETUP.EXE] in the [AutoPlay] dialog box. If the screen does not appear even when you double‐click the [SETUP.EXE] icon, or if an error occurs during the installation, access the CD‐ROM drive. Double‐click the [RP_SETUPXX.EXE] icon in the [DRIVERS] folder, and then install the printer driver by following the instructions that appear on the screen. Select a language for the interface, and then click [OK]. Click [Printer Driver]. Read the entire license agreement carefully. If you accept its terms, click [I accept the agreement.], and then click [Next >]. Click [Connect USB cable], and then click [Next >]. Check that the power of the machine is off, and then click [Next >]. Installation starts. Ignore the Windows security warning if it appears during installation and continue with the installation. Make sure that the computer and machine are properly connected, and then press the [Power] key. Click [Yes] to specify the machine as the default printer. Select whether or not to open the Status Monitor automatically, and then click [Next >]. If you want to make initial settings for the printer, click [Set Now]. Make initial settings, and then click [OK]. Click [Finish]. If a dialog box asking whether you want to restart now appears, select [Yes, restart now.], and then click [Finish]. • For details about sharing the printer, see page 43 "Sharing the Printer". 42 ...
-
Page 45: Sharing The Printer
Connecting the Computer and Installing the Software (USB Connection) • Confirm the printer driver is correctly installed by checking the Power lamp is lit, and then performing a test print. To perform a test print, open the [Printer Properties] dialog box, click [Print Test Page] on the [General] tab. If the test page does not print properly, see page 184 "If Test Print Fails". • If Windows Firewall is installed on the print server, configure exceptions in the firewall before using Status Monitor. For details about configuring the Windows Firewall settings, see page 208 "Status Monitor Does Not Open". Sharing the Printer This section explains how to share the printer over a network by connecting it via USB. To share the printer, specify the settings for sharing it on the computer that it is connected to so that the computer acts as a print server. Server Client computer Setting up a server • Only administrators can make this setting. Log on as a member of the Administrators group. On the [Start] menu, click [Control Panel]. • For Windows 10: Right‐click the [Start] button, and then click [Control Panel]. Click [Network and Internet]. Click [Network and Sharing Center]. ... - Page 46 2. Preparing for Printing Click [Change advanced sharing settings]. Click the chevron to expand [Home or Work (current profile)]. In [File and printer sharing], click [Turn on file and printer sharing]. Click [Save changes]. On the [Start] menu, click [Devices and Printers]. • For Windows 10: Right‐click the [Start] button, and then click [Control Panel]. Once the [Control Panel] window is displayed, click [View devices and printers]. Right‐click the machine you want to share, and then click [Printer properties]. Click the [Sharing] tab, and select the [Share this printer] check box. Click [OK]. Configure a computer connected to the network, where the print server is connected, as a client computer. See page 54 "Using as the Windows network printer". 44 ...
-
Page 47: Connecting The Computer And Installing The Software (Network Connection)
Connecting the Computer and Installing the Software (Network Connection) Connecting the Computer and Installing the Software (Network Connection) Connect the machine to the computer via an Ethernet cable. Then, configure the network settings in accordance with the network environment. Finally, install the printer driver. This guide uses Windows 7/10 procedures for its examples. Procedures and screens might vary depending on the operating system you are using. Connecting the Machine via Ethernet Interface Be sure to install all necessary network equipment, such as hubs, etc. before connecting the Ethernet cable to the machine. You can connect a 10BASE‐T or 100BASE‐TX cable to the machine. • Ethernet cables are not supplied with this machine. Select your cable according to the network environment. Open the port cover. DYX017 Plug the Ethernet cable into the port. DYX020... - Page 48 2. Preparing for Printing Connect the other end of the cable to the machine's network, such as to a hub. Check the LEDs on the Ethernet port. CHU123 Indicator (green) Lights whenever the machine is properly connected to the network. Indicator (yellow) Lights whenever the machine is sending or receiving data via the network. Close the port cover. DYX048 46 ...
-
Page 49: Network Settings For Ethernet
Connecting the Computer and Installing the Software (Network Connection) Network Settings for Ethernet Make the following network settings according to the network interface you are using. The following example explains how to allocate an IPv4 address. Press the [Power] key. Press the [ /Menu] key. Press the [ ] or [ /Menu] key to display the [Host Interface] menu, and then press the [#Enter] key. <Menu> Host Interface Press the [ ] or [ /Menu] key to display [Network Setup], and then press the [#Enter] key. <Host Interface> Network Setup Press the [ ] or [ /Menu] key to select [IPv4 Address], and then press [#Enter] key. <Network Setup> IPv4 Address The current IP address appears on the display. ... -
Page 50: Installing The Printer Driver
2. Preparing for Printing Press the [ ] or [ /Menu] key to enter the left most entry field of the IP address, and then press the [#Enter] key. <IPv4 Address> 01■ .022.033.044 To get an IP address for the machine, contact your network administrator. The value moves by 10 if the [ ] or [ /Menu] key is kept pressed. Press the [#Enter] key. The entered value is confirmed, and the cursor moves to the next field <IPv4 Address> 192.02■.033.044 To return to the previous field, press the [Escape] key. Specify values in all fields, and then press the [#Enter] key. Specify "IPv4 Subnet M." and "IPv4 Gatewy.Ad." in the same way. After you have made all the settings, press the [Escape] key. The specified settings are set and the initial screen reappears. You can print the configuration page to confirm the specified settings. For details about how to print a configuration page, see page 96 "Printing a Configuration Page". Installing the Printer Driver Once the machine is connected to the computer, install the printer driver. There are two installation methods. Install the printer driver using one of these methods. • Quick Install for Network Install the printer driver automatically. See page 48 "Quick Install for network". • Manual install Configure the settings of the printer driver manually and install it. See page 50 "Installing the Printer Driver Manually Using the Network". Quick Install for network Follow the procedure below to install the printer driver. •... - Page 51 Connecting the Computer and Installing the Software (Network Connection) Insert the driver CD in the CD‐ROM drive. Quit all other applications currently running. Select a language for the interface, and then click [OK]. Click [Quick Install for Network]. Read the entire license agreement carefully. If you accept its terms, click [I accept the agreement.], and then click [Next >]. Check that the power of the machine turns on, the Ethernet cable is connected, and the IP Address is set, and then click [Next]. Quit all other applications currently running. Click [Next >]. Click [Continue]. Installation starts. If you want to make initial settings for the printer, click [Set Now]. Make initial settings, and then click [OK]. Select whether or not to open the Status Monitor automatically, and then click [Next >]. Click [Finish]. When the dialog box asking whether you want to restart now appears, select [Yes, restart now.], and then click [Finish]. The printer driver is now installed. The installer launch automatically as Auto Run programs when you insert the CD‐ROM. Auto • Run might not work automatically with certain OS settings. If this is the case, double‐click "SETUP.EXE", located on the CD‐ROM root directory, or click [Run SETUP.EXE] in the [AutoPlay] dialog box. If a message prompting you to restart the computer appears, restart the computer. • Confirm the printer driver is correctly installed by checking the Power lamp is lit, and then • performing a test print. To perform a test print, open the [Printer Properties] dialog box, click [Print Test Page] on the [General] tab. If the test page does not print properly, see page 125 "Using the [Host Interface] Menu". ...
-
Page 52: Installing The Printer Driver Manually Using The Network
2. Preparing for Printing Installing the Printer Driver Manually Using the Network For a network connection, you can either perform direct printing (over a peer‐to‐peer network) using the Windows printer port or access the printer as a network printer via the print server. Using this Printer as the Windows Printing Port DYX053 Using as a Network Printer This printer can be used as the Windows network printer. See page 54 "Using as the Windows network printer". DYX054 50 ... - Page 53 Connecting the Computer and Installing the Software (Network Connection) Using the standard TCP/IP port This section explains how to install the printer driver (TCP/IP) and set up the Standard TCP/IP Port. • Only administrators can perform this installation. Log on as a member of the Administrators group. Insert the driver CD in the CD‐ROM drive. Quit all applications currently running. Select an interface language, and then click [OK]. Click [Printer Driver]. Read the entire license agreement carefully. If you accept its terms, click [I accept the agreement.], and then click [Next >]. Click [Connect to a printer port or LAN], and then click [Next >]. To search for printers automatically, select [Search for printers automatically], and then follow the wizard's instructions. To search for a printer by its IP address, select [Search for printers by specified IP Address], and then follow the wizard's instructions. If you do not search for a printer, select [Select a port or specify a new port]. In this example procedure, [Select a port or specify a new port] is selected. Select [Specify a new port] and click [Next >]. Click [Standard TCP/IP], and then click [Next >]. Click [Next >]. Enter the printer name or machine's IP address in the [Printer Name or IP Address] box, and then click [Next >]. Click [Finish]. If necessary, configure the default printer. If necessary, configure the setting for sharing the printer. Click [Continue]. The printer driver installation starts. If you want to make initial settings for the printer, click [Set Now]. Make initial settings, and then click [OK]. Select whether or not to open the Status Monitor automatically, and then click [Next >]. ...
- Page 54 2. Preparing for Printing Click [Finish]. If a dialog box asking whether you want to restart now appears, select [Yes, restart now.], and then click [Finish]. • Although the Windows security warning may appear during installation, ignore it and continue with the installation. • A message appears if there is a newer version of the printer driver already installed. If this is the case, you cannot install the printer driver using Auto Run. See page 202 "If a Message Appears during Installation". Using the LPR port This section explains how to install the printer driver (TCP/IP) and set up the LPR Port. • Only administrators can perform this installation. Log on as a member of the Administrators group. Insert the driver CD in the CD‐ROM drive. Quit all applications currently running. Select an interface language, and then click [OK]. Click [Printer Driver]. Read the entire license agreement carefully. If you accept its terms, click [I accept the agreement.], and then click [Next >]. Click [Connect to a printer port or LAN], and then click [Next >] To search for printers automatically, select [Search for printers automatically], and then follow the wizard's instructions. To search for a printer by its IP address, select [Search for printers by specified IP Address], and then follow the wizard's instructions. If you do not search for a printer, select [Select a port or specify a new port]. In this example procedure, [Select a port or specify a new port] is selected. Select [Specify a new port] and click [Next >]. Click [LPR Port], and then click [Next >]. If [LPR Port] does not appear, see Windows Help and install it. Enter the machine's IP address in the [Name or address of server providing lpd] box. Enter "lp" in the [Name of printer or print queue on that server] box, and then click [OK]. If necessary, configure the default printer. If necessary, configure the setting for sharing the printer. 52 ...
- Page 55 Connecting the Computer and Installing the Software (Network Connection) Click [Continue]. The printer driver installation starts. If you want to make initial settings for the printer, click [Set Now]. Make initial settings, and then click [OK]. Select whether or not to open the Status Monitor automatically, and then click [Next >]. Click [Finish]. If a dialog box asking whether you want to restart now appears, select [Yes, restart now.], and then click [Finish]. • Although the Windows security warning may appear during installation, ignore it and continue with the installation. • A message appears if there is a newer version of the printer driver already installed. If this is the case, you cannot install the printer driver using Auto Run. See page 202 "If a Message Appears during Installation". Using the IPP port On the [Start] menu, click [Devices and Printers]. • For Windows 10: Right‐click the [Start] button, and then click [Control Panel]. Once the [Control Panel] window is displayed, click [View devices and printers]. Click [Add a printer]. • For Windows 10: Go to step 4. Click [Add a network, wireless or Bluetooth printer]. Click [The printer that I want isn't listed]. In the [Select a shared printer by name] box, enter "http://(machine's IP address)/printer (or ipp)" as the printer's address, and then click [Next]. Click [Have Disk...]. Insert the CD‐ROM in the CD‐ROM drive. Click [Browse...], and then specify a location for the INF file. The Drivers are in the following folders on the supplied CD‐ROM. RPCS raster printer driver for the 32‐bit Windows • DRIVERS\X86\RPCS_R\X86\disk1 • RPCS raster printer driver for the 64‐bit Windows DRIVERS\X64\RPCS_R\X64\disk1 ...
- Page 56 2. Preparing for Printing Using as the Windows network printer This section assumes that the client has already been configured to communicate with a print server. Do not begin the following procedure before the client is set up and configured correctly. To use the print server, install the printer driver by selecting "Network printer server", and then select the shared printer. • Only administrators and power users can perform this installation. Log on as a member of the Administrators or Power Users group. • If you print with a Windows Vista/7/8.1/10, notification functions may not be used with the client. Insert the driver CD in the CD‐ROM drive. Quit all applications currently running. Select an interface language, and then click [OK]. Click [Printer Driver]. Read the entire license agreement carefully. If you accept its terms, click [I accept the agreement.], and then click [Next >]. Click [Connect to a printer port or LAN], and then click [Next >]. To search for printers automatically, select [Search for printers automatically], and then follow the wizard's instructions. To search for a printer by its IP address, select [Search for printers by specified IP Address], and then follow the wizard's instructions. If you do not search for a printer, select [Select a port or specify a new port]. In this example procedure, [Select a port or specify a new port] is selected. ...
- Page 57 Connecting the Computer and Installing the Software (Network Connection) Select whether or not to open the Status Monitor automatically, and then click [Next >]. Click [Finish]. If a dialog box asking whether you want to restart now appears, select [Yes, restart now.], and then click [Finish]. The installer launch automatically as Auto Run programs when you insert the CD‐ROM. Auto • Run might not work automatically with certain OS settings. If this is the case, double‐click "SETUP.EXE", located on the CD‐ROM root directory, or click [Run SETUP.EXE] in the [AutoPlay] dialog box. Although the Windows security warning may appear during installation, ignore it and •...
-
Page 58: Fabric
2. Preparing for Printing Fabric This section explains the usable fabric and precautions regarding fabric. Usable Fabric This machine can print on fabric having a 50 to 100% cotton blending ratio. The print quality of T‐shirts with pockets, polo sleeves (sleeve and back side), T‐shirts for pets, towels, handkerchiefs, bibs, etc. is not guaranteed. Use the machine at your own risk. • As the A4 standard tray and A5 tray becomes hot when continuously used on the optional finisher, give an interval of five minutes or longer to set them after they are pulled out. Precautions Regarding Fabric • When loading or removing fabric, keep your hands or fingers clear of the tray. Otherwise, your hands or fingers might get caught, resulting in injury. Loading fabric precautions • Remove dust or lint from the print side of the fabric with a lint brush or a roller beforehand. • Press down the fabric on the table as much as possible so that the fabric does not come off. Also, set the fabric parallel to the table. Fabric type precautions Thin fabrics • With thin fabrics, ink bleeding through them may adhere to other parts. You can avoid this happening by placing paper on the back side. Non‐compatible fabric • Fabrics having a cotton blend ratio of 50% or less (the machine cannot print on quick‐drying and dry fabrics) 56 ... - Page 59 Fabric Printable area Printable and unprintable areas CHU027 Front of the Tray Printable Area Windows: 3 mm (0.12 inches), Mac: 3 mm (0.12 inches) The printing ranges of each tray are as follows: • A4 standard tray: 291 × 204 mm (11.5 × 8.0 inches) • A5 tray: 204 × 142 mm (8.0 × 5.6 inches) • Sleeve & Socks Tray: 204 × 142mm (8.0 × 5.6 inches) ...
-
Page 60: Loading Fabrics
2. Preparing for Printing Loading Fabrics This section explains the procedures for loading fabrics. • When loading or removing fabrics, keep your hands or fingers clear of the tray. Otherwise, your hands or fingers might get caught, resulting in injury. Loading a Fabric in the Standard Tray This section explains how to load a fabric in the A4 standard tray. The same operation applies when the A5 tray is used. • When printing on thin fabrics, the ink may adhere to the table. Place paper or something similar on the table before loading the fabric. Press the [Power] key. Remove the tray after turning the power on. If the tray is mistakenly removed before turning the power on, turn the power off once, and then turn the power on again. Check that the tray stand comes to the front. If the tray stand does not come to the front, press the [Tray] key and move the tray to the front. Lift the tray slightly, pull it to the front to remove it. Press the unlock button and lift the cover. DSA348 Put marks on the fabric for when loading it in the tray. The image will be printed in the direction from the front side to the back side of the tray. Turn the protection cover inside out and put it on the fabric in the direction as shown in the figure, and then use a pen with erasable ink to make the marks through the holes in the protective cover. 58 ... - Page 61 Loading Fabrics DSA071 Load the fabric on the table. When loading the fabric, align the corners of the table with the marks on the fabric. • When loading a T‐shirt or sweatshirt DSA219 • When loading a canvas tote bag or natural cotton tote bag DSA220 When loading a medium size canvas tote bag or natural cotton tote bag in the A4 standard tray, the tray might not have enough space for the tote bag. If it is difficult to load the tote bag in the A4 standard tray, use the A5 tray for the tote bag. When you print on a natural cotton tote bag or a T‐shirt other than a Heavyweight T‐shirt, the ink may bleed through the fabric and stain other parts. You can prevent this staining by inserting a piece of paper against the inner side. ...
- Page 62 2. Preparing for Printing Tuck the edges of the fabric under the table. Smooth out the fabric so that no wrinkles or slack remain on the print surface. Tuck the fabric so that no wrinkles or folds remain in the area at the edges of the table. DSA370 After checking that no wrinkles or slack remains on the print side, close the cover. As you close the cover, smooth away wrinkles with your hand. Check that the fabric is not protruding from the tray. When using the optional finisher, smooth wrinkles and flatten fibers after loading the fabric in the tray. DSA014 After closing the cover, make sure that the fabric is loaded so its surface is parallel to the cover. DSA217 DSA218 60 ...
-
Page 63: Loading Socks In The Sleeve & Socks Tray
Loading Fabrics After closing the cover, if there are still wrinkles or slack on the printing surface at the center of the table, push both ends of the tray lightly and push the fabric under the table. After closing the cover, check that the fabric is not caught between the cover and the tray. DSA048 DSA049 Loading Socks in the Sleeve & Socks Tray When you want to print on socks, use the Sleeve & Socks Tray. • To use Sleeve & Socks Tray, you need to install the latest firmware (ver. 1.20 or later) on the machine. • If you perform printing with the edges of the fabric still outside of the table, the fabric or this machine might be damaged. After fixing the fabric, make sure that it fits within the width of the tray. • Do not forcibly lift or twist the table. Doing so may cause a failure. Press the [Power] key, and then turn on the machine. Detach the tray after turning on the machine. If you detach the tray before turning on the machine, turn it off first, and then turn it on again. Make sure that the tray stand is out of the machine, and then detach the tray. If it is not out of the machine, press the [Tray] key to eject the tray. Lift up the tray lightly and pull the tray to detach it. • ... - Page 64 2. Preparing for Printing Press the unlock button to open the cover. DYX063 Load the socks on the table. DYX064 Tuck the edges of the fabric under the table. DYX065 62 ...
- Page 65 Loading Fabrics Make sure that no wrinkles or slack remain on the print surface, and then close the cover. DYX066 Load the tray in the tray stand and start printing. DYX072 Printable area • Load the fabric so that its surface is as flat as possible and it is parallel to the table. Printable area of socks You can print socks in the positions shown. DYX074 Leg 2. Instep ...
-
Page 66: Loading A Sleeve In The Sleeve & Socks Tray
2. Preparing for Printing • Example: Instep When printing on the instep, widen and load the fabric so that the printable area of the instep is in the middle. DYX070 1. Printable area Loading a Sleeve in the Sleeve & Socks Tray When you want to print on the sleeves of a garment, use the Sleeve & Socks Tray. • To use Sleeve & Socks Tray, you need to install the latest firmware (ver. 1.20 or later) on the machine. • If you perform printing with the edges of the fabric still outside of the table, the fabric or this machine might be damaged. After fixing the fabric, make sure that it fits within the width of the tray. • Do not forcibly lift or twist the table. Doing so may cause a failure Press the [Power] key, and then turn on the machine. Detach the tray after turning on the machine. If you detach the tray before turning on the machine, turn it off first, and then turn it on again. Make sure that the tray stand is out of the machine, and then detach the tray. If it is not out of the machine, press the [Tray] key to eject the tray. • Lift up the tray lightly and pull the tray to detach it. • 64 ... - Page 67 Loading Fabrics Press the unlock button to open the cover. DYX063 Slip the sleeve onto the table. If you cannot slip it on, load it onto the table. Align the perforation with the indentation on the table. DYX067 Tuck the edges of the fabric under the table. DYX068...
- Page 68 2. Preparing for Printing Make sure that no wrinkles or slack remain on the print surface, and then close the cover. DYX069 Load the tray in the tray stand and start printing. DYX072 Printable area Printable area of sleeve You can print sleeve in the positions shown. DYX075 Collar Shoulder Sleeve 66 ...
- Page 69 Loading Fabrics You can print without margins on the sleeves. Cover the table with paper so the • table does not get dirty, and then position the sleeve of the garment. DYX071 1. Paper 2. Printable area ...
- Page 70 2. Preparing for Printing 68 ...
-
Page 71: Printing On T-Shirts
3. Printing on T‐shirts This section explains the procedures for printing on T‐shirts. In order to create printing data and perform printing, use the "Design Software" application dedicated for T‐shirt printing. For printing procedures using applications other than Design Software, see page 83 "4. Printing via the Printer Driver". About Design Software Design Software is application software for printing on T‐shirts using this machine. You can use this application by installing it on Windows or Mac. Operating Environment Use the Design Software under the following conditions: • Supported device: Devices running a Windows operating system or Microsoft .NET Framework 4.5 or later, devices running a Mac OS X® (iMac®, MacBook®, Mac mini®, etc.) • Supported operating system: Windows 7/8.1/10 (32‐bit/64‐bit), Mac OS X 10.11.x or later • Supported display resolutions: 1280 × 800 or higher • We cannot guarantee that Design Software operates properly if it is installed on an unsupported operating system even though it could be installed there. Installing Connect the CD‐ROM drive to the Windows or Mac and install the Design Software. Insert the driver CD into the CD‐ROM drive. If another application software is running, exit it. Click [Roland Design Software]. Follow the on‐screen instructions to install the application. When the Windows security warning appears during installation, ignore it and continue the installation. ... -
Page 72: Launching
3. Printing on T‐shirts Launching Windows: Click [All Programs] from the [Start] menu in Windows, and then click [Roland Design Software] ‐ [Roland Design Software]. Alternatively, double‐click the [Roland Design Software] shortcut created on the desktop. Mac: Click [Roland Design Software] from the [Launchpad]. Alternatively, double‐click [Roland Design Software] in the [Applications] folder of the [Finder]. Exiting Windows: When using a computer, click [×] in the top right corner of the application screen. When using a tablet, flick the tablet screen from the left edge to the center with your finger and tap [×] on the top right corner of [Roland Design Software] when it is displayed. Mac: Click [×] on the top left corner of the application screen. 70 ... -
Page 73: Creation Flow
Creation Flow Creation Flow The operation flow for printing on T‐shirts is as follows. Steps 3 to 7 are the operations using the Design Software. • To use Sleeve & Socks Tray, you need to install the latest firmware (ver. 1.20 or later) on the machine. • Use the latest version of the Design Software. See the latest help for the operating procedures. • Do not use the optional finisher for purposes other than flattening fibers, removing wrinkles, and fixing ink. Doing so may cause a fire. Step Task Reference for full details 1 This is the process to print on T‐shirts clearly. The page 72 "Removing Dust and optional finisher is used. Flattening Fibers" 2 Load a T‐shirt into the tray in accordance with the size page 73 "Loading a T‐shirt in of the T‐shirt. the Tray" 3 Launch the Design Software and configure the settings See the Design Software for the printing fabric you want to use. Help. 4 Select the tray size to be used and the printing See the Design Software direction in the Design Software. Help. 5 Select the image to print, and then fetch it in the ... -
Page 74: Removing Dust And Flattening Fibers
3. Printing on T‐shirts Removing Dust and Flattening Fibers This process is to print on T‐shirts clearly. The optional finisher is used. • As the A4 standard tray, A5 tray, and Sleeve & Socks Tray becomes hot when continuously used on the optional finisher, give an interval of five minutes or longer to set them after they are pulled out. • Do not print on wet fabric. Doing so may result in a blurry image. • Do not use the spray. If you wet the T‐shirt with the spray, the color of the tray may stain the back of the T‐shirt. • In high temperature environments, fabric might absorb moisture and stretch after smoothed. Print immediately after loading the fabric. • Remove dust and lint from fabric before printing because dust and lint whose color is the same with the fabric color are hard to find, we recommend using a lint roller to remove dust and lint from fabric before smoothing it. Remove dust and lint from the print surface of the T‐shirt. Remove them with a lint brush for clothes or a roller. Use the finisher to flatten fibers and remove wrinkles from the T‐shirt. • When using the finisher, you can carry out heat press processing for the T‐shirt loaded in the A4 standard tray, A5 tray, or Sleeve & Socks Tray. 72 ... -
Page 75: Loading A T-Shirt In The Tray
Loading a T‐shirt in the Tray Loading a T‐shirt in the Tray Load a T‐shirt in the tray. For details of the procedure, see page 58 "Loading a Fabric in the Standard Tray". • The image will be printed in the direction from the front side to the back side of the tray. Load the fabric so that it does not protrude from the tray. • ... -
Page 76: Printing
3. Printing on T‐shirts Printing Using the Design Software, perform printing. • Do not touch the tray or put your hand in the machine while printing is performed. • Do not open the top cover while printing is performed. Printing is forcibly interrupted and cannot be resumed. • When a garment misfeed error is indicated, see page 189 "Adjusting the Height of the Tray". • Do not print if no fabric is loaded on the tray. It may cause the ink to stick to the tray. After printing without loading a fabric in the tray, do the following: Solutions if Printing Was Performed Without a Fabric Loaded in the Tray 1. Wipe the tray with a dry cloth. Do not use tissue paper because it makes the tray dirty. Use polythene gloves to avoid touching the ink directly. Do not use chemicals such as thinner or ethanol. 2. Dry the remaining ink using the optional finisher or an iron. Stains might remain on the tray, which can still be used however. When using the optional finisher, use it in dry mode. When ironing, lay down a sheet of paper on the surface of the tray, and apply the iron to the paper. After drying the ink, rub the surface of the tray, with a cloth to check whether or not the ink is dry. If ink does not stick to the cloth, the ink has dried completely. Load the tray in the tray stand. Place the rear side of the tray in the tray stand, and then push it in slowly all the way until you hear it click. You can check if the tray is correctly positioned using the line on the left side of the tray. 74 ... - Page 77 Printing DSA063 Click [Start Printing] on the Design Software. DSB023 Printing data is sent to the machine. Once the machine receives the data correctly, the [Start] key on the machine lights up blue. Make sure that the [Start] key lights up blue, and then press the [Start] key. After the tray is loaded into the machine and the height of the table is automatically adjusted, printing starts. ...
- Page 78 3. Printing on T‐shirts Once the tray returns to the front side of the machine, remove the tray. • While the [Start] key is lit, printing has not been finished. Press the [Start] key again without removing or moving the tray from the machine. Printing resumes. • When using the A4 standard tray or A5 tray, insert the protection cover horizontally as illustrated in the figure, and then remove it with the A4 standard tray or A5 tray. This prevents you from coming into contact with the printing surface. Make sure the protection cover is correctly positioned horizontally. DYX008 Finish the Design Software. • By clicking [Print One More], you can configure the layout settings again for the image loaded. • Clicking [Back to TOP] discards the loaded image and returns you to the top screen of the Design Software. DSB024 76 ...
-
Page 79: Removing The T-Shirt From The Tray
Removing the T‐shirt from the Tray Removing the T‐shirt from the Tray • When removing the T‐shirt, be sure to prevent the print surface from touching any other part. • If you touch the print surface before the ink fixes, the ink might blot on the fabric. When using the A4 standard tray or A5 tray Press the unlock button and lift the cover. DSA357 Pull out the tucked edges of the fabric. Be careful not to touch the printed side. DSA342 ... - Page 80 3. Printing on T‐shirts Hold the T‐shirt by the shoulders and remove it from the tray. DSA344 78 ...
-
Page 81: Fixing Ink
Fixing Ink Fixing Ink Use the optional finisher to fix the ink to the fabric. • As the A4 standard tray, A5 tray, and Sleeve & Socks Tray becomes hot when continuously used on the optional finisher, give an interval of five minutes or longer to set them after they are pulled out. • For reference, in the case of a commercially available heat press, ink was fixed at 330°F (approx. 165°C) in 90 seconds. • When using the finisher, you can carry out heat press processing for the T‐shirt loaded in the A4 standard tray, A5 tray, or Sleeve & Socks Tray. ... -
Page 82: Handling Printed Goods
3. Printing on T‐shirts Handling Printed Goods Precautions When Washing Printed Goods Note the following handling precautions for T‐shirts and sweatshirts: • Turn garments inside out before washing them. • When washing T‐shirts and other garments by hand, dissolve some neutral detergent in lukewarm water of about 30°C (approx. 86°F) and wash them without rubbing the printed areas. After that, spin them dry for about 1 minute in a washing machine, smooth wrinkles, and then hang them to dry. DSA541 • Do not rub the printed surfaces. Doing so may cause discoloration due to friction. DSA542 • When washing T‐shirts and other garments in a washing machine, turn them inside out so the printed side is inside and put them in a laundry net. After washing them, shake out as much water as possible, smooth out wrinkles, and hang them in the shade to dry. 80 ... - Page 83 Handling Printed Goods DSA543 • Do not use a dryer or bleach. • Avoid ironing the printed surfaces. • Do not dry‐clean garments. Note the following handling precautions for tote bags: • Do not machine wash tote bags. Doing so may cause the tote bag to lose its shape or cause its colors to fade. • When washing tote bags by hand, dissolve some neutral detergent in lukewarm water of about 30°F (approx. 86°F) and wash them without rubbing their printed areas. After washing a tote bag, shake it out to remove as much water as possible. Then, flatten it to remove wrinkles and dry it in the shade. ...
- Page 84 3. Printing on T‐shirts 82 ...
-
Page 85: Printing Via The Printer Driver
4. Printing via the Printer Driver This chapter explains the printer driver setting screen and basic printing procedures using an application other than the Design Software. This guide uses Windows 7/10 procedures for its examples. Procedures and screens might vary depending on the operating system you are using. For printing procedures using the T‐shirts Designer, see page 69 "3. Printing on T-shirts". Setting the Accessories Tab on the Printer Driver • Only administrators can set this. Log on as a member of the Administrators group. From the [Start] menu, click [Devices and Printers]. • For Windows 10: Right‐click the [Start] button, and then click [Control Panel]. Once the [Control Panel] window is displayed, click [View devices and printers]. Right‐click the machine icon, and then click [Printer properties]. Click the [Accessories] tab. Click [Adjust Color Density...]. Adjust the color density within the range of 1 to 9. The bigger the number, the darker the color. The number can be directly input in the entry field or changed by clicking the up and down pointing triangles. Click [OK]. Click [OK] to close the [Printer Properties] dialog box. ... -
Page 86: Printing
4. Printing via the Printer Driver Printing In this example, the procedure using Microsoft Paint is explained. How to open the setting screen of the printer driver depends on the application. For details, see the user manual for the application. • You can select the print quality from the following: • Speed Print speed increases while the image quality does not deteriorate. • Fine Image quality is prioritized. • Vivid Intensity is prioritized. In this mode, as the machine prints one sheet, the counter value is incremented by 2. • Ink consumption increases when you set [Select Print Quality:] to [Vivid] or [Garment Type:] to [Thick Garment] in the printer driver. • When printing from Windows Photo Viewer, you cannot change the resolution from the "Quality:" pull‐down menu of Windows Photo Viewer. To change the resolution from Windows Photo Viewer, click [Options...], and then select the print quality from ... -
Page 87: Displaying The Printing Settings
Printing • For details about how to handle the tray, see page 20 "Loading and Removing the Tray". • For usable fabric types and precautions, see page 56 "Fabric". • Opening the setting screen of the printer driver in the application displays the descriptions configured as default values. On this screen, change the necessary settings only and print. • The settings changed here are effective only in this application. When printing is performed using other applications, the settings here are not reflected. Depending on the application, the setting contents of the printer driver may be automatically changed. Displaying the Printing Settings From the [Start] menu, click [Devices and Printers]. • For Windows 10: Right‐click the [Start] button, and then click [Control Panel]. Once the [Control Panel] window is displayed, click [View devices and printers]. Right‐click the machine icon, and then click [Printing Preferences]. ... -
Page 88: Canceling Printing
4. Printing via the Printer Driver Canceling Printing Print jobs can be canceled from either a machine or computer. How to cancel print jobs differs according to their job status. Check the job status first. Canceling a print job already sent to the machine Cancel the print job using the Status Monitor or pressing the [Stop] key. Canceling a print job that is not sent to the machine Cancel the print job from the taskbar of the computer. Canceling Printing from the Status Monitor Follow the procedure below to cancel a print job that is displayed on the Status Monitor. Check that printing and the Status Monitor have started. Click [Stop Printing]. It will take a few moments for printing to stop. For details about Status Monitor and how to open the Status Monitor, see page 131 "Using the Status Monitor". Canceling Printing Using the [Stop] Key Follow the procedure below to cancel a print job that was already sent to the machine. The [Stop] key cancels all print jobs being printed or that were received. If you do not want to cancel another person's print job that was sent later, it's possible to delete only the current print job. Cancel only the print job being printed Check that printing has started. 86 ... -
Page 89: Canceling Printing From The Taskbar
Canceling Printing Press the [Stop] key. The confirmation screen appears. Job Reset? Current Job Press the [#Enter] key. Only the print job being printed is deleted. If there are other print jobs waiting, they will be printed after the current print job is deleted. It takes time to cancel the print job. Canceling Printing from the Taskbar Follow the procedure below to cancel a print job in the printer queue. Double‐click the machine icon on the taskbar. Select the print job you want to cancel, and then click [Cancel] on the [Document] menu. ... - Page 90 4. Printing via the Printer Driver 88 ...
-
Page 91: Machine Setup Menus
5. Machine Setup Menus This section describes the menu items for configuring and adjusting machine settings. Making Machine Settings Using the Control Panel Counter You can check how many sheets have been printed. Item Show Counter Print See page 93 "Using the [Counter] Menu". List/Test Print You can check the machine's present settings and operational status. Item Config. Page Color Demo Page Error Log See page 96 "Using the [List/Test Print] Menu". Maintenance You can adjust the print quality. Item Nozzle Check Head‐cleaning Head‐flushing Head Position Registration Date/Time Key Repeat Default: [On] Feed Test Move Prnt‐Heads ... - Page 92 5. Machine Setup Menus Item Height Adjust Clean Maint Unit Auto Head Maint. Clean Internals Fan Filter Fan Speed See page 98 "Using the [Maintenance] Menu". System You can configure basic system settings. Item Energy Saver E.Saver Timer Default: [5 minutes] Notify by Email Default: [Off] (mainly Europe, Asia, and China) Default: [mm] Unit of Measure (mainly North America) Default: [inch] Uni‐direct.Prt. Default: [Auto Detect] Img Recov. Error Default: [Display] Display Job Name Default: [Off] Display Version Printer Version WLAN Version Ink C.U. Space See page 122 "Using the [System] Menu". Host Interface You can configure settings related to connection and communication. Item I/O Timeout Default: [15 seconds] 90 ...
- Page 93 Making Machine Settings Using the Control Panel Item Machine Name Host Name Domain Name IPv4 DNS Default: [0.0.0.0] IPv4 DDNS Default: [On] DHCP Default: [On] IPv4 Address Default: [11.22.33.44] IPv4 Subnet M. Default: [0.0.0.0] IPv4 Gatewy.Ad. Default: [0.0.0.0] IPv6 DDNS Default: [On] IPv6 DNS Default: [::] Network Setup DHCPv6 Default: [Off] IPv6 Statlss Ad Default: [On] IPv6 Address IPv6 Gatewy.Ad. Default: [::] Active Protocol Default: [Active] IPsec Default: [Off] MAC Address Ethernet Speed Default: [Auto Select] Prmt SNMPv3 Com Default: [Ciphertext] Pmt SSL/TLS Com Default: [Active] ...
- Page 94 5. Machine Setup Menus Language You can select which language the menu is displayed in. Item English German French Italian Dutch Danish Swedish Norwegian Spanish Finnish Portuguese Czech Polish Hungarian The [Language] menu will be displayed in English. See page 130 "Using the [Language] Menu". • You can prevent users other than the administrator from changing the machine's settings. For details, see page 159 "Restricting Machine Functions". 92 ...
-
Page 95: Using The [Counter] Menu
Using the [Counter] Menu Using the [Counter] Menu You can check and print out the printer's counter figures. Show Counter You can check on the display the number of prints made by the printer. Color: Indicates the total number of color originals printed using the printer driver's [Color] setting. Black: Indicates the total number of black and white originals printed using the printer driver's [Black and White] setting. Print You can print out the printer's page counts. Total Full Color Indicates the total number of color originals printed using the printer driver's [Color] setting. Total Black Indicates the total number of black and white originals printed using the printer driver's [Black and White] setting. Coverage Count. Indicates the total amount (%) of ink used for the color options below: Full Color Coverage • Black Coverage • Coverage 0 Indicates a print coverage ratio between 0 and 5%. Coverage 5 Indicates a print coverage ratio between 5 and 20%. Coverage 20 Indicates a print coverage ratio of 20% and higher. About coverage counter "Coverage" means a coverage ratio, and a coverage ratio of 100 indicates the total amount of ... -
Page 96: Displaying The Counter
5. Machine Setup Menus A Full Color Coverage count: (Full Color Coverage)=(Full Color Coverage (K))+(Full Color Coverage (C))+(Full Color Coverage (M))+(Full Color Coverage (Y)) Ex.: Multiple color consumption on a fabric K: 3%, C: 8%, M: 7%, Y: 2% (3% + 8% + 7% + 2% = 20%) Full Color Coverage: 00000020 A coverage ratio calculation for full color printing per page: (Full Color Coverage)/(Total Full Color) Ex.: Total Full Color: 00000888 Full Color Coverage: 00007692 7692 / 888 = 8.7% Coverage Count. figures are rounded off to one decimal place. • Black and white files are counted as black and white prints even if color printing was specified. • The counter numbers you can check from the [Counter] menu on the display may differ from the counter numbers that appear on the system configuration page. For details, see page 95 "Differences Between the Counter and the Total Counter". • As the machine prints one sheet, the counter value is incremented by 1. When you set [Select Print Quality:] to [Vivid] in the printer driver or [Garment Type:] to [Thick Garment], the counter value is incremented by 2 as the machine prints one sheet. Displaying the Counter This section explains how to display the counter. Press the [ /Menu] key. Press [ ] or [ /Menu] key to display [Counter], and then press the [#Enter] key. <Menu> Counter ... -
Page 97: Printing The Counter
Using the [Counter] Menu Printing the Counter This section explains how to print the counter numbers. Load the fabric in the tray. Press the [ /Menu] key. Press [ ] or [ /Menu] key to display [Counter], and then press the [#Enter] key. <Menu> Counter Press [ ] or [ /Menu] key to display [Print], and then press the [#Enter] key. <Counter> Print Press the [#Enter] key. Color:00001234 Press # to print Press the [Start] key. The counter numbers will be printed. Differences Between the Counter and the Total Counter The counter numbers you can check from the [Counter] menu on the display may differ from the total counter numbers that appear on the system configuration page. The values the total counter displays include the numbers of the printed pages, test patterns, system configuration pages, or counter printouts, so the values may be greater than those on the [Counter] menu. ... -
Page 98: Using The [List/Test Print] Menu
5. Machine Setup Menus Using the [List/Test Print] Menu Use the [List/Test Print] menu to check that the machine is working properly and to also check the machine's system configuration and settings. Config. Page You can print the current configuration of the machine. Color Demo Page You can print color samples. Error Log You can print error logs. Printing a Configuration Page Load the fabric in the tray. Press the [ /Menu] key. Press the [ ] or [ /Menu] key to display [List/Test Print], and then press the [#Enter] key. <Menu> List/Test Print Press the [ ] or [ /Menu] key to display [Config. Page], and then press the [#Enter] key. <List/Test Print Config. Page Press the [Start] key. The configuration page is printed. Set another fabric. Print all configuration pages by repeating Steps 5 and 6. Press the [Escape] key. 96 ... -
Page 99: Interpreting The Configuration Page
Using the [List/Test Print] Menu Interpreting the Configuration Page System Reference Information such as the counter numbers (Pages Printed), the machine's version, printer language name, and remaining amount of ink are printed in this area. Maintenance The specified settings in the [Maintenance] menu are printed in this area. System The specified settings in the [System] menu are printed in this area. Host Interface, Interface Information The specified settings in the [Host Interface] menu are printed in this area. Language The selected language in the [Language] menu is printed in this area. • Under "System Version", the version of the machine's firmware is displayed. You can check over the Internet whether you need to update the firmware by comparing its version with that of the latest version. You can also check the firmware version by opening the [Printing Preferences] dialog box and clicking [About] on the [Configuration/About] tab. • The number of printed pages displayed in "Pages Printed" differs from the number displayed in the [Counter] menu. See page 95 "Differences Between the Counter and the Total Counter". ... -
Page 100: Using The [Maintenance] Menu
5. Machine Setup Menus Using the [Maintenance] Menu You can specify machine maintenance settings for adjusting print quality. • When using the [Maintenance] menu, set the tray. Otherwise, some menus are not displayed. Nozzle Check Print a test pattern to check that print head nozzles become clogged. If nozzle problems occur, print head nozzles become clogged and ink cannot be ejected properly. This will result in lower print quality. Head‐cleaning You can clean the print head. Clean the head if certain colors are not printed or are printed faintly. Head cleaning consumes ink. Head‐flushing You can clean the print head more thoroughly. Because head flushing consumes more ink than head cleaning, do it only if the print head cannot be cleaned properly by head cleaning. Head Position You can resolve problems such as lines that are printed vertically misaligned or blurred colors. Registration Adjust the print start position of the fabric. Date/Time You can specify the date and time. Key Repeat The key repeat function allows you to specify setting values in units of ten or scroll the display quickly by pressing and holding down the [ ] or [ /Menu] key. Holding down the [Adjust Height ] or [Adjust Height ] key allows the height of the tray to be quickly adjusted. Default: [On] Feed Test Check how the tray works. Printing is not performed on the fabric. Move Print‐Heads Move the print head to make it easier to remove foreign objects stuck in the right edge. When all operations are completed, turn the power back on and print a [Nozzle Check] test ... -
Page 101: Nozzle Check
Using the [Maintenance] Menu Clean Maint Unit Move the maintenance unit to a position where cleaning can be carried out. If the message prompting you to provide regular maintenance appears, clean the Maintenance Unit. Auto Head Maint. The print head nozzles clean automatically. If the message prompting you to provide regular maintenance appears, clean the print head. Clean Internals The internal compartments clean automatically. Clean the interior if you do not use the machine for a long time. Fan Filter Reset the count of the number of prints after replacing the filter. See page 170 "Replacing Filters". Fan Speed You can adjust the fan speed if you are bothered with the fan noise. See page 171 "Adjusting the Fan Speed". Nozzle Check Follow the procedure below to check whether the print head nozzles are clogged up or not by printing a nozzle check test pattern. To maintain print quality, we recommend checking a nozzle before printing if the machine has not printed anything for a certain interval of time, such as for the first time in the day or after a rest period. Load the fabric in the tray. Press the [ /Menu] key. Press the [ ] or [ /Menu] key to display [Maintenance], and then press the [#Enter] key. <Menu> Maintenance Press the [ ] or [ /Menu] key to display [Nozzle Check], and then press the [#Enter] <Maintenance> Nozzle Check Press the [#Enter] key. Press # to ... - Page 102 5. Machine Setup Menus Check the printed test pattern. Printed Test Pattern DSA196 Using the test pattern, check print head clogging and the number of clogged heads. The number appearing above each color in the test pattern is the number of the print head. The print head for cyan and black is [Head 1]. The print head for yellow and magenta is [Head 2]. Check which print head is clogged by referring to the following illustration. Normal CFT168 When print heads are clogged CFT169 If the print head is clogged, perform Head Cleaning. See page 101 "Head‐cleaning". If the problem persists, perform Head Flushing. See page 102 "Head‐flushing". 100 ...
-
Page 103: Head-Cleaning
Using the [Maintenance] Menu • This function can also be used with paper. When loading the paper on the tray, fix it to all sides of the tray with tape so that the paper does not lift up. You also need to adjust the height of the tray. For details, see page 189 "Adjusting the Height of the Tray". DYX111 Head‐cleaning Follow the procedure below to perform a normal print head cleaning. Perform a head cleaning when a particular color cannot be printed or print images are blurred. Head cleaning consumes ink. When the ink cartridge is empty, replace it instead of performing a print head cleaning. After an ink cartridge is replaced, a print head cleaning will be automatically performed. • Do not turn the machine off during print head cleaning. If the machine is turned off during print head cleaning, start again from the beginning. Press the [ /Menu] key. Press the [ ] or [ /Menu] key to display [Maintenance], and then press the [#Enter] key. <Menu> Maintenance Press the [ ] or [ /Menu] key to display [Head‐cleaning], and then press the [#Enter] key. <Maintenance> Head‐cleaning Press the [ ] or [ /Menu] key to select a color, and then press the [#Enter] key. <Head‐cleaning> All Heads ... -
Page 104: Head-Flushing
5. Machine Setup Menus Press the [#Enter] key. Press # to clean heads Head cleaning starts. Wait while "Maintenance in process..." is displayed. Press the [Escape] key until the top screen appears. No‐fuss head cleaning You can perform a one‐touch head cleaning for all colors. Press the [Tray] and [Stop] keys at the same time. The following message appears: Press # to clean heads Press the [#Enter] key. Head cleaning starts. Wait while "Maintenance in process..." is displayed. Confirm that the top screen re‐appears. Head‐flushing Follow the procedure below to perform a thorough print head cleaning. Because head flushing consumes more ink than head cleaning, do it only if the print head cannot be cleaned properly by head cleaning. When the ink cartridge is empty, replace it instead of performing a print head cleaning. After an ink cartridge is replaced, a print head cleaning will be automatically performed. • Do not turn the machine off during print head cleaning. If the machine is turned off during print head cleaning, start again from the beginning. 102 ... - Page 105 Using the [Maintenance] Menu Press the [ /Menu] key. Press the [ ] or [ /Menu] key to display [Maintenance], and then press the [#Enter] key. <Menu> Maintenance Press the [ ] or [ /Menu] key to display [Head‐flushing], and then press the [#Enter] key. <Maintenance> Head‐flushing Press the [ ] or [ /Menu] key to select a color, and then press the [#Enter] key. <Head‐flushing> All Heads To clean all the print heads, select [All Heads]. To clean the print head for cyan and black, select [Head 1]. To clean the print head for yellow and magenta, select [Head 2]. Press the [#Enter] key. Press # to flush heads Head flushing starts. Wait while "Maintenance in process..." is displayed. Press the [Escape] key until the top screen appears. 103 ...
-
Page 106: Head Position
5. Machine Setup Menus Head Position Adjusts the print head. Perform this operation if printed lines are vertically misaligned or printed colors are blurred. Sun. Mon. Sun. Mon. Head Position DYX110 To check adjustment values, print test patterns applying "Thick, Standard", "T‐shirt Fine", "T‐shirt Speed", "T‐shirt Vivid" settings. Check adjustment values for each line (A, B, C), and adjust the print head positions. If the adjustment value is set to "0", adjustment is not necessary. Adjust all lines so their adjustment values indicate "0" ... - Page 107 Using the [Maintenance] Menu Press the [ ] or [ /Menu] key to display [Pr.Test Pattern], and then press the [#Enter] key. <Head Position> Pr.Test Pattern Press the [ ] or [ /Menu] key to select the target's resolutions, and then press the [#Enter] key. <Pr.Test Pattern T‐shirt Fine Press the [Start] key. A test pattern to adjust print head positions is printed. To determine the adjustment value, select the square that is faintest (closest to white). Alternatively, select the square whose internal lines overlap to form a single color. DYX104 Combined two‐color lines form squares, and depending on line overlapping, (white) spaces between the lines are painted and look darker. Sometimes the colors of the lines are identical. For this illustration, the adjustment value is "‐2". DYX105 105 ...
- Page 108 5. Machine Setup Menus If you cannot determine the adjustment value, select the square that is between the • straightest lines. DYX106 Each vertical line is made of an upper part and lower part. If the print head is not properly positioned, the vertical line will be displayed as two disconnected lines, so that the line looks misaligned. This illustration indicates an adjustment value of "‐3". • If you still cannot determine the adjustment value, check the deviations of the lines to the left, right, and both sides of the pale squares, and then select the square whose lines deviate symmetrically. This illustration indicates an adjustment value of "‐1". DYX107 Press the [ ] or [ /Menu] key to display [Adjustment], and then press the [#Enter] key. <Head Position> Adjustment Press the [ ] or [ /Menu] key to select a resolution from Step 6, and then press the [#Enter] key. <Adjustment> T‐shirt Fine 106 ...
-
Page 109: Registration
Using the [Maintenance] Menu Select the items that you need to adjust, and then press the [# Enter] key. <Adjustment> 1.A Enter the optimal adjustment values from Step 8, and then press the [#Enter] key. <A> (‐4, +4) ‐1 Press the [Escape] key until the top screen appears. • This function can also be used with paper. When loading the paper on the tray, fix it to all sides of the tray with tape so that the paper does not lift up. You also need to adjust the height of the tray. For details, see page 189 "Adjusting the Height of the Tray". DYX111 Registration Print a test pattern to adjust the print start position of the fabric. Look at the left, right, upper, and lower margins, and adjust them if you want to shift the printing position. Doing this is usually not necessary. Load the fabric in the tray. Align the fabric with the corners of the table. Press the [ /Menu] key. Press the [ ] or [ /Menu] key to display [Maintenance], and then press the [#Enter] key. <Menu> Maintenance Press the [ ] or [ /Menu] key to display [Registration], and then press the [#Enter] key. <Maintenance> Registration ... - Page 110 5. Machine Setup Menus Press the [ ] or [ /Menu] key to display [Pr.Test Pattern], and then press the [#Enter] key. <Registration> Pr.Test Pattern Press the [Start] key. A test pattern to adjust the print start position is printed. Check the optimal adjustment values on the printed test pattern if necessary. Check the length of "a" and "b", or "x" and "y" in the figure. Keep the fabric or paper loaded on the tray. • When adjusting the print position in the horizontal direction Check the length of "a" and "b" in the figure. To shift the printed cross mark by one gradation on the scale in the "+" direction, the adjustment value in [Read Direction] should be "+1.0". • When adjusting the print position in the vertical direction Check the length of "x" and "y" in the figure. To shift the printed cross mark by one gradation on the scale in the "+" direction, the adjustment value in [Feed Direction] should be "+1.0". DYX108 Press the [ ] or [ /Menu] key to display [Adjustment], and then press the [#Enter] key. <Registration> Adjustment 108 ...
-
Page 111: Setting The Date And Time
Using the [Maintenance] Menu Press the [ ] or [ /Menu] key to enter the adjustment values (‐4.0 to +4.0) in the [Read Direction] from Step 8, and then press the [#Enter] key. <Read Direction> (‐4, +4) 0.0 Press the [ ] or [ /Menu] key to enter the adjustment values (‐4.0 to +4.0) in the [Feed Direction] from Step 9, and then press the [#Enter] key. <Feed Direction> (‐4, +4) 0.0 Press the [Escape] key until the top screen appears. • This function can also be used with paper. When loading the paper on the tray, fix it to all sides of the tray with tape so that the paper does not lift up. You also need to adjust the height of the tray. For details, see page 189 "Adjusting the Height of the Tray". DYX111 Setting the Date and Time Use the following procedure to specify the date, time, and time zone. Date setting Press the [ /Menu] key. Press the [ ] or [ /Menu] key to display [Maintenance], and then press the [#Enter] key. <Menu> Maintenance 109 ... - Page 112 5. Machine Setup Menus Press the [ ] or [ /Menu] key to display [Date/Time], and then press the [#Enter] key. <Maintenance> Date/Time Press the [ ] or [ /Menu] key to display [Date Setting], and then press the [#Enter] key. <Date/Time> Date Setting Press the [ ] or [ /Menu] key to set the date, and then press the [#Enter] key. (mainly Europe, Asia, and China) <Date Setting> 30/ 8/2012 (mainly North America) <Date Setting> 8/30/2012 To specify the time right after this step, go to Step 4 in "Time Setting". See page 110 "Time setting". Press the [Escape] key. Time setting Press the [ /Menu] key. Press the [ ] or [ /Menu] key to display [Maintenance], and then press the [#Enter] key. <Menu> Maintenance Press the [ ] or [ /Menu] key to display [Date/Time], and then press the ...
-
Page 113: Move Print-Heads
Using the [Maintenance] Menu Press the [ ] or [ /Menu] key to set the time, and then press the [#Enter] key. (mainly Europe, Asia, and China) <Time Setting> 10:31:25 (mainly North America) <Time Setting> 10:31:25 AM To specify the time zone right after this step, go to Step 4 in "Time Zone Setting". See page 111 "Time zone setting". Press the [Escape] key. Time zone setting Press the [ /Menu] key. Press the [ ] or [ /Menu] key to display [Maintenance], and then press the [#Enter] key. <Menu> Maintenance Press the [ ] or [ /Menu] key to display [Date/Time], and then press the [#Enter] key. <Maintenance> Date/Time Press the [ ] or [ /Menu] key to display [Time Zone], and then press the [#Enter] key. <Date/Time> Time Zone Press the [ ] or [ /Menu] key to set the time zone, and then press the [#Enter] ... - Page 114 5. Machine Setup Menus • Do not open the cover while the machine is operating and keep your hands or fingers clear of the machine. Doing so might cause your hands or fingers to get trapped in the machine, potentially causing injury. • After moving the print head and turning the power off, be sure to turn the power back on. Do not keep the print head moving. • Do not touch the toothed rubber belt and ink tube. Moreover, pay attention not to have your sleeves caught on the ink tube or cables. DSA504 Toothed rubber belt Ink tubes • When the cartridge runs out, the machine will not operate. After replacing the ink cartridge, perform this operation. • Do not use tools with sharp tips to remove stuck foreign objects. Using it may cause a failure. Check that the top cover is closed. Press the [ /Menu] key. Press the [ ] or [ /Menu] key to display [Maintenance], and then press the [#Enter] key. <Menu> Maintenance Press the [ ] or [ /Menu] key to display [Move Print‐Heads], and then press the [#Enter] key. <Maintenance> Move Print‐Heads ...
- Page 115 Using the [Maintenance] Menu Remove the foreign objects carefully. Check that there are no foreign objects, and then close the top cover. The machine turns off and on automatically, and then it returns to the usual condition. Press the [ /Menu] key. Press the [ ] or [ /Menu] key to display [Maintenance], and then press the [#Enter] key. <Menu> Maintenance Press the [ ] or [ /Menu] key to display [Nozzle Check], and then press the [#Enter] key. <Maintenance> Nozzle Check Press the [Start] key. A test pattern is printed. Wait while "Maintenance in process..." is displayed. Press the [Escape] key. Check the printed test pattern. Normal CFT168 When print heads are clogged CFT169 If the print head is clogged, perform Head Cleaning. See page 101 "Head‐cleaning". 113 ...
-
Page 116: Clean Maint Unit
5. Machine Setup Menus Clean Maint Unit You can move the Maintenance Unit to the position for cleaning. If a message prompting you to provide regular maintenance appears, clean the Maintenance Unit. • Do not touch the toothed rubber belt or ink tubes when cleaning the Maintenance Unit. Also, take care not to have your sleeves caught with cables or ink tubes. • The cleaning cloth cannot be used to clean the Maintenance Unit. Use the cleaning stick to clean it. • If you have not cleaned the print head nozzles, proceed to clean them. • When cleaning the Maintenance Unit, be careful not to drop the cleaning stick into the machine. Press the [ /Menu] key. Press the [ ] or [ /Menu] key to display [Maintenance], and then press the [#Enter] key. <Menu> Maintenance Press the [ ] or [ /Menu] key to display [Clean Maint Unit], and then press the ... - Page 117 Using the [Maintenance] Menu Wipe off any dirt in the area shown in the figure with the cleaning stick moistened with the cleaning liquid. For the top part of the cap, wipe it gently. Wiper (back and front) Lever Cap (side part, top part, and inner part) DSA199 Top part Side part Inner part Wipe the side part, top part, and inner part of the cap until all the solidified ink is removed. 115 ...
-
Page 118: Auto Head Maint
5. Machine Setup Menus DYX041 Top part Inner part Side part After cleaning the Maintenance Unit, close the top cover. Head‐cleaning starts after restart, after which the machine returns to the usual condition. Auto Head Maint. You can clean the print head nozzles automatically. If the message prompting you to provide regular maintenance appears, clean the print head. • Do not put your hands inside the machine while cleaning of the print head nozzles is automatically performed. Your fingers may be trapped and injured inside the machine. • Do not open the cover while the print head nozzles are being automatically cleaned. • You cannot reuse the absorbent. After using it, be sure to dispose it properly. • If you have not cleaned the maintenance unit, proceed to clean it. 116 ... - Page 119 Using the [Maintenance] Menu Attach the two absorbents to the cleaning tool, and then use the dropper to moisten the absorbent with the cleaning liquid. Use the dropper to suck cleaning liquid up to the scale 2 on the dropper. Use half of this for each absorbent swab. Be sure to moisten the absorbent with the cleaning liquid until the absorbent is completely wet. DSA255 Absorbent Cleaning Tool Press the [ /Menu] key. Press the [ ] or [ /Menu] key to display [Maintenance], and then press the [#Enter] key. <Menu> Maintenance Press the [ ] or [ /Menu] key to display [Auto Head Maint.], and then press the [#Enter] key. <Maintenance> Auto Head Maint. The print heads will move to a position where you can clean it. Press the [#Enter] key. Press # to start maintenance head When "Remove Tray" is displayed, remove the tray. 117 ...
-
Page 120: Clean Internals
5. Machine Setup Menus When "Set Maint. Kit Press Start key" is displayed, attach the cleaning tool to the tray stand. Push the cleaning tool to the back until it clicks. DSA104 Press the [Start] key. Cleaning of the print head nozzles will start automatically. It takes 10 to 15 minutes. Wait while "Maintenance in process..." is displayed. When "Remove Maint Kit Press Start key" is displayed, detach the cleaning tool, and then press the [Start] key. Wait while "Maintenance in process..." is displayed. After that, the machine returns to its normal state. Press the [Escape] key until the top screen appears. Clean Internals The internal compartments clean automatically. Clean the interior if you do not use the machine for a long time. When cleaning the interior, use the optional dedicated cleaning cartridge. • Once cleaning of the interior has started, it cannot be canceled. Cleaning must be completed before the machine can be used again. Once cleaning is completed, replace the ink cartridge, turn the machine on, and provide the initial supply of ink. Once the message "Ready" appears after the initial supply of ink is provided, you can use the machine. • When cleaning the interior, a large amount of waste fluid is generated. Moreover, when cleaning fails, a new ink cartridge or ink collector unit may be required due to additional ink consumption or waste fluid generation. Clean the interior only if you do not use the machine for three months or longer. 118 ... - Page 121 Using the [Maintenance] Menu • When using this machine again after cleaning the interior, an initial supply of ink is required. The initially supplied ink is consumed. In order to avoid an ink shortage during the initial supply of ink and consumption of the ink cartridge, when using this machine again, attach a new ink cartridge. • When cleaning the interior, use a new dedicated cleaning cartridge. • The cleaning cartridges for each color are single use. Even if the liquid remains inside, do not use the cartridge. When reusing the cleaning cartridge, cleaning may not be completed. • If the Maintenance Unit is not cleaned and automatic print head maintenance is not performed, cleaning of the interior may fail. When the Maintenance Unit is not cleaned and automatic print head maintenance is not performed, carry out this maintenance before cleaning the interior. For details, see page 114 "Clean Maint Unit", page 116 "Auto Head Maint.". • Do not operate this machine while the interior is being cleaned. Doing so may result in a cleaning failure. When the ink collector unit is full during cleaning, a message may appear. However, do not operate until cleaning is completed. Moreover, do not perform printing or access the machine from a computer. • When storing the machine after cleaning the interior, store it with a cleaning cartridge attached. Replace the ink cartridge using this machine again. Turn the machine on. Confirm that "Ready" appears. Confirm that the ink collector unit has sufficient available capacity. When the ink collector unit is almost full or full, replace it with a new ink collector unit. For details, see page 166 "Replacing an Ink Collector Unit". Press the [ /Menu] key. Press the [ ] or [ /Menu] key to display [Maintenance], and then press the [#Enter] key. <Menu> Maintenance ...
- Page 122 5. Machine Setup Menus Take out the ink cartridges. While taking out the cartridges, be sure to hold the machine firmly so that it does not move. DYX044 Check the cartridges' orientation, and then install them carefully. DYX046 Close the right front cover. Press the [ ] or [ /Menu] key to display [Execute], and then press the [#Enter] key. <Clean Internal> Execute Press the [#Enter] key. Press # to start Clean Internals Insert Cleaning Cartridge Cleaning of the interior will start. It takes 16 minutes to clean the interior. Wait while "Maintenance in process..." is displayed. When "Cleaning finish Restart machine" is displayed, hold down the [Power] key to turn off the power. 120 ...
- Page 123 Using the [Maintenance] Menu When cleaning of the interior fails When cleaning of the interior fails, a message regarding the solution appears after the display of "Maintenance failed". Take appropriate actions according to the message that appears. • When "Open Front Cover / Reset Cartridge" appears, reset the cleaning cartridge correctly, and then clean the interior again. • When "Open Front Cover / Replace Ink Crtg" appears, a cleaning cartridge which has been used once is attached. Replace it with a new cleaning cartridge, and then clean the interior again. • When "Prepare new Ink Collector Unit" appears, replace it with a new ink collector unit, and then clean the interior again. • Upon returning to the menu of "<Clean Internal>", raise the room temperature to 10°C (approx. 50°F) or higher, and then clean the interior again from the beginning. • When "Right Front Cover is open / Close Right Front Cover" appears, close the right front cover, and then clean the interior again. • When "SC(28000) Power Off On / Call Service if error reoccurs" appears without "Maintenance failed" being displayed, replace it with a new ink cartridge and clean the Maintenance Unit and perform automatic print head maintenance. Once the Maintenance Unit is cleaned and automatic print head maintenance is performed, clean the interior again from the beginning using a new cleaning cartridge. If the problem still persists even after the actions mentioned above are taken, clean the interior again from the beginning using a new cleaning cartridge. • If the ink collector unit is full during cleaning, a message may appear. If the message "Cleaning finish Restart machine" appears after the cleaning operation, cleaning is successfully completed. • After cleaning the interior, the machine can be stored for approximately one and half years within the period of the product life cycle. 121 ...
-
Page 124: Using The [System] Menu
5. Machine Setup Menus Using the [System] Menu You can set basic functions required to use the machine. The machine can be used on factory default, but the configuration can be changed depending on the condition of the user. The changed condition holds even if the machine is turned off. Energy Saver Use Energy Saver mode to reduce the machine's power consumption. You can specify how long the machine remains idle before it switches to Energy Saver mode. When the machine is in Energy Saver mode, it requires time to start up when it receives a print job. You can specify between 5 and 60 minutes as the idle time before switching to the Energy Saver mode. • 5 minutes • 15 minutes • 30 minutes • 45 minutes • 60 minutes Default: [5 minutes] Notify by Email You can specify whether or not to send notification that a printer error has occurred to a particular e‐mail address. Use the Web browser to specify e‐mail address to send notification. See page 138 "Notifying the Machine Status by E‐mail". • On • Off Default: [Off] Unit of Measure You can switch the measurement between "mm" and "inch". • mm • inch (mainly Europe, Asia, and China) Default: [mm] ... -
Page 125: Changing The [System] Menu
Using the [System] Menu Normally, select [Auto Detect]. When printing is performed on fabrics of varied thicknesses or a vertical aberration or blurring occurs, select [Always]. • Auto Detect • Always Default: [Auto Detect] Img Recov. Error You can specify whether or not [Page Recovery Error] is reported. • Display • Do not Display Default: [Display] Display Job Name The name of the job is displayed on the screen from when the job is transmitted until the [Start] key is pressed. • On • Off Default: [Off] Display Version Displays the firmware version. Printer Version Displays the firmware version of the machine. Ink C.U. Space You can check the remaining capacity of the ink collector unit. ... - Page 126 5. Machine Setup Menus Press [ ] or [ /Menu] key to select the lead time needed to switch to the Energy Saver mode. <E.Saver Timer> *5 minutes Press the [#Enter] key. Press the [Escape] key. 124 ...
-
Page 127: Using The [Host Interface] Menu
Using the [Host Interface] Menu Using the [Host Interface] Menu In the [Host Interface] menu, you can specify settings related to connection and communication. Settings made using the [Host Interface] menu remain effective even if you turn the machine off. To configure the machine's network settings, use the [Network Setup] menu. I/O Timeout Specify how long the printer waits for the currently‐connected interface to respond. When the specified time elapses, the machine can receive data from another interface. If you make the I/O Timeout period too short, timeout might occur while data transfer is in progress. If this happens, the print job will be interrupted by a new job from another interface. You can specify a timeout between 10 and 60 seconds. 10 seconds • • 15 seconds • 20 seconds • 25 seconds • 60 seconds Default: [15 seconds] Network Setup You can make network‐related settings. Machine Name Displays the machine's name. Host Name Displays the machine's host name. Domain Name Displays the machine's domain name. IPv4 DNS Specify the DNS server settings under IPv4. If DHCP is off, enter the IPv4 addresses for the primary and secondary DNS servers in the format "xxx.xxx.xxx.xxx" (where each x represents a digit). Default: [0.0.0.0] IPv4 DDNS Specify the setting to update the host or domain name. • On ... - Page 128 5. Machine Setup Menus IPv4 Address You can specify the machine's IPv4 address. When DHCP is set to on, the IP address cannot be changed. To change it, set DHCP to off. Contact your network administrator for information about the network configuration. Default: [11.22.33.44] IPv4 Subnet M. You can specify the subnet mask. When DHCP is set to on, the subnet mask cannot be changed. To change it, set DHCP to off. Contact your network administrator for information about the network configuration. Default: [0.0.0.0] IPv4 Gatewy.Ad. You can specify the IPv4 gateway address. When DHCP is set to on, the gateway address cannot be changed. To change it, set DHCP to off. Contact your network administrator for information about the network configuration. Default: [0.0.0.0] IPv6 DDNS Specify the setting to update the host or domain name. • On • Off Default: [On] IPv6 DNS Specify the DNS server settings under IPv6. If DHCP is off, enter the IPv6 addresses for the primary and secondary DNS servers in the form "xxxx:xxxx:xxxx:xxxx:xxxx:xxxx:xxxx:xxxx" (where each x represents a digit). Default: [::] DHCPv6 You can specify whether or not to use DHCP in an IPv6 environment. • DHCPv6‐Lite • DHCPv6‐Full • Off Default: [Off] IPv6 Statlss Ad Select whether to enable or disable IPv6 stateless address auto configuration. ...
- Page 129 Using the [Host Interface] Menu IPv6 Gatewy.Ad. You can specify the IPv6 gateway address. Default: [::] Active Protocol Select the protocol by setting the IPv4, IPv6, HTTP (IPv4), HTTP (IPv6), and Web protocols to [Active] or [Not Active]. • Active • Not Active Default: [Active] IPsec Specify the machine's IPsec function Active/Not Active. • On • Off Default: [Off] MAC Address Displays the machine's MAC address (physical address). Ethernet Speed Set the access speed for networks. Select a speed that matches your network environment. [Auto Select] should usually be selected. • Auto Select • 10Mbps Half D. • 10Mbps Full D. • 100Mbps Half D. • 100Mbps Full D. Default: [Auto Select] Prmt SNMPv3 Com Select SNMPv3 communication for managing the machine using MIB. • Ciphertext ...
-
Page 130: Changing The [Host Interface] Menu
5. Machine Setup Menus USB Setting You can specify the settings related to communication when the computer and machine are connected via USB. Usually, you do not need to change these settings. After changing this setting, turn the machine off, and then turn it on again. USB Speed • Full Speed • Auto Default: [Auto] Port Setting • On • Off Default: [Off] Changing the [Host Interface] Menu This section gives an example of changing a setting in the [Host Interface] menu. Press the [ /Menu] key. Press the [ ] or [ /Menu] key to display [Host Interface], and then press the [#Enter] key. <Menu> Host Interface Press the [ ] or [ /Menu] key to display [I/O Timeout], and then press the [#Enter] key. <Host Interface> I/O Timeout Press the [ ] or [ /Menu] key to display [20 seconds], and then press the [#Enter] key. <I/O Timeout> ... -
Page 131: Precautions To Take When Using In A Network
Using the [Host Interface] Menu Precautions to Take When Using in a Network Using DHCP • You can register the host name to a DNS server. In the Web Image Monitor menu, you can enable or disable [Notify Host Name to DHCP Server]. For details, see page 135 "Changing the Machine Settings". • The DHCP Relay Agent is not supported. • Supported DHCP server operating systems are: Windows Server 2008, and UNIX standard. • The IP address acquired from DHCP can be checked on the configuration page. For details ... -
Page 132: Using The [Language] Menu
5. Machine Setup Menus Using the [Language] Menu This section explains how to select the language used for the settings and messages displayed on the display. Press the [ /Menu] key. Press the [ ] key once, and then press the [#Enter] key. <Menu> Language Press the [ ] or [ /Menu] key to select the language, and then press the [#Enter] key. <Language> *English On the display, the names of the available languages appear in English. The message "Power Off On to Change Setting" appears. Turn the machine off, and then turn it on again. 130 ... -
Page 133: Monitoring And Configuring The Machine
6. Monitoring and Configuring the Machine This chapter describes how to monitor and configure the machine. Using the Status Monitor Using the Status Monitor, you can check the print job status, error messages, amount of remaining ink and other machine status information. You can specify how to receive notification of print job status via the Status Monitor. Open the [Printing Preferences] dialog box. Click the [Maintenance] tab. Click [Status Monitor Settings]. From the list in the [Status Monitor display settings] area, select a method for launching the Status Monitor. Press [OK] two times. For details about [Status Monitor Settings], see the printer driver Help. • You can cancel printing from the Status Monitor. See page 86 "Canceling Printing from the • Status Monitor". To check the amount of remaining ink, see page 160 "Replacing an Ink Cartridge". • To check the amount of waste ink, see page 166 "Replacing an Ink Collector Unit". • To check the error messages on the Status Monitor, see page 208 "Status Monitor Errors". • ... -
Page 134: Using Web Image Monitor
6. Monitoring and Configuring the Machine Using Web Image Monitor The following operations can be remotely performed using Web Image Monitor from a client computer. Displaying machine status or settings • Making machine settings • Making e‐mail notification settings • Making network protocol settings • Performing maintenance • Making security settings • Resetting the machine • Updating the machine's firmware • Configuring the machine To perform the operations from Web Image Monitor, TCP/IP is required. After the machine is configured to use TCP/IP, operations from Web Image Monitor become available. Recommended Web browsers • Windows Internet Explorer 6.0 or higher Firefox 2.0 or higher • Mac OS Safari 2.0 or higher Firefox 2.0 or higher If the previous versions of the Web browser above are used or JavaScript and cookies are • not enabled with the Web browser used, display and operation problems may occur. Non‐recommended Web browsers might not display certain screen elements correctly. • If you are using a proxy server, change the Web browser settings. Contact your network •... -
Page 135: Displaying Top Page
Using Web Image Monitor Displaying Top Page This section explains the Top Page and how to display Web Image Monitor. Launch the Web browser. In the address bar, enter "http://(machine's IP address or host name)/". When setting SSL, a protocol for encrypted communication, under environment which server authentication is issued, enter "https://(machine's IP address or host name)/". The displayed Web Image Monitor page is split into the following areas: Menu Area A menu appears. Tab area Details about each menu appear. Language Selection Menu Select a language. If the displayed page is garbled when using an English language operating system, select "English" with the language selection menu. Auto Update Interval You can specify the update interval on the [Status] tab's work area. Information for other menus and tabs are not automatically updated, so click [Refresh] to update. Default: [10 seconds] Header area You can check the version of the machine's firmware by clicking . Check whether you need to update the firmware by comparing its version with that of the latest firmware via the Internet. You can ... -
Page 136: Menu
6. Monitoring and Configuring the Machine Main Area Displays the contents of the item selected in the menu area. See page 144 "About the Web Image Monitor Help". To display Web Image Monitor, click [Web Image Monitor...] on the [Configuration/About] • tab in the [Printing Preferences] dialog box. Menu This section explains the items in the Web browser menu. Home The [Status], [Device Info], and [Counter] tab are displayed. Details of the tab menu are displayed on the work area. Settings Make system settings for the machine, interface settings, and security. Maintenance Click to perform printer maintenance. Logging in Using Web Image Monitor To change the machine settings, log in to the machine as the administrator. Launch the Web browser. In the address bar, enter "http://(machine's IP address or host name)/". Click [Administrator Login]. A dialog box for entering the user name and password opens. 134 ... -
Page 137: Changing The Machine Settings
Using Web Image Monitor Enter the user name and password, and then click [OK]. If this is the first time to do this, enter "admin" as the user name and leave the password blank. To ensure security, it is important you change the password. In the menu area, click [Settings]. Specify the machine settings. Click [OK]. The specified settings are transmitted to the machine. Changing the Machine Settings You can specify the following settings on each page of Web Image Monitor. [Device Settings] area [System] page • [General Settings] • You can specify [Device Name], [Comment], and [Location]. [Help Source File Setting] • You can specify [Help Source File]. [Date/Time] page • You can specify [Set Date], [Set Time], [SNTP Server Address], [SNTP Polling Interval], [Time Zone], and [Daylight saving time settings]. [Email] page • For details about the items and descriptions, see page 138 "Notifying the Machine Status by E‐mail". [ROM Update] page • You can check the ROM firmware version and update the firmware as necessary. Download the latest update and update the firmware according to the displayed instructions. [Auto Email Notification] area See page 138 "Notifying the Machine Status by E‐mail". [Administrator Tools] area [Administrator Authentication] page • You can specify [New Password] and [Confirm New Password]. [Restore Defaults] page ... - Page 138 6. Monitoring and Configuring the Machine [Network] area [IPv4] page • You can specify whether to enable or disable [IPv4] [Ethernet] • You can specify [Host Name], [DHCP], [Notify Host Name to DHCP Server], [Domain Name], [Use Domain Name], [IPv4 Address], [Subnet Mask], and [AutoIP]. [Details] • You can specify [Default Gateway Address], [DNS Server1], [DNS Server2], [DNS Protocol Priority], [LPR(515)], [DIPRINT(9100)], [IPP(80/631)], [WSD (Device)], [WSD (Device) Port Number], [WSD (Printer)], [WSD (Printer) Port Number], [WSD (Printer) / IPP Timeout], and [LLTD]. [IPv6] page • You can specify whether to enable or disable [IPv6]. [Ethernet] • You can specify [Host Name], [Domain Name], [Stateless Address Autoconfiguration], and [Manual Configuration Address]. [Details] • You can specify [Default Gateway Address], [DNS Server1], [DNS Server2], [DNS Protocol Priority], [LPR(515)], [DIPRINT(9100)], [IPP(80/631)], [WSD (Device)], [WSD (Device) Port Number], [WSD (Printer)], [WSD (Printer) Port Number], [WSD (Printer) / IPP Timeout], and [LLTD]. [DHCPv6] page • You can specify [DHCPv6 Operation Mode], [IAID], and [Request Timeout]. [DDNS] page • You can specify [IPv4], [IPv6], [A Record Registration for DHCP], [AAAA Record Registration for DHCPv6], [Operation when records are duplicated], and [Interval to Update Device's Record]. [SNMP] page • [Protocol] •...
- Page 139 Using Web Image Monitor [SNMPv3] page • [SNMPv3 Setting] • You can specify [SNMPv3 Function], [SNMPv3 Trap Communication], and [Permit SNMPv3 Communication]. [Permit SNMPv3 Communication] • You can configure up to five SNMPv3 trap destinations. [Account(User)] • You can specify [Account Name(User)], [Authentication Password(User)], [Authentication Password re‐enter(User)], [Encryption Password(User)], [Encryption Password re‐enter(User)], and [Access Type(User)]. [Account(Administrator)] • You can specify [Account Name(Administrator)], [Authentication Password(Administrator)], [Authentication Password re‐enter(Administrator)], [Encryption Password(Administrator)], [Encryption Password re‐ enter(Administrator)], and [Access Type(Administrator)]. [Bonjour] page • You can specify whether to enable or disable IPv4 and IPv6 when using [Bonjour]. [Details] • You can specify [Computer Name] and [Location]. [Print Order Priority] • You can specify [DIPRINT], [LPR], and [IPP]. [Security] area [Network Security] page • [SSL/TLS Version] • You can specify [TLS1.1], [TLS1.0], and [SSL3.0]. [Encrypted Communication Settings] • You can specify [AES], [3DES], and [RC4]. [Access Control] page ...
-
Page 140: Notifying The Machine Status By E-Mail
6. Monitoring and Configuring the Machine [Device Certificate] page • You can select [Create], [Request], [Install], [Install intermediate Certificate], [Delete/Cancel Request], and [Delete intermediate Certificate] for up to three certificates. [Certification] • Select the certificate to be used in [SSL/TLS], and [IPsec]. [IPsec] page • You can specify [IPsec]. You can configure up to ten parameters. Notifying the Machine Status by E‐mail You can be notified of the machine status by e‐mail on an occasion such as when a print error occurs. The e‐mail notifying the machine status will be sent to the e‐mail address specified as the destination in advance. You can also specify the timing and status to notify. Depending on your e‐mail application, a phishing warning message might appear when you • receive e‐mail. To stop this warning message appearing, see your e‐mail application's Help for details about registering trusted senders. 138 ... - Page 141 Using Web Image Monitor To receive reports of the machine's status by e‐mail, set [Notify by Email] to [On] in the [System] menu, and then specify an e‐mail address and other required settings using Web Image Monitor. The [Auto Email Notification] setting can be changed only by the administrator. The following status can be notified: The printer error has occurred. • The ink has run out. • The ink will run out soon. • The Ink Collector Unit must be replaced now. • The Ink Collector Unit must be replaced soon. • The fabric was jammed. • The tray size is wrong. • A cover is open. • The specified part such as an ink cartridge is not installed correctly. • The machine is out of its operational temperature range. • The total number of printed pages. • For details about Notify by Email, see page 122 "Using the [System] Menu". • How to log in as the administrator, see page 134 "Logging in Using Web Image Monitor". • Specifying notification the printer status by e‐mail On the [Email] page, you can specify the basic and authentication settings for sending e‐mail. You can enable or disable Auto Email Notification. The "Administrator Email Address" will appear in the e‐mail message. The "Device Email Address" will appear in the "From" box. [Auto Email Notification] You can specify whether to enable or disable this function. Default: [Inactive] [Device Email Address] Enter the device's e‐mail address using up to 127 characters. ...
- Page 142 6. Monitoring and Configuring the Machine • [SMTP Server Name] Enter the server name using up to 127 characters. Default: Blank • [SMTP Port No.] Default: [25] • [SMTP AUTH] You can specify whether to enable or disable this function. Default: [Inactive] • [SMTP Auth. User Name] Enter the user name using up to 191 characters. Default: Blank • [SMTP Auth. Password] Enter the password using up to 63 characters. Default: Blank • [Confirm SMTP Auth. Password] Enter the password using up to 63 characters. Default: Blank • [SMTP Auth. Encryption] If you select [Auto Select], the printer logs on using DIGEST MD5, CRAM MD5, NTLM Authentication, LOGIN, and then PLAIN. If you select [On], the printer logs on using DIGEST MD5, CRAM MD5, and then NTLM Authentication. If you select [Off], the printer logs on using LOGIN and then PLAIN. Default: [Auto Select] [POP before SMTP] By specifying the SMTP authentication setting, you can send e‐mails to destinations where the email server carries out SMTP authentication. By using POP before SMTP, you can log on to an SMTP server supporting POP before SMTP. You can specify whether to use POP before SMTP, and specify the POP server name, POP port number, POP user name, and POP password. • [POP before SMTP] ...
- Page 143 Using Web Image Monitor • [POP Auth. Encryption] If you select [Auto Select], the printer logs on by APOP login, and then in plain text. If you select [On], the printer logs on only by APOP login. If you select [Off], the printer logs on only in plain text. Default: [Auto Select] • [Timeout setting after POP Auth.] In standby time following POP authentication (in milliseconds), you can specify how long the printer can wait for logging on to the SMTP server after logging on to the POP server. Default: [300 milli‐second] [POP3/IMAP4] • [POP Server Name] Enter the server name using up to 127 characters. Default: Blank [Email Reception Port] • [POP3 Reception Port No.] Default: [110] Auto Email Notification: Error Notification by Email: Group 1‐3 [Groups to Notify] • [Group Name] Enter a group name using up to 19 characters. Default: Blank • [Email Language] You can select the language used for e‐mail. Default: [English] • [Subject] Enter a subject using up to 31 characters. Default: Blank • [Message] Enter a message using up to 255 characters. Default: Blank [Notify] ...
- Page 144 6. Monitoring and Configuring the Machine [Error Items to Notify] Select which errors are sent as e‐mail notifications. • [Error: Printer] • [Out of Ink] • [Low Ink] • [Replace Ink Collector Unit] • [Prepare new Ink Collector Unit] • [Garment Misfeed] • [Size Mismatch] • [Cover Open] • [Unit/Cartridge Not Set] • [Device cannot be used in this temperature conditions.] Default: Not selected Auto Email Notification: Counter Notification: Group [Groups to Notify] • [Email Language] You can select the language used for e‐mail. Default: [English] • [Subject] Enter a subject using up to 31 characters. Default: Blank [Notify] • [Notify 1‐5] Enter up to 19 characters for [Name] and up to 127 characters for [Email Address]. Default: Blank [Notification Item] ...
- Page 145 Using Web Image Monitor [Low Ink] • [Notify when error:] Default: [Occurs] • [Remaining] Default: [10 %] [Replace Ink Collector Unit] • [Notify when error:] Default: [Occurs] • [Notify within:] Default: [0 minute(s)] [Prepare new Ink Collector Unit] • [Notify when error:] Default: [Occurs] • [Remaining] Default: [10 %] [Garment Misfeed] • [Notify when error:] Default: [Occurs] • [Notify within:] Default: [0 minute(s)] [Size Mismatch] • [Notify when error:] Default: [Occurs] • [Notify within:] Default: [0 minute(s)] [Cover Open] • [Notify when error:] Default: [Occurs] ...
-
Page 146: About The Web Image Monitor Help
6. Monitoring and Configuring the Machine Auto Email Notification: Counter Notification [Total Pages Printed] • [Method to Notify] Default: [Number of Pages] • [Interval] Default: [100 Per Page] • [Date to Notify] Default: [1] About the Web Image Monitor Help You can view help on the things you can do through Web Image Monitor. When you can access the Internet: Launch the Web browser. In the address bar, enter "http://(machine's IP address or host name)/". Click . The Help top page appears. If you click on the displayed page, you can view Help for that page. When you cannot access the Internet: Insert the driver CD into the CD‐ROM drive. Click [Browse This Disk]. Double‐click the WIMHELP folder. Copy the language folder and save it on your computer. Open the language folder that you saved. Open the index.html. 144 ... -
Page 147: Snmp
SNMP SNMP The Ethernet interface includes the Simple Network Management Protocol (SNMP) agent for UDP. Using the SNMP manager, you can obtain printer data. The default community name is "public". Using this community name, you can obtain MIB data. Supporting MIB SNMPv1/v2c/SNMPv3 • MIB‐II • PrinterMIB • HostResourceMIB • RicohPrivateMIB • PrinterPortMonitorMIB • IP Forwarding Table MIB SNMPv3 • SNMPv2‐MIB • SNMP‐FRAMEWORK ‐MIB • SNMP‐MPD‐MIB • SNMP‐TARGET‐MIB • SNMP‐NOTIFICATION‐MIB • SNMP‐USER‐BASED‐SM‐MIB • SNMP‐VIEW‐BASED‐AMC‐MIB • SNMP‐COMMUNITY‐MIB 145 ... - Page 148 6. Monitoring and Configuring the Machine 146 ...
-
Page 149: Using The Machine With A Macintosh
7. Using the Machine with a Macintosh This chapter describes how to use the machine with a Macintosh. System Requirements for Macintosh The machine is compatible with Mac OS X 10.11 and later versions. The operating environment for the printer driver depends on the application in use. OS X Server is not supported. • You can only use a network printer via a TCP/IP connection. You cannot use AppleTalk. ... -
Page 150: Instructions Applicable To Both Macintosh And Windows Computers
7. Using the Machine with a Macintosh Instructions Applicable to Both Macintosh and Windows Computers The instructions in the following sections apply to both Windows and Macintosh computers. Checking the machine status and settings See page 96 "Using the [List/Test Print] Menu". Specifying the interface and network settings See page 125 "Using the [Host Interface] Menu". Usable fabric and precautions regarding fabric See page 56 "Fabric". Loading fabrics See page 58 "Loading Fabrics". Specifying the machine's settings using a web browser See page 132 "Using Web Image Monitor". Checking the number of printed pages See page 93 "Using the [Counter] Menu". Adjusting the print quality See page 98 "Using the [Maintenance] Menu". Specifying system settings See page 122 "Using the [System] Menu". Selecting the display language See page 130 "Using the [Language] Menu". Restricting machine functions See page 159 "Restricting Machine Functions". Replacing an ink cartridge See page 160 "Replacing an Ink Cartridge". Replacing an ink collector unit See page 166 "Replacing an Ink Collector Unit". Cleaning See page 172 "Cleaning". Moving See page 177 "Moving". Disposing See page 179 "Disposing". When not using for a long period of time See page 180 "When Not Using for a Long Period of Time". 148 ... - Page 151 Instructions Applicable to Both Macintosh and Windows Computers Printing will not start See page 187 "Printing Does Not Start". Tray does not operate normally See page 188 "The Tray Does Not Operate Correctly". Print results are not satisfactory See page 196 "Print Results Are Not Satisfactory". Error & status messages on the display See page 203 "Error & Status Messages on the Display". Software on the CD‐ROM See page 217 "Software on the CD‐ROM". 149 ...
-
Page 152: Installing The Printer Driver On A Macintosh
7. Using the Machine with a Macintosh Installing the Printer Driver on a Macintosh This section explains how to install the printer driver on a Macintosh and then register the printer in accordance with the type of connection. The following procedures are based on Mac OS X 10.11. The procedures for your machine might differ slightly from those shown if you are using a different version of Mac OS. • You cannot install the printer driver while other applications are running. Be sure to close all applications before installing the printer driver. • To install the printer driver, you must log on as administrator. For details, consult the administrator of the Macintosh in question. Insert the driver CD in the CD‐ROM drive. Double‐click the [macOS] folder. Double‐click the [RPCS_R] folder. Double‐click the "product name.pkg" icon. Click [Continue] three times. Click [Agree]. Select the install location, and then click [Continue]. Click [Install]. To select where to install the file, click [Change Install Location...]. Enter the administrator's user name and password, and then click [Install Software]. Click [Close]. Adding the Printer through a USB Connection via the Printers & Scanners Preferences Pane • Connect the machine to the USB port in advance and turn it on. On the [Apple] menu, click [System Preferences...], and then click the [Printers & Scanners]. From the list of printers, select a printer that is automatically recognized by plug‐ andplay, and then click [‐] to delete it. Click [Delete Printer]. 150 ... -
Page 153: Adding The Printer In The Printers & Scanners Panel Using Bonjour
Installing the Printer Driver on a Macintosh Click [+]. Click [Default], and then make sure [Kind] is set to [USB]. Select the name of the printer you want to use. Make sure the product name appears in the [Name] field, and then click [Add]. The name of the added printer appears in [Printers & Scanners]. Click [×]. Adding the Printer in the Printers & Scanners Panel Using Bonjour You can configure the machine to print using Bonjour. • Before printing, be sure to set [Bonjour] to [Active] using Web Image Monitor. On the [Apple] menu, click [System Preferences...], and then click the [Printers & Scanners]. Click [+]. Click [Default], and then select the printer. Make sure [Kind] is set to [Bonjour]. Make sure the product name appears in the [Name] field, and then click [Add]. The name of the added printer appears in [Printers & Scanners]. Click [×]. Adding the Printer through a Network Connection via the Printers & Scanners Preferences Pane • Connect the machine to the network in advance and turn it on. • Specify the machine's IP address on its control panel in advance. On the [Apple] menu, click [System Preferences...], and then click the [Printers & Scanners]. Click [+]. Click [IP]. From the [Protocol:] menu, select [HP Jetdirect ‐ Socket]. In the [Address:] field, enter the IP address or the host name of the printer you want to use. 151 ... - Page 154 7. Using the Machine with a Macintosh Select [Select Software...] in the [Use:] field. Select the name of the printer you want to use in the list, click [OK], and then click [Add]. The IP address of the added printer appears in [Printers & Scanners]. Click [×]. 152 ...
-
Page 155: Maintenance Of The Machine Using A Macintosh
Maintenance of the Machine Using a Macintosh Maintenance of the Machine Using a Macintosh You can perform the maintenance of the machine using a Macintosh. For details about maintenance, see page 98 "Using the [Maintenance] Menu". Displaying the [Maintenance Utility] on a Macintosh On the [Apple] menu, click [System Preferences...], and then click the [Printers & Scanners]. Select the printer you want to use, and then click [Options & Supplies...]. If you want to use a network printer, select the IP address or the host name of the printer. Click [Utility] and [Open Printer Utility]. If [Maintenance Utility] is displayed, bidirectional communication is available. • For details about the [Maintenance Utility], see the printer driver Help. 153 ... -
Page 156: Printing With A Macintosh
7. Using the Machine with a Macintosh Printing with a Macintosh This section explains how to load a fabric in the tray and print on it. How to open the printer properties pane on a Macintosh depends on the application in use. For details, see the application's manual. Load on the tray stand the tray in which the fabric has been loaded. How to load the fabric depends on the fabric type. See page 58 "Loading Fabrics". If you want to change the print condition settings for the media size, print mode, color mode, and color profile, you need administrator's privileges. You must log on as a member of the administrators group. If you do not want to change the print condition settings, proceed to Step.8. Open the Terminal application and input the command "> cupsctl WebInterface=yes". Access a web browser and enter localhost: 631 in the address bar. From the [Printers] tab, select the printer you want to use. If you want to use a printer connected to the network, select the printer according to its IP address. From the menu where application names (such as Preview) are displayed, you can select items such as [Printer Features]. If necessary, change the settings of each item. Select [Set Default Options] from the Administration drop‐down list in the displayed screen. Specify the settings for Media Size, Print Mode, and Color Mode in the General screen. Specify the settings for Color profile in the Image Adjustments screen. From the application's File menu, select [Print...]. From the [Printer:] menu, select the printer you want to use. If you want to use a printer connected to the network, select the printer according to its IP address. From the menu where application names (such as Preview) are displayed, you can select items such as [Printer Features]. ... - Page 157 Printing with a Macintosh • For details about the printable area of a fabric, see page 57 "Printable area" • Depending on the application, the setting contents of the printer driver may be automatically changed. • For details on how to handle the tray, see page 20 "Loading and Removing the Tray". • For usable fabric types and precautions, see page 56 "Fabric". 155 ...
-
Page 158: Canceling Printing On A Macintosh
7. Using the Machine with a Macintosh Canceling Printing on a Macintosh You can cancel a print job from either the machine or the computer. Canceling a print job from the machine You can cancel the print job by pressing the [Stop] key. See page 86 "Canceling Printing Using the [Stop] Key". If the computer has not yet sent the print job to the printer If you execute the print command, the print job queue window opens and the print job is queued. Using the print job queue window, you can cancel print jobs. See page 156 "Canceling a Print Job from the Print Job Queue Window". Canceling a Print Job from the Print Job Queue Window You can delete a print job before, during, and after its being sent from the computer to the printer. Check that the print job queue window opens. In the print job queue window, select the print job you want to cancel. Click [×]. 156 ... -
Page 159: Opening Help On A Macintosh
Opening Help on a Macintosh Opening Help on a Macintosh Help is useful for learning about what the various settings do and how to specify them. On the [Apple] menu, click [System Preferences...], and then click the [Printers & Scanners]. Select the printer you want to use, and then click [Open Print Queue...]. If you want to use a network printer, select the IP address or the host name of the printer. On the [Help] menu, click the help showing your printer's name. 157 ... - Page 160 7. Using the Machine with a Macintosh 158 ...
-
Page 161: Maintenance
8. Maintenance This chapter describes how to maintain and operate the machine. Restricting Machine Functions This section explains how to lock keys on the control panel to prevent general users from changing settings and performing certain functions. By locking certain control panel keys, you can prevent users other than the administrator from doing the following: Pressing the [ /Menu] key to display the menu • Press the [Tray] and [Stop] keys at the same time to perform the no‐fuss head cleaning • Pressing the [Stop] key to cancel print jobs • Pressing the [Power] key to turn the machine off • Locking the Keys Use this procedure to lock the control panel keys. Simultaneously press and hold down the [ /Menu], [Escape], and [#Enter] keys for 3 seconds, and then [#Enter] key two times. If you press a locked key, "Panel Locked/Cannot use" appears. • If an error occurs while the keys are locked, certain keys are automatically unlocked to allow • you to clear the error. Unlocking the Keys Use this procedure to unlock the control panel keys. Simultaneously press and hold down the [ /Menu], [Escape], and [#Enter] keys for 3 seconds, and then [#Enter] key two times. Unlock the keys if an error occurs and the "Panel Locked/Cannot use" message appears. • ... -
Page 162: Replacing An Ink Cartridge
8. Maintenance Replacing an Ink Cartridge If the ink cartridge has been empty for a long time, you will not be able to perform the • maintenance for the print head. This may cause a printer malfunction. Make sure you always have a new ink cartridge. Install it soon after the message about replacement appears. Checking the Remaining Ink Follow the procedure below to check when to replace ink cartridges using the Status Monitor or the cartridge replacement indicators. Checking the remaining ink level on the display You can check the remaining ink level by looking at the icon that appears above the cartridge replacement indicator. K, C, M, and Y indicate black, cyan, magenta, and yellow, respectively. CHU012 If the ink will soon run out, the message "Low Ink" appears on the display. Make sure you have a new ink cartridge for the color indicated by the icon. If an ink cartridge runs out of ink, the message "Open Front Cover / Replace Ink Crtg" appears on the display. Replace the ink cartridge for the color indicated by the or icon. 160 ... -
Page 163: Replacing An Ink Cartridge
Replacing an Ink Cartridge Checking the remaining ink level on the Status Monitor The cartridge status can be used to check when to replace the cartridge. Open the [Printing Preferences] dialog box. Click the [Maintenance] tab. Click [Display Status Monitor]. Check the cartridge status. You can specify that the Status Monitor send a notification when the ink will soon run • out. To do this, open the printer driver dialog box, click [Status Monitor Settings] on the [Maintenance] tab, and then select the [Notify cartridge replacement] check box. Be sure to insert the ink cartridges correctly. If you insert them incorrectly, Status • Monitor might not be able to detect the amount of ink that is remaining in the cartridges. See page 164 "Handling Ink Cartridges". ... - Page 164 8. Maintenance • When removing the ink cartridge, avoid putting your hand near the place where the ink cartridge is installed. If ink comes in contact with your hands, wash them thoroughly with soap and water. • When removing the ink cartridge, do not touch the inside of the machine. • Carefully install a cartridge in the correct position. • Do not push the right front cover to insert the ink cartridge when replacing it. Take the ink cartridge out of the box. Open the right front cover. DYX030 Take out the empty cartridges. While taking out the cartridges, be sure to hold the machine firmly so that it does not move. DYX047 162 ...
- Page 165 Replacing an Ink Cartridge Check the cartridges' orientation, and then install them carefully. Install in the following order from the left: black, cyan, magenta, and yellow. DYX051 Push each cartridge fully in. DYX052 Close the right front cover. Make sure that the ink cartridge has been fully pushed in before closing the right front cover. Replacing an Ink Cartridge DYX059 163 ...
-
Page 166: Handling Ink Cartridges
8. Maintenance Handling Ink Cartridges Important points about handling ink cartridges are explained. • The following explains the warning messages on the plastic bag used in this product's packaging. • Keep the polythene materials (bags, gloves, etc.) supplied with this machine away from babies and small children at all times. Suffocation can result if polythene materials are brought into contact with the mouth or nose. • Keep ink and ink containers out of reach of children. • If ink gets into contact with eyes, wash eyes immediately with running water. Consult a doctor if necessary. • When replacing ink, avoid getting ink on your clothing. If ink comes into contact with your clothing, wash the stained area with cold water. Hot water will set the ink into the fabric and make removing the stain impossible. • When replacing ink, avoid getting ink on your skin. If ink comes into contact with your skin, wash the affected area thoroughly with soap and water. • When removing the ink cartridge, avoid putting your hand near the place where the ink cartridge is installed. If ink comes in contact with your hands, wash them thoroughly with soap and water. About ink cartridges • Ink cartridges comply with the manufacturer's safety specifications. To ensure safety and reliability, use genuine ink cartridges. • When using the machine for the first time, install genuine ink cartridges. ... - Page 167 Replacing an Ink Cartridge Using ink cartridges • Ink cartridges should be used up before their expiry date, ideally within three months of being removed from their packaging. • Do not open the package of an ink cartridge until the cartridge will be installed in the machine. • Do not touch the ink cartridges' ink inlets or chip contacts. • Do not shake ink cartridges strongly. Ink may leak out. • Do not take apart ink cartridges. • Do not open the right front cover except when installing ink cartridges. Do not turn off the power or unplug the power cord during the process of installing the cartridges. • Always confirm the color of an ink cartridge before installing it. • Do not remove an ink cartridge once it has been installed unless necessary. • Do not remove an ink cartridge while printing is being performed. Printing will stop. Storing ink cartridges • Store ink cartridges at a temperature of between ‐30 and +40°C (‐22 to 104°F). Ink consumption • To protect the print head and ensure print quality, the machine performs periodic maintenance and print head cleaning when it is turned on. Both operations consume ink. • The amount of ink consumed during cleaning depends on the cartridge size. If you intend to use the machine after it has not been used for a long time, see page 180 • "When Not Using for a Long Period of Time". 165 ...
-
Page 168: Replacing An Ink Collector Unit
8. Maintenance Replacing an Ink Collector Unit Checking the Waste Ink Level Follow the procedure below to check when to replace an ink collector unit using the Status Monitor or the waste ink full indicator. Checking the waste ink level on the display You can check the waste ink level by looking at the icon that appears above the waste ink full indicator. CHU124 If the ink collector unit is almost full, the message "Prepare new Ink Collector Unit" appears on the display. Make sure you have a new ink collector on hand. If the ink collector unit is full, the message "Ink Collector Unit is full / Replace Ink Collector Unit" appears on the display. Replace the ink collector unit. Checking the waste ink level on the Status Monitor The ink collector unit status can be used to check when to replace the ink collector unit. 166 ... -
Page 169: Replacing An Ink Collector Unit
Replacing an Ink Collector Unit Open the [Printing Preferences] dialog box. Click the [Maintenance] tab. Click [Display Status Monitor]. Check the ink collector unit status. Replacing an Ink Collector Unit • The following explains the warning messages on the plastic bag used in this product's packaging. - Page 170 8. Maintenance • When replacing ink, avoid getting ink on your skin. If ink comes into contact with your skin, wash the affected area thoroughly with soap and water. • When removing the ink cartridge, avoid putting your hand near the place where the ink cartridge is installed. If ink comes in contact with your hands, wash them thoroughly with soap and water. When removing the ink collector unit, do not touch the inside of the machine. • Do not use an ink collector unit that has not been used for a long time. • Do not touch the ink collector unit' chip contacts. • Take care not to drop the ink collector unit. • Take care not to drop the ink collector unit when putting it in the supplied plastic bag. The • bag might tear, causing ink to spill. Make sure the ink collector unit is fully inserted. If it is not, ink will leak inside the machine. • Take the ink collector unit out of the box. Open the right front cover. DYX030 Wait at least five seconds, and then remove the full ink collector unit from the machine. DSA322 While pulling the unit out, keep the unit level and press on the area marked "PUSH". 168 ...
- Page 171 Replacing an Ink Collector Unit Put the Ink collector unit in the supplied plastic bag. DSA228 Insert the new ink collector unit. DSA323 Slide the ink collector unit carefully into the machine until you hear it click. DSA324 Close the right front cover. 169 ...
-
Page 172: Replacing Filters
8. Maintenance Replacing Filters If a message prompting you to replace the filter appears, replace it, and then reset the count for the number of prints using the [Maintenance] menu. Prepare the filter to replace. Pinch the handle of the filter, and then pull it out. DSB071 Insert the new filter firmly. DSB072 Replace the filter of the opposite side in the same way. Press the [ /Menu] key. Press the [ ] or [ /Menu] key to display [Maintenance], and then press the [#Enter] key. Press the [ ] or [ /Menu] key to display [Fan Filter], and then press the [#Enter] key. Press the [ ] or [ /Menu] key to display [Reset count no.], and then press the [#Enter] key. Check that "Press # to reset count no" is displayed, and then press the [#Enter] key. Press the [Escape] key until the top screen appears. 170 ... -
Page 173: Adjusting The Fan Speed
Adjusting the Fan Speed Adjusting the Fan Speed You can adjust the fan speed if you are bothered with the fan noise. Press the [ /Menu] key. Press the [ ] or [ /Menu] key to display [Maintenance], and then press the [#Enter] key. Press the [ ] or [ /Menu] key to display [Fan Speed], and then press the [#Enter ]key. Press the [ ] or [ /Menu] key to select the fan speed, and then press the [#Enter] key. [Normal Speed] is specified as the factory default. Usually, you need not to change the setting. If you set [Fan Speed] to [Low Speed], the fan becomes quiet and the machine's operational life shortens, depending on the conditions and environment of the machine. If you set [Fan Speed] to [Off], the fan stops. Note that this might particularly shorten the machine's operational life. Do not use this setting except in special cases. Press the [Escape] key until the top screen appears. 171 ... -
Page 174: Cleaning
8. Maintenance Cleaning Clean the outside of the machine regularly to maintain the condition of the machine. • Do not remove any covers or screws other than those explicitly mentioned in this manual. Inside this machine are high voltage components that are an electric shock hazard. Contact your authorized Roland DG Corporation dealer if any of the machine's internal components require maintenance,adjustment, or repair. • Do not attempt to disassemble or modify this machine. Doing so risks burns and electric shock. • When performing maintenance on the machine, always disconnect the power cord from the wall outlet. To clean the exterior of the machine, wipe it with a soft, dry or damp cloth. If the dirt does not come off, wipe the machine first with a cloth moistened with a neutral detergent, then with a damp cloth, and finally with a dry cloth. Do not use volatile chemicals like benzene or thinner, or insecticides on the machine. Using •... - Page 175 Cleaning Open the top cover. DYX026 Wipe the top cover and the area around it by using a cloth moistened with water or cleaning liquid. Unless you can remove the dirt, wipe the machine with a cleaning alcohol (ethanol). DYX027 Close the top cover. DYX028 173 ...
-
Page 176: Cleaning The Height Position Sensor
8. Maintenance Cleaning the Height Position Sensor Turn off the machine before cleaning the height position sensor. • When cleaning the inside of the machine, be sure to wear protective glasses and protective • gloves. Use a cleaning stick and a cleaning liquid or a cleaning alcohol (ethanol) to clean the height • position sensor. You can clean it effectively with the corner of a cleaning stick because the lens of the height position sensor is very small and concave. To clean the height position sensor, use a new cleaning stick on which there is no any ink or • other dirt. Open the top cover. DYX026 174 ... - Page 177 Cleaning Wipe off dirt on the lens of the height position sensor by moistening the cleaning stick with cleaning liquid or cleaning alcohol (ethanol). DYX101 Cleaning stick Height position sensor Lens Wipe the area shown in the figure back and forth 10 times. Wait 5 minutes, and then wipe it backand forth 10 times again. DSB054 175 ...
-
Page 178: Cleaning The Power Cable Plug
8. Maintenance Close the top cover. DYX028 Cleaning the Power Cable Plug This section describes precautions for cleaning the power cable plug. • Be sure to disconnect the plug from the wall outlet at least once a year and check for the following: • There are burn marks on the plug. • The prongs on the plug are deformed. • If any of the above conditions exist, do not use the plug and consult your authorized Roland DG Corporation dealer. Use of the plug could result in fire or electric shock. • Be sure to disconnect the power cord from the wall outlet at least once a year and check for the following: • The power cord's inner wires are exposed, broken, etc. • The power cord's coating has a crack or dent. • When bending the power cord, the power turns off and on. • Part of the power cord becomes hot. • The power cord is damaged. • If any of the above conditions exist, do not use the plug and consult your authorized Roland DG Corporation dealer. Use of the plug could result in fire or electric shock. • Be sure to disconnect the plug from the wall outlet and clean the prongs and the area around the prongs at least once a year. Allowing dust to build up on the plug constitutes ... -
Page 179: Moving
Moving Moving The precautions when moving the machine a short distance or long distance are explained. Moving a Short Distance Take the following precautions when moving the machine a short distance ‐ for instance, when relocating the machine inside the same room. • The printer weighs around 24 kg (53.0 lb). • Hold the lift indentations at the base of the machine's sides with two people or more. Lift it slowly and do not strain your body. • When moving the machine, be sure to remove the tray and manual pocket. Lifting the machine forcefully or treating it roughly may break it or result in injury. • Unplug the power cord from the wall outlet before you move the machine. While moving the machine, take care that the power cord is not damaged under the machine. Failing to take these precautions could result in fire or electric shock. • When disconnecting the power cord from the wall outlet, always pull the plug, not the cord. Pulling the cord can damage the power cord. Use of damaged power cords could result in fire or electric shock. Be sure to keep the machine level. If it is unduly tilted, ink will leak from the ink collector. • Press and hold down the [Power] key until it turns off, and then unplug the power cord. Disconnect the USB cable or Ethernet cable. Remove the tray and manual pocket. 177 ... -
Page 180: Moving A Long Distance
8. Maintenance Lift the machine and move it to the place where you want to install it. DSB067 Grip the indentations for lifting at the base of the machine's sides with two people or more, as shown. Lift and carry the machine slowly and carefully. When you move the machine, unplug the power cord from the machine, too. • Make sure the power cord is not trapped under the machine. • Moving a Long Distance To transport the machine, put it in the box it came in. For details, contact your authorized Roland DG Corporation dealer. Check the type of ink cartridges that are installed in the machine before moving the • machine. Do not remove ink cartridges. Make sure that the ink cartridges have been fully pushed in, • and then move the machine. Remove the tray. • The inside of the machine may become dirty if the machine is not level when transported. • When you move the machine, also unplug the power cord from the machine. • 178 ... -
Page 181: Disposing
Disposing Disposing When disposing of the machine by yourself, be sure to comply with local disposal regulations. 179 ... -
Page 182: When Not Using For A Long Period Of Time
If you try to use the machine after it has been out of use for a long time, it may not print • properly even if head cleaning is carried out several times. If this is the case, carry out head flushing. See page 102 "Head‐flushing". If the print heads are still clogged, leave the machine for about ten minutes, and then print the nozzle check pattern. If the problem persists, turn the machine off and leave it for at least eight hours. This should unclog the print heads. After head cleaning is performed multiple times, clogged ink will dissolve over time, and • normal printing may become possible. If there is no improvement after performing the steps above, contact authorized Roland DG • Corporation dealer. 180 ... -
Page 183: Troubleshooting
9. Troubleshooting This chapter describes troubleshooting procedures that are applicable to all functions of this machine and what to do when print results are not satisfactory or error messages appear on the display. Software Cannot Be Installed This section explains how to troubleshoot software installation problems under different environments. Confirming Installation Check whether the software has been installed. Checking icons If the printer driver is properly installed, the machine icon appears in the [Devices and Printers] window. If the icon does not appear, the software has not been installed. Try installing the software again. See page 37 "Connecting the Computer and Installing the Printer Driver". Checking ports In the [Printer Properties] dialog box, check that USB connection or network printer is selected for the port. To check the connection, perform a test print. If the test print is not printed, see page 184 "If Test Print Fails". Checking Your Computer Environment Check the system requirements for installing the software. Quick Install for USB The CD‐ROM may not be inserted properly. Check that the CD‐ROM is inserted properly. Check also that it is not damaged and the CD‐ROM drive is working properly. The power cord or USB cable may not be properly connected. Check that the power cord and USB cable are properly connected and not damaged. The operating system is incompatible. There is insufficient hard disk space. Check that the computer's operating system is fully compatible with this machine. See page 24 "Checking the Computer and Installation Area". ... - Page 184 9. Troubleshooting Other applications are not closed. When installing software, quit all other applications. Installation may be disrupted if other applications are open. Also, quit any anti‐virus applications that are running. The machine is turned on before installation. Turn the machine off and then on, and then try "Quick Install for USB" again. The USB connection does not work. Turn the machine off, unplug the USB cable from the machine, launch "Quick Install for USB" again, and then turn the machine on when the dialog box confirming printer driver installation appears. If this does not resolve the problem, press the [ /Menu] key, change [USB Setting] in [Host Interface] from [Auto] to [Full Speed], uninstall the printer driver, delete the device, and then launch "Quick Install for USB" again. Windows made USB settings automatically. Open Windows' Device Manager, and then, under [Universal Serial Bus controllers], remove any conflicting devices. Conflicting devices will be indicated by a yellow [!] or [?] icon. Take care not to accidentally remove required devices. For details, see page 186 "Deleting Devices". An error occurs during the installation because the machine is recognized as an unidentified device. Follow the troubleshooting procedure described under in "The USB connection does not work" or "Windows made USB settings automatically" section. Quick Install for Network The CD‐ROM may not be inserted properly. Check that the CD‐ROM is inserted properly. Check also that it is not damaged and the CD‐ROM drive is working properly. The power cord or Ethernet cable may not be properly connected. Check that the power cord and Ethernet cable are properly connected and not damaged. ...
-
Page 185: Printer Driver Cannot Be Installed
Software Cannot Be Installed Printer Driver Cannot Be Installed This section explains how to troubleshoot printer driver installation problems. The printer driver installer does not start. An error occurs during installation. If the screen does not appear even when you double‐click the [SETUP.EXE] icon, or if an • error occurs during installation, access the CD‐ROM drive from [Computer (or My Computer)] or [Explorer]. Double‐click the [RP_SETUPXX.EXE] icon, and then install the printer driver by following the instructions that appear on the screen. An error occurs if the path to the location of the stored data is too long. To install a printer • driver downloaded from a Web site or copied from a CD‐ROM, save the printer driver directly on the hard disk, and then install it. Add the printer without using the installer. • On the [Start] menu, click [Devices and Printers], click [Add a printer], and then install the printer driver according to the displayed instructions. For Windows 10: Click [Control Panel], [Hardware and Sound], [Devices and Printers], • and then click [Add a printer]. For details about adding printers, see the Windows Help. USB Connection is not Automatically Detected If the USB connection is not automatically detected, do the following procedure: Delete the printer driver. See page 185 "Uninstalling the Printer Driver". Delete the device. See page 186 "Deleting Devices". Run [Quick Install for USB] again. If these steps do not resolve the problem, contact your authorized Roland DG Corporation dealer. 183 ... -
Page 186: If Test Print Fails
9. Troubleshooting If Test Print Fails This section explains how to troubleshoot Test Print problems. The power cord or USB cable or Ethernet cable is not properly connected. Check that the power cord and USB cable, Ethernet cable are properly connected. The port connection is not properly set. This guide uses Windows 7/10 procedures for its examples. Procedures and screens might vary depending on the operating system you are using. On the [Start] menu, click [Devices and Printers]. • For Windows 10: Click [Control Panel], and then click [View devices and printers]. 2. Right‐click the machine icon, and then click [Printer properties]. Click the [Ports] tab, and then check the printer port. Select USB or network printer in the list when the selected port connection is something other than USB or network printer. To connect via USB when USB does not appear in the list, you must re‐install the printer driver. See page 183 "USB Connection is not Automatically Detected". Ink feed is incomplete. Ink begins automatically feeding into the print heads when the power of the machine is first turned on or when a cartridge is replaced. Wait until ink feed is complete at which point the power lamp stops flashing and remains lit. A printer error has occurred. Check the error message on the display, resolve the problem, and then perform the test print again. See page 203 "Error & Status Messages on the Display". If you cannot resolve the problem, contact authorized Roland DG Corporation dealer. If the Status Monitor displays an error message, see page 208 "Status Monitor Errors". • 184 ... -
Page 187: Uninstalling
Uninstalling Uninstalling If software was installed incorrectly or incompletely, uninstall and then re‐install it. This guide uses Windows 7/10 procedures for its examples. Procedures and screens might vary depending on the operating system you are using. Before uninstalling software or deleting devices, turn off any other printers connected to • your computer via USB, or disconnect the USB cable to the printers. Screens vary according to the operating environment. • To re‐install the software, restart Windows. • Uninstalling the Printer Driver The Status Monitor installed with the current printer driver is uninstalled when the current • printer driver is uninstalled. Press and hold down the [Power] key for one second. On the [Start] menu, click [Devices and Printers]. • For Windows 10: Right‐click [Start], click [Control Panel], and then click [View devices and printers]. Right‐click the machine icon, and then click [Remove device]. Click [Yes]. The printer driver is uninstalled. Select an arbitrary printer, and then click [Print server properties]. Click the [Drivers] tab. In the [Installed printer drivers:] list, select [Printer Name], and then click [Remove]. Click [Remove driver and driver package], and then click [OK]. Click [Yes]. Click [Delete]. Click [OK]. Click [Close]. Restart Windows. 185 ... -
Page 188: Deleting Devices
9. Troubleshooting To update the printer driver, download the latest driver from the manufacturer's Web site. • Deleting Devices If Windows automatically establishes a USB connection because of an unauthorized device, you can delete the device and any others like it. Be sure not to delete necessary devices. If USB connection is established normally, you do not need to perform this procedure. Turn the machine on. On the [Start] menu, click [Control Panel]. • For Windows 10: Right‐click [Start], and then click [Control Panel]. Click [System and Security]. Click [Device Manager] in [System]. Click [USB Printing Support] or [Product Name]. Click [Action], and then click [Uninstall]. Click [OK]. Click [Close]. 186 ... -
Page 189: Printing Does Not Start
Printing Does Not Start Printing Does Not Start If printing fails, check the following: Check the machine's power. The power lamp is not lit. • Turn the machine on. See page 22 "Turning On/Off the Power". The power lamp does not light up or flash despite the [Power] key being pressed. • Check whether the power cord is plugged into the receptacle properly. Plug another appliance that works into the receptacle to determine whether the receptacle is all right. If the problem persists, unplug the power cord and contact your authorized Roland DG Corporation dealer. Check the error message. If the error message appears on the display • See page 203 "Error & Status Messages on the Display". If the error message appears on the Status Monitor • See page 208 "Status Monitor Errors ". Check the name associated with the printer's icon. If you share the printer, make sure the name associated with the printer's icon does not exceed 32 characters. Check the printer driver setting. On the [Detailed Settings] tab, select [Print Quality], and then select the [Change Data Processing] check box. Checking the Version of the Printer Driver If it is not the latest version, update the driver. Checking the version of the printer driver on a Windows • Open the [Printing Preferences] dialog box from the application. On the [Configuration/About] tab, click [About]. Check the version. Checking the version of the printer driver on a Macintosh • 1. On the [Apple] menu, click [System Preferences...]. Click the [Printers & Scanners]. ... -
Page 190: The Tray Does Not Operate Correctly
9. Troubleshooting The Tray Does Not Operate Correctly This section explains how to troubleshoot when printing does not start even though the tray is loaded, when the tray cannot be removed or the fabric or a foreign object is stuck. Checking the Status of the Fabric and the Tray If printing does not start with an error message even after the tray is loaded, check the following: The fabric is incorrectly loaded Wrinkles, slacks or floats remain on the printing surface. Load the fabric while smoothing out the fabric from the center outward so that the printing surface becomes flat. See page 58 "Loading Fabrics". Removal of dust/flattening fibers is not performed or performed insufficiently. Before printing, straighten out the fabric. Once dust is removed from the printing surface of the fabric, flatten the fabric and remove wrinkles. See page 72 "Removing Dust and Flattening Fibers". The edges of the fabric are protruding from the tray. The edges of the fabric are protruding from the tray. Tuck under the table the parts protruding from the table of the tray. See page 58 "Loading Fabrics". A non‐compatible fabric is loaded. Remove the loaded fabric and load a usable fabric. See page 56 "Usable Fabric". Uneven fabric is loaded. With uneven fabric, the height of the tray may not be correctly detected. Adjust the height of the tray. See page 189 "Adjusting the Height of the Tray". Wrinkly fabric is loaded. When printing on wrinkly fabric while [Select Print Quality:] is set to [Vivid] and [Garment Type:] is set to [T‐shirt (White/Pale)] in the printer driver, a height position sensor in the machine may react. If this is the case, set [Select Print Quality:] to [Fine]. See page 84 "Printing". 188 ... -
Page 191: Adjusting The Height Of The Tray
The Tray Does Not Operate Correctly The tray is incorrectly loaded The tray is not pushed to the back. Place the rear side of the tray on the tray stand, and then slowly push it in all the way until it clicks. See page 58 "Loading Fabrics". The position of the tray is too high. A height position sensor in the machine is reacting. Remove the tray and reload the fabric correctly, and then reload the tray. If printing does not start, adjust the height of the tray. See page 58 "Loading Fabrics", page 189 "Adjusting the Height of the Tray". Foreign objects remain inside the machine Remove the tray and find foreign objects inside the machine. Adjusting the Height of the Tray When you have multiple trays, the appropriate height for printing with each tray varies depending on the type of the tray and the garment to be loaded on it. Therefore you need to adjust ... - Page 192 9. Troubleshooting DYX035 Sensor Press the [Start] key. Printing starts. If printing does not start, repeat Steps 1 and 2 until the height becomes appropriate for printing. Adjusting the height of the tray automatically • Remove the garment from the tray before performing auto adjustment. Do not perform auto adjustment while the garment is on the tray. • When you perform auto adjustment, the height of the tray is adjusted appropriately according to the tray that is set. Perform auto adjustment again every time a different tray is set. ...
- Page 193 The Tray Does Not Operate Correctly Check that "Press # to start" is displayed, and then press the [#Enter] key. Auto adjustment starts after the tray is loaded into the machine. After auto adjustment is completed, the tray returns and stops in position so that you can see the tray positioning line on the left side of it. • The value set by adjustment is stored in [Manual Adjust] in the [Maintenance] menu. • If an error occurs during auto adjustment, perform the operation from Step 1 again. Adjusting the height of the tray manually • If you enter a negative value as the height value, the height position sensor in the machine may react. Load the fabric correctly so that the printing surface can be flat. • If the fabric is not correctly set after the height of the tray is adjusted manually, the machine might not start printing because a height position sensor in the machine reacts when you send a print job. In this case, remove the tray, load the fabric into the tray correctly, and then load the tray into the machine. • The image quality might deteriorate if you change the height value significantly. In this case, adjust the registration. • Adjust the height little by little so that the print side is not rubbed. When printing starts, the machine adjusts the height of the tray according to the height value specified in the [Maintenance] menu. If the printed image is blurry or there is dust stuck to it, or ...
- Page 194 9. Troubleshooting DSA215 When the distance between the print head and the fabric is suitable, the printed image is satisfactory as shown in the figure. DSA216 Press the [ /Menu] key. Press the [ ] or [ /Menu] key to display [Maintenance], and then press the [#Enter] key. Press the [ ] or [ /Menu] key to display [Height Adjust], and then press the [#Enter] key. Press the [ ] or [ /Menu] key to display [Manual Adjust], and then press the [#Enter] key. Press the [ ] or [ /Menu] key to enter the height value, and then press the [#Enter] key. • You can enter a height value from ‐20 to 20 in increments of 0.1. We recommend changing the existing setting by entering values in increments of ±0.1 to 0.3. ...
-
Page 195: Removing The Tray Manually
The Tray Does Not Operate Correctly • The value you set in Step 5 remains after the machine is turned off. • If you enter "‐2.0" as the height value and want to increase the value in Step 5, press the [Stop] key to cancel printing whenever you enter a new height value. Removing the Tray Manually If the tray is not automatically ejected, eject the tray using any of the following procedures: Turning the power back on Turn the power off, and then turn the power on again. The tray stand moves to the front and the tray will be ejected. Pressing the [Tray] key If the tray is not ejected even if the power is turned on again, press the [Tray] key and move the tray stand to the front. If the tray is not removed using above mentioned procedures, a fabric or foreign object may be stuck inside the machine. Open the top cover and remove the fabric or foreign object, and then remove the tray. See page 193 "Removing a Fabric or Foreign Object by Opening the Top Cover ". Removing a Fabric or Foreign Object by Opening the Top Cover • Do not open the cover while the machine is operating and keep your hands or fingers clear of the machine. Doing so might cause your hands or fingers to get trapped in the machine, • Normally, keep the top cover closed. For safety reasons, opening or closing the top cover will cause the power to turn off immediately. Do not open or close the top cover when not required, such as while printing is performed. When a message prompting you to open the top cover appears on the display, follow the instructions. • Do not touch the ink tubes or toothed rubber belt. Also, take care not to catch cables or ink tubes with your sleeves. 193 ... - Page 196 9. Troubleshooting DSA504 Toothed rubber belt Ink tubes Open the top cover. DYX026 Press the [Tray] key. Remove the stuck fabric or foreign object through the top cover opening. DYX056 Remove the fabric or foreign object carefully. Forcibly removing them may cause parts to come off. If the print head has stopped halfway, move it to either end. 194 ...
- Page 197 The Tray Does Not Operate Correctly Close the top cover. DYX028 The power of the machine turns off and on automatically, after which it returns to the usual condition. Print the nozzle check test pattern to make sure the print head's nozzles are not clogged. See page 99 "Nozzle Check". • If a fabric or foreign object cannot be successfully removed, perform [Move Prnt‐Heads], and then remove the fabric or foreign object. See page 111 "Move Print‐Heads ". 195 ...
-
Page 198: Print Results Are Not Satisfactory
9. Troubleshooting Print Results Are Not Satisfactory If print quality is poor, check the machine and printer driver settings for problems. If no problems are apparent, check the ink cartridge or other consumables. For details about handling fabric, see page 56 "Fabric". For details about handling the ink cartridges, see page 164 "Handling Ink Cartridges". • If problems persist even after configuration checks indicate correct values, contact your authorized Roland DG Corporation dealer. Prints are Unsatisfactory This section explains how to troubleshoot the machine when printing is uneven (due to the wrong amount of ink being used) or when prints are smudged, smeared, or blotchy or when the color of the print differs from the previous one. Have you printed the nozzle check test pattern? Print the nozzle check test pattern to check whether the print head nozzles are all ejecting ink properly, and, if necessary, carry out head cleaning or head‐flushing. Execute Nozzle Check to determine the number of the clogged print head. Perform Head Cleaning for the clogged print head. Execute Nozzle Check to determine whether the problem has been eliminated. If the problem persists, do not use the machine for 5 to 10 minutes. By doing this, minute bubbles in the print head nozzle may disappear as the air in them dissolves into the ink, resulting in unclogging. Execute Nozzle Check to determine whether the problem has been eliminated. ... - Page 199 Print Results Are Not Satisfactory Is there a problem with the machine's location? Make sure that the machine is level. Place the machine in a location where it will not be subject to shaking or excessive force. See page 24 "Checking the Computer and Installation Area Have you performed registration? Perform registration if the print start point indicates misalignment. See page 107 "Registration". Does the fabric (garment) type setting match? Make sure that the fabric (garment) type setting of the Design Software or the printer driver matches the type of fabric (garment) loaded. See page 84 "Printing". Is the fabric being used too thick or thin? Check if the fabric is compatible. The print heads will rub against fabric that is too thick or thin, and this will cause smearing. See page 56 "Usable Fabric ". Uneven fabric, fluffy fabric, or wrinkled fabric is loaded. With uneven fabric, fluffy fabric, or wrinkled fabric, the height of the tray may not be appropriately adjusted. Adjust the height of the tray manually. See page 191 "Adjusting the height of the tray manually". Have you touched the printed side of the fabric? Avoid touching the printed side of the fabric. When using the A4 standard tray or A5 tray, load the protection cover, and then remove it with the A4 standard tray or A5 tray. This prevents you from coming into contact with the printing surface. See page 56 "Precautions Regarding Fabric". Is the printing surface of the fabric flat? If wrinkles, slacks or floats remain on the printing surface of the fabric, position aberration or blurring may occur in the image. Load the fabric while smoothing out the fabric from the center ...
- Page 200 9. Troubleshooting Is the temperature setting appropriate for the optional finisher that is working to fix the ink to the fabric? If the fabric's color changes, lower the temperature and adjust it for the fabric. If this does not resolve the problem, attach the spacer to the inside of the tray. DSA545 Are the heater and fabric in contact? If the fabric becomes dirty, attach the spacer to the inside of the tray. DSA545 • As the spacer is needed to operate the finisher, keep it in a safe place. • Before attaching the spacers, make sure that the tray is sufficiently cool. Before removing the spacers, make sure that the tray and spacers are sufficiently cool. • If the fabric's color does not change or the fabric does not become dirty, remove the spacers and use just the tray. Is the temperature of the machine too high? If the machine's temperature is too high, the density of prints might become uneven. • Do not expose the machine to direct sunlight. • Keep the machine away from objects that may become hot. • Do not print or use the finisher continuously if the temperature of the area in which the machine is located is 30°C or higher. • If the density of prints is uneven, even though the above conditions do not apply, wait until the machine cools off. The machine may require an hour or so to cool. 198 ...
-
Page 201: Colors Do Not Match The Displayed Image
Print Results Are Not Satisfactory Do you perform regular maintenance? If the Maintenance Unit and print head nozzles are not cleaned regularly, normal printing results may not be achieved. If the message prompting you to provide regular maintenance appears, clean both the Maintenance Unit and print head. Even if the message does not appear, performing regular maintenance may resolve image quality problems. See page 114 "Clean Maint Unit", page 116 "Auto Head Maint.". Have you changed the settings in the printer driver? When you change the setting for [Select Print Quality:] or [Garment Type:] in the printer driver, you might need to adjust the height of the tray on the machine. See page 84 "Printing", page 191 "Adjusting the height of the tray manually". Have you adjusted the height of the tray? When printing starts, the machine adjusts the height of the tray according to the height value specified in the [Maintenance] menu. If the printed image is blurry or dusty, adjust the height of the tray using the [Maintenance] menu. Printed images may be blurry, especially, when you load a T‐shirt and set [Select Print Quality:] to [Vivid] in the printer driver. If this is the case, set [Select Print Quality:] to [Fine] in the printer driver or make the distance between the print head and the garment smaller by adjusting the height of the tray. However, the print quality might deteriorate when setting [Select Print Quality:] to [Fine] as compared with setting [Select Print Quality:] to [Vivid]. Also, note that when making the distance between the print head and the garment smaller, a height detection error might occur. If a height detection error occurs, remove the tray, load the garment correctly into the tray, and then load the tray into the machine. See page 191 "Adjusting the height of the tray manually", page 74 "Printing", and page 190 "Adjusting the height of the tray automatically". Colors Do Not Match the Displayed Image If there are differences between colors of the print results and the displayed image, refer to the following questions: Has the hue of colors been adjusted? Since printed colors and screen colors are produced by different methods, a color printed and a color displayed on a screen can have different hues even though they are the "same" color. Use the color matching function to make the hue of printed colors and displayed colors closer. For details about the color matching function, see the printer driver Help. Has the nozzle check been performed? The print heads may be clogged and the amount of ink may not be able to be regulated. Print the nozzle check test pattern and clean the print heads as necessary. See page 99 "Nozzle Check", page 101 "Head‐cleaning". Was printing done in black and white? Check the color setting of the application and the color print setting of the printer driver. Have the print quality settings been made? In the [Select Print Quality:], select [Fine], [Speed], or [Vivid] (only for thin fabrics). ... -
Page 202: Positions Do Not Match The Displayed Image
9. Troubleshooting Does the fabric (garment) type setting match? Make sure that the fabric (garment) type setting of the Design Software or the printer driver matches the type of fabric (garment) loaded. See page 84 "Printing". Positions Do Not Match the Displayed Image If the position of printed items differs from the position of displayed items, refer to the following questions: Have the settings for page layout been made? Check whether page layout settings have been made with the application. Does the tray size setting match? Make sure that the tray size selected in the [Print On:] list of the [Printing Preferences] dialog box matches the size of the tray loaded. Have the print heads been aligned? When bidirectional printing is performed, select [Head Position] to align the print heads. If the problem persists, print the nozzle check test pattern and clean the print heads as necessary. See page 104 "Head Position", page 99 "Nozzle Check" and page 101 "Head‐cleaning". Is the fabric correctly loaded? Put marks for positioning using the supplied protection cover, and then load the fabric so that the marks match the corners of the table. See page 58 "Loading Fabrics". Have you changed print quality? When printing on fabrics of varied thicknesses or you are concerned with position aberration or image blurring, try unidirectional printing to improve print quality. In [Print Quality] on the [Detailed Settings] tab, select the [Uni‐directional print only] check box. Note, however, that this will slow printing down. ... -
Page 203: Checking The Consumables
Print Results Are Not Satisfactory Some characters are garbled or missing. • On the [Detailed Settings] tab, select [Driver Options], and then select the [Spool Data in EMF Format] check box. • On the [Detailed Settings] tab, select [Print Quality], and then select the [Change Data Processing] check box. Some characters are printed faintly or not printed. • In the [Select Print Quality:], select [Vivid]. If [Vivid] cannot be selected, select [Fine]. • On the [Detailed Settings] tab, select [Driver Options], and then select the [Spool Data in EMF Format] check box. • On the [Detailed Settings] tab, select [Print Quality], and then select the [Print All Text as Black] check box. Printing is slow and takes time, which delays release of the application. • In the [Select Print Quality:], select [Speed], and then print. • On the [Detailed Settings] tab, select [Driver Options], and then select the [Spool Data in EMF Format] check box. • On the [Detailed Settings] tab, select [Print Quality], and then clear the [Adjust Photographs] and [Smooth Low Resolution Images] check boxes. • Close the resident application. Printing stops halfway. View the Status Monitor to check whether an error has occurred. See page 208 "Status Monitor Errors". Ink smudges and characters are not properly formed when printing white text on a black background. In the [Select Print Quality:], select [Speed], and then print. The characters printed in yellow on a black fabric are faint. To reproduce the detail of the image, try the following: • Change the application you are using to print •... -
Page 204: If A Message Appears During Installation
9. Troubleshooting If a Message Appears during Installation Message number 13, 14, 34, or 58 indicates the printer driver cannot be installed using Auto Run. Uninstall and then re‐install the printer driver as follows: Double‐click the [RP_SETUPXX.EXE] icon in the [DRIVERS] folder on the CD‐ROM, and then install the printer driver according to the displayed instructions. For details about uninstalling the printer driver, see page 185 "Uninstalling the Printer Driver". 202 ... -
Page 205: Error & Status Messages On The Display
Error & Status Messages on the Display Error & Status Messages on the Display This section explains what the messages that appear on the display mean and what to do when a particular message appears. Status Messages Message Status Ink being filled. Loading Ink... / WAIT! N minutes "N" indicates time required for this operation. Maintenance in process... The machine is cleaning or flushing its print head. Wait a moment. Press Start key Printing data was received. Press the [Start] key and start printing. Processing... The machine is printing. Ready The machine is able to print. The machine is reinitializing a print job. Wait a moment. If the Resetting Job... message does not disappear after a while, turn off the machine, and then turn it back on. Setting change... The machine is updating the network interface. Wait a moment. Waiting... Wait a moment. Error Messages Message Causes Solutions Detach the tray, and then load Wrinkles, ... - Page 206 Required. always displayed once every four weeks. Replace the filter, and then reset The number of prints that have the count for the number of been performed with the filter Exchange Fan Filter prints using the [Maintenance] installed in the machine exceeds menu. See page 170 "Replacing the maximum number (2,000). Filters". Disconnect all cables, turn the machine off, and then turn it on An error in the Ethernet port again. If the message reappears, Hardware Problem (ethernet board) network contact your authorized Roland Ethernet Board function has occurred. DG Corporation dealer. See page 215 "Network Interface Error". Use of non‐genuine ink cartridges Indepdnt.ink set or refilled ink cartridges may Indepdnt.ink set / Replace Ink A non‐genuine ink cartridge was reduce print quality or cause Crtg installed. malfunctions. Indepdnt.ink set / Press # to See page 224 "Recommended continue Consumables". Install the ink collector unit for ...
- Page 207 Error & Status Messages on the Display Message Causes Solutions Replace the ink collector unit. Ink Collector Unit is full / The ink collector unit is full. See page 166 "Replacing an Ink Replace Ink Collector Unit Collector Unit". Make sure you have a new ink cartridge for the color indicated Low Ink The ink will soon run out. by the icon. See page 212 "Cartridge Almost Empty". Run the maintenance again after clearing the error. Head cleaning, head flushing, or You can clear a maintenance Maintenance failed other maintenance operations error as follows: • The machine receives another have failed. print job. • Press the [#Enter] key. Install a new ink cartridge for the color indicated by the or Open Front Cover / The ink has run out. icon. Replace Ink Crtg See page 161 "Replacing an Ink Cartridge". The ink cartridges are not ...
- Page 208 The ink (cyan, magenta, yellow, quality, thickness) uses a large black) will soon run out. ###: Cyan, Magenta, Yellow, volume of ink, it may run out Black while you are printing. Prepare the ink cartridge soon. Right Front Cover is open / Close Close the right front cover. The right front cover is open. Right Front Cover See page 209 "Cover Open". For details about internal unit Internal unit is a service replacement, contact your Right Int. Unit almost full replacement part. authorized Roland DG Corporation dealer. Turn the machine off and then SCXXX‐XX Power Off On / Call on. If the message reappears, An error has occurred. Service if error reoccurs contact your authorized Roland DG Corporation dealer. Turn the machine off and then on. If the message appears again, clean the height position sensor An error has occurred that the SC523‐00 Power Off On / Call referring to page 174 "Cleaning height position sensor cannot Service if error reoccurs the Height Position Sensor". If detect correctly. this problem persists, contact ...
- Page 209 Error & Status Messages on the Display • If this does not eliminate the problem, contact your authorized Roland DG Corporation dealer. 207 ...
-
Page 210: Status Monitor Errors
9. Troubleshooting Status Monitor Errors If an error occurs with the machine, the Status Monitor displays an error message. Read the explanation about the corresponding error and check the detailed solution you can take. Status Monitor Does Not Open If the Status Monitor does not open for a shared printer, refer to the following questions: Are the share settings correct? • Check the share settings of the printer. The printer driver must also be installed on the client computer. • If Windows Firewall is installed on the print server, configure exceptions in the firewall before using the Status Monitor. 1. On Windows Firewall dialog box, click the [Exception] tab, and then select the [File and Print Sharing] check box. Click [Add Port...], make sure [TCP] is selected, and then enter "55665" in [Port number]. No Response from Machine Follow the procedure below to check the port settings and the connection between the machine and computer. Check that the power of the machine is on. Make sure that the computer and machine are properly connected using a USB cable. On the [Start] menu, click [Devices and Printers]. • For Windows 10: Right‐click [Start], click [Control Panel], and then click [View devices and printers]. Right‐click the machine icon, and then click [Printer properties]. Click the [Ports] tab. Check that USB is selected in the [Print to the following port(s)] list. • If you want to connect the machine to the network, check the operating environment, and then hange the port setting. 208 ... -
Page 211: No Tray
Status Monitor Errors No Tray The tray is not installed or is incorrectly installed. Resolve the error using any of the following procedures: • Load the tray. See page 73 "Loading a T‐shirt in the Tray". • Remove the tray. Press the [Tray] key and remove the tray, and then reset the tray • Cancel printing. See page 86 "Canceling Printing". Garment Misfeed The fabric or tray is incorrectly installed. Alternatively, a fabric or foreign object may be stuck inside the machine. Resolve the error using any of the following procedures: • Load the fabric or tray correctly. See page 58 "Loading Fabrics". • Adjust the height of the tray. See page 189 "Adjusting the Height of the Tray". • Remove the fabric or foreign object. See page 193 "Removing a Fabric or Foreign Object by Opening the Top Cover". Garment Size Mismatch The tray of the specified size or type is not loaded. Resolve the error using any of the following procedures: • Change the printing size. • Cancel printing. See page 86 "Canceling Printing". Cover Open The top or right front cover is open. Close the cover. If these covers are closed, open and close each of them again. 209 ... -
Page 212: Print Cartridge(S) Not Detected/Wrong Cartridge/Cover Open
9. Troubleshooting If the top cover is open: Close the cover. DYX028 If the right front cover is open: Close the right front cover. DSA368 Print Cartridge(s) Not Detected/Wrong Cartridge/Cover Open The ink cartridges are not installed or are incorrectly installed. Install the ink cartridges correctly. Alternatively, an ink cartridge not designated for this machine may have been installed. Install an ink cartridge designated for this machine. If the right front cover is open, close it. 210 ... - Page 213 Status Monitor Errors If the ink cartridges are not installed or are installed incorrectly: Open the right front cover. DYX030 Push the cartridge fully in. DYX052 Close the right front cover. DYX059 • If the error persists, remove the ink cartridge, and then re‐install it. Do this once only. • If there is a problem with the ink cartridge, try installing a new cartridge. • For details about handling the ink cartridges, see page 164 "Handling Ink Cartridges". 211 ...
-
Page 214: Cartridge Almost Empty
9. Troubleshooting Cartridge Almost Empty One of the ink cartridges is almost empty. Check which color ink cartridge will soon have to be replaced, and then have a new cartridge handy. • If you print an image that needs a lot of ink, the machine may stop printing before the print is finished. An example of such an image is one containing a single large area of solid color, or one made up almost entirely of a few such areas. • Do not carry out head cleaning or head flushing. If you do, the ink may run out. • If you turn the machine off, and then turn it on again, the machine will send the ink in the ink cartridge to the machine. During this, the ink in the ink cartridge may run out. • The amount of remaining ink shown in the cartridge replacement indicator is for reference only and may differ from the actual amount. Also, cartridges can become empty without a low ink warning appearing. Cartridge Empty The ink has run out. Replace the cartridge. See page 161 "Replacing an Ink Cartridge". • If the cartridge is empty, head cleaning or flushing cannot be performed. • If the ink runs out during printing, the machine may eject the tray while printing is performed or leave nothing printed. Used Cartridge A used ink cartridge was installed. Replace the ink cartridge. See page 161 "Replacing an Ink Cartridge". • If the cartridge is empty, head cleaning or flushing cannot be performed. • Cartridges that are no longer usable for printing reserve a small quantity of ink for maintenance usage. Make sure you do not install an empty ink cartridge by mistake. •... -
Page 215: Ink Collector Unit Not Detected/Wrong Unit
Status Monitor Errors Ink Collector Unit Not Detected/Wrong Unit The ink collector unit is not installed or is incorrectly installed. Install the ink collector unit correctly. Alternatively, an ink collector unit not designated for this machine may have been installed. Install an ink collector unit designated for this machine. Open the right front cover. DYX030 Attach the ink collector unit by pushing it in until it clicks. Take care not to spill the ink. DSA324 Close the right front cover. DYX013 If the message reappears, contact your authorized Roland DG Corporation dealer. 213 ... -
Page 216: Ink Collector Unit Almost Full
9. Troubleshooting Ink Collector Unit Almost Full The ink collector unit is almost full. Have a new ink collector unit handy. • If an ink cartridge starts running out of ink when the ink collector unit is almost full, the alert indicator will flash and a message informing you of the cartridge's low ink level will appear on the display. Ink Collector Unit Full The ink collector unit is full. Replace the ink collector unit. See page 166 "Replacing an Ink Collector Unit". Used Ink Collector Unit A used ink collector unit is installed. Replace the ink collector unit. See page 166 "Replacing an Ink Collector Unit". Out of Printable Temperature Range Printing is not possible because the printer is placed in a location that is too hot or cold. Move the machine to a more suitable environment. Press and hold down the [Power] key for one second. Place the machine in an environment where a temperature range is between 10 and 40°C (50 and 104°F). Turn the machine on. • Even after the power is turned on, the machine may remain in standby mode until it acclimates to the room temperature. If this happens, wait until the power lamp stops flashing and stays lit. • For details about what conditions the machine can be used under (ambient temperature and humidity range), see page 24 "Checking the Computer and Installation Area" 214 ... -
Page 217: Printer Error
Status Monitor Errors Printer Error An error has occurred in the machine. Turn the machine off, and then turn it on again. • If the error still does not clear after the power is turned back on, contact your authorized Roland DG Corporation dealer. Network Interface Error An error in the Ethernet port network function has occurred. Turn the machine off, and then turn it on again. • If the message reappears, contact your authorized Roland DG Corporation dealer. Maintenance Failed Head cleaning, head flushing, or other maintenance operations have failed. Run the maintenance again after clearing the error. You can clear a maintenance error as follows: • The machine receives another print job. • Press the [#Enter] key. Cannot Recover Error Page If you resume printing after resetting the garment misfeed error or other errors, printing may not be correctly performed and a message appears. Depending on the printing result, resolve the error using any of the following procedures: If Nothing Printed If the tray is not automatically ejected, press the [Tray] key and move the tray stand to the front. Remove the tray and reload the fabric correctly. After reloading the tray, press the [Start] key to resume printing. If printing does not start, adjust the height of the tray, and then press the [Start] key. See page 58 "Loading Fabrics", page 189 "Adjusting the Height of the Tray". If Partially Printed Cancel printing. See page 86 "Canceling Printing". 215 ... - Page 218 9. Troubleshooting 216 ...
-
Page 219: 10. Appendix
10. Appendix Software on the CD‐ROM Files The following is a list of the files on the CD‐ROM. For Windows • Printer Driver for Windows 7/8.1/10 • WebImageMonitor Help • Manuals • Tools to acquire computer information • Design Software • ICM Color Profiles for Printer • Install Manager • Setup.exe • OSS.pdf For Macintosh • Printer driver for Mac OS X 10.11 or later • WebImageMonitor Help • Manuals • Design Software • OSS.pdf Printer Drivers This section gives the file locations of the different printer drivers and their system requirements. File Location The drivers are in the following folders on the supplied CD‐ROM. • Printer driver for the 32‐bit Windows ... -
Page 220: Manuals
10. Appendix • In a cluster configuration environment, you cannot autorun the printer driver install. • For details about using the printer driver, see the printer driver Help. Manuals This section gives the location of the manuals. File Location The manuals are in the following folders on the supplied CD‐ROM. MANUAL_PDF 218 ... -
Page 221: Electromagnetic Interference
Electromagnetic Interference Electromagnetic Interference If another electronic device is placed next to the machine, each will influence the other negatively. In the case of a television or radio, noise may be generated. If this happens, do the following: Move the television or radio as far as possible from the machine. • Change the position of the antenna of the television or radio. • Use a different wall outlet on a different circuit. • 219 ... -
Page 222: Specifications
10. Appendix Specifications Specifications of the machine and options are listed. Machine Body Item Print method GELJET print technology Print time • Full color 74 seconds (after pressing the [Start] key) • B&W 72 seconds (after pressing the [Start] key) Print resolution Max 1200 × 1200 dpi equivalent Nozzles Black: 192 nozzles Cyan, magenta, and yellow: 192 nozzles per color Warm‐up time 21 seconds Tray type A4 standard tray • Printable area 291 × 204 mm (11.5 × 8.0 inches) A5 tray • Printable area 204 × 142 mm (8.0 × 5.6 inches) Sleeve & Socks Tray • Printable area 204 × 142 mm (8.0 × 5.6 inches) Fabric thickness 4 mm (0.16 inches) Number of loadable 1 tray trays ... - Page 223 Specifications Item Power consumption Main unit only Ready (mainly Europe, Asia, and China) 9.6 W (mainly North America) 9.8 W During printing (mainly Europe, Asia, and China) 31.2 W (mainly North America) 30.9 W Maximum (mainly Europe, Asia, and China) 47 W (mainly North America) 47 W Complete system Maximum Power consumption (mainly Europe, Asia, and China) 47 W (mainly North America) 47 W Reduced power Energy Saver mode (mainly Europe, Asia, and China) ...
-
Page 224: Optional Trays
10. Appendix Item Weight Approx. 34 kg (75.0 lb.) (when packaged) Approx. 24 kg (53.0 lb.) (machine and tray) Approx. 21 kg (46.3 lb.) (machine) Interface USB 2.0 high speed Ethernet (10BASE‐T, 100BASE‐TX) Printer language RPCS Raster *1 To avoid any power consumption, disconnect the power plug from the wall outlet. (Unplug the power plug only after making sure the power lamp is off.) Power Consumption may differ depending on the conditions and environment of the machine. *2 The time it takes to switch out from energy saving functions and power consumption may differ depending on the conditions and environment of the machine. Optional Trays Item External dimensions • A5 tray (W × D × H) 242.2 × 409.2 × 97.9 mm (9.5 × 16.1 × 3.9 inches) • Sleeve & Socks Tray (W × D × H) 242.2 × 409.2 × 97.9 mm (9.5 × 16.1 × 3.9 inches) Weight • A5 tray Approx. 2.6 kg (5.8 lb.) • Sleeve & Socks Tray Approx. 2.4 kg (5.3 lb.) 222 ... -
Page 225: Where To Inquire
Where to Inquire Where to Inquire For inquiries, contact your authorized Roland DG Corporation dealer. 223 ... -
Page 226: Recommended Consumables
10. Appendix Recommended Consumables Consumables recommended for this machine are listed. Purchase necessary consumables before your supply runs out. For information about consumables, contact your authorized Roland DG Corporation dealer. • Ink cartridges • Ink Collector Unit • Cleaning cartridge • Cleaning tool • Absorbent • Cleaning stick • Cleaning liquid • Filter 224 ... -
Page 227: Options And Consumables
Options and Consumables Options and Consumables Roland CT‐A5 This tray is for printing within an A5 size area on a fabric. Tray for Sleeve & Socks This tray is for printing on sleeve or socks. • For information about options and consumables, contact your authorized Roland DG Corporation dealer. 225 ... -
Page 228: Trademarks
10. Appendix Trademarks Apple, AppleTalk, Bonjour, ColorSync, Leopard, Macintosh, Mac OS, OS X, iMac, MacBook, Mac mini, Power Mac, Safari and TrueType are trademarks of Apple Inc., registered in the United States and other countries. Citrix, Citrix Presentation Server and Citrix XenApp are either registered trademarks or trademarks of Citrix Systems, Inc. Firefox® is a registered trademark of the Mozilla Foundation. Intel and Intel Core are registered trademarks of Intel Corporation or its subsidiaries in the United States and other countries. Microsoft®, Windows®, Windows Server®, Windows Vista®, and Internet Explorer® are either registered trademarks or trademarks of Microsoft Corporation in the United States and/or other countries. Monotype is a registered trademark of Monotype Imaging Inc. PowerPC® is a registered trademark of International Business Machines Corporation in the United States and other countries, or both. UNIX is a registered trademark in the United States and other countries, licensed exclusively through, X/ Open Company Limited. The proper name of Internet Explorer 6 is Microsoft® Internet Explorer® 6. The proper names of the Windows operating systems are as follows: The product names of Windows 7 are as follows: • Microsoft® Windows® 7 Home Premium Microsoft® Windows® 7 Professional Microsoft® Windows® 7 Ultimate Microsoft® Windows® 7 Enterprise The product names of Windows 8.1 are as follows: • Microsoft® Windows® 8.1 Microsoft® Windows® 8.1 Pro Microsoft® Windows® 8.1 Enterprise The product names of Windows 10 are as follows: • Microsoft® Windows® 10 Home Microsoft® Windows® 10 Pro Microsoft® Windows® 10 Enterprise Microsoft® Windows® 10 Education Other product names used herein are for identification purposes only and might be trademarks of their respective companies. We disclaim any and all rights to those marks. ... -
Page 229: Index
INDEX About coverage counter ........93 IPv4 DNS ............ 125 Active Protocol ..........127 IPv4 Gatewy.Ad.......... 126 Adjust Height keys ..........19 IPv4 Subnet M. .......... 126 Alert indicator ..........18 IPv6 Address .......... 126 Auto Head Maint. ..........99 IPv6 DDNS ............ 126 Canceling Printing ..........86 IPv6 DNS ............ 126 Cartridge replacement indicator ......19 IPv6 Gatewy.Ad.......... 127 Clean Internals ..........99 IPv6 Statlss Ad .......... 126 Clean Maint Unit ..........99 Key Repeat ............ 98 Color Demo Page ..........96 Language .......... 92, 130, 148 Config. Page ............96 List/Test Print ... - Page 230 Table ............. 1 5, 16, 17 Unlock Button ........ 15, 16, 17 Top Cover ............13 USB Connection .......... 38 Tray (A4 Standard Tray) ........15 USB port ............ 14 Tray (A5 Tray) ...........16 USB Setting ............ 128 Tray (Sleeve & Socks Tray) .......17 USB Speed ............ 128 Tray key ............18 Vent .............. 13 Tray Positioning Line ...... 1 5, 16, 17 Waste ink full indicator ........ 19 Tray Stand ............14 Web Image Monitor ........ 132 Uni‐direct.Prt. ..........122 WLAN Version .......... 123 Unit of Measure ..........122 ...
- Page 231 MEMO 229 ...
- Page 232 ...
- Page 234 © 2018 Roland DG Corporation EN EN EN J089‐7022 R1‐181105 FA01403...