Table of Contents
Advertisement
Advertisement
Table of Contents

Subscribe to Our Youtube Channel
Related Manuals for Promaster 100SL


Summary of Contents for Promaster 100SL
-
Page 3: Table Of Contents
Contents Precautions Foreword Parts Identification Basic Operation Inserting The Batteries Attaching And Detaching The Speedlight Turning On The Power Custom Settings LCD Panel Icons On Camera Interface Slave Mode Operation TTL Mode M(Manual) Mode Repeat Mode Wireless Modes Slave Mode( F1/F2 Advanced Applications Adjusting The Flash Coverage... - Page 4 Precautions 1. Do not disassemble, open, or repair this speedlight by yourself. 2. Always use batteries of the same type, brand, and age. Always replace all 4 batteries at the same time. Do not combine different types, brands, old, or new batteries. This could cause the batteries to overheat, leak, or explode.
-
Page 5: Foreword
100 ft (ISO 100 at the 50mm zoom position). The 100SL can easily perform various types of flash operations, such as manual flash, TTL auto flash, and HSS. It is also equipped with an LED light for videography and to function as a catchlight. - Page 6 ■ Thermal Cut-out protection This function protects the 100SL from high operating temperatures. If the temperature of the unit rises to a certain level, the 100SL will switch to protective shutdown mode. ■ Sound monitor Receive audible feedback each time a button is pressed and when the 100SL reaches a full charge indicating it is ready to fire.
-
Page 7: Parts Identification
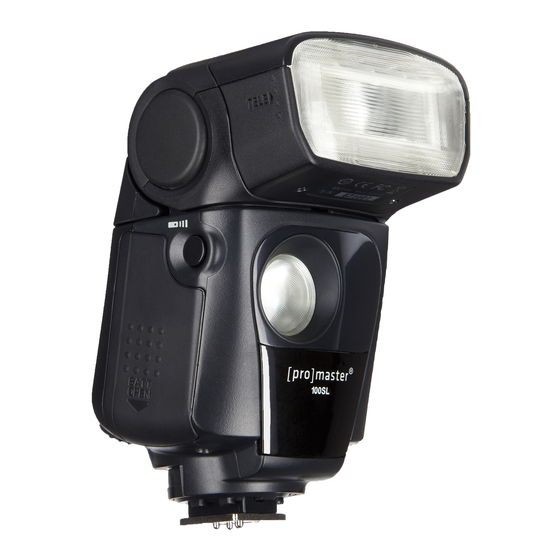
Parts Identification Flash head LED light button Right button LED light Power switch Micro USB Confirm button Wireless sensor Left button Battery cover Ready light / Locking pin test button Camera contacts Tilting angle Lock-release scale button Rotating angle Mounting foot’s scale locking lever LCD display... -
Page 8: Basic Operation
Basic Operation Inserting The Batteries Open the cover. Slide it in the direction of the arrow and flip open. Install the batteries. Make sure the + and - battery contacts are properly oriented as shown inside the battery compartment. Close the cover. Close the battery compartment cover by flipping it down, pressing, and sliding it closed. -
Page 9: Attaching And Detaching The Speedlight
Basic Operation Attaching And Detaching The Speedlight Attaching the speedlight Mount the speedlight into the camera’s hot shoe all the way. Securing the speedlight. On the mounting foot, slide the lock lever to the right until it locks in place. Detaching the speedlight While pressing the lock-release button, slide the lock lever to the left... -
Page 10: Turning On The Power
Basic Operation Turning On The Power Turn on the power. S de the power switch to <ON>. Check that the speedlight is ready. The charging indicator is red while the speedlight is powering up. It will turn green and beep twice when the speedlight is ready to fire. -
Page 11: Custom Settings
When [TEMP] is turned on and temperature of the 100SL hits level 4, the icon will be flashing and the speedlight will not operate. Give it 15 minutes to cool down When [TEMP] is turned off the, and the... -
Page 12: Lcd Panel
LCD Panel Icons Flash exposure Temperature Icon Front-Curtain sync High compensation Rear-Curtain sync High-speed sync. Low battery power Catchlights (CA) Communicating with a Key lock LOCKED LED AF-assist lamp compatible camera. LED video light Standby LED video light turn on brightness setting... -
Page 13: On Camera Interface
LCD Panel On Camera Interface Slave Mode Press the <MODE> button to Press the <MODE> for approx. change the flash mode 2 sec. to enter Remote Mode TTL Mode F1 Mode F2 Mode Manual Mode Repeat mode... -
Page 14: Operation
Operation TTL Mode In this mode information obtained by monitor pre-flashes and exposure control information are combined in - camera to automatically adjust flash output levels. Press the <MODE> button and set the flash mode to TTL . ● The default flash exposure compensation is 0. -
Page 15: M(Manual) Mode
Operation M Mode You can set the 100SL to manual mode and choose a power level between 1/1and 1/512. Press the <MODE> button and set the flash mode to M . Set the flash output level. ● Press the left/right buttons to decrease/increase the flash output level. -
Page 16: Repeat Mode
Operation Repeat Mode In Repeat mode , the 100SL fires repeatedly during a single exposure , creating stroboscopic multiple - exposure effects . This operation is useful when shooting fast moving subjects . You can set the firing frequency ( number of flashes per second expressed as Hz ), the number of flashes , and the flash output . - Page 17 Operation Set the firing frequency. ● Press the <SET> button to highlight the frequency. ● Press the left/right buttons to decrease/increase the number. ● Press the <OK> button to confirm. ● Use the following equation to determine the shutter speed. Then set your camera to a shutter speed slower than the calculated number.
-
Page 18: Wireless Modes
The F1 mode is used in a manual flash environment. The F2 mode is used in a TTL flash environment so as to ignore preflashes and properly fire in-sync. However, the 100SL only functions as a manual flash without TTL exposure. F1 mode Press the <MODE>... -
Page 19: Advanced Applications
Advanced Applications Adjusting The Flash Coverage The flash head can be extended or retracted manually to match the lens focal length. Flash head position Normal position(24mm) Extended position(50mm) Guide number 23/75(ISO 100 in M/ft) Guide number 30/100(ISO 100 in M/ft) ●... -
Page 20: Bounce Flash Operation
Advanced Applications Bounce Flash Operation Tilt or rotate the 100SL’s flash head to bounce the light off a ceiling or walls, providing more natural-looking pictures of people with softer shadows. If the wall or ceiling is too far away, the bounced flash might be too weak and can result in underexposure. -
Page 21: Led Video Light
● When the remaining battery power is low, the LED light may not turn on even if the flash-ready lamp is lit. If the LED light does not turn on replace the batteries. ● The LED light will not turn on when the 100SL may be to Slave Mode. -
Page 22: Key Lock
LED AF-assist function will turn off. The AF assist function helps your camera to properly auto focus in low light conditions. It uses the LED light on the 100SL to illuminate your subject thereby enabling the camera's AF to lock onto it. -
Page 23: Led Catchlights
Advanced Applications LED Catchlights The 100SL's LED video light can be used a Catchlight during still photography. In this case the LED light will flash simultaneously to the main flash head. This creates a pleasing, round catchlight in your subject's eyes even if the main flash head is being bounced. -
Page 24: Troubleshooting Guide
The Speedlight Does Not Fire Possible cause: The batteries are installed in the wrong orientation. Solution: Install the batteries in the correct orientation. Possible cause: The batteries are exhausted. Solution: Replace the batteries. Possible cause: The speedlight is not attached securely to the camera. Solution: Attach the speedlight's mounting foot securely to the camera. -
Page 25: Appendix
Appendix Guide No. (at ISO 100, in meters) Flash Output 1/16 1/32 1/64 1/128 1/256 1/512 Flash Coverage 24mm (flash head 11.5 in normal position) 50mm (flash head 21.2 10.6 in extended position) 1/16 1/32 1/64 1/128 1/256 1/512 6-7Hz 8-9Hz 10Hz 11Hz... -
Page 26: Specifications
Type On-camera, TTL speedlight Guide No. GN 30 / 100' (at 50mm focal length, ISO 100) Flash coverage: Manual zoom ( 24mm or 50mm) Wireless mode: F1/F2 mode Audible: Can be turned on or off Display type: LCD Dot Matrix Screen with LED Backlight Protection type: Thermal Cut-out (can be turned on or off) Power supply:...
Need help?
Do you have a question about the 100SL and is the answer not in the manual?
Questions and answers