
Related Manuals for Medeli A1000


Summary of Contents for Medeli A1000
- Page 1 Electronic Keyboard Quick Start Guide aw_A1000_QuickStartGuide_G08_130506_PA 2013 17:27:30...
- Page 2 INFORMATION FOR YOUR SAFETY! THE FCC REGULATION WARNING (for USA) PRECAUTIONS This equipment has been tested and found to comply with the limits for a Class B digital device, pursuant to Part 15 of PLEASE READ CAREFULLY BEFORE PROCEEDING the FCC Rules. These limits are designed to provide reasonable protection Please keep this manual in a safe place for future reference.
-
Page 3: Table Of Contents
Contents Introduction Appendices Troubleshooting ..........19 Panel & Display Description Front Panel............4 Specification ..........19 Rear Panel............5 Main Display............6 Appendices Voice List............20 Setup Style List............26 Power Supply............7 Song List............29 Setting a Music Stand.........7 Demo List............29 Connecting a Footswitch........7 Chord List............30 Connecting a Volume Pedal........7 MIDI Implementation List........31 Connections Connecting a pair of Headphones.......8... -
Page 4: Panel & Display Description
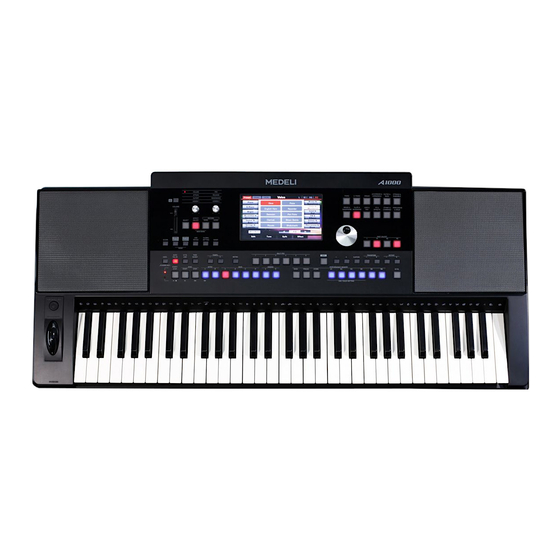
Panel & Display Description Front Panel 10 11 12 13 14 15 16 17 20 21 22 23 24 1. POWER ON/OFF BUTTON 8. SCORE BUTTON 19. METRO. BUTTON Turn the power on or off. Show the staff of the current song Turn the Metronome on or off. -
Page 5: Rear Panel
Panel & Display Description 36 37 38 27. MULTI PAD BUTTONS 37. FREEZE BUTTON Add spice to your performance Turn the FREEZE function on or Rear Panel with special dynamic phrases off. by pressing them. 38. STORE BUTTON 28. VOICE BUTTONS Save the panel setups to one of the Enter the VOICE SELECT performance memories. -
Page 6: Main Display
Panel & Display Description Main Display Voice Chord Display voice name and octave data of each part. Display the chord name and related information. (Right1, Right2, Right3, Left) A. Chord Name How to select the voice for each part? B. Chord Mode For example: C. -
Page 7: Setup
Setup This section contains information about setting up your instrument and preparing to play. Please go through this section carefully before turning the power on. Power Supply Move the MASTER VOLUME slider downwards to set the minimum volume level. Connect the AC/DC adaptor to the power supply jack. Plug the AC/DC adaptor into an AC outlet. -
Page 8: Connections
Connections Connecting a pair of Headphones When an optional pair of stereo headphones is connected with the headphones jack, the sound from speakers will switch off automatically resulting in only the sound from headphone to be heard for private practice or late-night playing. Note: Do not listen with the headphones at high volume for long periods of time. -
Page 9: Connecting A Computer
Connections Connecting a Computer You can simply connect the computer with USB cable via the USB connector. You can use a commercially available MIDI interface to connect the keyboard to the computer via the MIDI connectors. Note: The default MIDI I/O device is USB, So please first set this device as MIDI, and then connect to the computer. -
Page 10: Basic Operations
Basic Operations Selection Operation There are some selection interfaces: voice selection, style selection, song selection, performance selection, etc. How to select the file in these selection interfaces? For example: Location of data Preset: Location where pre-programmed (preset) data is stored. User: Location where recorded or edited data is saved. -
Page 11: Setting Operation
Basic Operations Setting Operation There are three types on parameter setting. ON/OFF as in the picture: Press this “ON” button to switch the keyboard touch response ON or OFF. LIST (as in the picture: Curve Normal Press this “Normal” button, all available parameters would be listed. -
Page 12: Playing The Demos
Playing the Demos The instrument features 2 wonderful demos. Please refer to DEMO LIST. Press the [SONG SELECT] and [STYLE SELECT] buttons simultaneously to start playing the demo. Select your desired demo Press the Demo name on LCD or use the DATA DIAL, the [+] or the [-] button to select your desired demo. -
Page 13: Playing Voices
Playing Voices The instrument features exceptionally realistic 672 voices(Including 256 GM2 instrument voices and 15 drum kits), including piano, guitar, strings, brass and many more. Please refer to Voice List. Turn the R1 PART on Press the PART ON/OFF [RIGHT 1] button to turn the R1 part on. You can play different voices simultaneously or play different voices with the left and right hands. -
Page 14: Playing With A Style
Playing with a Style The instrument features 240 styles in a variety of different musical genres. Try selecting some of the different styles (Refer to Style List) and play with the auto accompaniment. Select a Style There are 2 methods to call up the Style Selection display. Press the [STYLE SELECT] button. -
Page 15: Playing Songs
Playing Songs The instrument features 90 songs. Select a Song There are 2 methods to call up the Song Selection display. Press the [SONG SELECT] button. Press Song Name on the Main Display. Press the song NAME to select the desired song on the current page display. -
Page 16: Recording Your Performance To Midi
Record Your Performance to MIDI Press the [RECORD SONG] and [EFFECT ON/OFF] buttons simultaneously to call up the Recording Display. A blank song (“New Song”) is called up for recording. The LED of [RECORD SONG] is flashing that means it is in the recording standby mode. Press the [PLAY/STOP] button or play the keyboard to start recording. -
Page 17: Recording Your Performance As Audio
Recording Your Performance as Audio You can record your performance as CD quality audio file to a USB device. Please connect your USB storage device drive to the keyboard. Press the [RECORD AUDIO] button to start recording your performance. The LED of [RECORD AUDIO] will light up. Press the [RECORD AUDIO] button again to stop recording your performance and call up soft keyboard display. -
Page 18: Using A Usb Storage Device
Using a USB Storage Device By connecting a USB storage device to your instrument, you can save data you’ve created to the connected device, as well as read data from the connected device. Compatible USB device Recommended Brand: KINGSTON, SANDISK, SONY, LEXAR, TRANSCEND Format: FAT 16/32 Capacity: 1G,2G,4G,8G,16G,32G... -
Page 19: Troubleshooting
Troubleshooting Problem Possible Cause and Solution The speakers produce a “pop” sound whenever the This is normal and is no cause for alarm. power is turned ON or OFF. No sound when the keyboard is played. The R1/R2/R3/L voice volume (Mixer) settings could be set too low. -
Page 20: Voice List
Voice List Full Name LCD Name Warm EP 1 Warm EP 1 Choir EP 1 Choir EP 1 Piano Acoustic Grand Piano Grand Piano Wah EP 1 Wah EP 1 Acoustic Grand Piano (wide) EP & Strings 1 Grand Piano/Wide EP&Strings 1 Acoustic Grand Piano (dark) Grand Piano/Dark... - Page 21 Voice List Tango Accordion 2 Tango Accordion 2 Slap Bass 2 Slap Bass 2 Synth Bass 1 Synth Bass 1 Guitar & Bass Acoustic Guitar (nylon) Nylon Guitar Synth Bass 2 Synth Bass 2 Ukulele Acoustic Bass 2 Ukulele Acoustic Bass 2 Acoustic Guitar (nylon + key off) NylonGtr/KeyOff Acoustic Bass 3...
- Page 22 Voice List Choir Aahs Choir Aahs Octave Orchestra Hit Octave OrchHit Choir Aahs 2 Choir Aahs 2 Brass & Saxophone Voice Oohs Voice Oohs Trumpet Trumpet Humming Dark Trumpet Soft Humming DarkTrump Soft Anlong Voice Anlong Voice Trombone Trombone Synth Voice Synth Voice Trombone 2 Trombone 2...
- Page 23 Voice List Sweet Soprano Sax Sweet Soprano Sax Pad 2a (sine pad) Sine pad Alto Sax 2 Alto Sax 2 Pad 3 (polysynth) Poly Synth Soft Alto Sax Soft Alto Sax Pad 4 (choir) Choir Pad Super Alto Sax Pad 4a (itopia) Super Alto Sax Itopia Pad Sax Band...
- Page 24 Voice List Rising Rising Train Train Congregate Congregate Jetplane Jetplane Starship Starship FX & Effects FX 1 (rain) Burst Noise FX 1 Rain Burst Noise FX 2 (soundtrack) FX 2 SoundTrack Applause Applause Prelude Prelude Laughing Laughing FX 3 (crystal) FX 3 Crystal Screaming Screaming...
- Page 25 Voice List Church Organ & Choir ChurchOrg&Choir Marimba & Vibraphone Marimba&Vibra Church Organ & Strings ChurchOrg&Str Wood Drum Wood Drum Harmonica & Acoustic Guitar Harmonica&AcGtr Xylophone Xylophone Harmonica & Strings Xylophone 2 Xylophone 2 Harmonica&Str Acoustic Guitar & Flute AcGtr&Flute Tubular Bells Tubular Bells Acoustic Guitar &...
-
Page 26: Style List
Style List Full Name LCD Name R&B Ballad 1 R&B Ballad 1 Guitar Ballad Guitar Ballad 8Beat & 16Beat 8Beat Ballad 8Beat Ballad Ballad Rock Ballad Rock 8Beat Piano 8Beat Piano Piano Pop 1 Piano Pop 1 8Beat 1 8Beat 1 Soft Ballad Soft Ballad Guitar Pop 1... - Page 27 Style List Techno 2 Techno 2 Country Pop 2 Country Pop 2 Progressive Progressive Bluegrass 2 Bluegrass 2 Rap 1 Rap 1 2/4 Country 2/4 Country Rap 2 Rap 2 Country Quick Steps Country QuickStp Disco Disco Country Folk Country Folk Soft Disco Soft Disco Country Shuffle...
- Page 28 Style List Scottish Scottish Norteno Norteno Pianist Pianist 1 Pianist 1 Pianist 2 Pianist 2 Pianist 3 Pianist 3 Jazz 1 Jazz 1 Jazz 2 Jazz 2 Jazz Pub Jazz Pub Piano Rock Piano Rock Pop Bossa Pop Bossa March 1 March 1 March 2 March 2...
-
Page 29: Song List
Song List Full Name LCD Name Piano Fur Elise Fur Elise Folk & Country Red River Valley Red River Valley Prelude In C-Sharp Major Prelude Troika Innocence Troika Innocence Oh! Susanna! Oh! Susanna! The Happy Farmer The Happy Farmer Wave Of The Danube Wave of Danube L' Arabesque L' Arabesque... -
Page 30: Chord List
Chord List Chord Name Abbreviation Normal Voicing Display for Root "C" Major 1+3+5 Sixth 1+(3)+5+6 Major seventh 1+3+(5)+7 Major seventh add sharp eleventh M7(#11) 1+(2)+3+#4+5+7 CM7(#11) Add ninth 1+2+3+5 C(9) Major seventh ninth M7(9) 1+2+3+(5)+7 CM7(9) Sixth ninth 6(9) 1+2+3+(5)+6 C6(9) Augmented 1+3+#5... -
Page 31: Midi Implementation List
MIDI Implementation List aw_A1000_QuickStartGuide_G08_130506_PC 2013 17:57:03... - Page 32 A1000_QuickStartGuide_G08 aw_A1000_QuickStartGuide_G08_130506_PC 2013 17:57:04...
Need help?
Do you have a question about the A1000 and is the answer not in the manual?
Questions and answers