Table of Contents
Advertisement
Quick Links
Advertisement
Table of Contents

Subscribe to Our Youtube Channel
Related Manuals for ACME LED-MTX25 IP


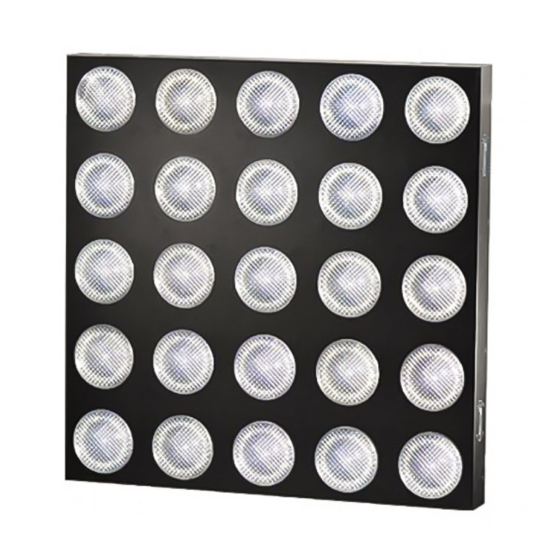
Summary of Contents for ACME LED-MTX25 IP
-
Page 1: User Manual
LED-MTX25 IP User Manual Please read the instructions carefully... -
Page 2: Table Of Contents
Contents 1. Safety Instructions ..................2 2. Technical Specifications ..................3 3. Installation......................4 3.1 Fixture Jointing..................4 4. How to set the unit ..................5 4.1 Rear Panel....................5 4.2 Main Function...................6 5. How To Control The Unit ................10 5.1 Master/Slave Built In Preprogrammed Function ........10 5.2 DMX Controller ..................10 5.3 DMX512 Configuration................11 6. -
Page 3: Safety Instructions
1. Safety Instructions Please read the instructions carefully which includes important information about the installation, operation and maintenance. WARNING Please keep this User Manual for future consultation. If you sell the fixture to another user, be sure that they also receive this instruction booklet. Please unpack and check carefully there is no transportation damage before using the fixture. -
Page 4: Technical Specifications
It’s important to ground the yellow/green conductor to earth in order to avoid electric shock. DO NOT touch any wire during operation and there might be a hazard of electric shock. DO NOT expose the fixture to rain or moisture, in order too prevent or reduce the risk of electrical shock or fire. -
Page 5: Installation
3. Installation The unit should be mounted via its screw holes on the bracket. Always ensure that the unit is firmly fixed to avoid vibration and slipping while operating. Always ensure that the structure to which you are attaching the unit is secure and is able to support a weight of 10 times of the unit’s weight. -
Page 6: How To Set The Unit
Secondly, use L type Hexagon wrench to counter-clockwise rotate connection lock to the end until lock tongue returns back, for direction please see arrow ① showed in figure 2 ,and the next step, use Hexagon wrench clockwise rotate connection lock to the end, see arrow ②. Figure 2 The maximum fixtures that can be jointed together is 10. -
Page 7: Main Function
○ 1 Display: Show the various menus and the selected functions ○ 2 LED: DMX input present MASTER Master Mode SLAVE Slave Mode ○ 3 Button: MENU To select the programming functions DOWN To go backward in the selected functions To go forward in the selected functions ENTER To confirm the selected functions... - Page 9 DMX 512 Address Select the , press the ENTER button and the display will blink. Use the DOWN and UP button to change the DMX 512 address. Once the address has been selected, press the ENTER button to setup or automatically exit menu mode without any change after 60 seconds. Back to the previous functions without any change press the MENU button.
- Page 10 Manual Mode Select the , press the ENTER button and the display will blink. Use the DOWN and UP button to select the (number) or (letter). When the is selected, press the ENTER button, then use the DOWN and UP button to select the or…or , and press the ENTER button to store.
-
Page 11: How To Control The Unit
Auto Test Select the , press the ENTER button and the unit will run the built-in programmer for Auto test. To go back to the functions press the MENU button. Fixture use time Select the , press the ENTER button and the display will show the number of working hours of the unit. -
Page 12: Dmx512 Configuration
512 channel so that the units can receive DMX signal. Press the MENU button up to when the is showing on the display. Pressing the ENTER button and the display will blink. Use the DOWN and UP button to change the DMX512 address. - Page 13 9 channel mode:...
- Page 14 25 channel mode:...
- Page 15 29 channel mode:...
-
Page 16: Dmx512 Connections
6. DMX512 Connections mode connection: mode connection:... -
Page 17: Troubleshooting
1. Connect the fixture together in a “daisy chain” by XLR plug cable from the output of the fixture to the input of the next fixture. The cable cannot be branched or split to a “Y” cable. Inadequate or damaged cables, soldered joints or corroded connectors can easily distort the signal and shut down the system 2. -
Page 18: Fixture Cleaning
the fixture or the previous one. 4. Try to use another DMX controller. 5. Check if the DMX cables run near or run alongside to high voltage cables that may cause damage or interference to DMX interface circuit. C. One of the channels is not working well 1. -
Page 19: Declaration Of Conformity
Declaration of Conformity We declare that our products (lighting equipments) comply with the following specification and bears CE mark in accordance with the provision of the Electromagnetic Compatibility (EMC) Directive 2004/108/EC. EN55103-1: 2009 ; EN55103-2: 2009; EN61000-3-2: 2006 + A1:2009 + A2:2009; EN61000-3-3: 2008. &... - Page 20 Innovation, Quality, Performance...
Need help?
Do you have a question about the LED-MTX25 IP and is the answer not in the manual?
Questions and answers