Advertisement
Available languages
Available languages
Table of Contents
- 1 Range Hood
- 2 Recommendations and Suggestions
- 3 To Reduce the Risk of a Range Top Grease Fire
- 4 Installation and Use
- 5 Location Preparation
- 6 Mount Heights & Clearance
- 7 Maintenance and Cleaning
- 8 Recommandations Et Suggestions
- 9 Caractéristiques
- 10 Installation Et Utilisation
- 11 Préparation de L'emplacement
- 12 Entretien Et Nettoyage
- Download this manual
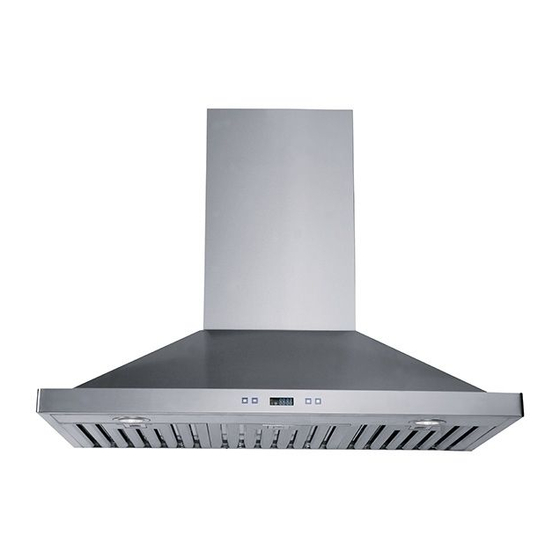
Range Hood
Hotte de Cuisine
Instructions Manual/Manual d'instructions
Model/Modele: R450SSSEBG
CUSTOMER SERVICE CENTER
SAVE THIS MANUAL and the original invoice for future reference
Carefully check all packing materials before discarding
Do not assemble if there are missing pieces
Should you encounter problems after following all the steps here in contained please contact our
Customer Support: Call 1-866-231-8893 or
email:info@ctm-inter.com
Kindly provide the model #,place and date of purchase and a short description of the problems
CENTRE DE SERVICE A LA CLIENTELE
CONSERVEZ CE MANUAL avec la facture d'origine pour reference future
Verifiez soigneusement tout l'emballage avant de jeter les boites
Ne pas assembler s'il y a des pieces manquantes
Si vous rencontrez des problems apres avoir suivi toutes les etapes ci-dessous,contactes notre
Service a la clientele : Composez le 1-866-231-8893 ou ecrivez-nous par courriel a
info@ctm-inter.com
Merci de fournir le numero du modele,le lieu et la date d'achat et une breve description du probleme.
Advertisement
Table of Contents

Subscribe to Our Youtube Channel
Related Manuals for CTM International R450SSSEBG

Summary of Contents for CTM International R450SSSEBG
-
Page 1: Range Hood
Range Hood Hotte de Cuisine Instructions Manual/Manual d’instructions Model/Modele: R450SSSEBG CUSTOMER SERVICE CENTER SAVE THIS MANUAL and the original invoice for future reference Carefully check all packing materials before discarding Do not assemble if there are missing pieces Should you encounter problems after following all the steps here in contained please contact our Customer Support: Call 1-866-231-8893 or email:info@ctm-inter.com... - Page 2 Dear Customer, If you follow the recommendations contained in this Instruction Manual, our appliance will give you constant high performance and will remain efficient for many years to come. We declines all responsibility in the event of failure to observe the instructions given here for installation, maintenance and suitable use of the product.
-
Page 3: Recommendations And Suggestions
RECOMMENDATIONS AND SUGGESTIONS CAUTION TO REDUCE THE RISK OF FIRE, ELECTRIC SHOCK OR INJURE TO PERSONS, PLEASE OBSERVE THE FOLLOWINGS: Installation work and electric wiring (including switch location) must be done by the qualified person(s) in accordance with local applicable codes and standards, including fire-rated construction. The hood may have sharp edges. -
Page 4: Installation And Use
CHARACTERISTICS WALL MOUNT Range Hood is designed for designer’s kitchen with the range hood install directly above cooking appliances against a wall. This hood is a highlight and show piece in your kitchen and at the same time provide you with the benefit of extracting the grease and smoke from your cooking. Please refer to the instruction below INSTALLATION &... -
Page 5: Mount Heights & Clearance
MOUNT HEIGHTS & CLEARANCE Minimum mount height between range top to hood bottom should be no less than 25” Maximum mount height should be no higher than 30” It is important to install the hood at the proper mounting height. Hoods mounted too low could result in heat damage and fire hazard;... - Page 6 MOUNTING THE RANGE HOOD Note 1 : On stainless steel hoods, carefully remove the plastic protective film from all exterior surfaces of the hood and chimney prior to final installation. Note 2: At least two people will be required to mount the hood. WALL DRILLING AND BRACKETS FIXING Draw a vertical line on the supporting wall up to the ceiling, or as high as practical, at the centre of the area in which the hood will be installed.
- Page 7 CONNECTIONS Ducted mode air exhaust system Caution: To reduce the risk of fire, use metal ductwork is preferred. Decide where the ductwork will run between the hood and the outside. A straight, short duct run will allow the hood to perform most efficiently.
- Page 8 TELESCOPIC CHIMNEY COMPRISING ASSEMBLY Decorative Chimney Top Raise the decorative chimney top 2.1 up inside the decorative chimney bottom 2.2. Secure decorative chimney top 2.1 to the chimney mounting bracket that is well fixed on the wall with the two chimney bracket screws 10.b supplied from two sides.
- Page 9 OPERATIONS Power: Power ON/OFF the range hood and activate power-off delay timer Decrease Value: Blower(motor) speed decrease, timer value decrease Increase Value: Blower(motor) speed increase,timer value increase Blower Power Indicator: Light up when blower(motor) is running Blower Speed Indicator: Shows current blower(motor) speed Light Power Indicator: Light up when light turned on Power-On Elapsed Digital Timer: Indicates the accumulated time the system is running Power-Off Delay Digital Timer: Indicates the length of time left for delay off function...
-
Page 10: Maintenance And Cleaning
MAINTENANCE & CLEANING Surface Maintenance: Clean periodically with hot soapy water and clean cotton cloth. Do not use corrosive or abrasive detergent (e.g. comet powder scrub, EZ-Off oven cleaner), or steel wool/scoring pads which will scratch and damage surface. For heavier soil use liquid degreaser such as ‘Formula 409’ or ‘Fantastic’ brand cleaner. After cleaning, you may use non abrasive stainless steel polish/cleaners such as 3M or ZEP, to polish and buff out the stainless luster and grain. - Page 11 LIGHT bulbs WARNING: Please ensure lights have been switched off for some time and the power source has been disconnected before replacing any globes. Please be aware that the light will retain hear for a short period of time after being switched off. Step 1: Turn anti-clockwise to open Step 2: Take the existing globe out Step 3: Insert a new globe (GU10 Fitting) and turn clockwise in lock position...
- Page 12 Cher client, Si vous suivez attentivement les recommandations contenues dans le présent manuel d’instructions, votre appareil vous fournira constamment de hautes performances et restera performant pendant des années. Le fabricant décline toute responsabilité s'il y a eu omission de respecter les directives fournies pour l'installation, l'entretien et l'usage adéquat du produit.
-
Page 13: Recommandations Et Suggestions
RECOMMANDATIONS ET SUGGESTIONS AVERTISSEMENT POUR ÉVITER LES RISQUES D’INCENDIE, D’ÉLECTROCUTION OU DE BLESSURES, VEUILLEZ OBSERVER LES DIRECTIVES SUIVANTES : L’installation et les travaux relatifs au câblage (y compris la pose de l’interrupteur) doivent être effectués par un technicien qualifié, conformément aux normes et aux codes en vigueur, y compris les travaux de construction classés résistants au feu. -
Page 14: Caractéristiques
Nettoyez régulièrement la hotte. Ne laissez pas la graisse s’accumuler sur le ventilateur ou le filtre. Utiliser des chaudrons de grandeur appropriée. Utilisez toujours des casseroles, dont la taille correspondant à celle de l’élément de cuisson. CARACTÉRISTIQUES La hotte de cuisine pour MONTAGE MURAL est conçue pour être installée directement sur un mur au-dessus des appareils de cuisson. - Page 15 HAUTEUR DE MONTAGE ET DÉGAGEMENT La hauteur de montage minimale entre le dessus de la surface de cuisson et le dessous de la hotte ne devrait pas être inférieure à 25 po (63 cm). Hauteur maximale du La hauteur de montage maximale ne devrait pas être supérieure à...
- Page 16 Toujours utiliser un conduit rigide en métal pour assurer un débit d’air maximum. Si vous devez faire des virages ou des transitions : faites-le le plus loin possible de l’ouverture en gardant le Utiliser le tableau de calcul (à gauche) pour établir la plus d’espace qui soit entre les deux.
- Page 17 Connecter un conduit rond de 6 po (15 cm) d’une longueur adéquate dans la partie en creux de l’adaptateur de sortie d’air. Fixer le conduit connecté à l’adaptateur de sortie d’air avec du ruban à conduits pour sceller les joints. BRANCHEMENTS Évacuation d’air par conduit d’aération Mise en garde : Pour réduire les risques d’incendie, utilisez de préférence des...
- Page 18 ou par toute autre personne qualifiée afin d’écarter tout risque de blessure. * Ne pas utiliser de prises ni de rallonges autres que celles fournies avec la hotte. * La mise à la terre est obligatoire. Ne pas retirer la branche de mise à la terre. ASSEMBLAGE DE LA CHEMINÉE TÉLESCOPIQUE Dessus de cheminée décorative Tirer le dessus de la cheminée (2.1) situé...
- Page 19 FONCTIONNEMENT Lumière Alimentation Augmentation de la vitesse Diminution de la vitesse Minuteur numérique de temps écoulé sous tension Témoin de la puissance du souffleur Minuteur numérique de temps écoulé hors tension Témoin de la vitesse du souffleur Témoin du minuteur de temps écoulé hors tension Témoin d’éclairage Alimentation : Allumer et éteindre la hotte et mise en marche du minuteur hors tension.
-
Page 20: Entretien Et Nettoyage
Rappel de nettoyage automatique La hotte est équipée d’un dispositif de rappel pour le nettoyage, qui s’activera après 30 heures d’utilisation. Lorsque le ventilateur (moteur) commence à tourner, le temps de fonctionnement cumulatif sera affiché sur le minuteur numérique de temps sous tension (écran d’affichage des interrupteurs). - Page 21 Nettoyer les filtres après 30 heures d’utilisation. Enlever et nettoyer les filtres à la main dans une bassine remplie d’eau chaude savonneuse. Le filtre va au lave-vaisselle. Pour la saleté plus tenace, vaporiser un détergent dégraissant de type Formula 409 ou équivalent et laisser tremper.
- Page 22 d’alimentation a été débranchée avant de remplacer les ampoules. L’ampoule reste chaude un certain temps après avoir été éteinte Étape 1 : Pour ouvrir, tourner en sens inverse des aiguilles d’une montre. Étape 2 : Enlever l’ampoule. Étape 3 : Insérer une nouvelle ampoule (GU10) et tourner dans le sens des aiguilles d’une montre pour verrouiller.
Need help?
Do you have a question about the R450SSSEBG and is the answer not in the manual?
Questions and answers